
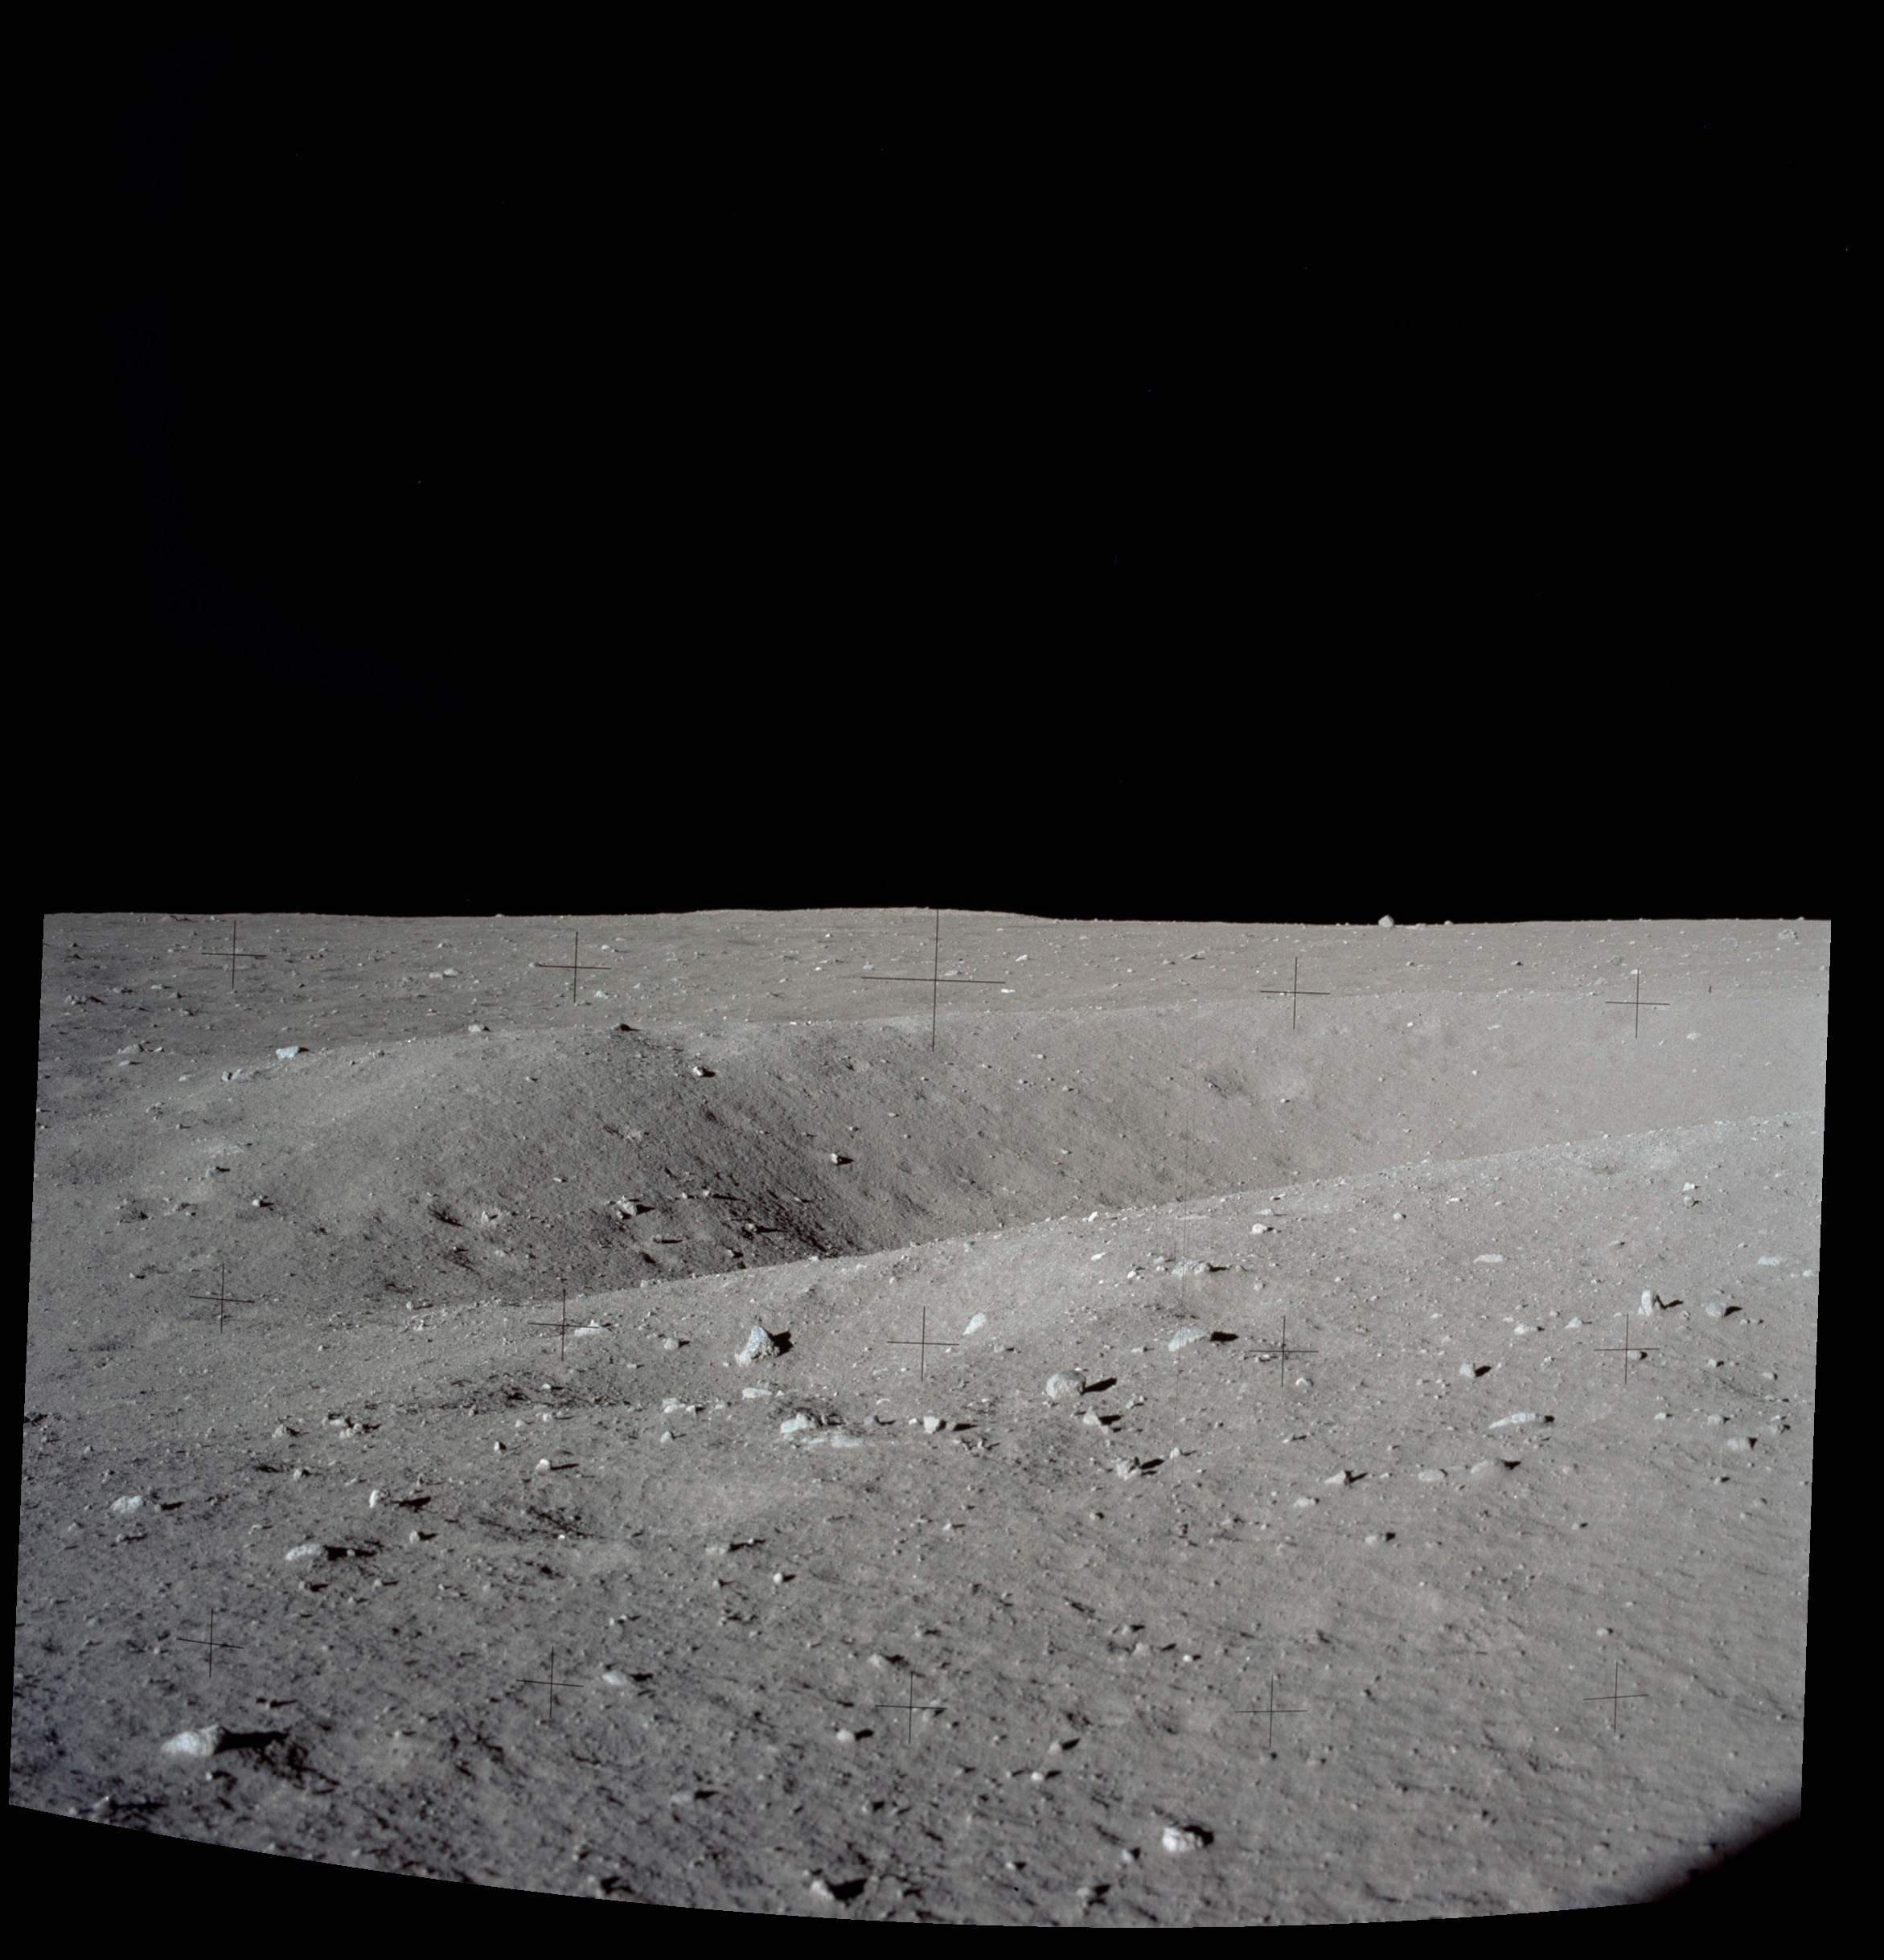
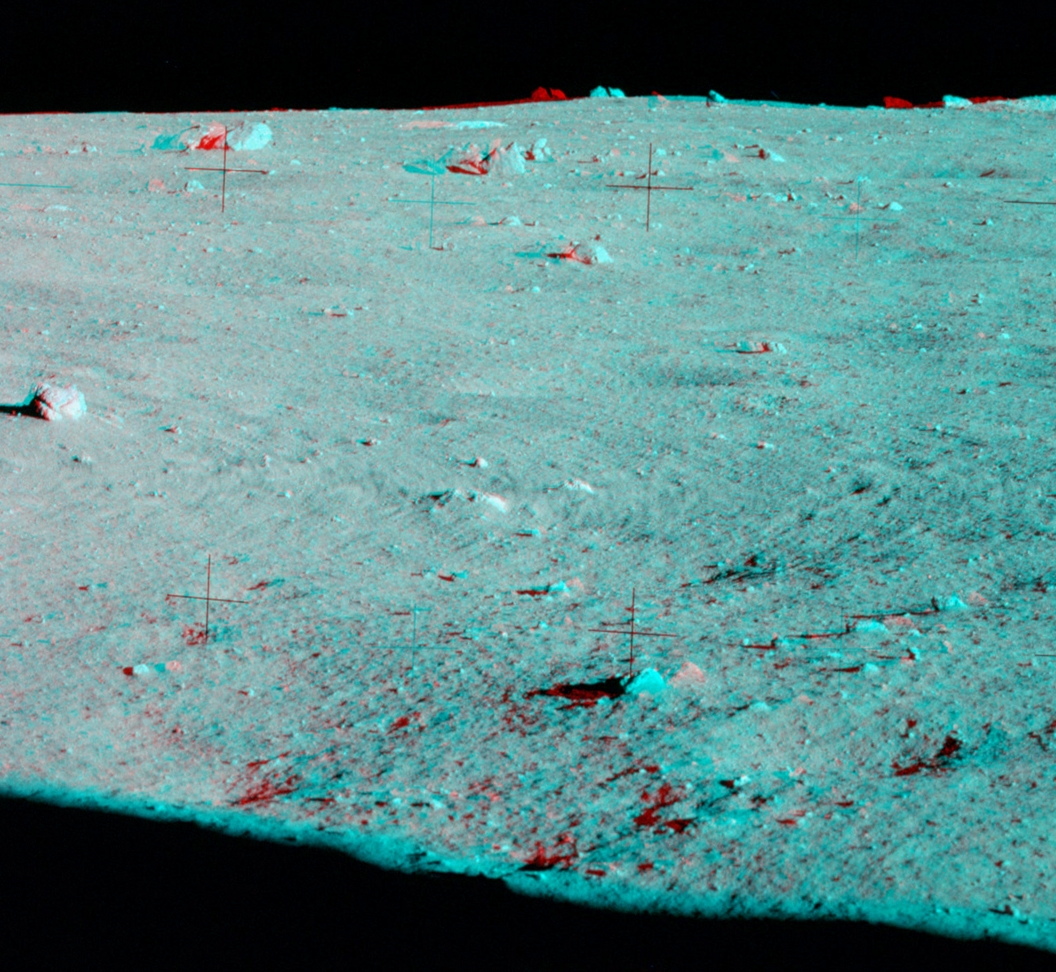
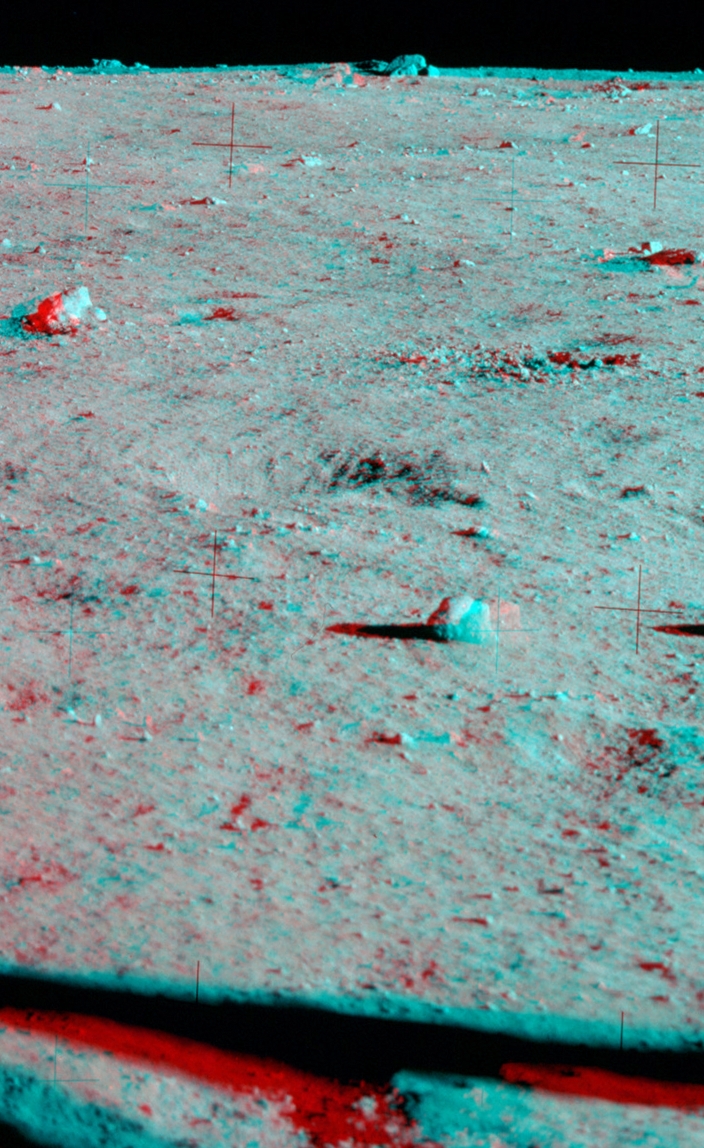
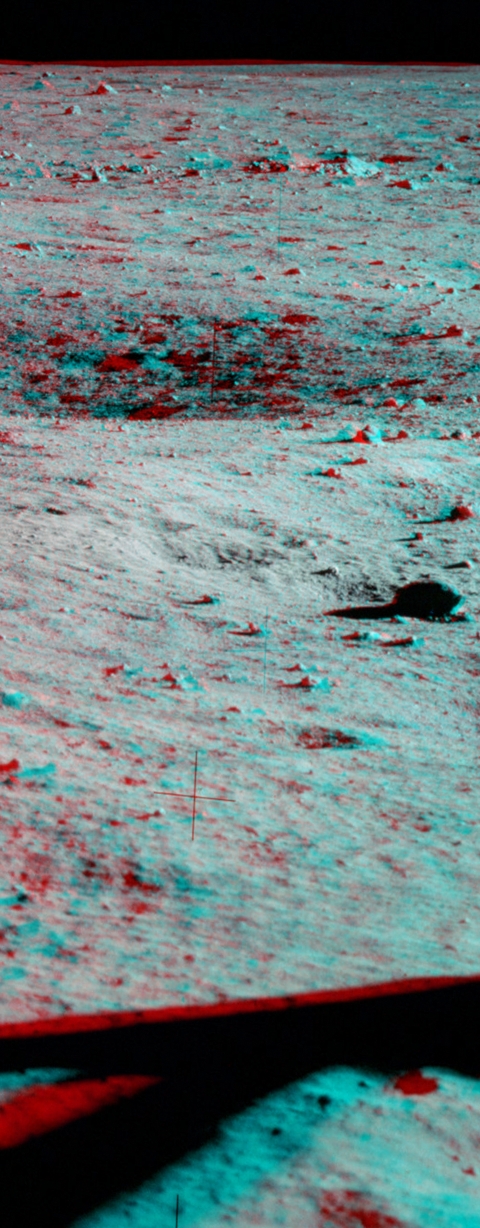
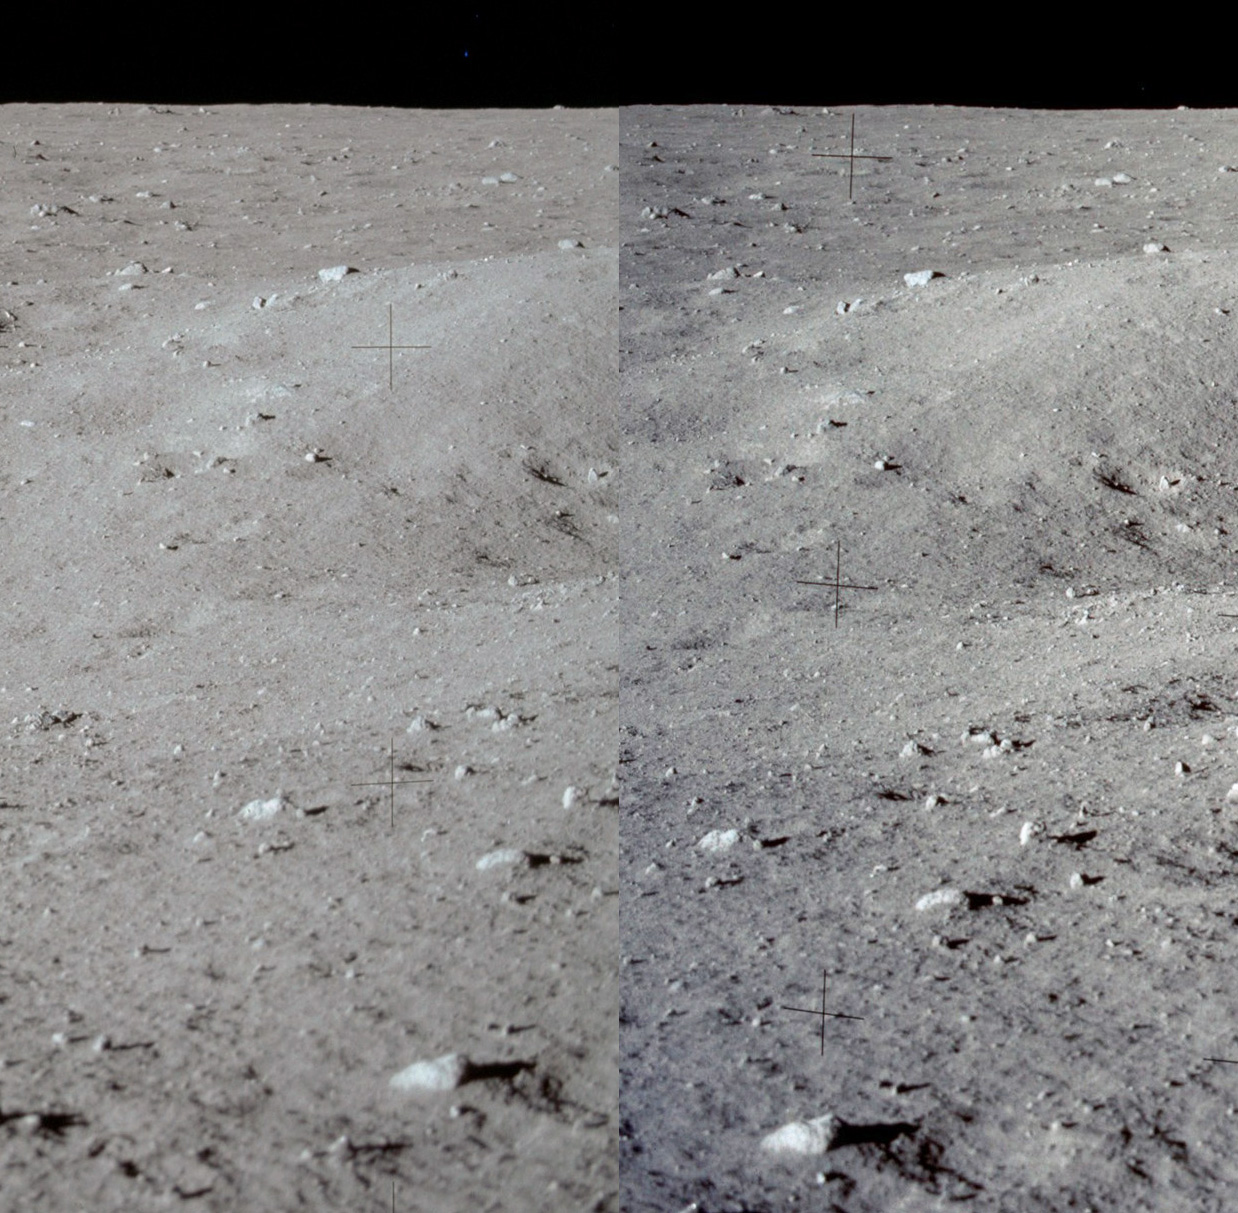
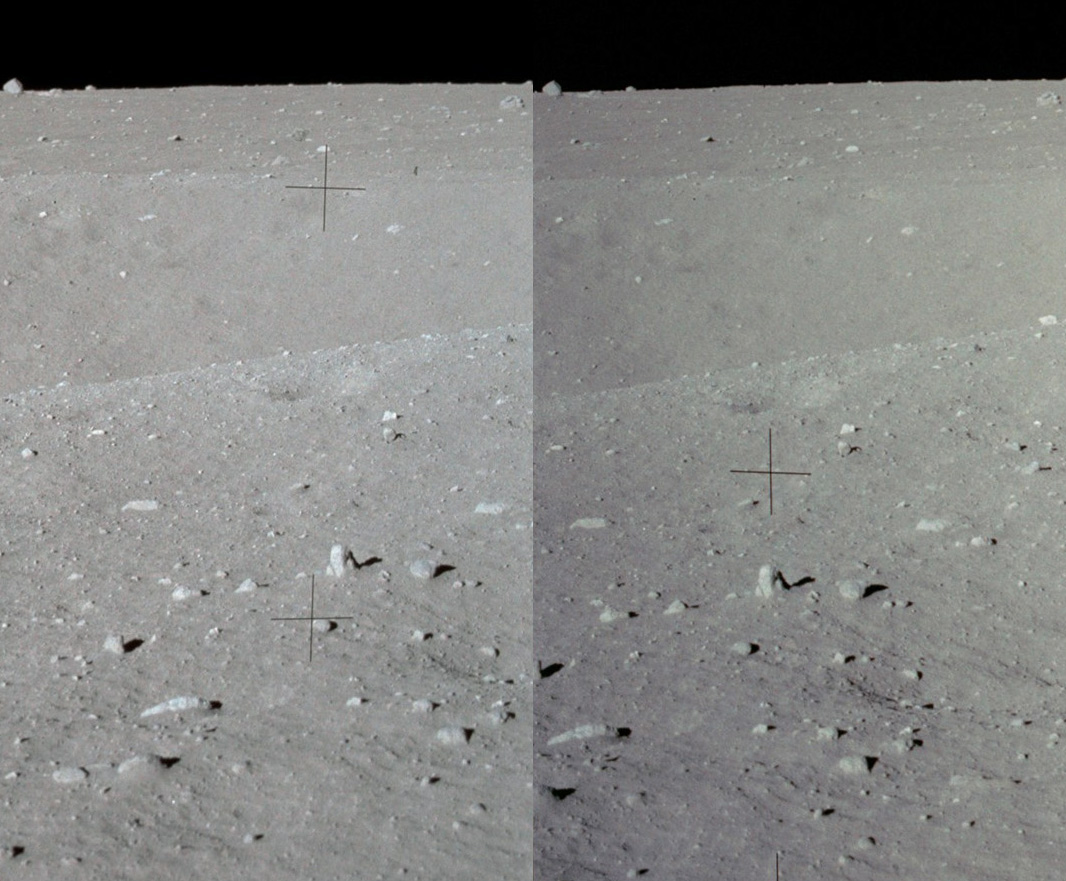
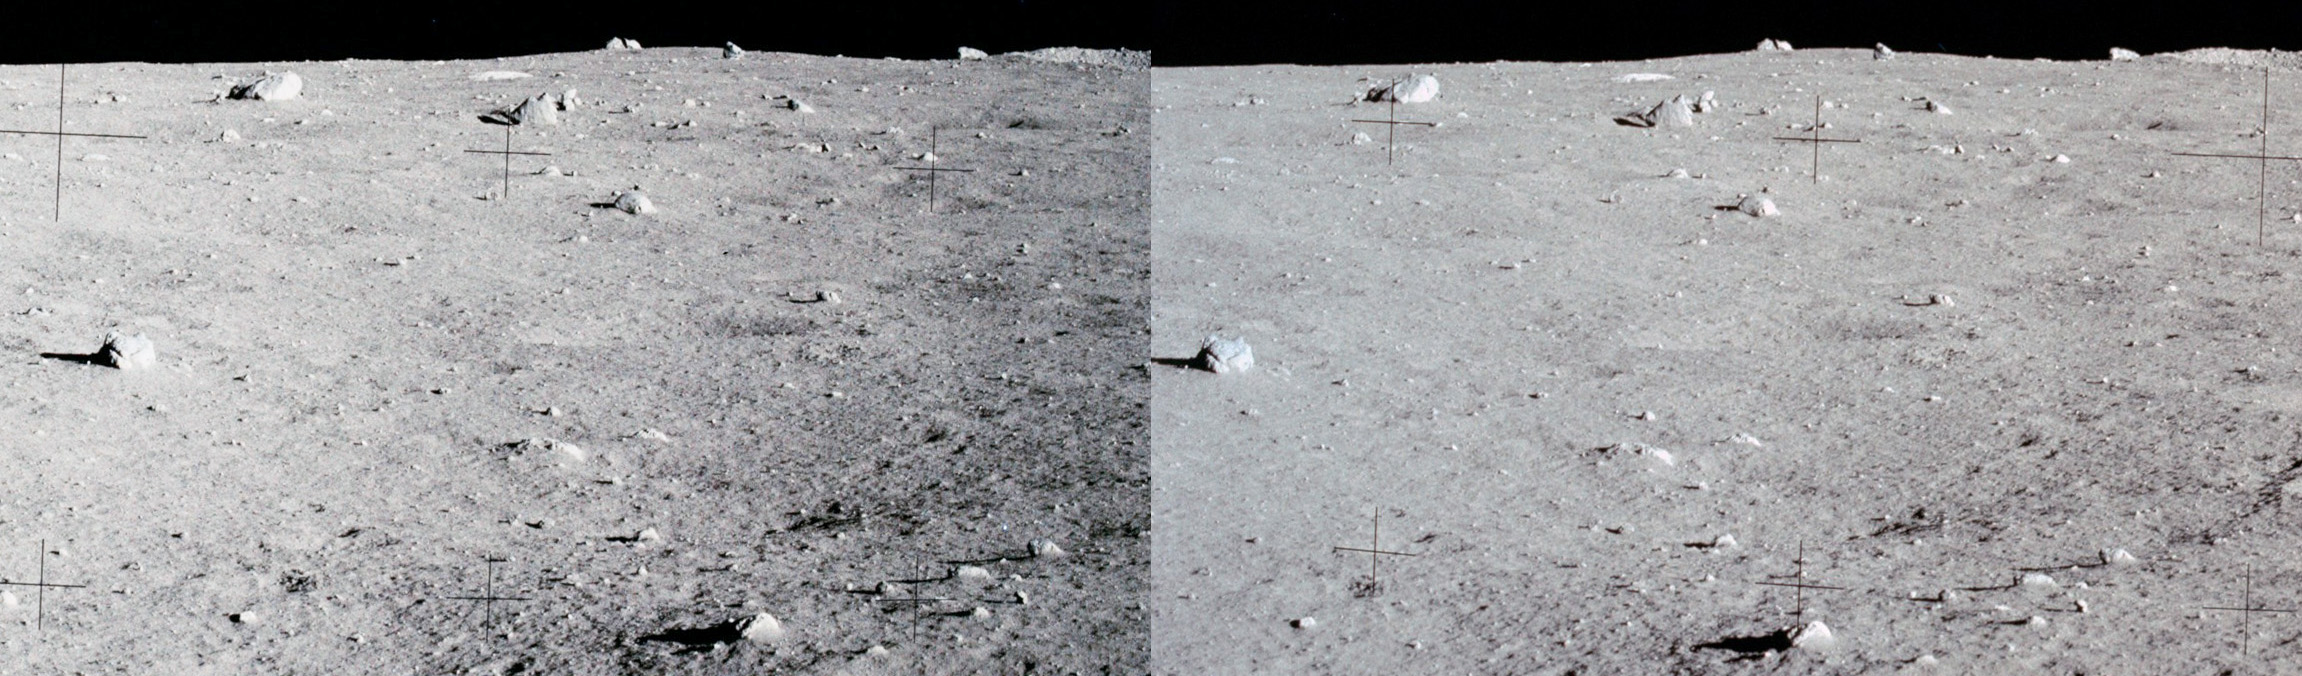
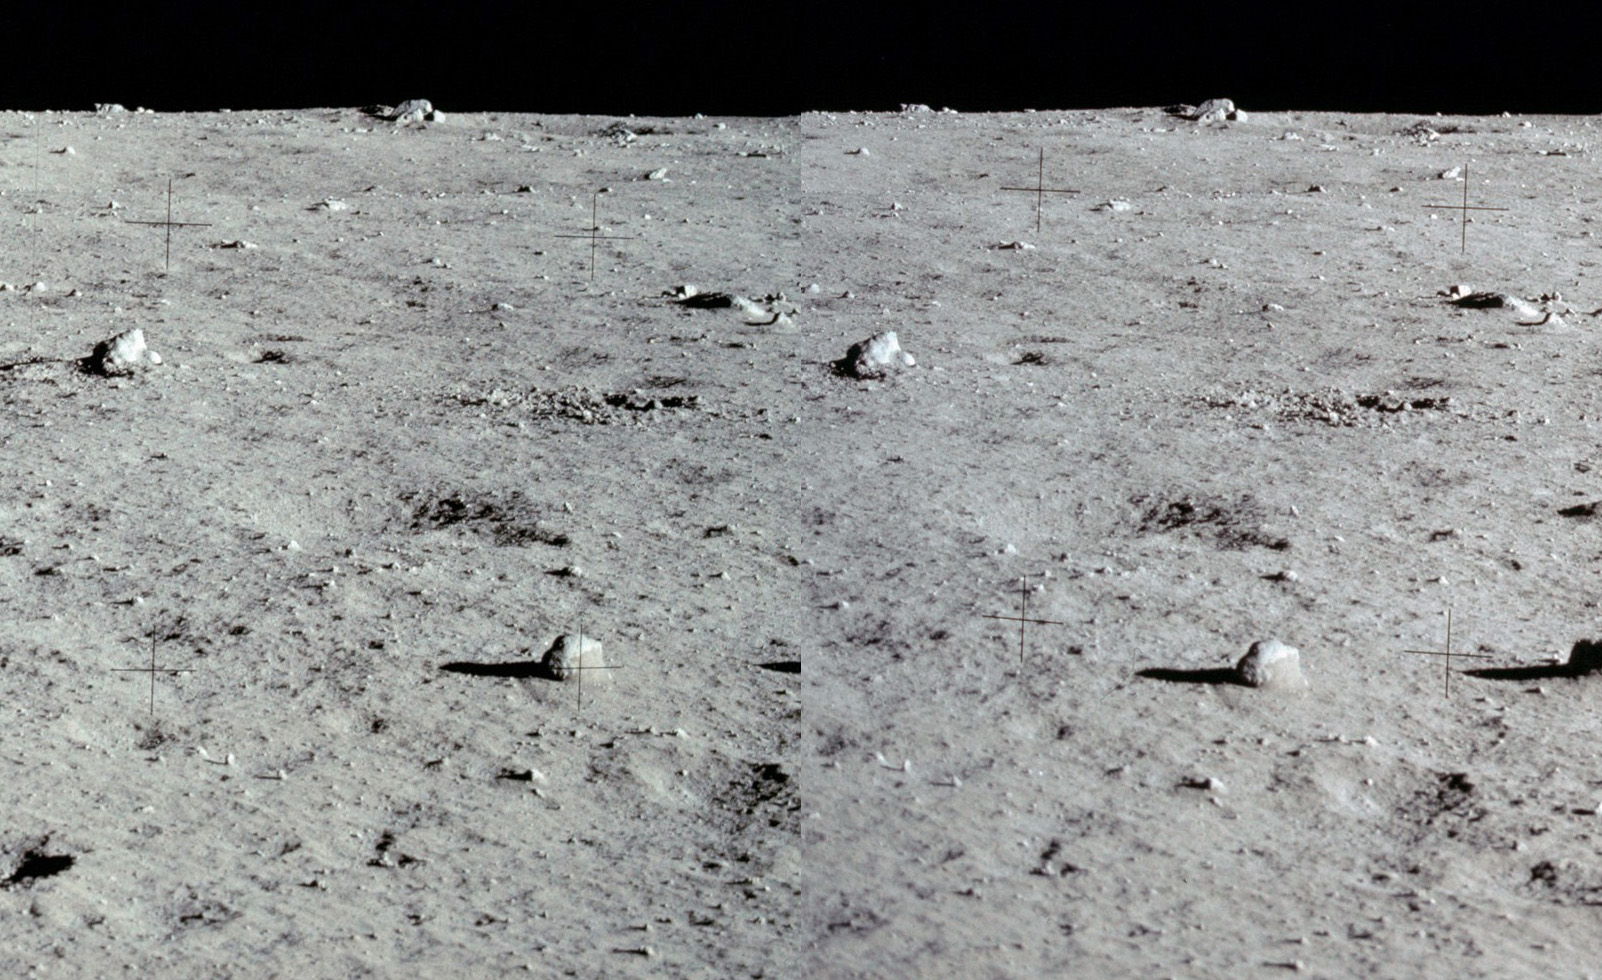
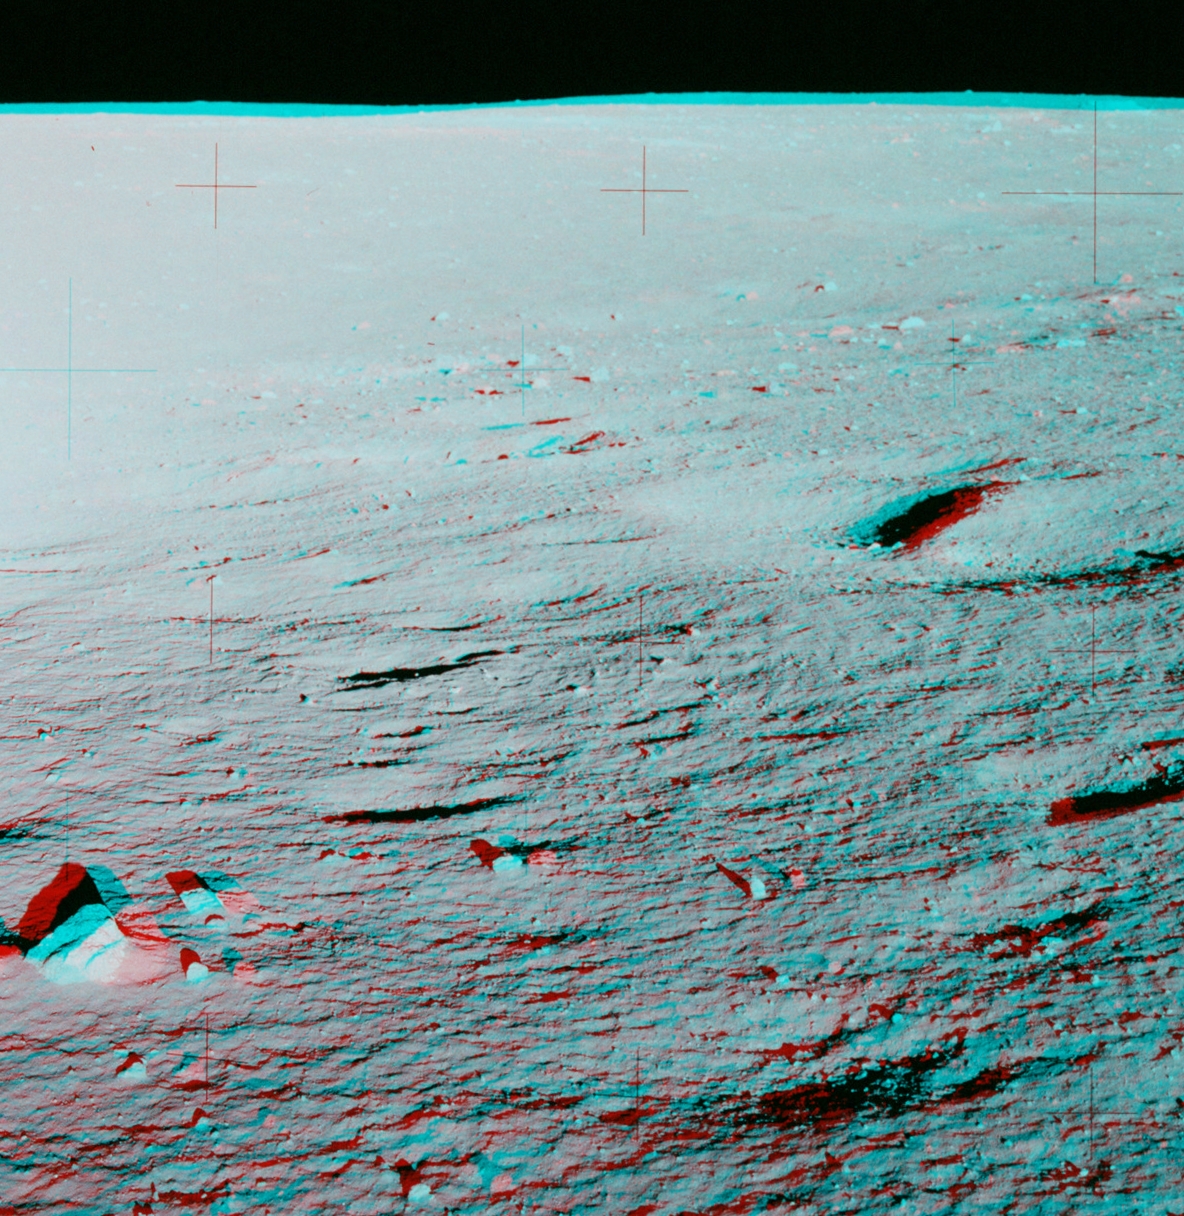
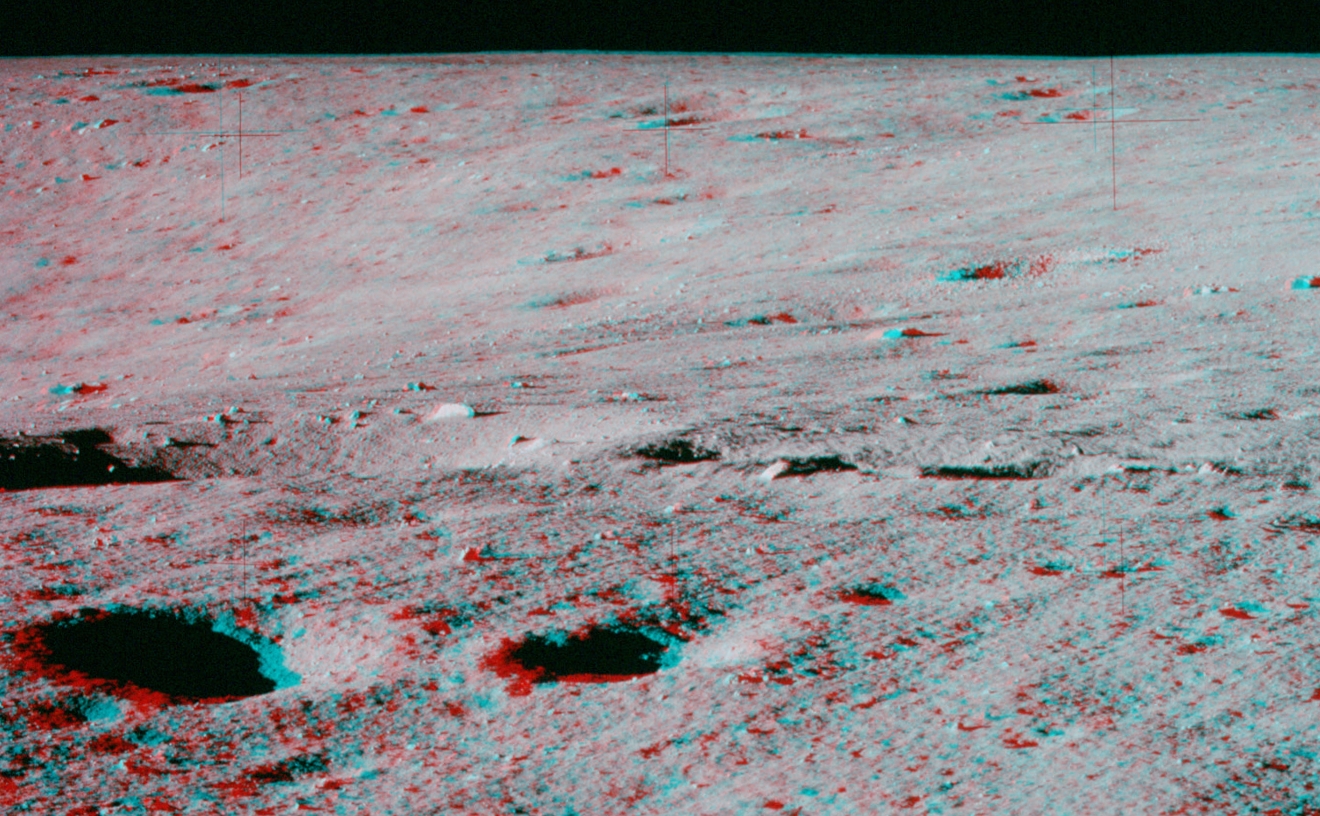
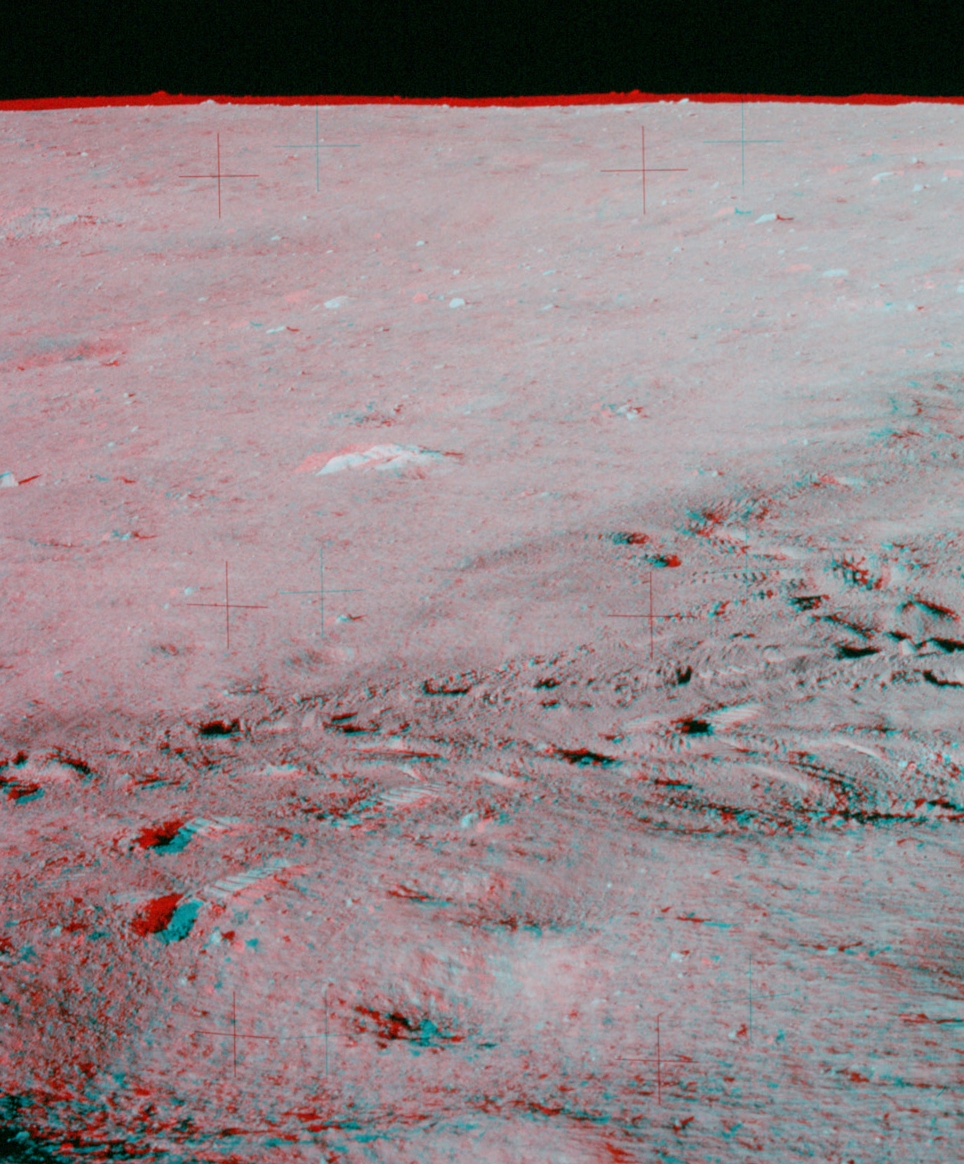
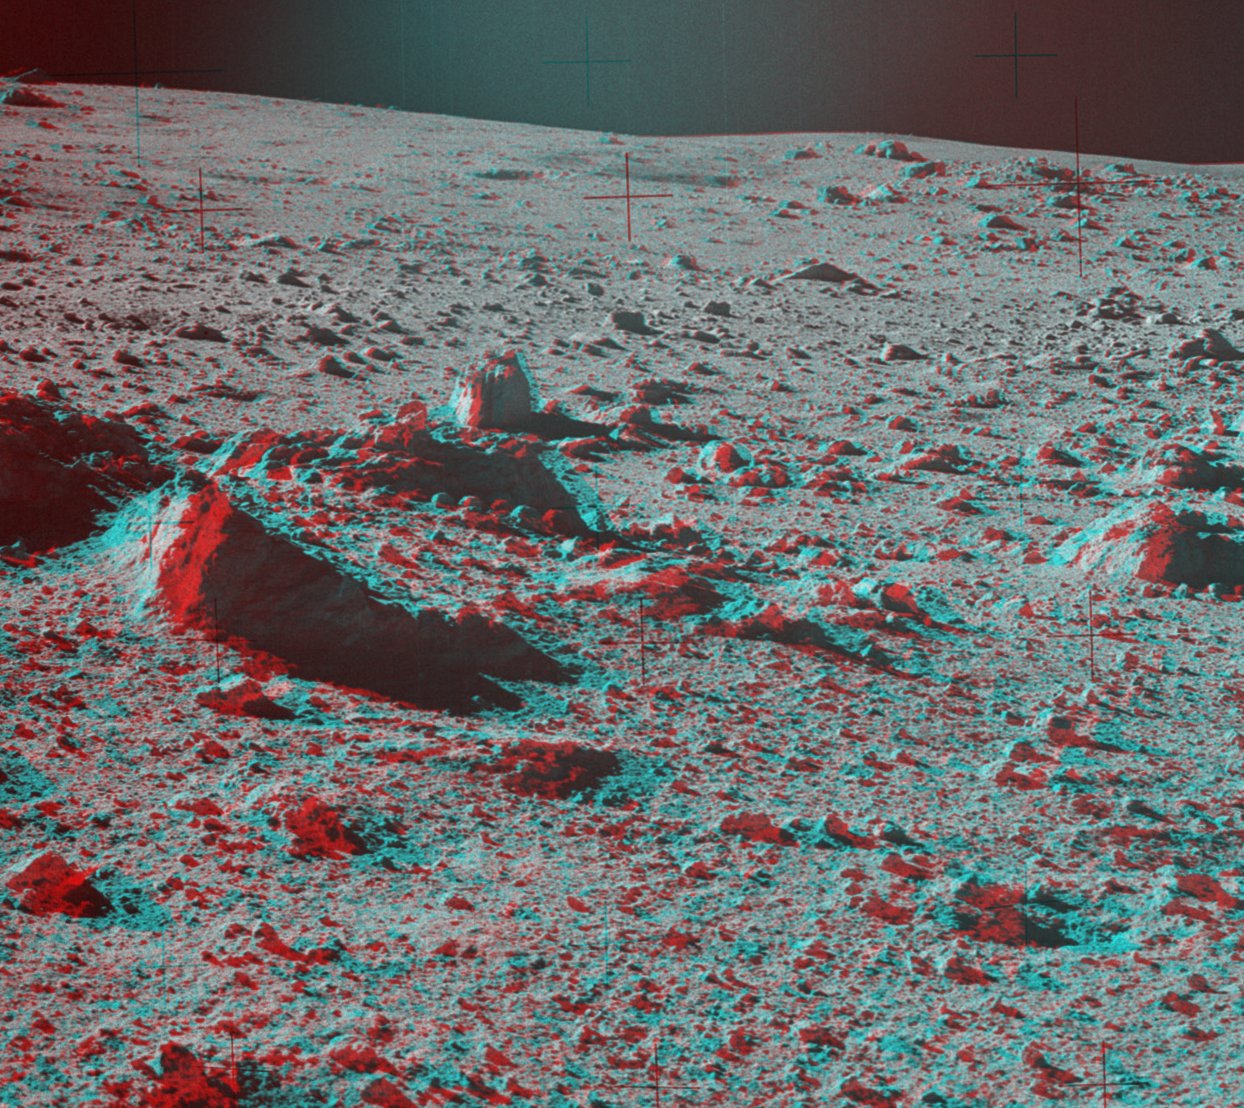
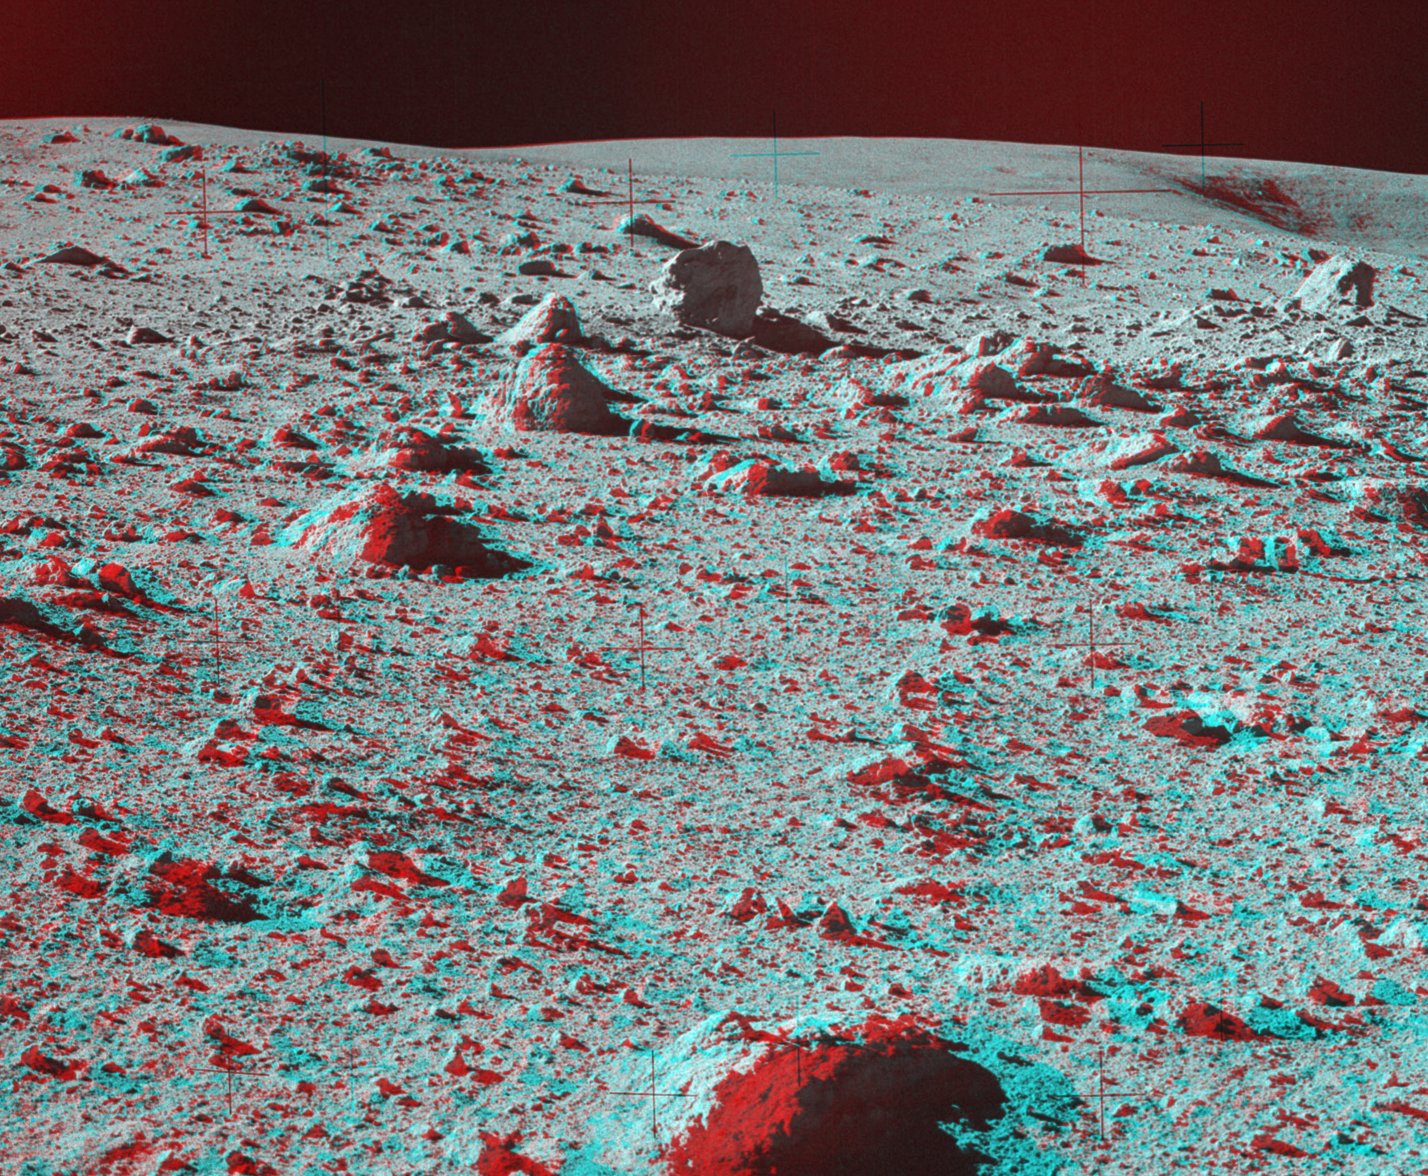
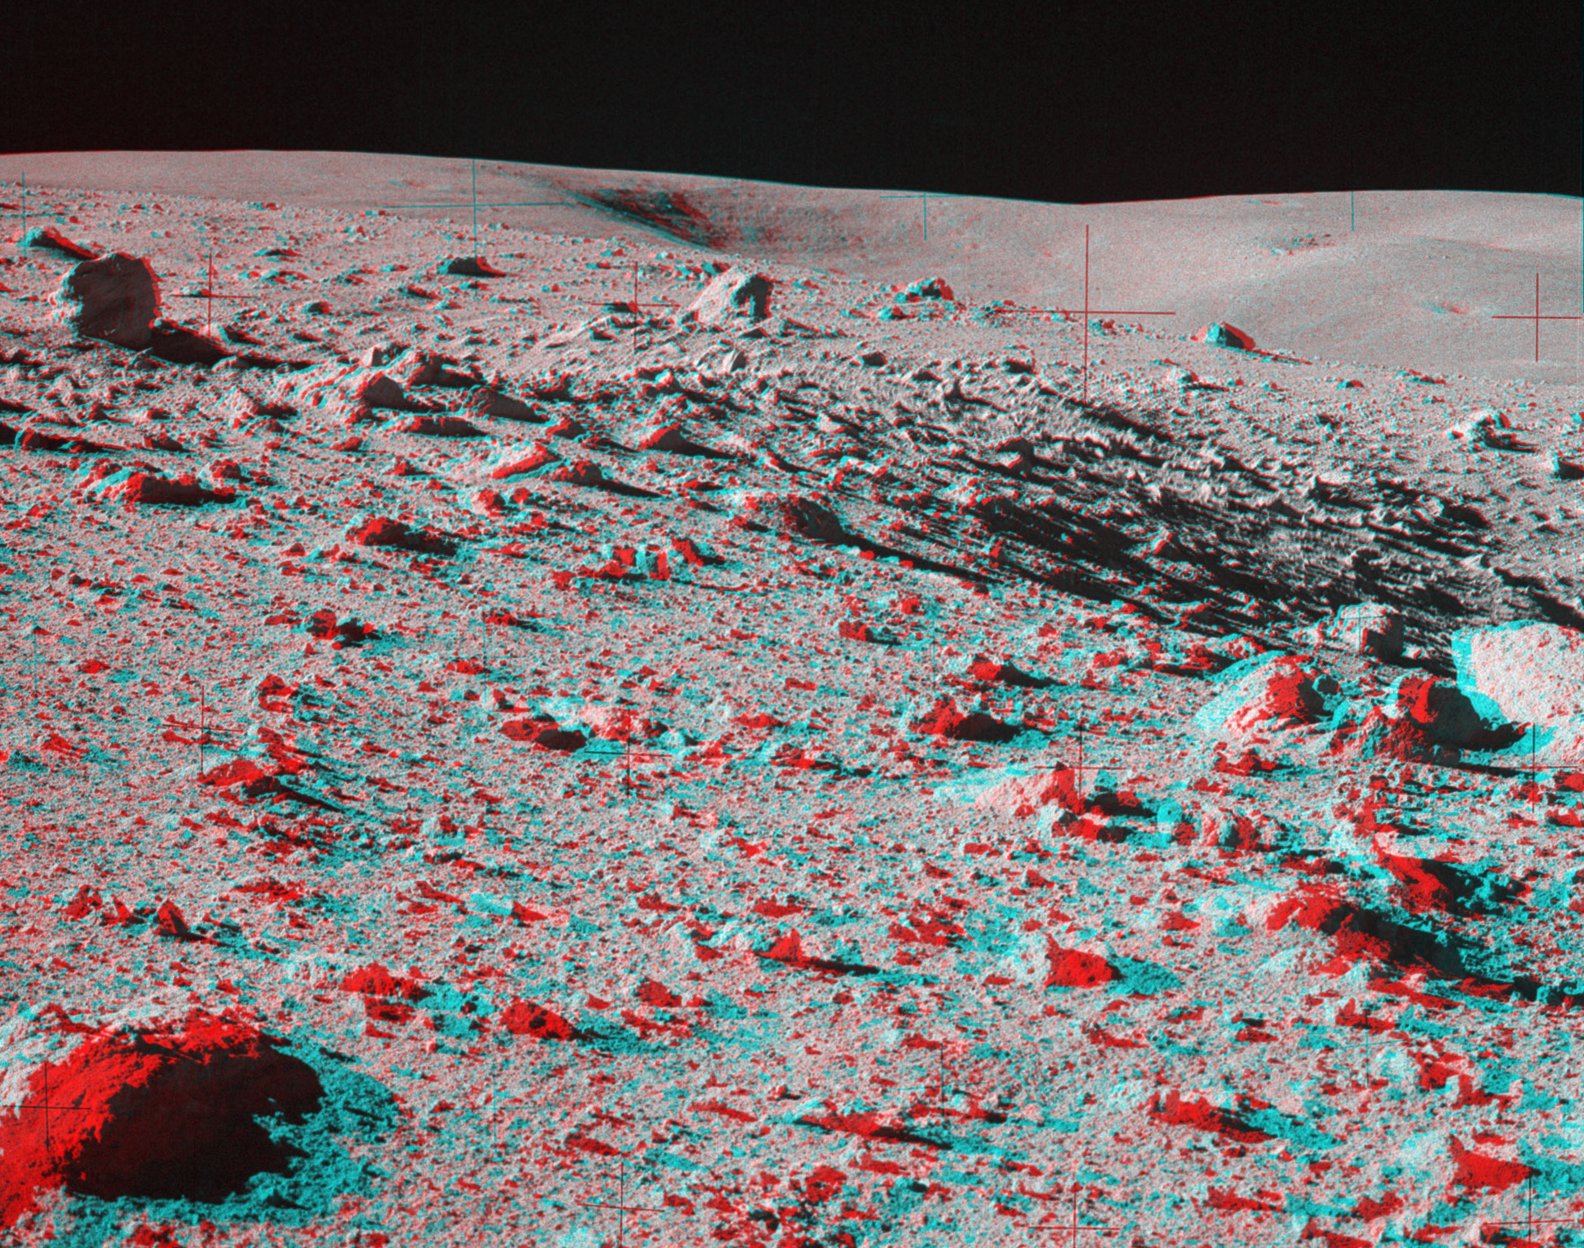
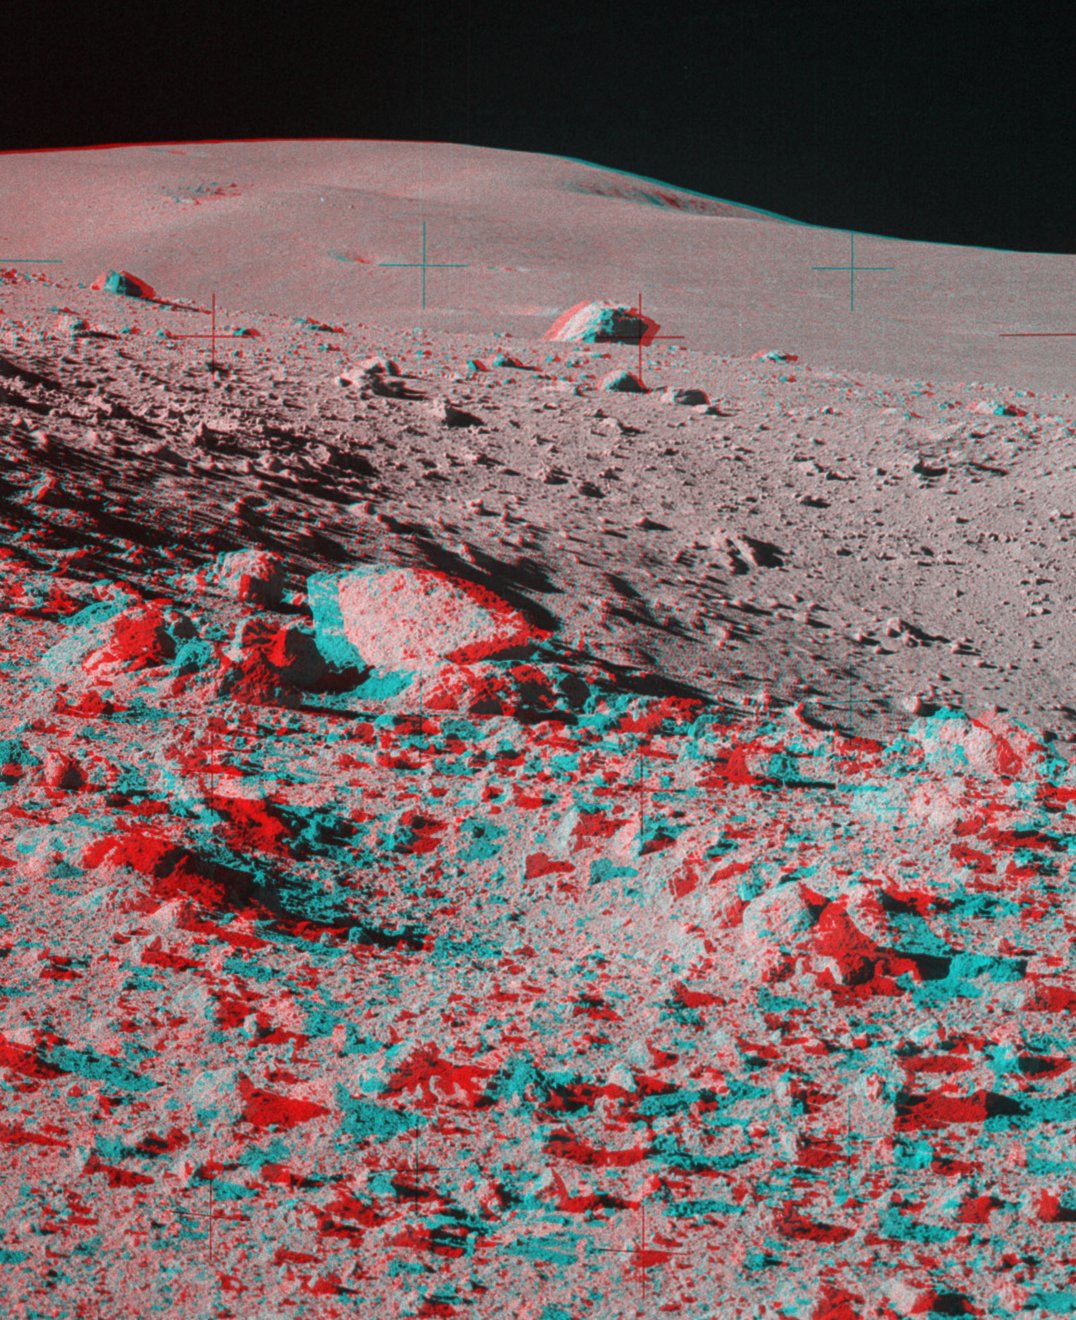
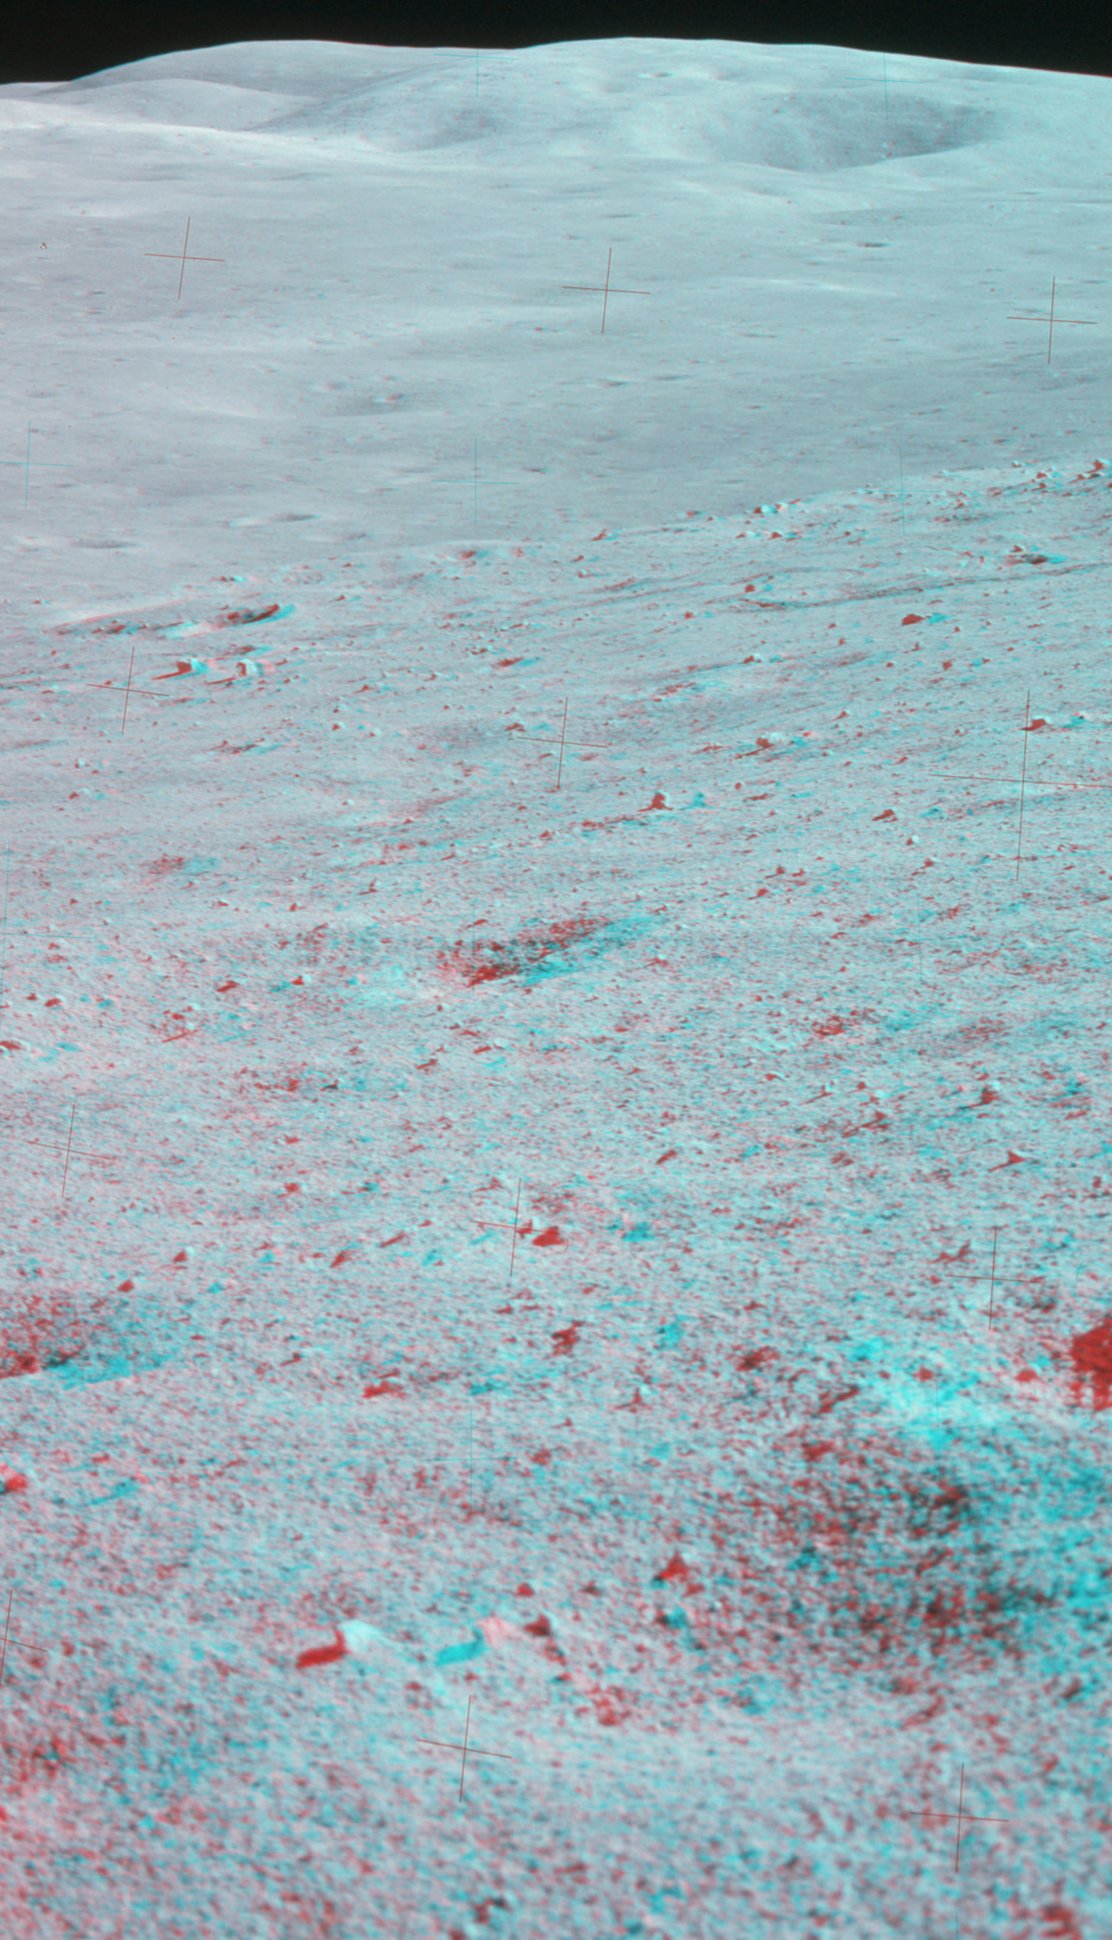
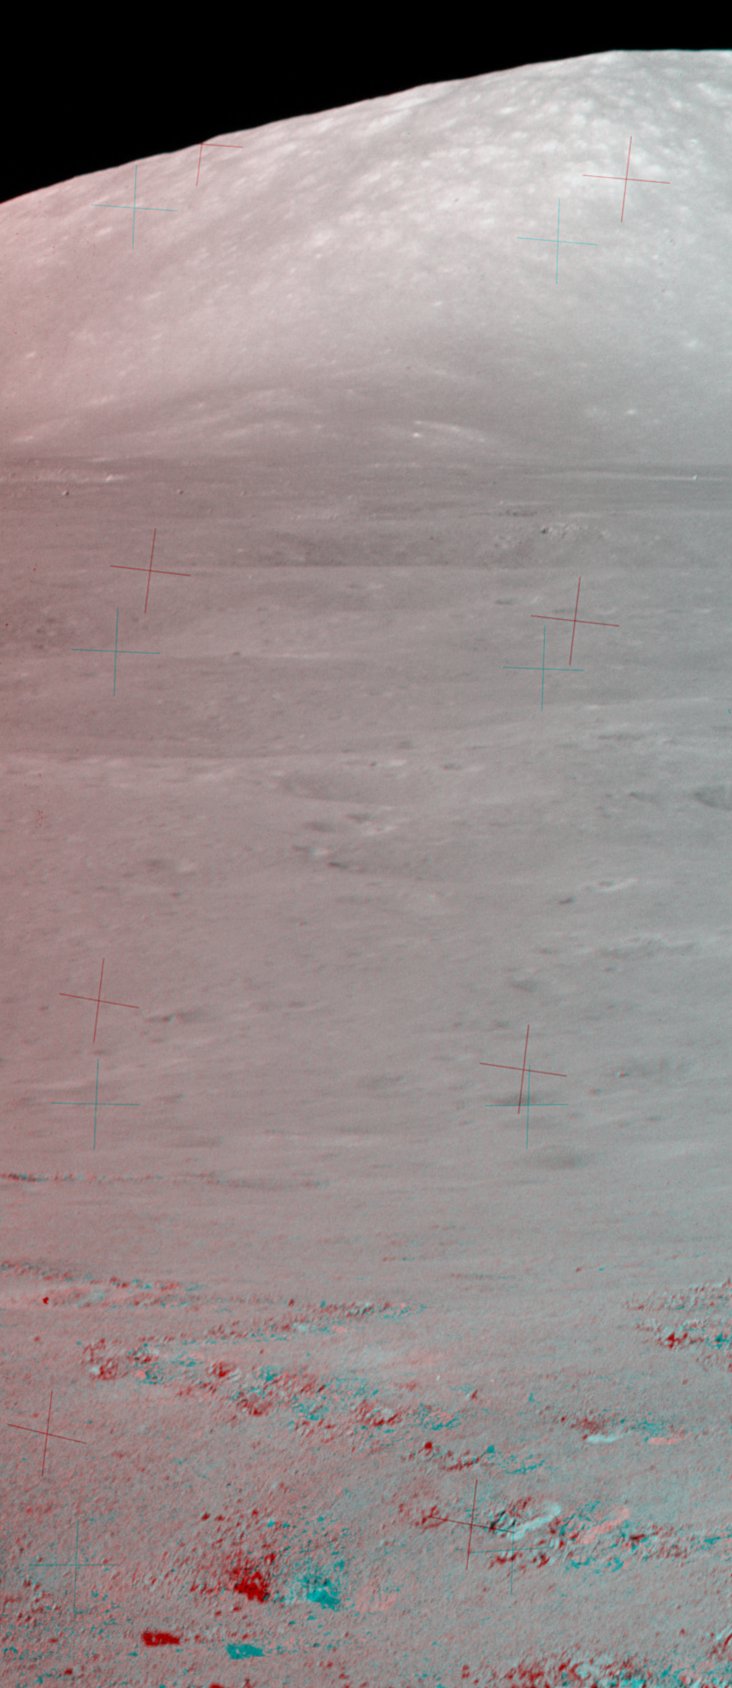
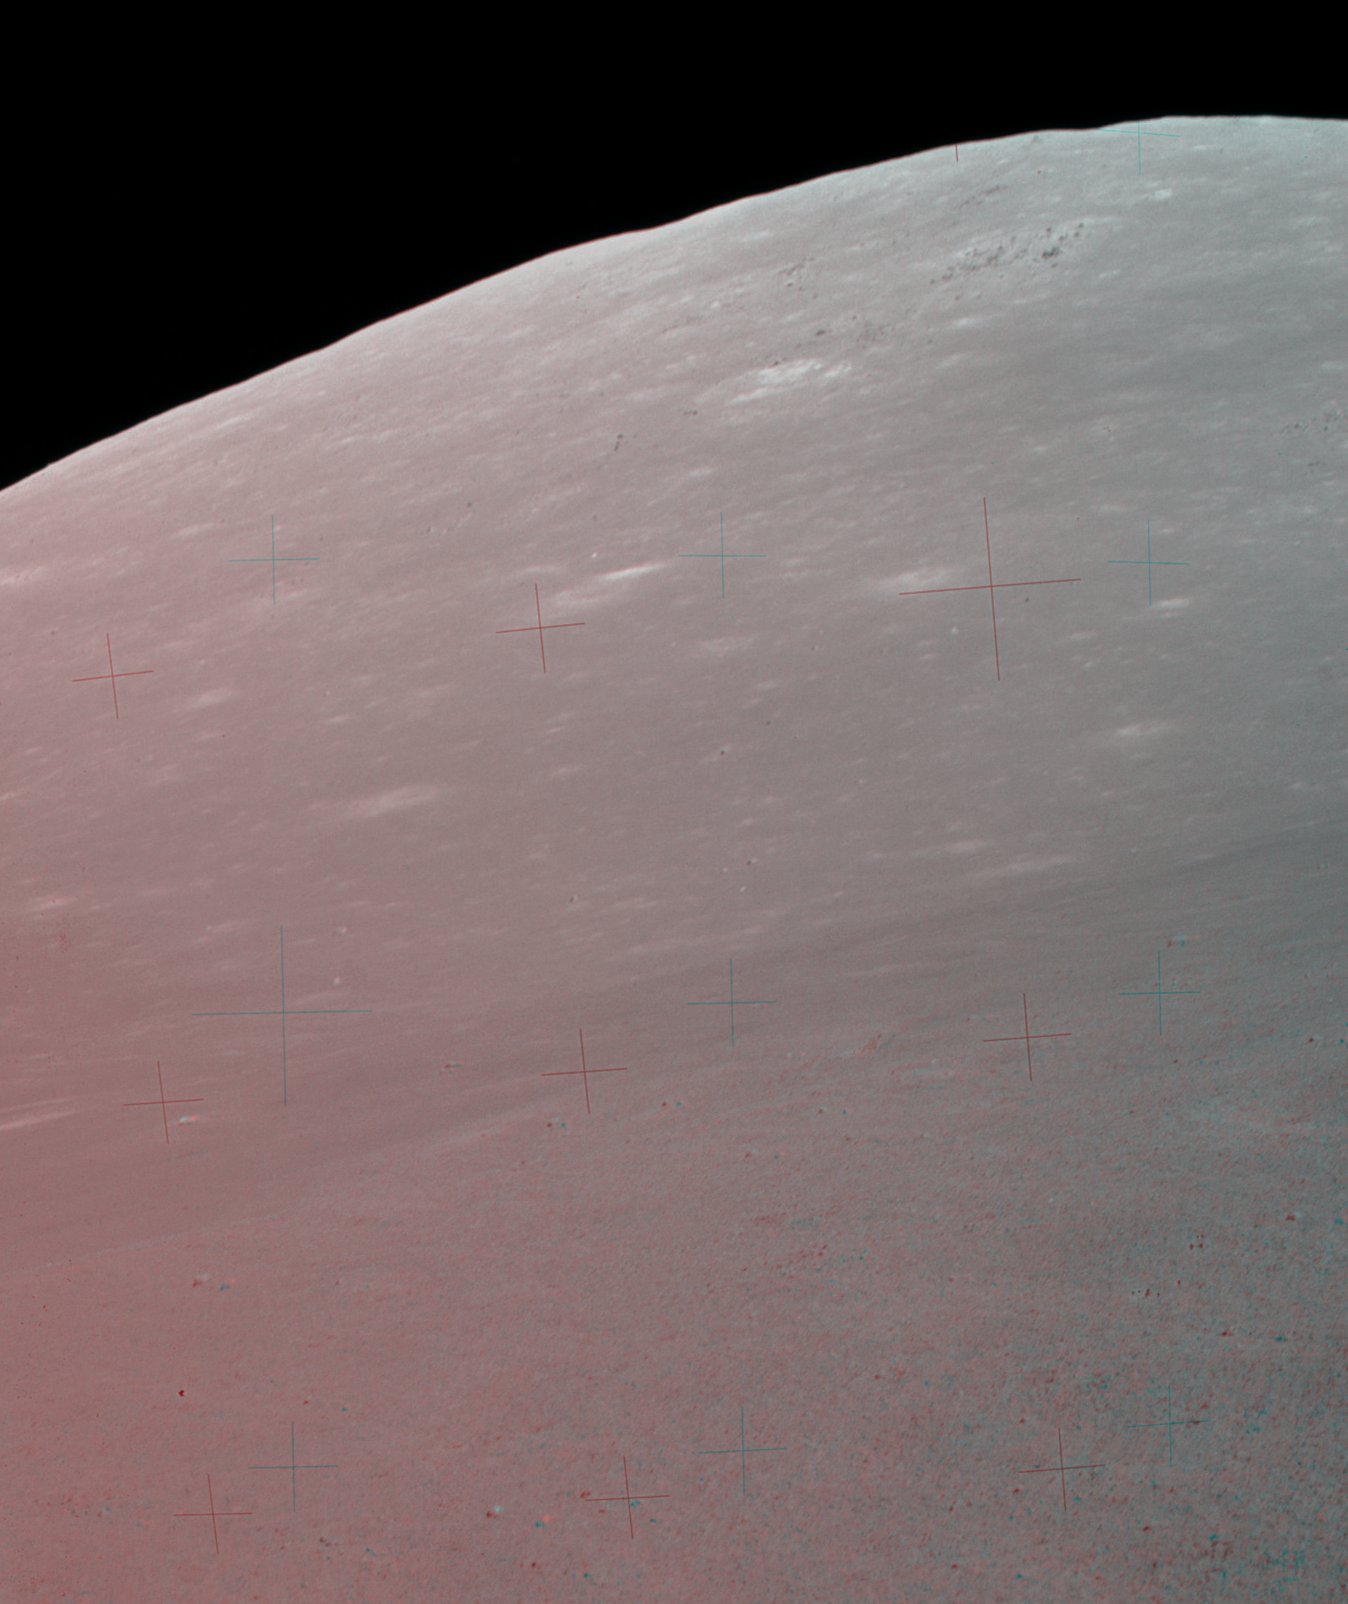
Terrain Experienced by the Apollo Crews
Copyright © 2009 by the Editors of Working on the Moon.
Unless otherwise credited, anaglyphs and stereopans
Copyright © 2009-14 by Eric Jones.
Last revised 9 August 2014.
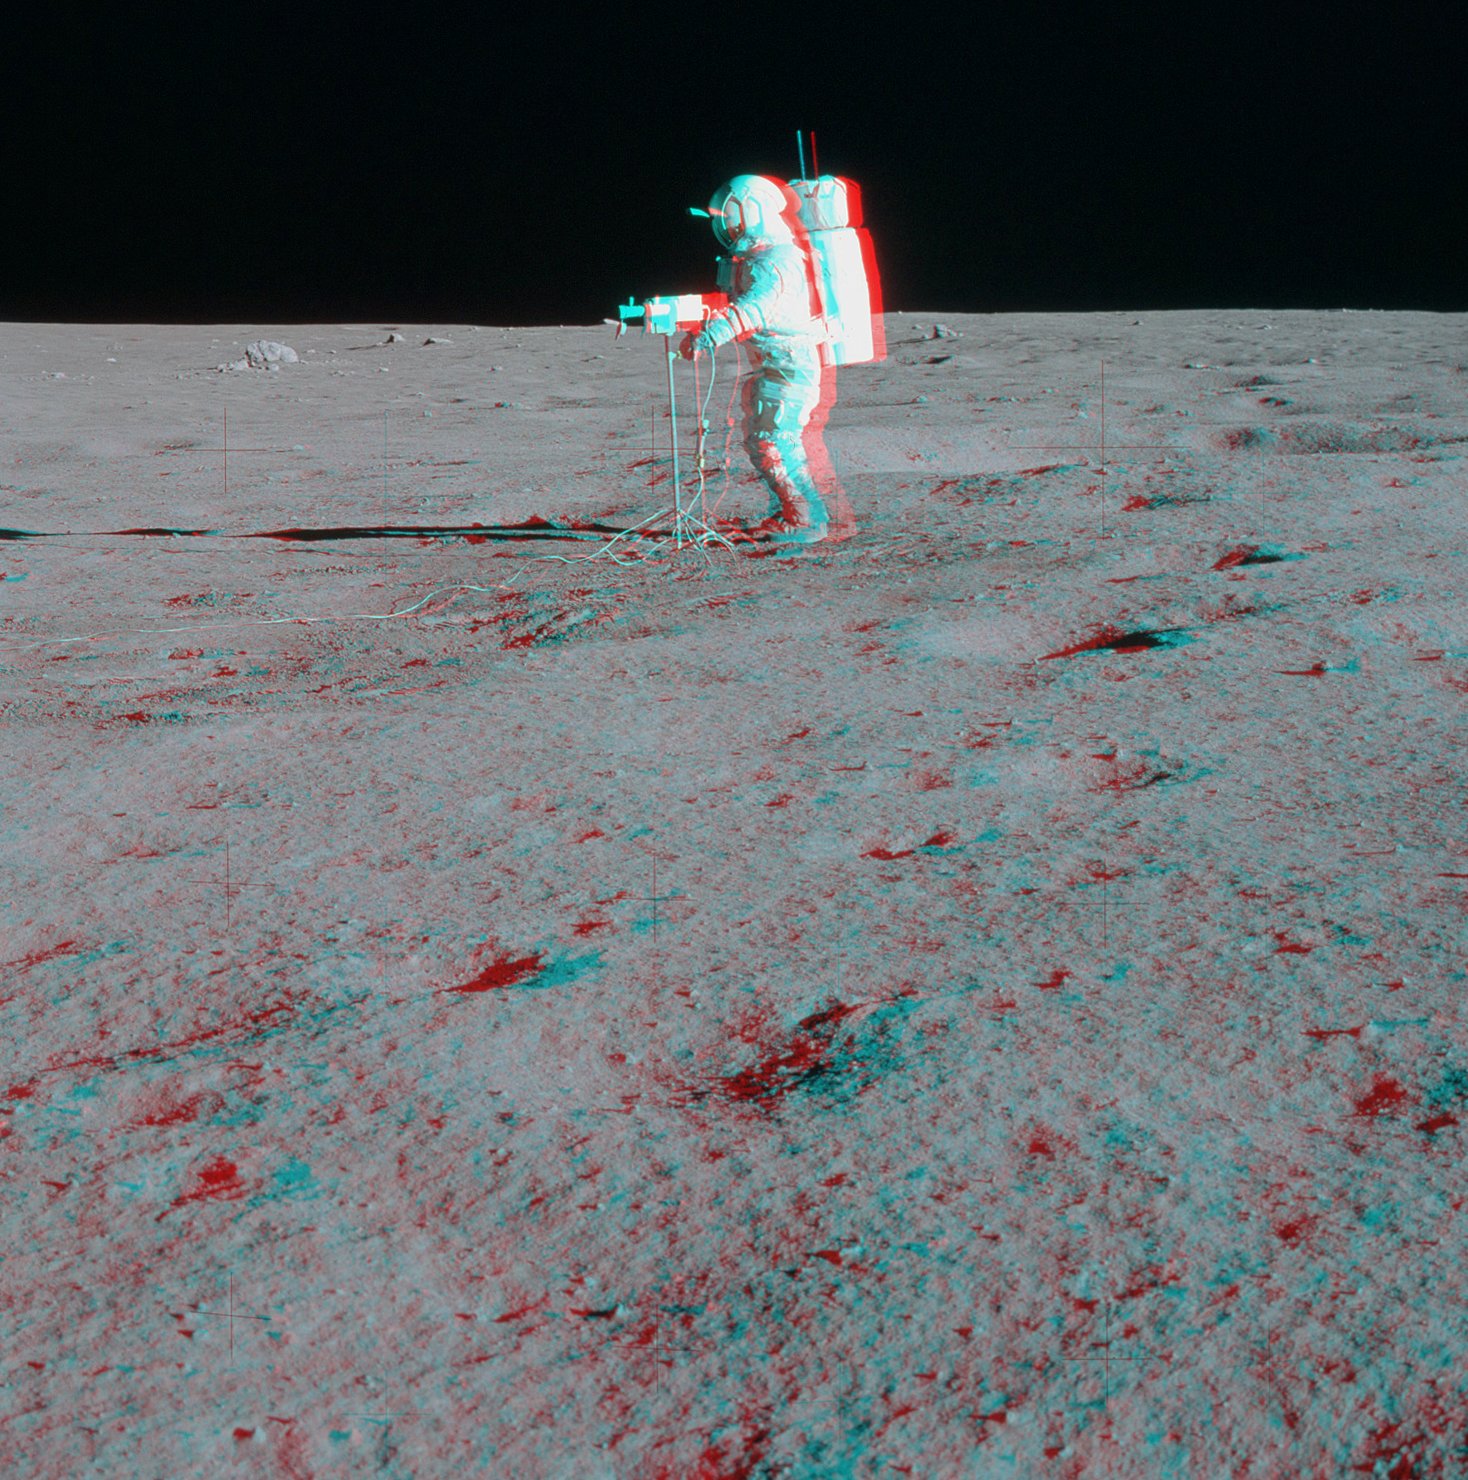
1. Introduction
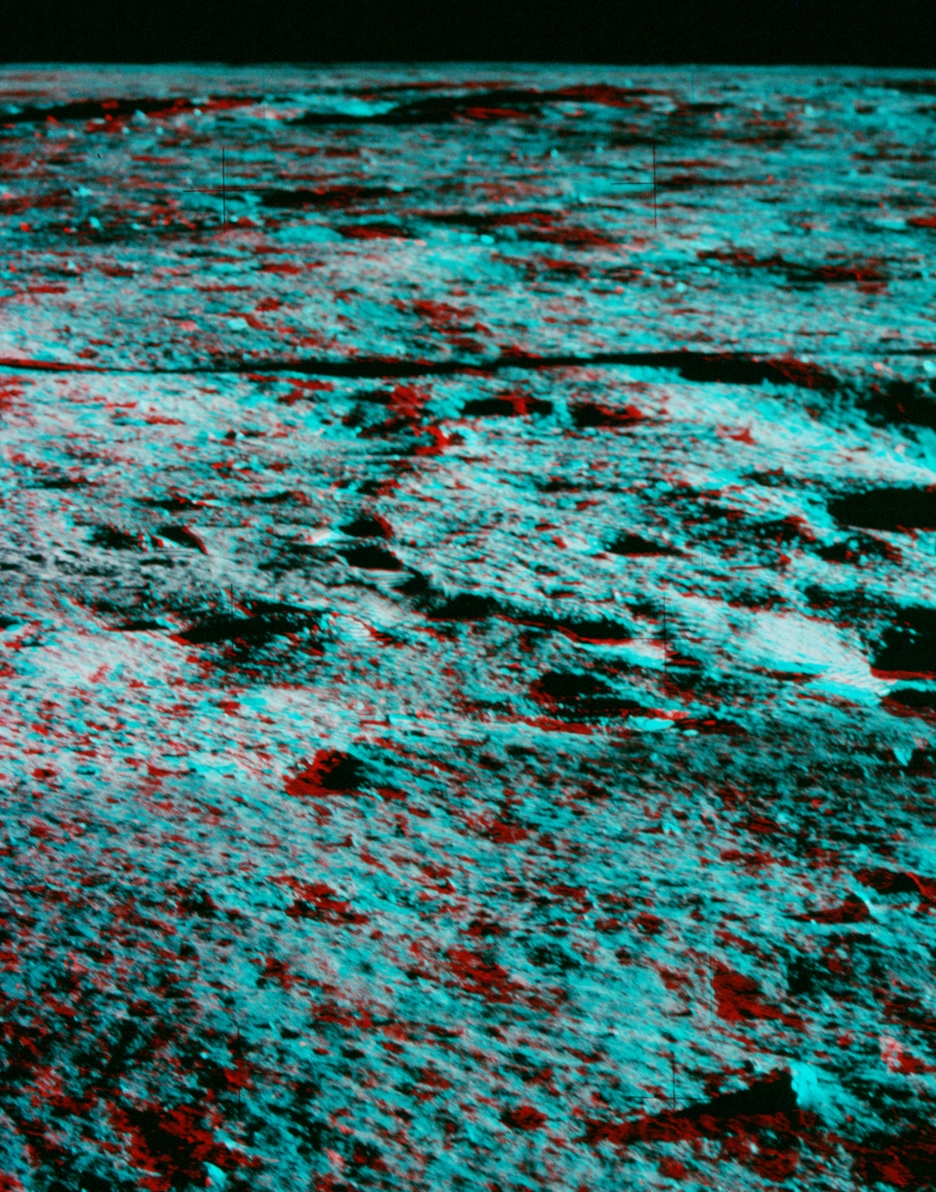
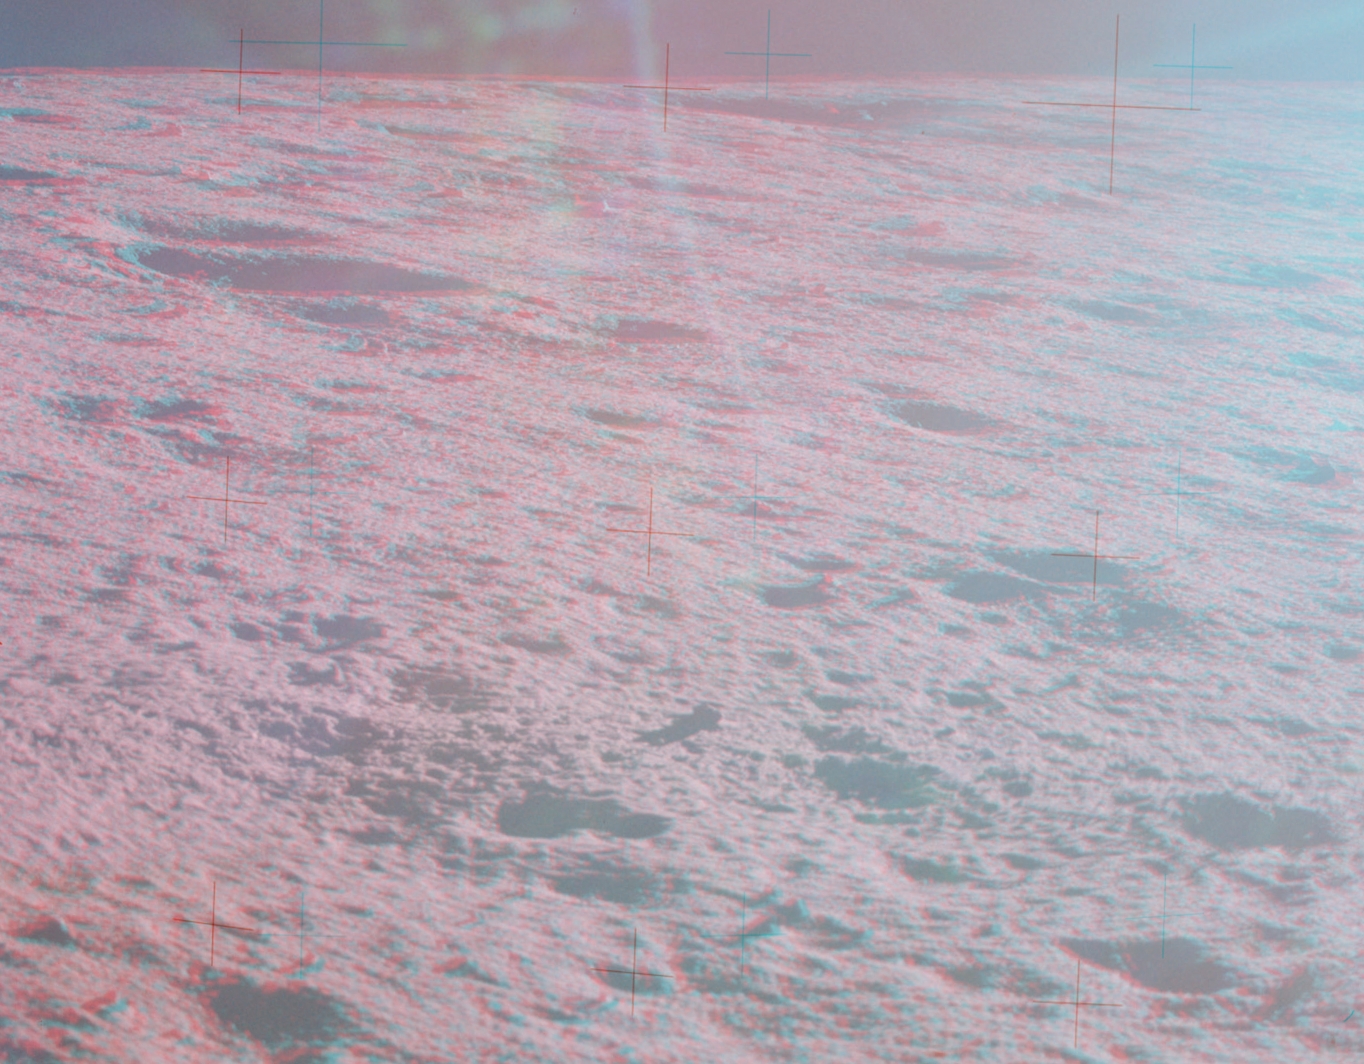
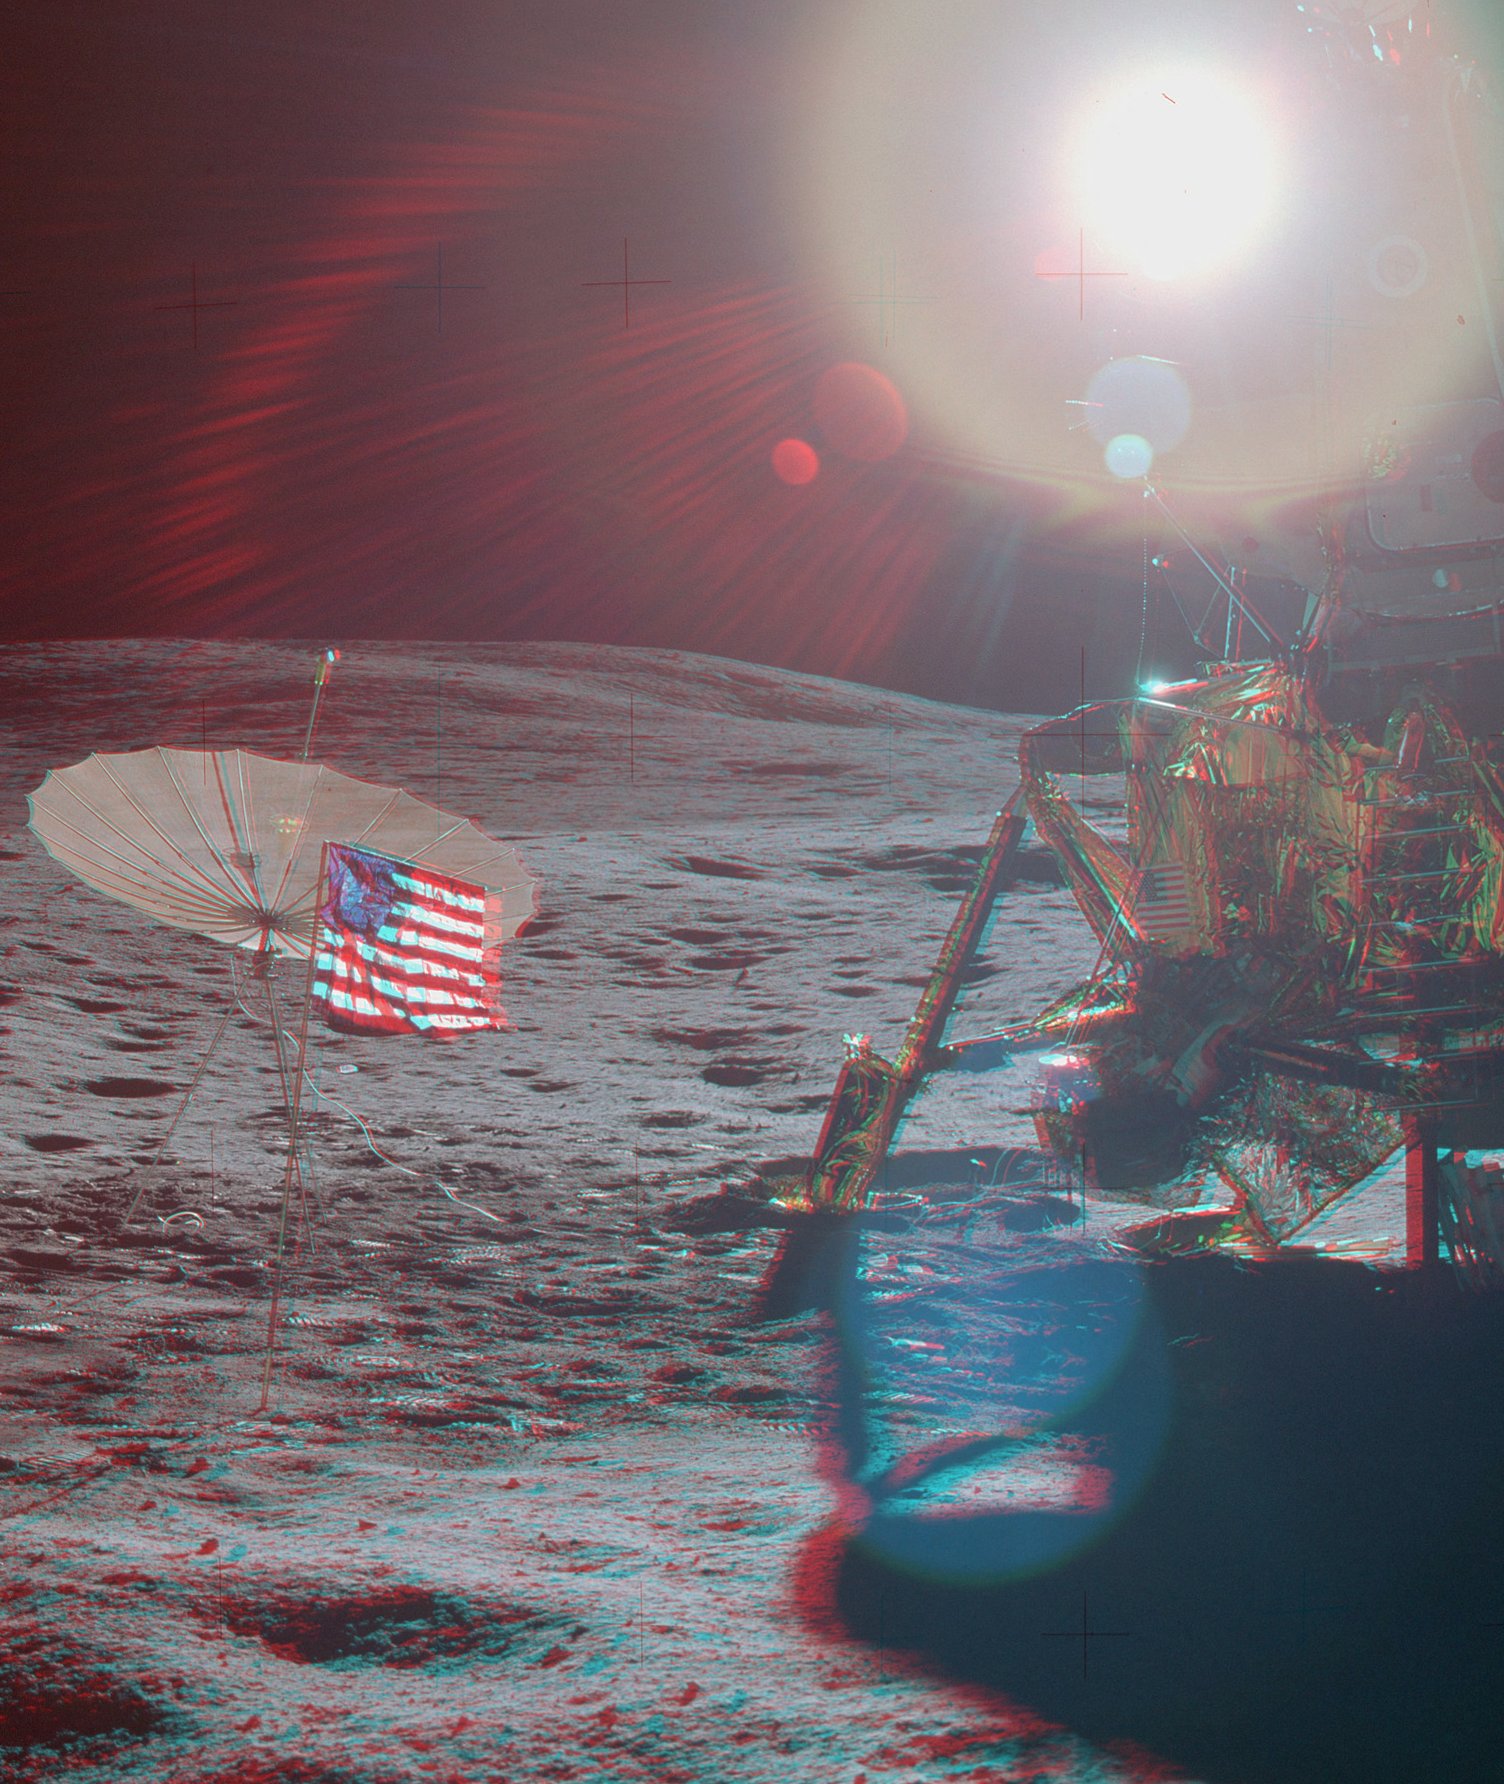
The first two landings occurred on
mare sites: Apollo 11 in the southwest portion of Mare
Tranquilitatis; and Apollo 12 in Mare Insularum (formerly part
of Mare Procellarum). Both sites were selected
because they have relatively low numbers of larger craters
and troublesome rocks per unit area, thus giving the crews
an excellent chance of finding good landing spots despite
uncertainties about where they might end up within the landing
ellipse. Except for the inevitable carpeting of the
surface by craters a meter across or smaller, the surface
between craters bigger than a few meters across is relatively
smooth. Rises and falls of more than one or two meters
over distances of a few tens of meters are rare in the small
areas traversed by these crews.
Demonstration of a precision landing on Apollo 12 allowed relaxation of site selection criteria and, thereby, visits to site of greater geologic interest and more varied terrain.
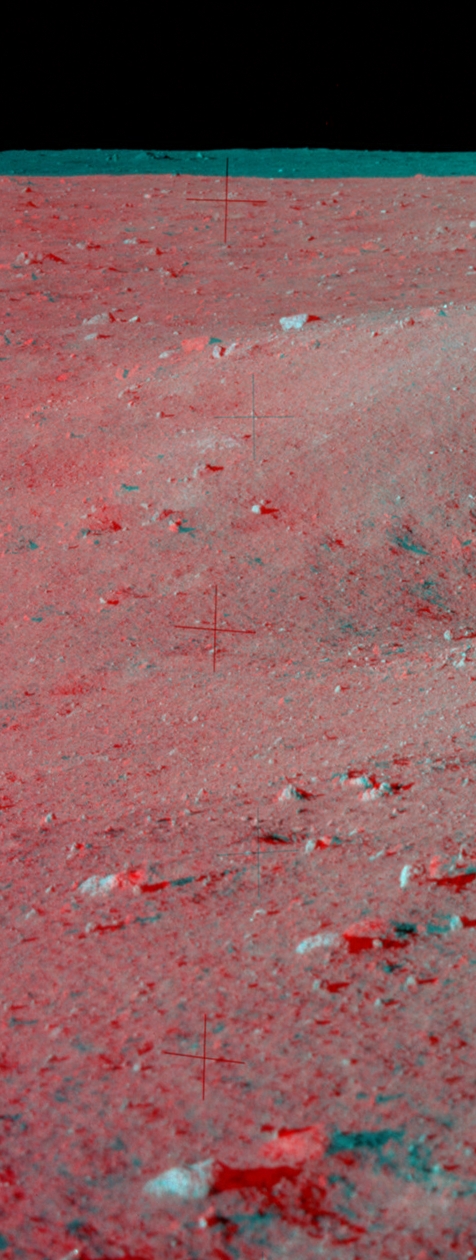
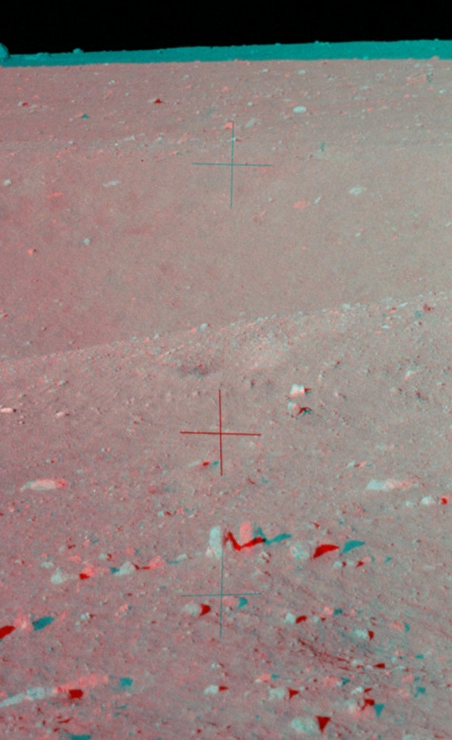
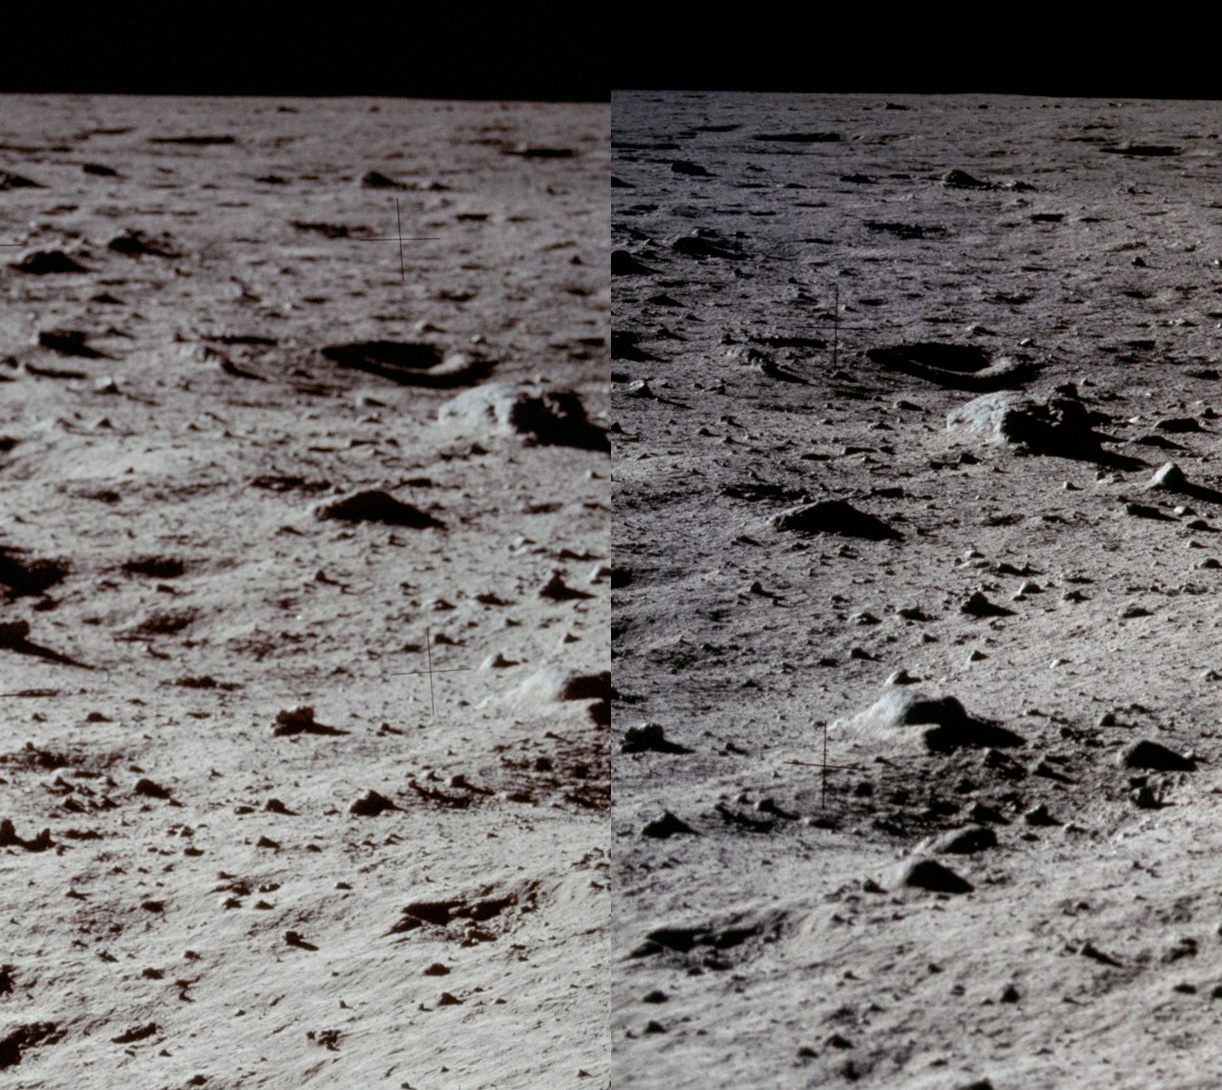
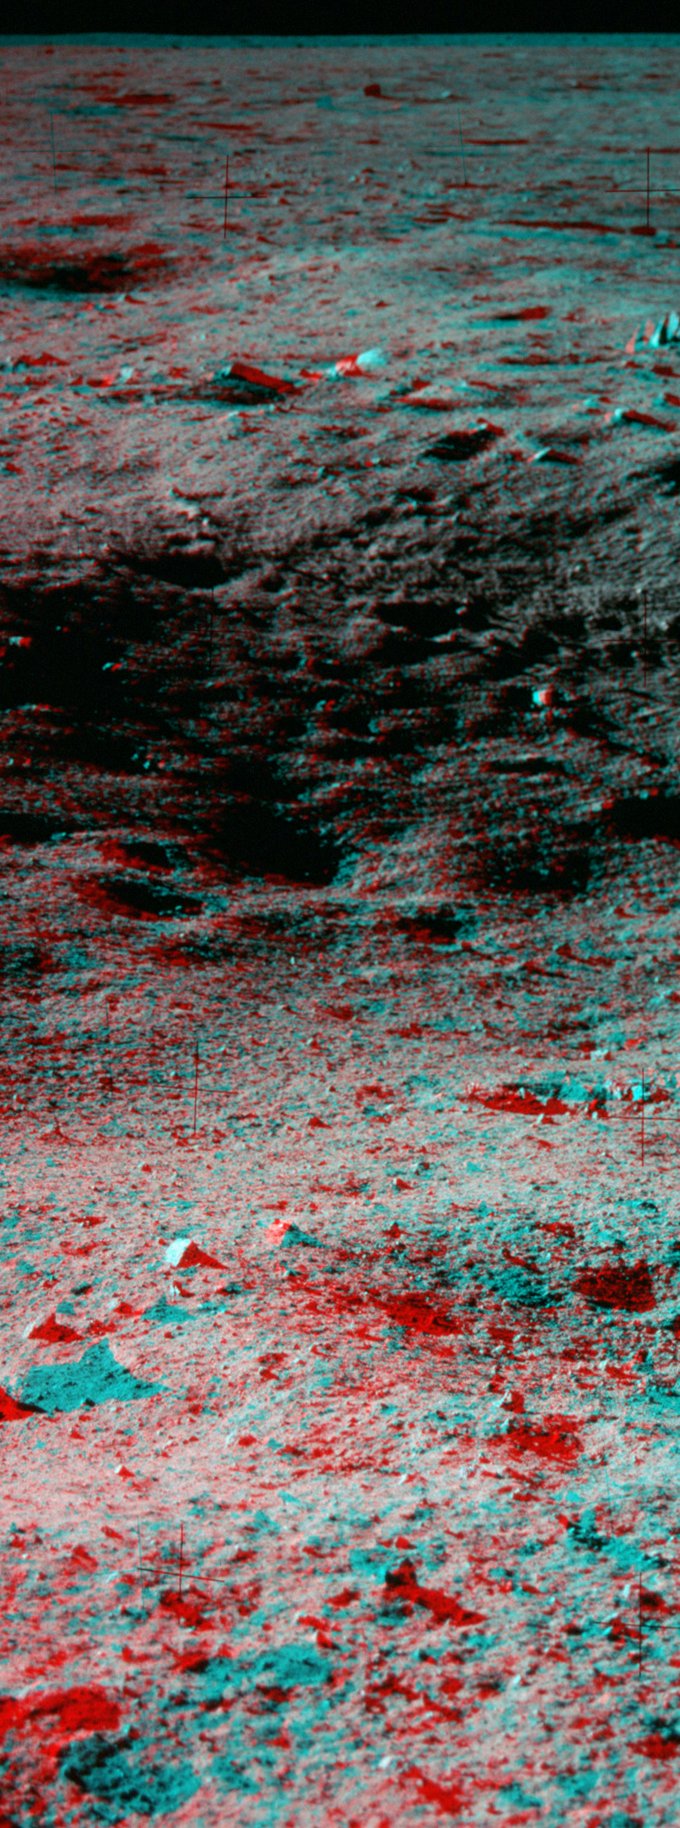
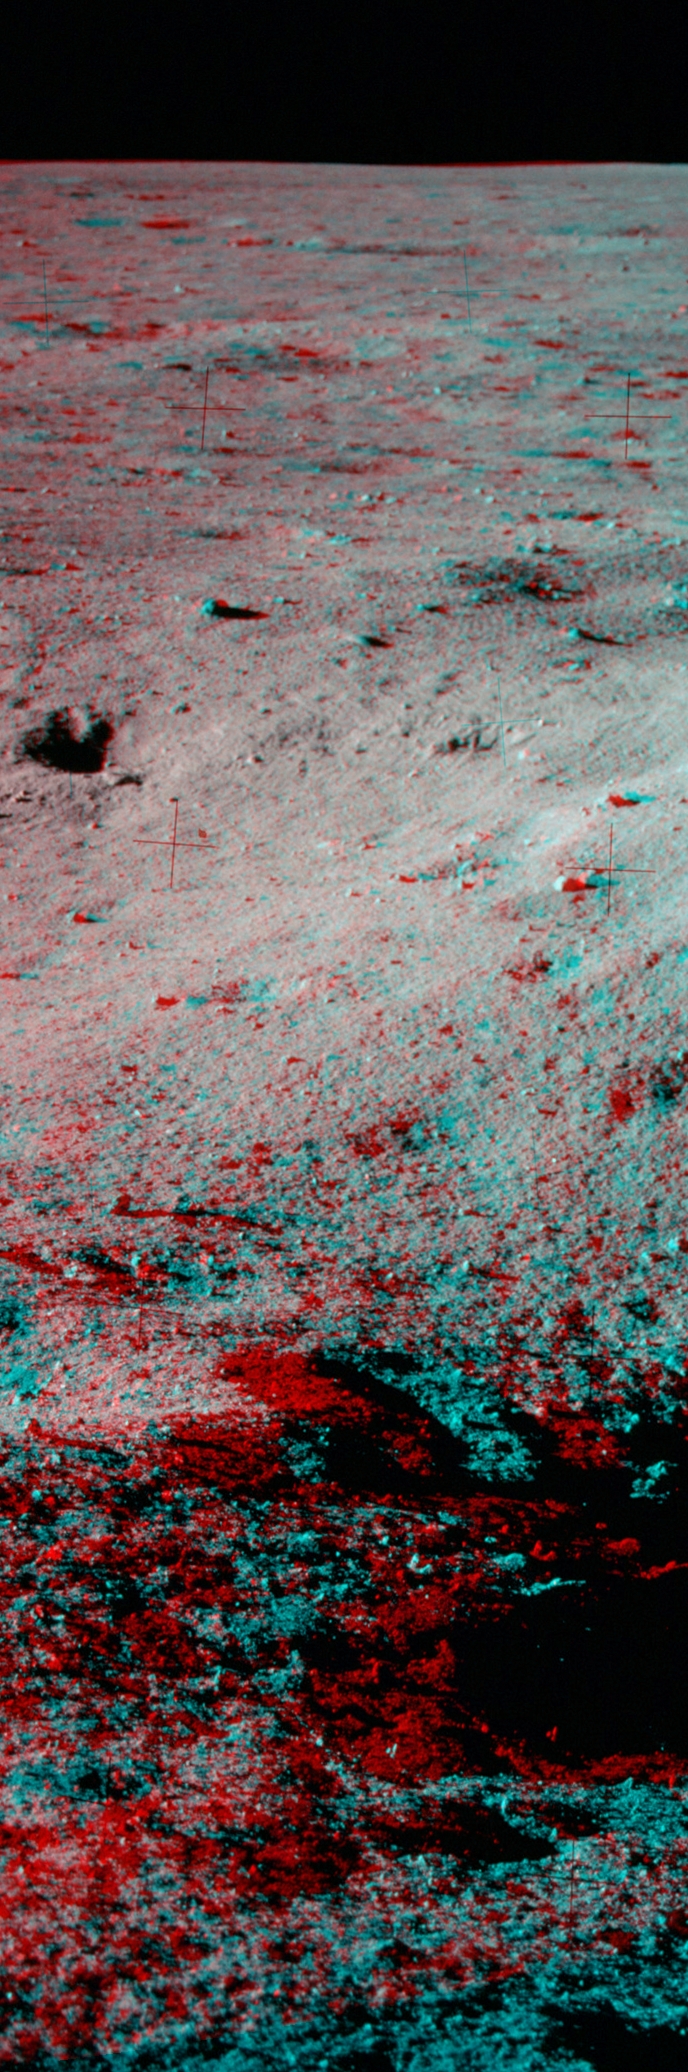
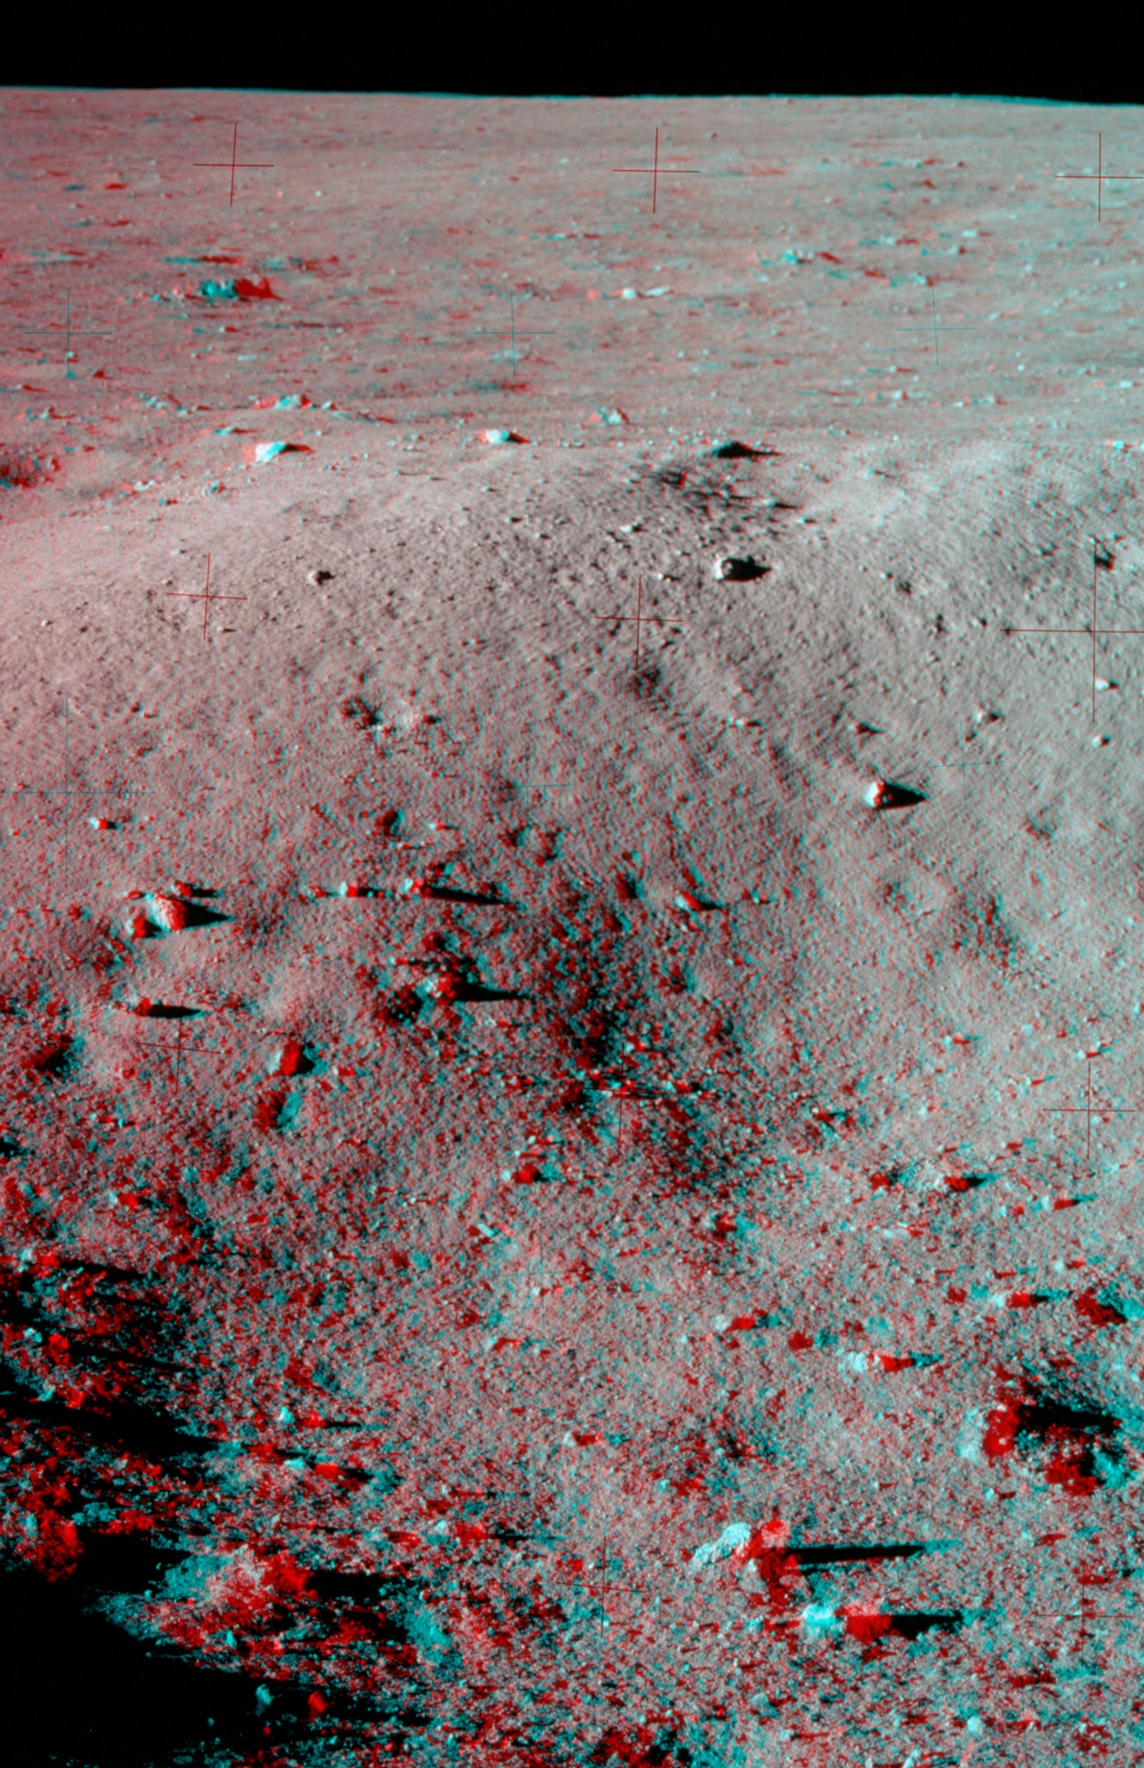
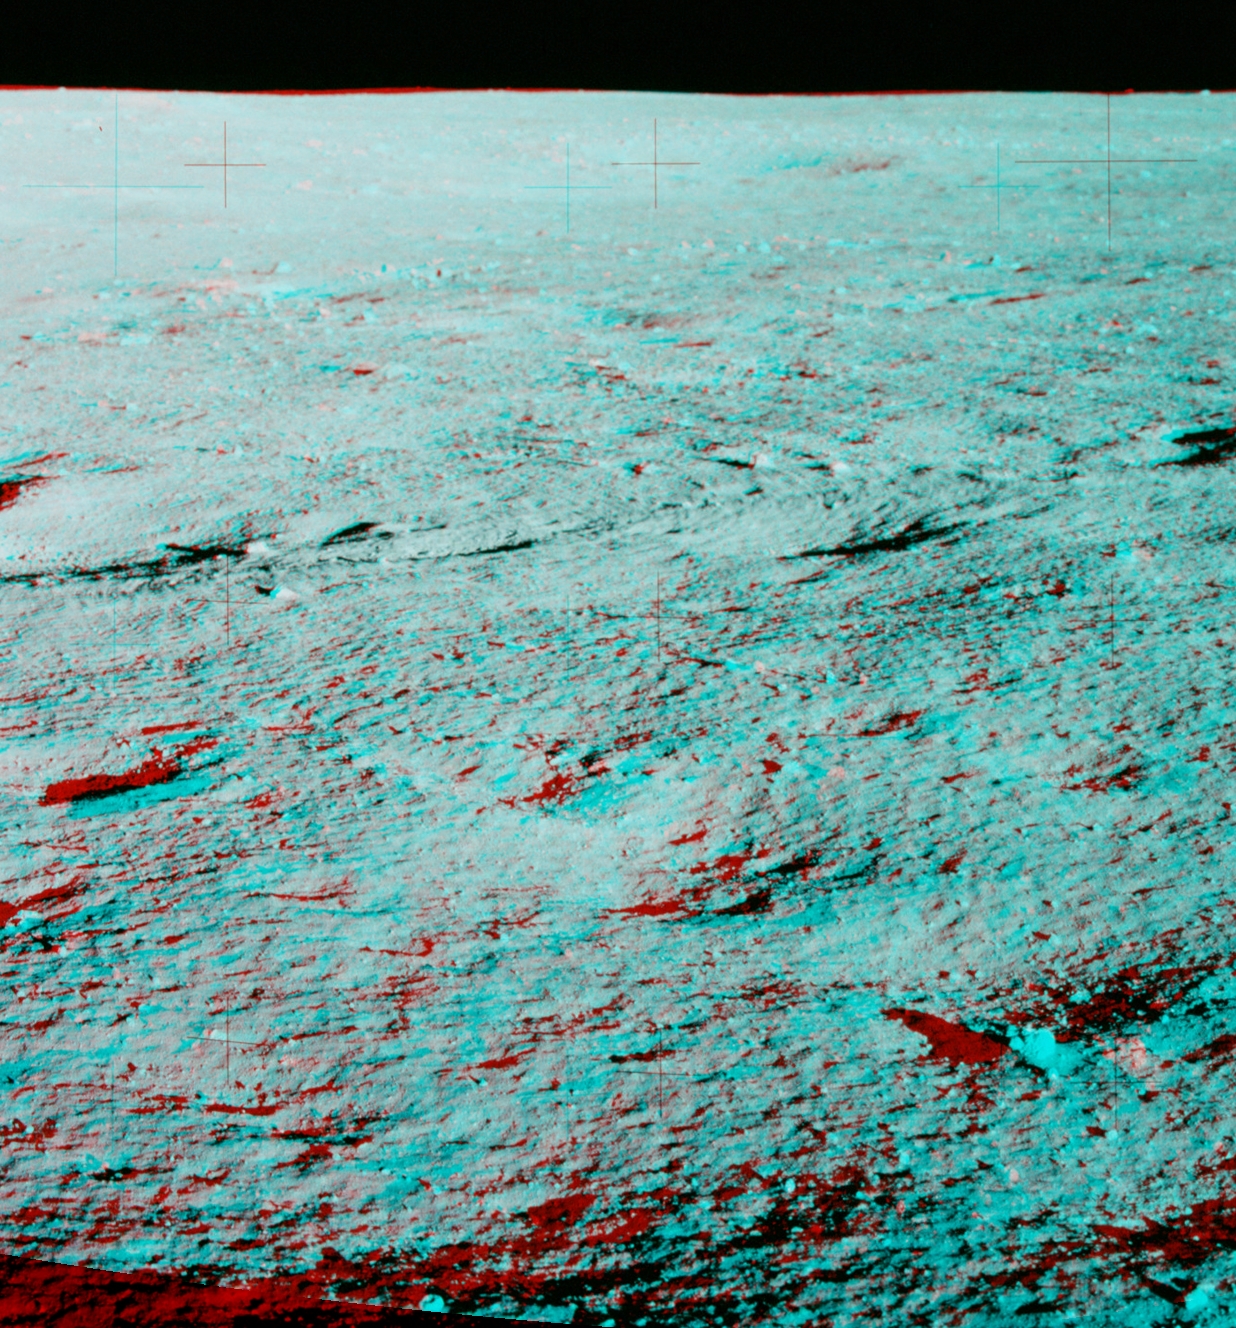
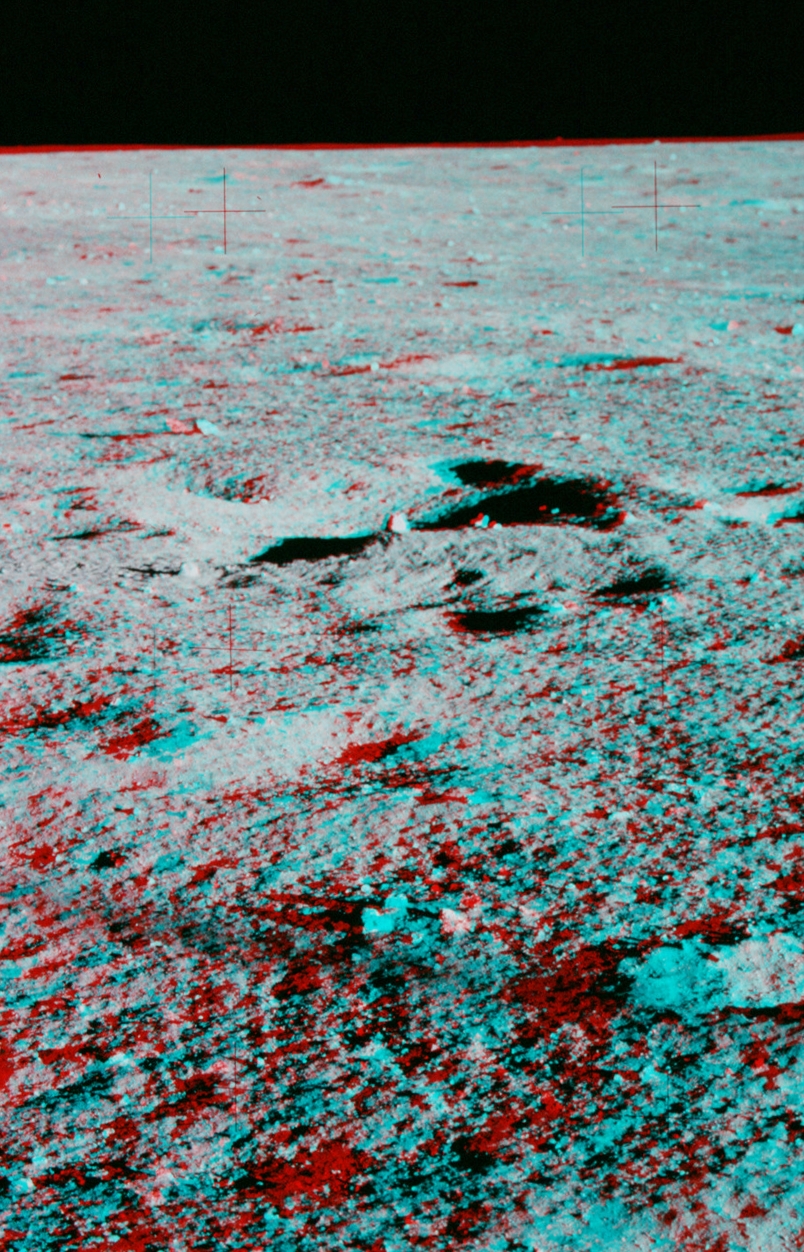
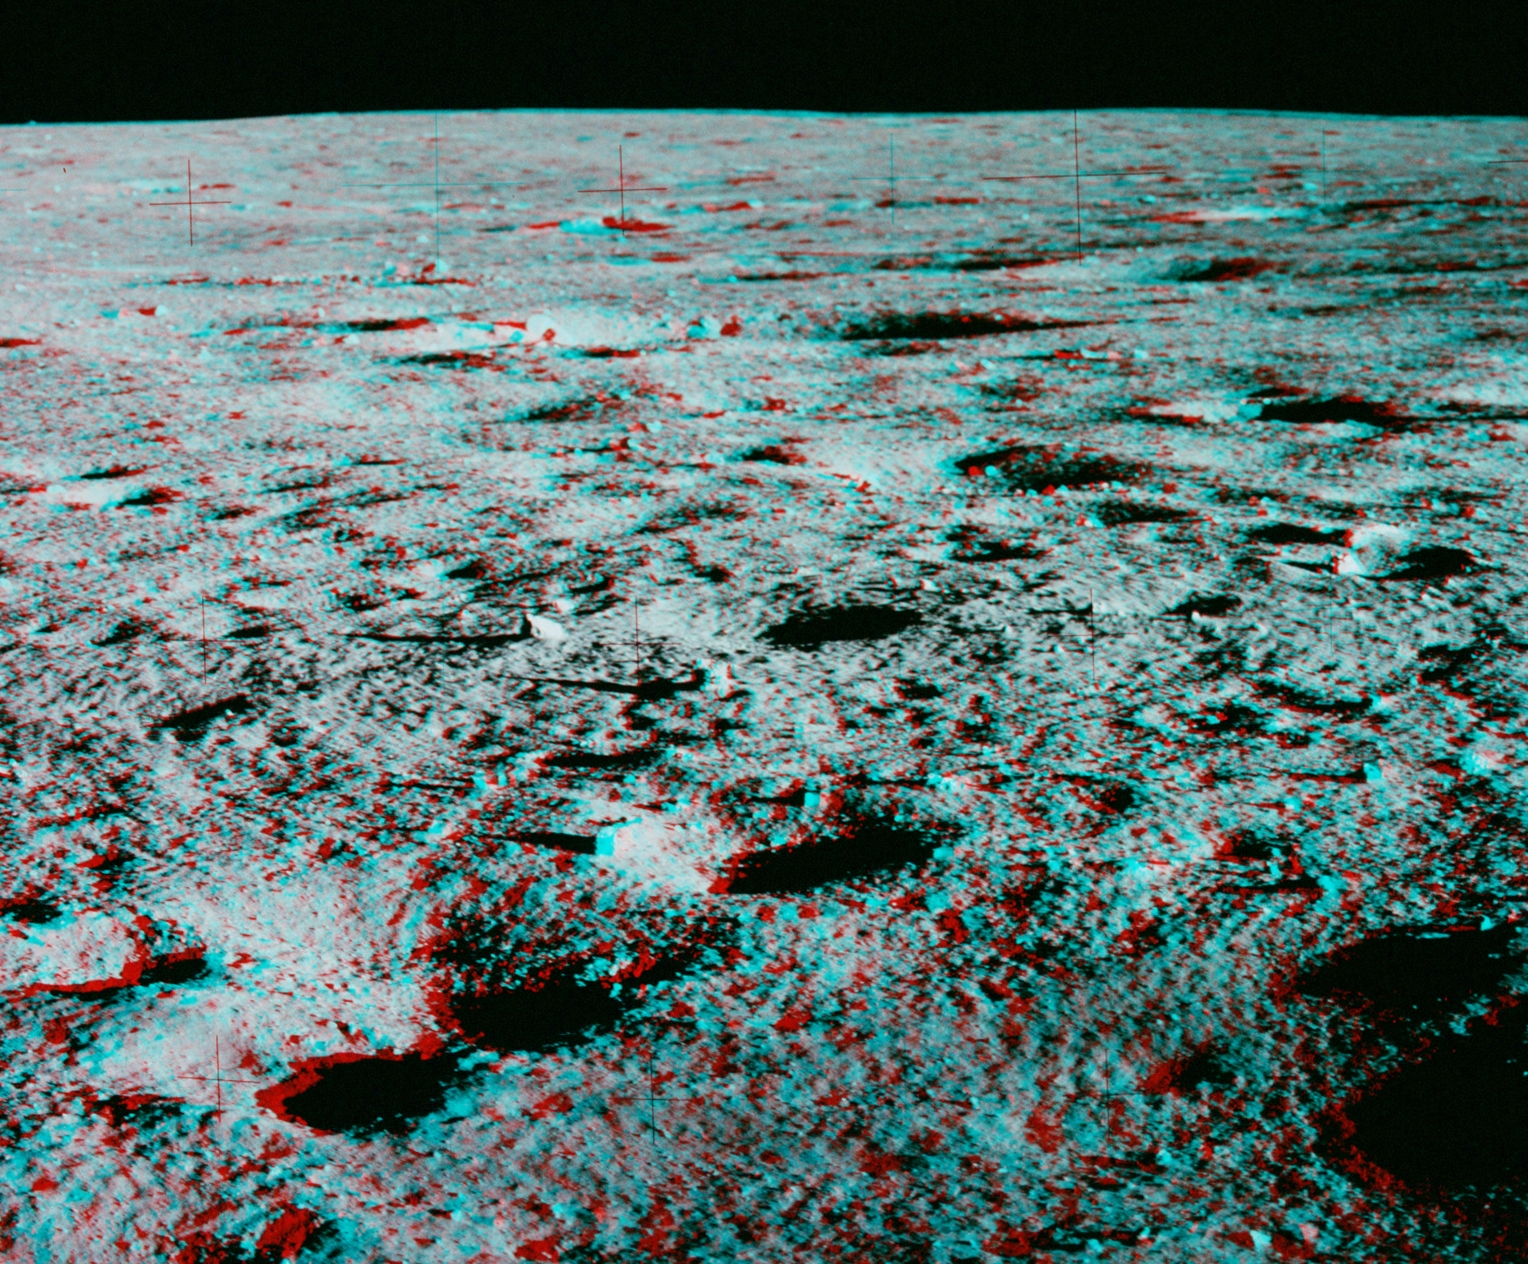
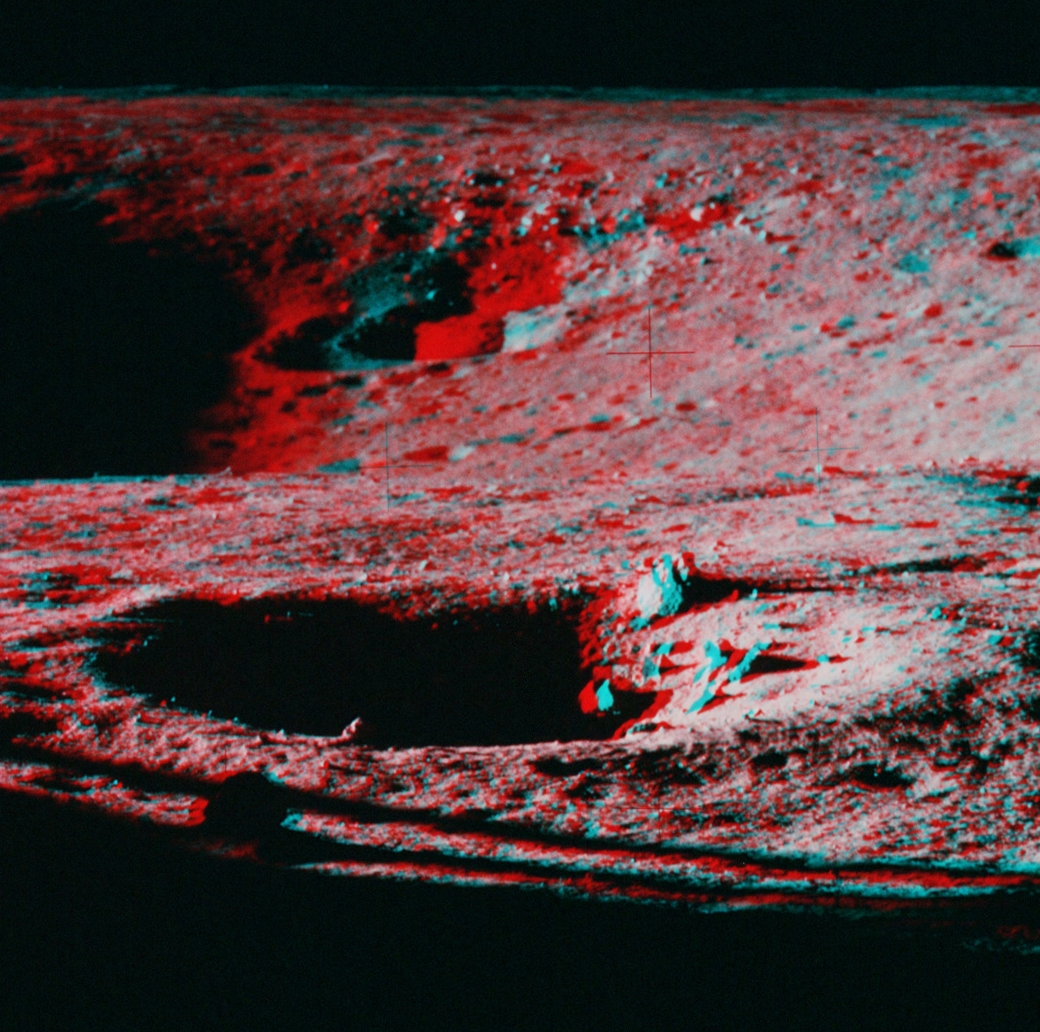
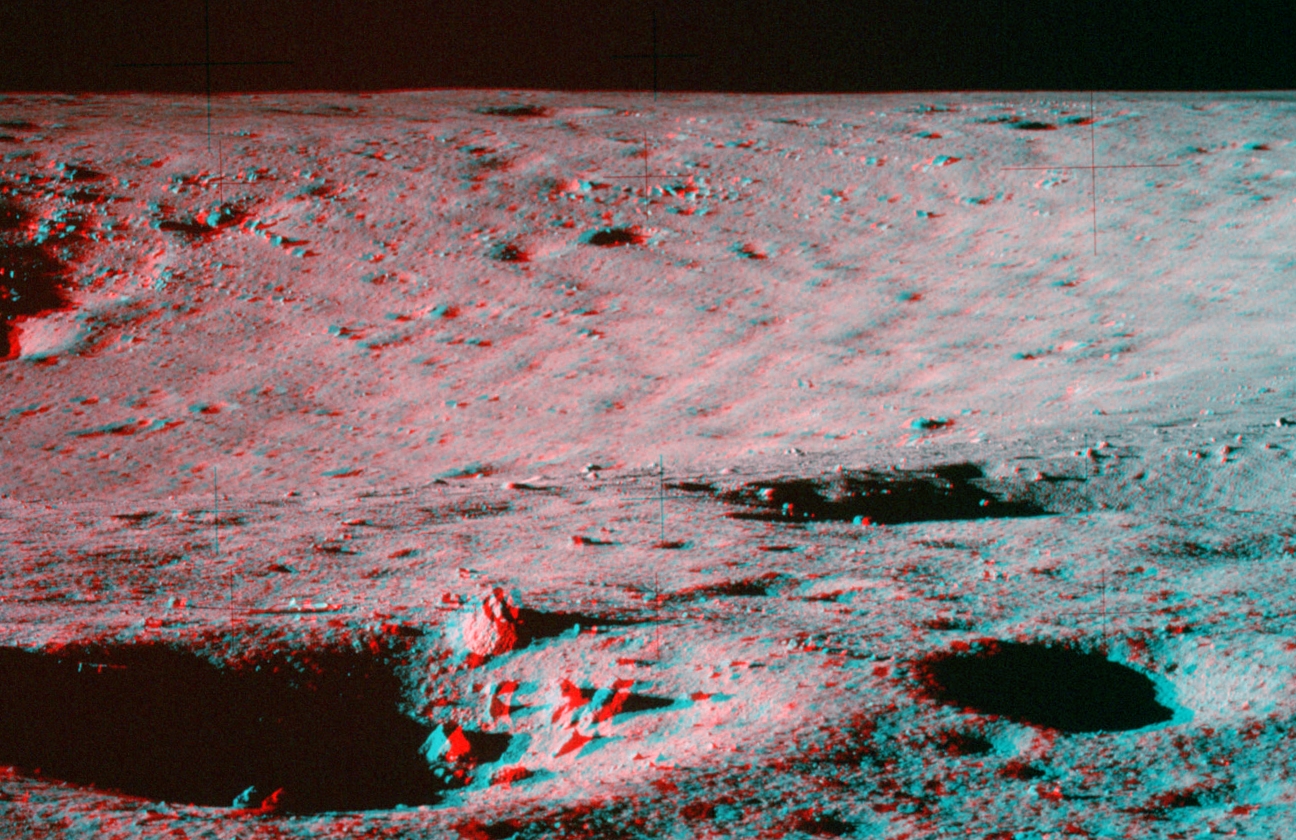
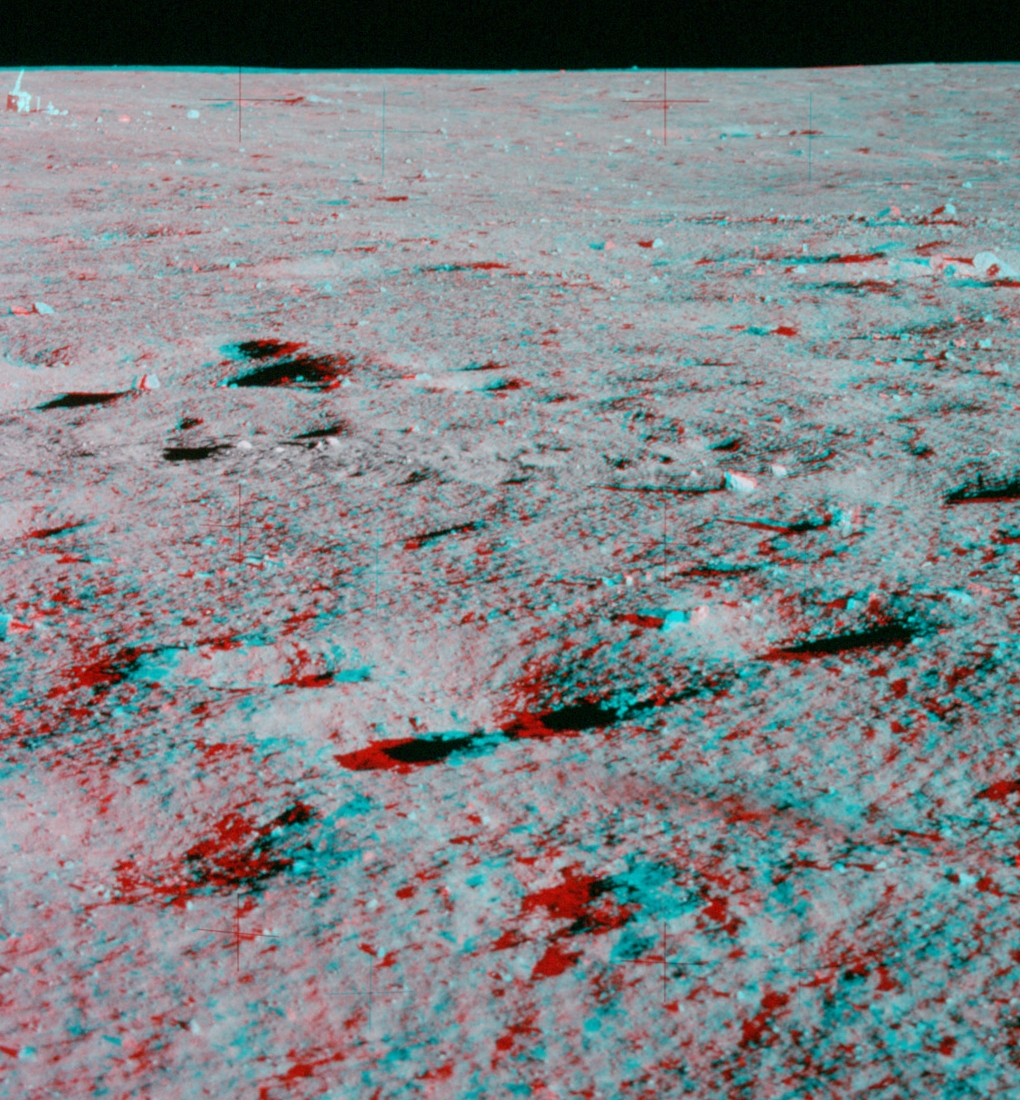
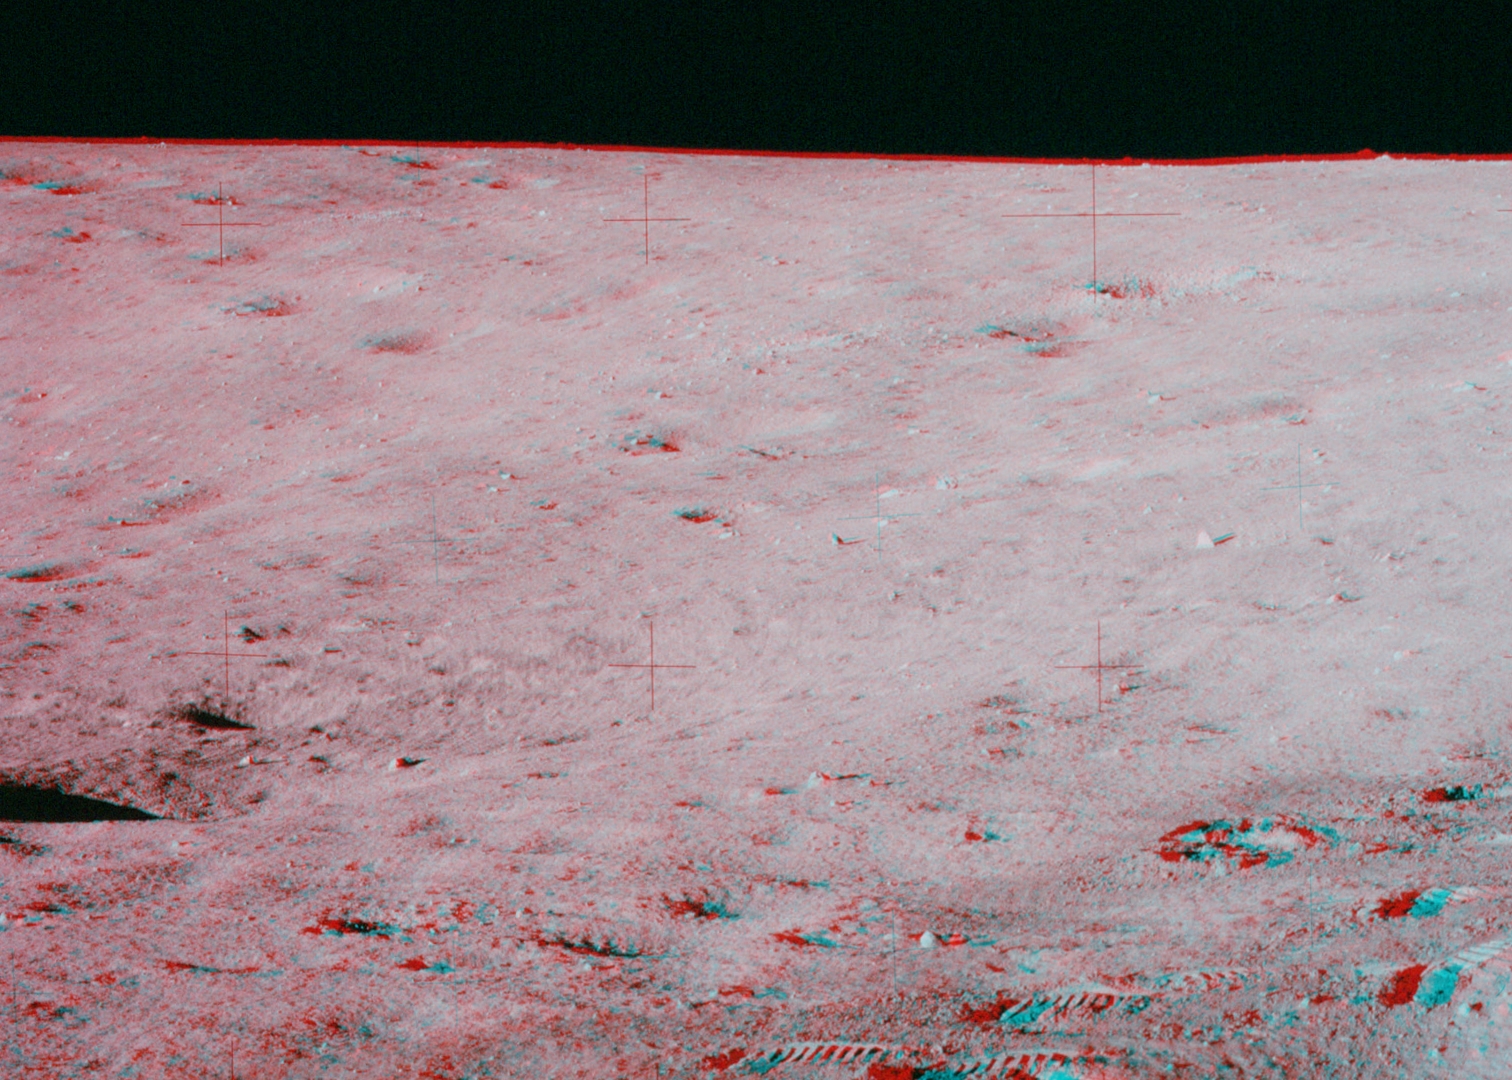
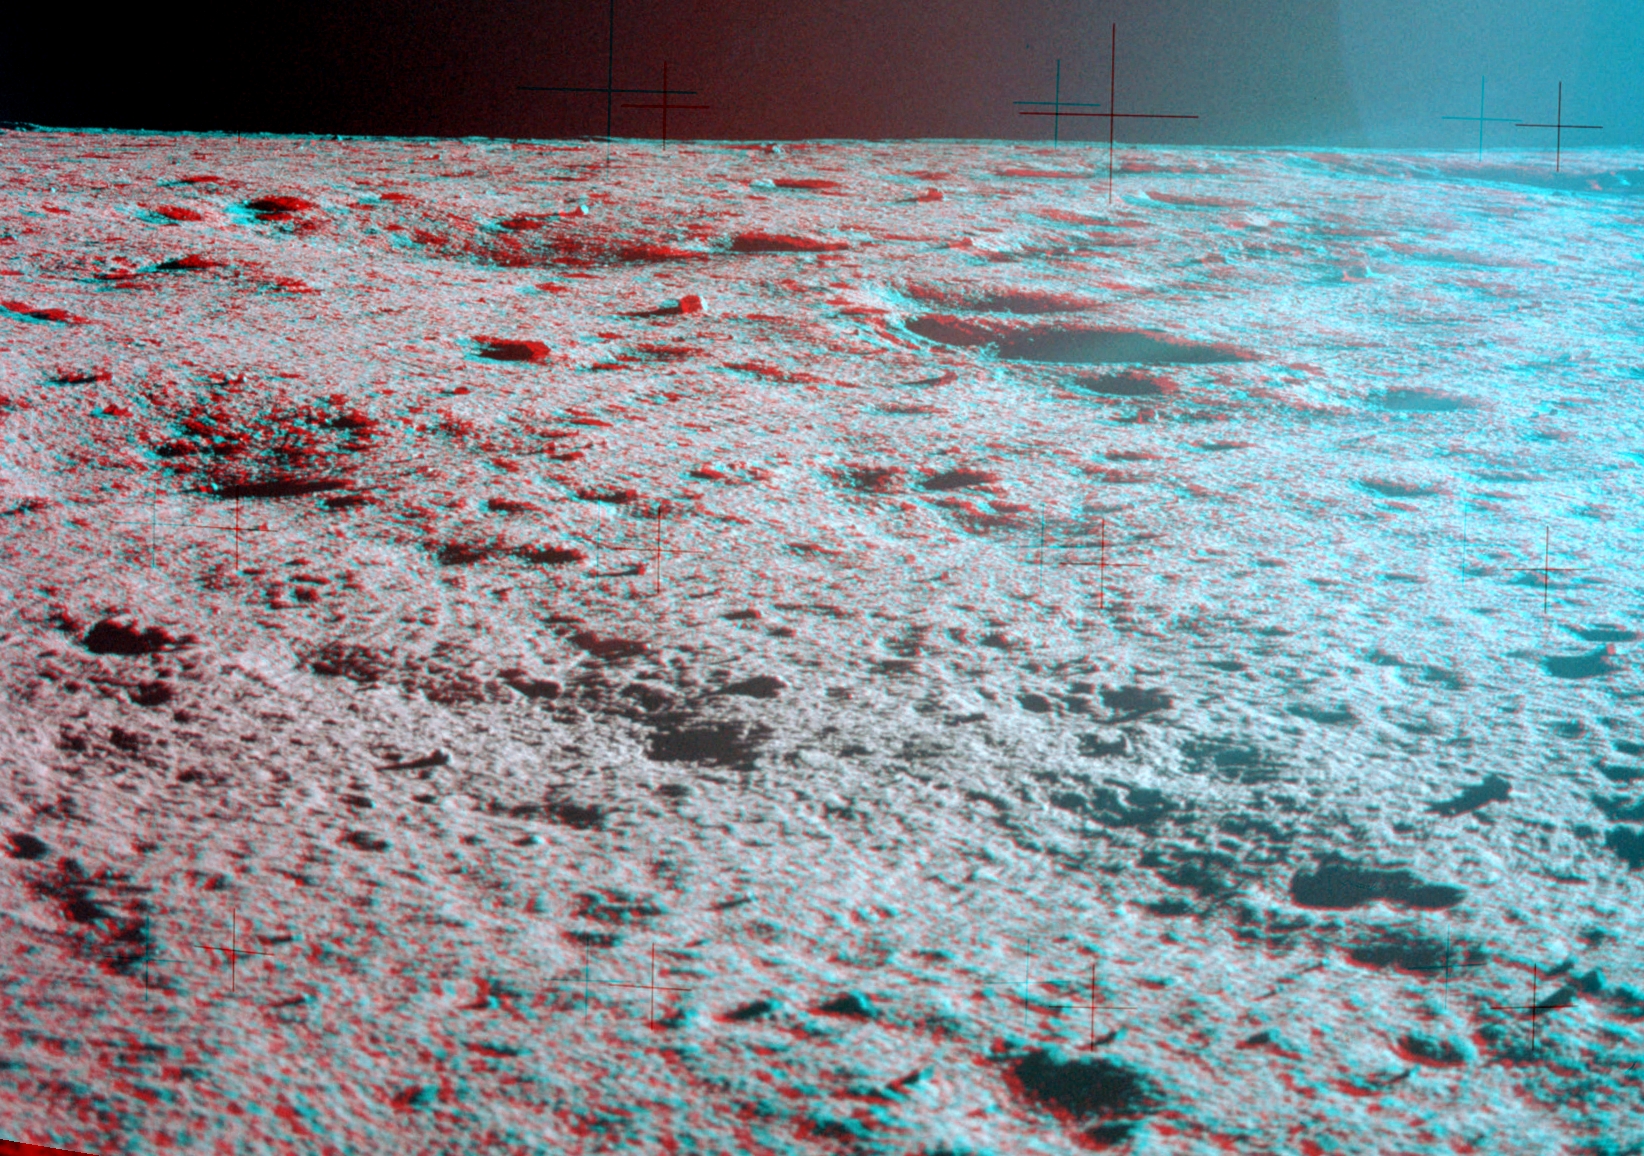
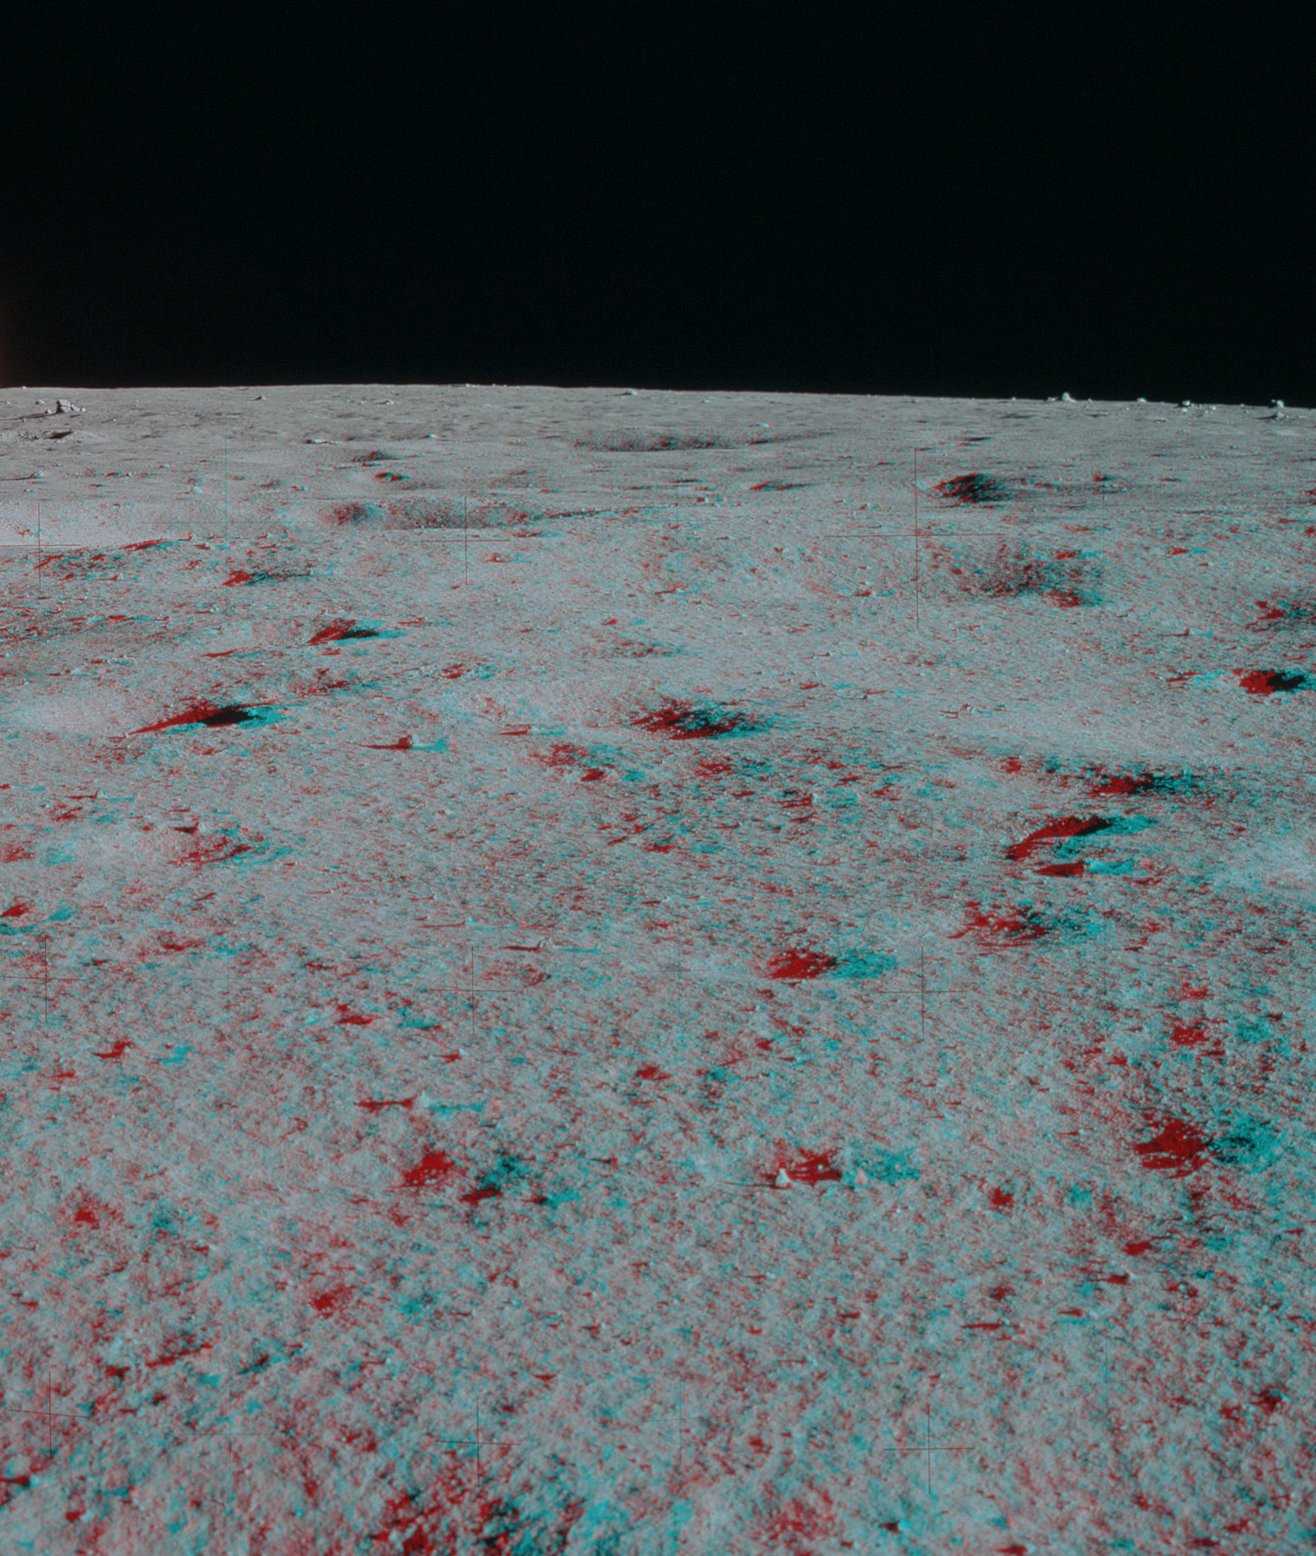
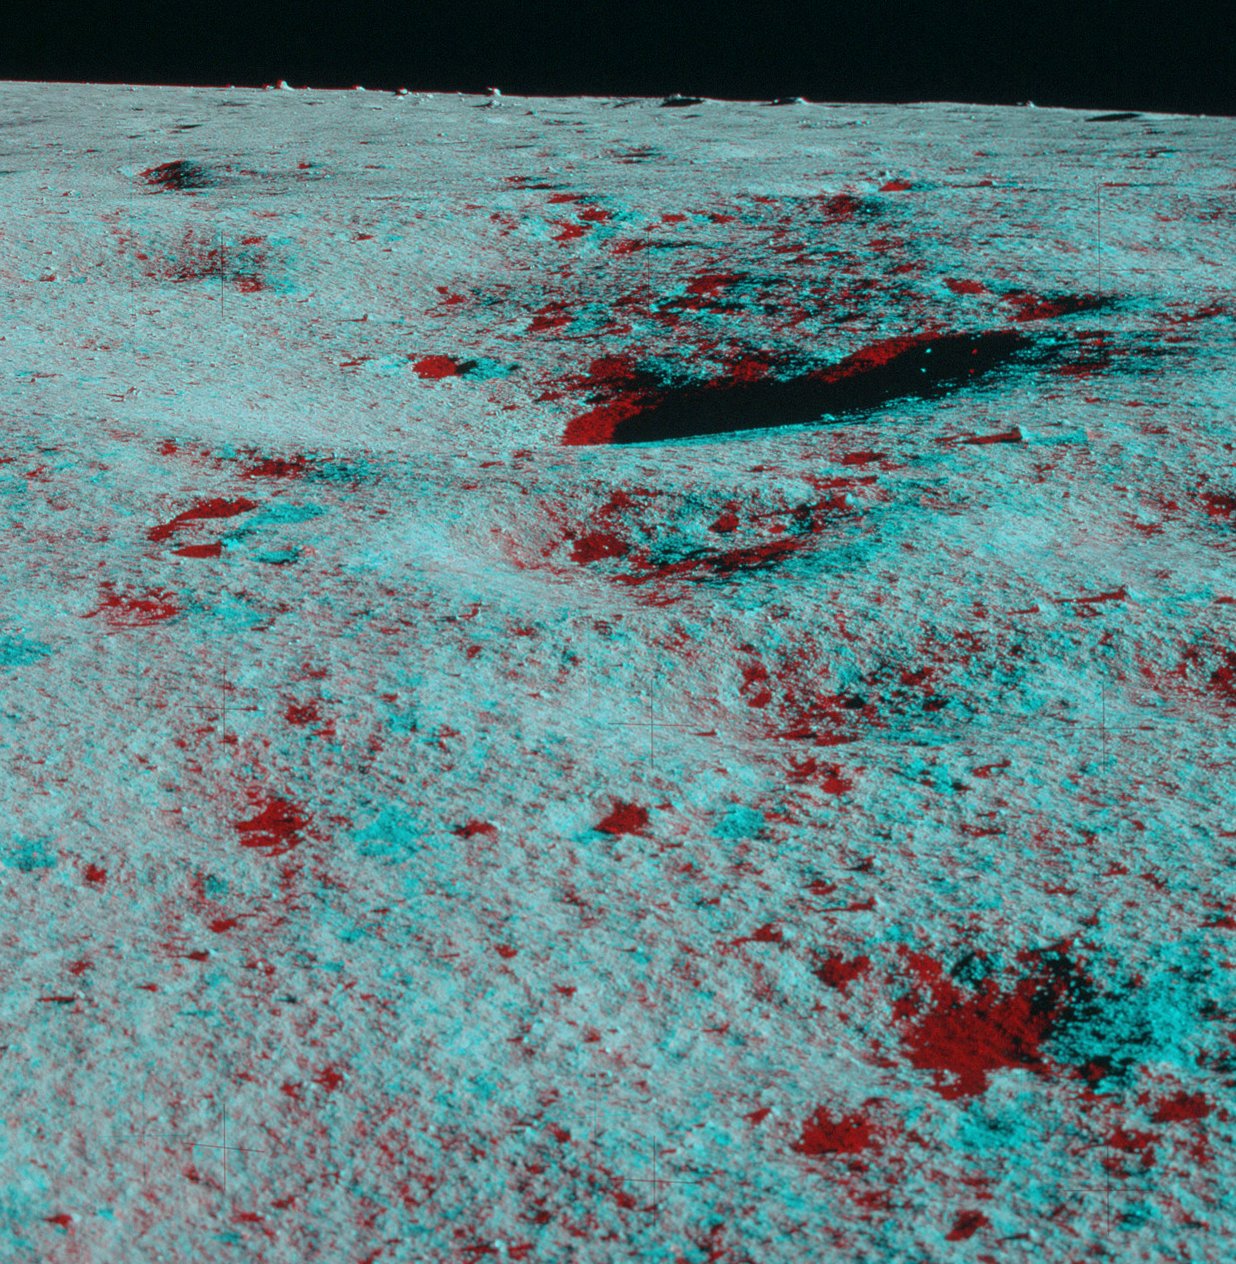
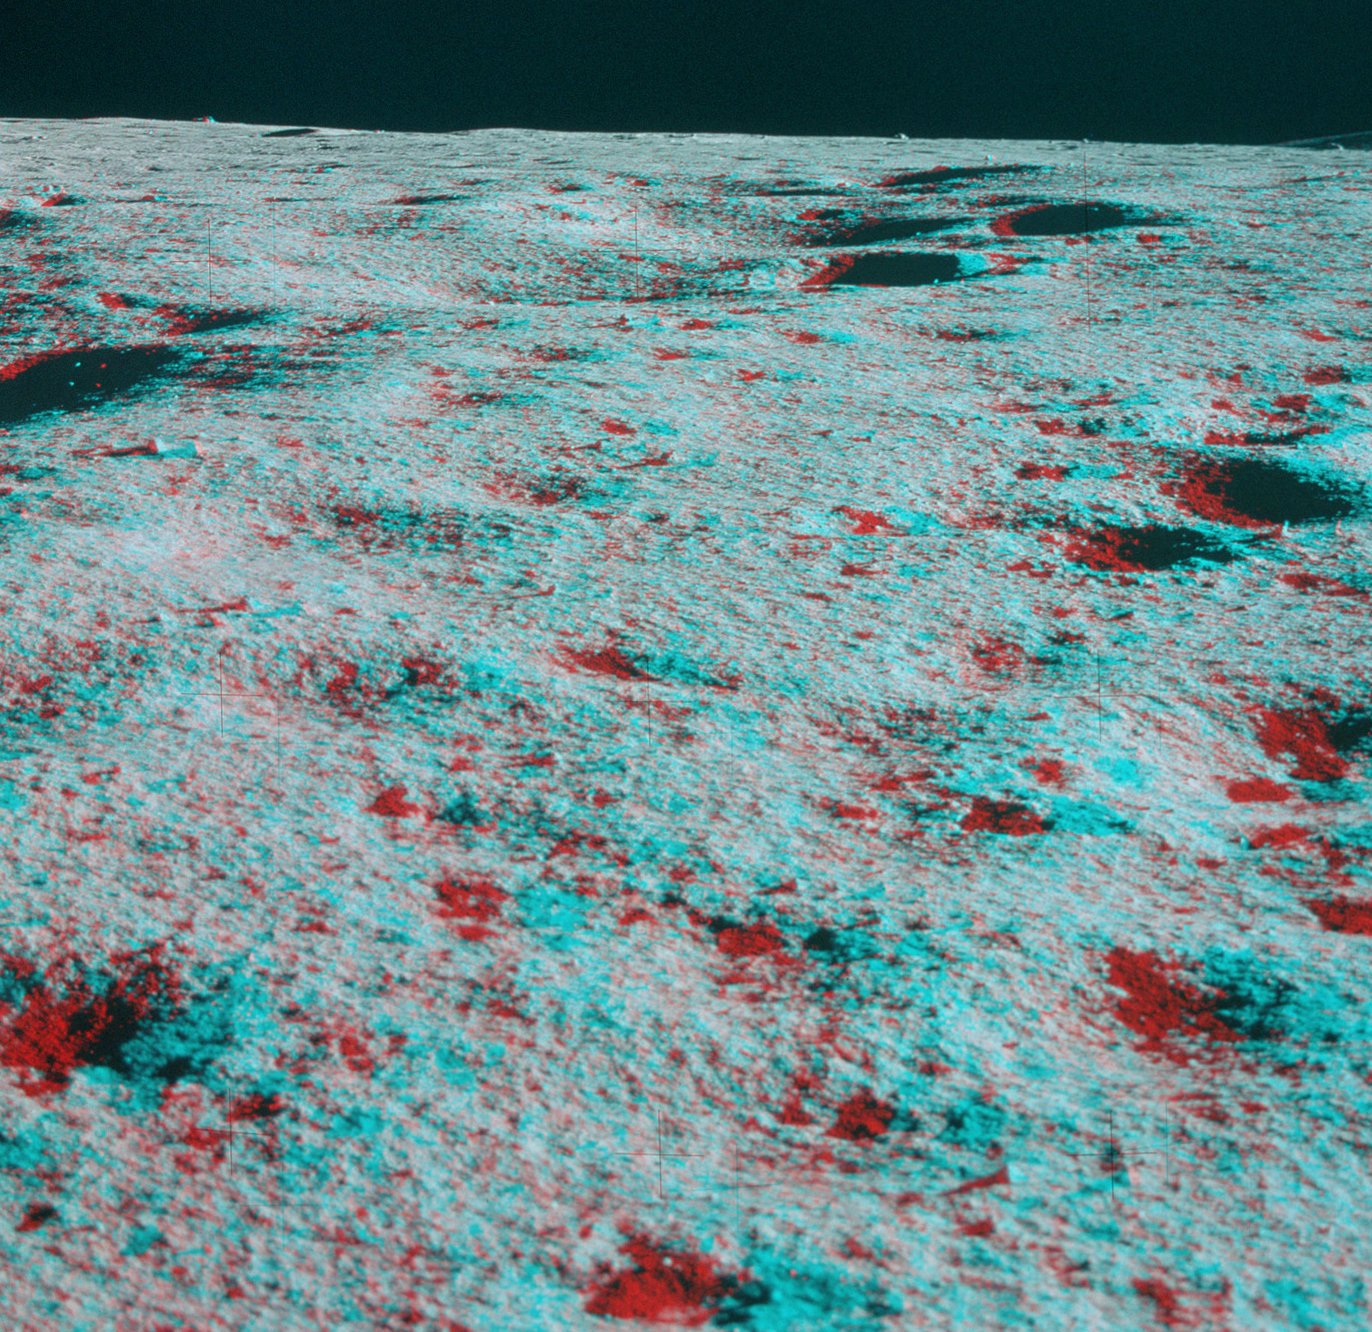
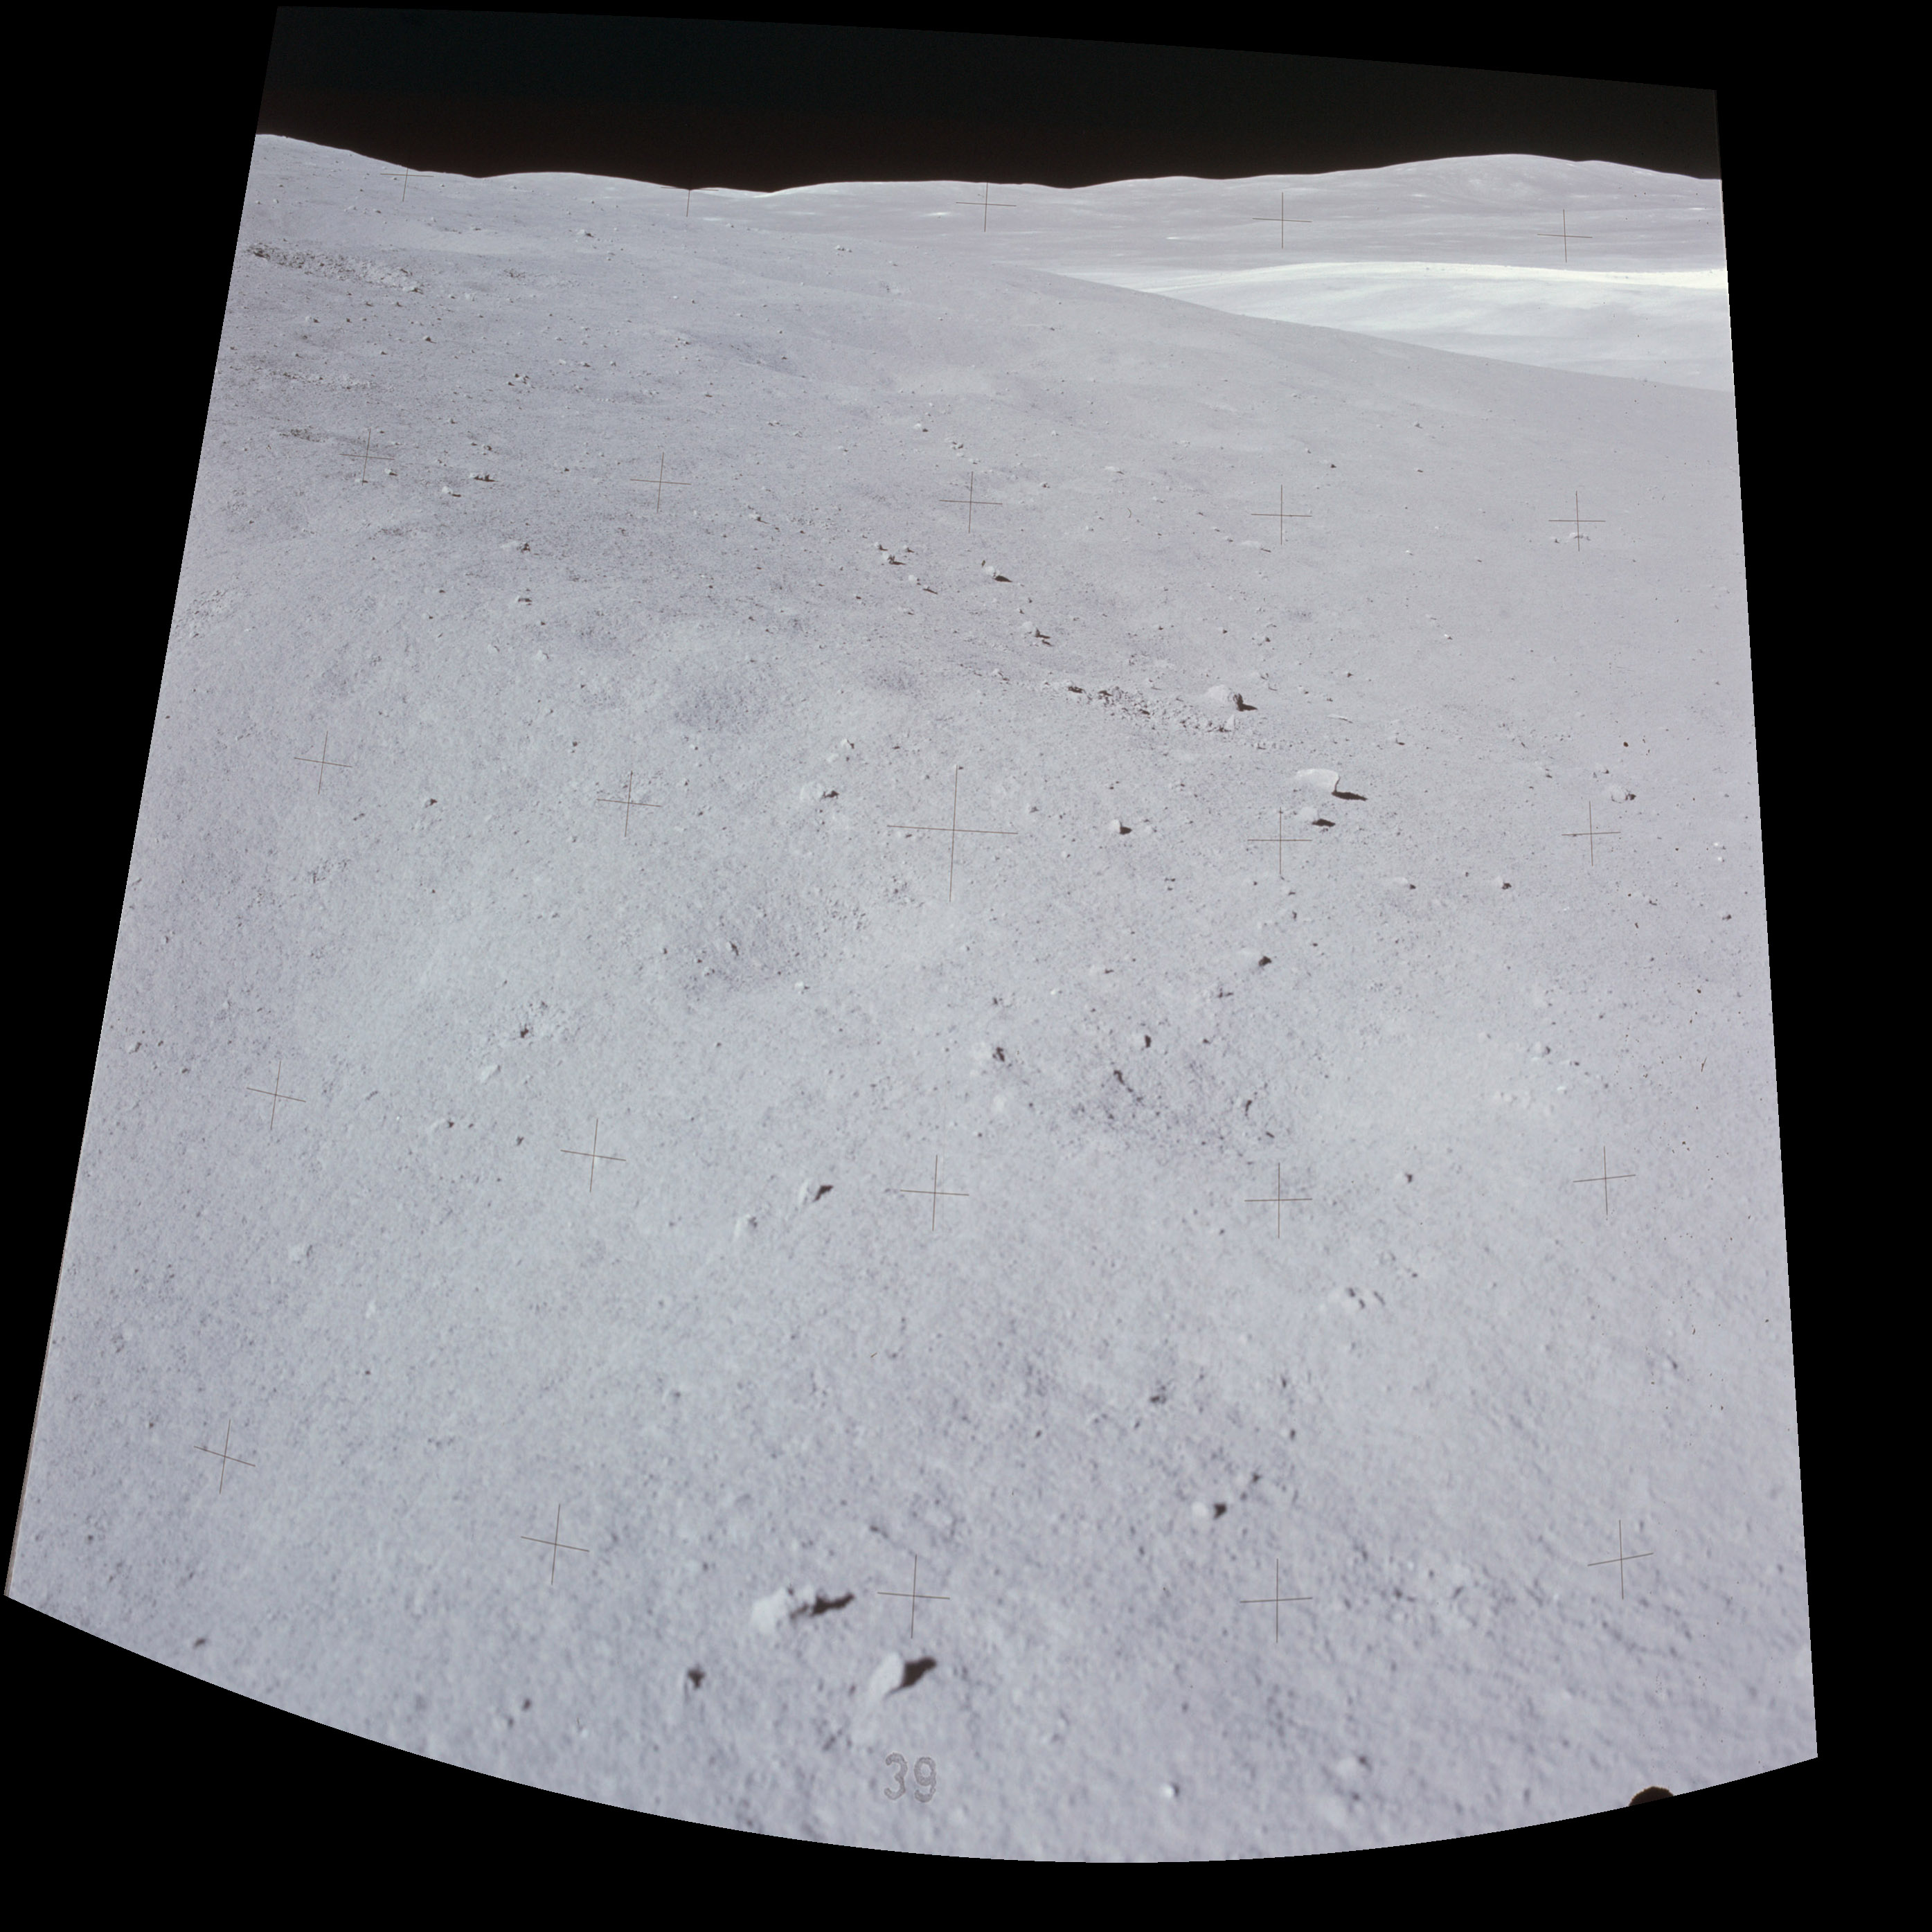
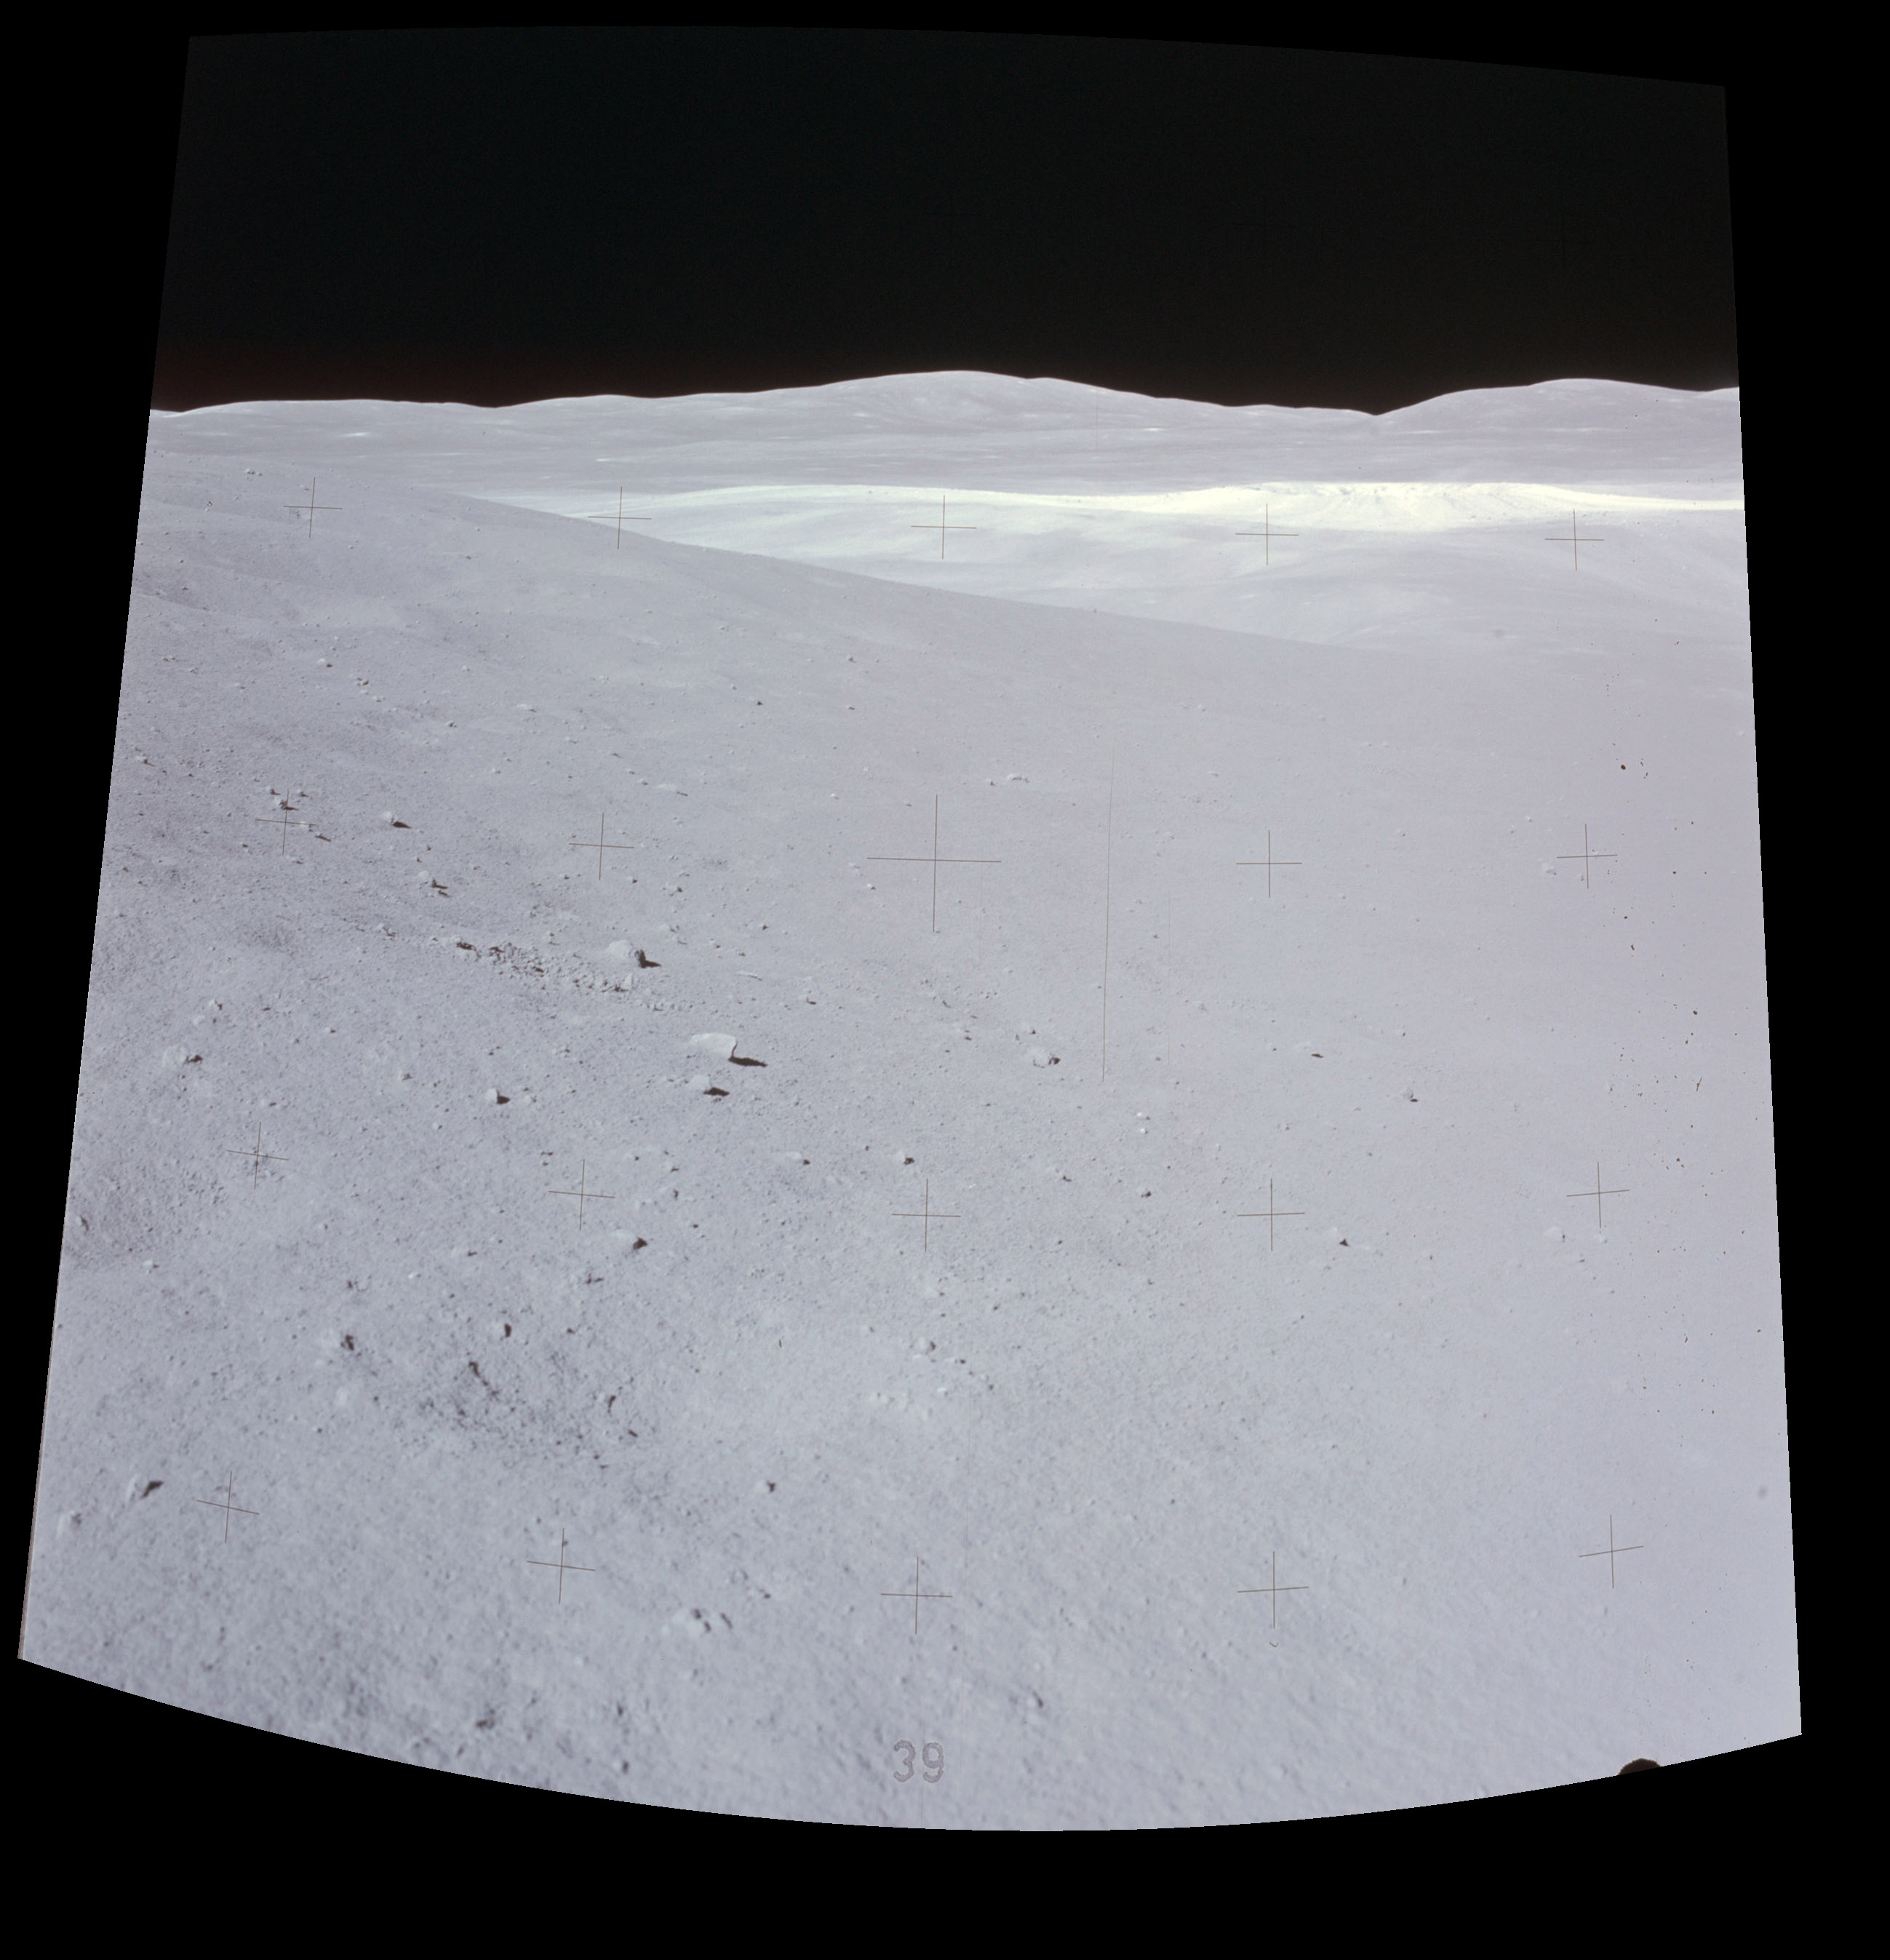
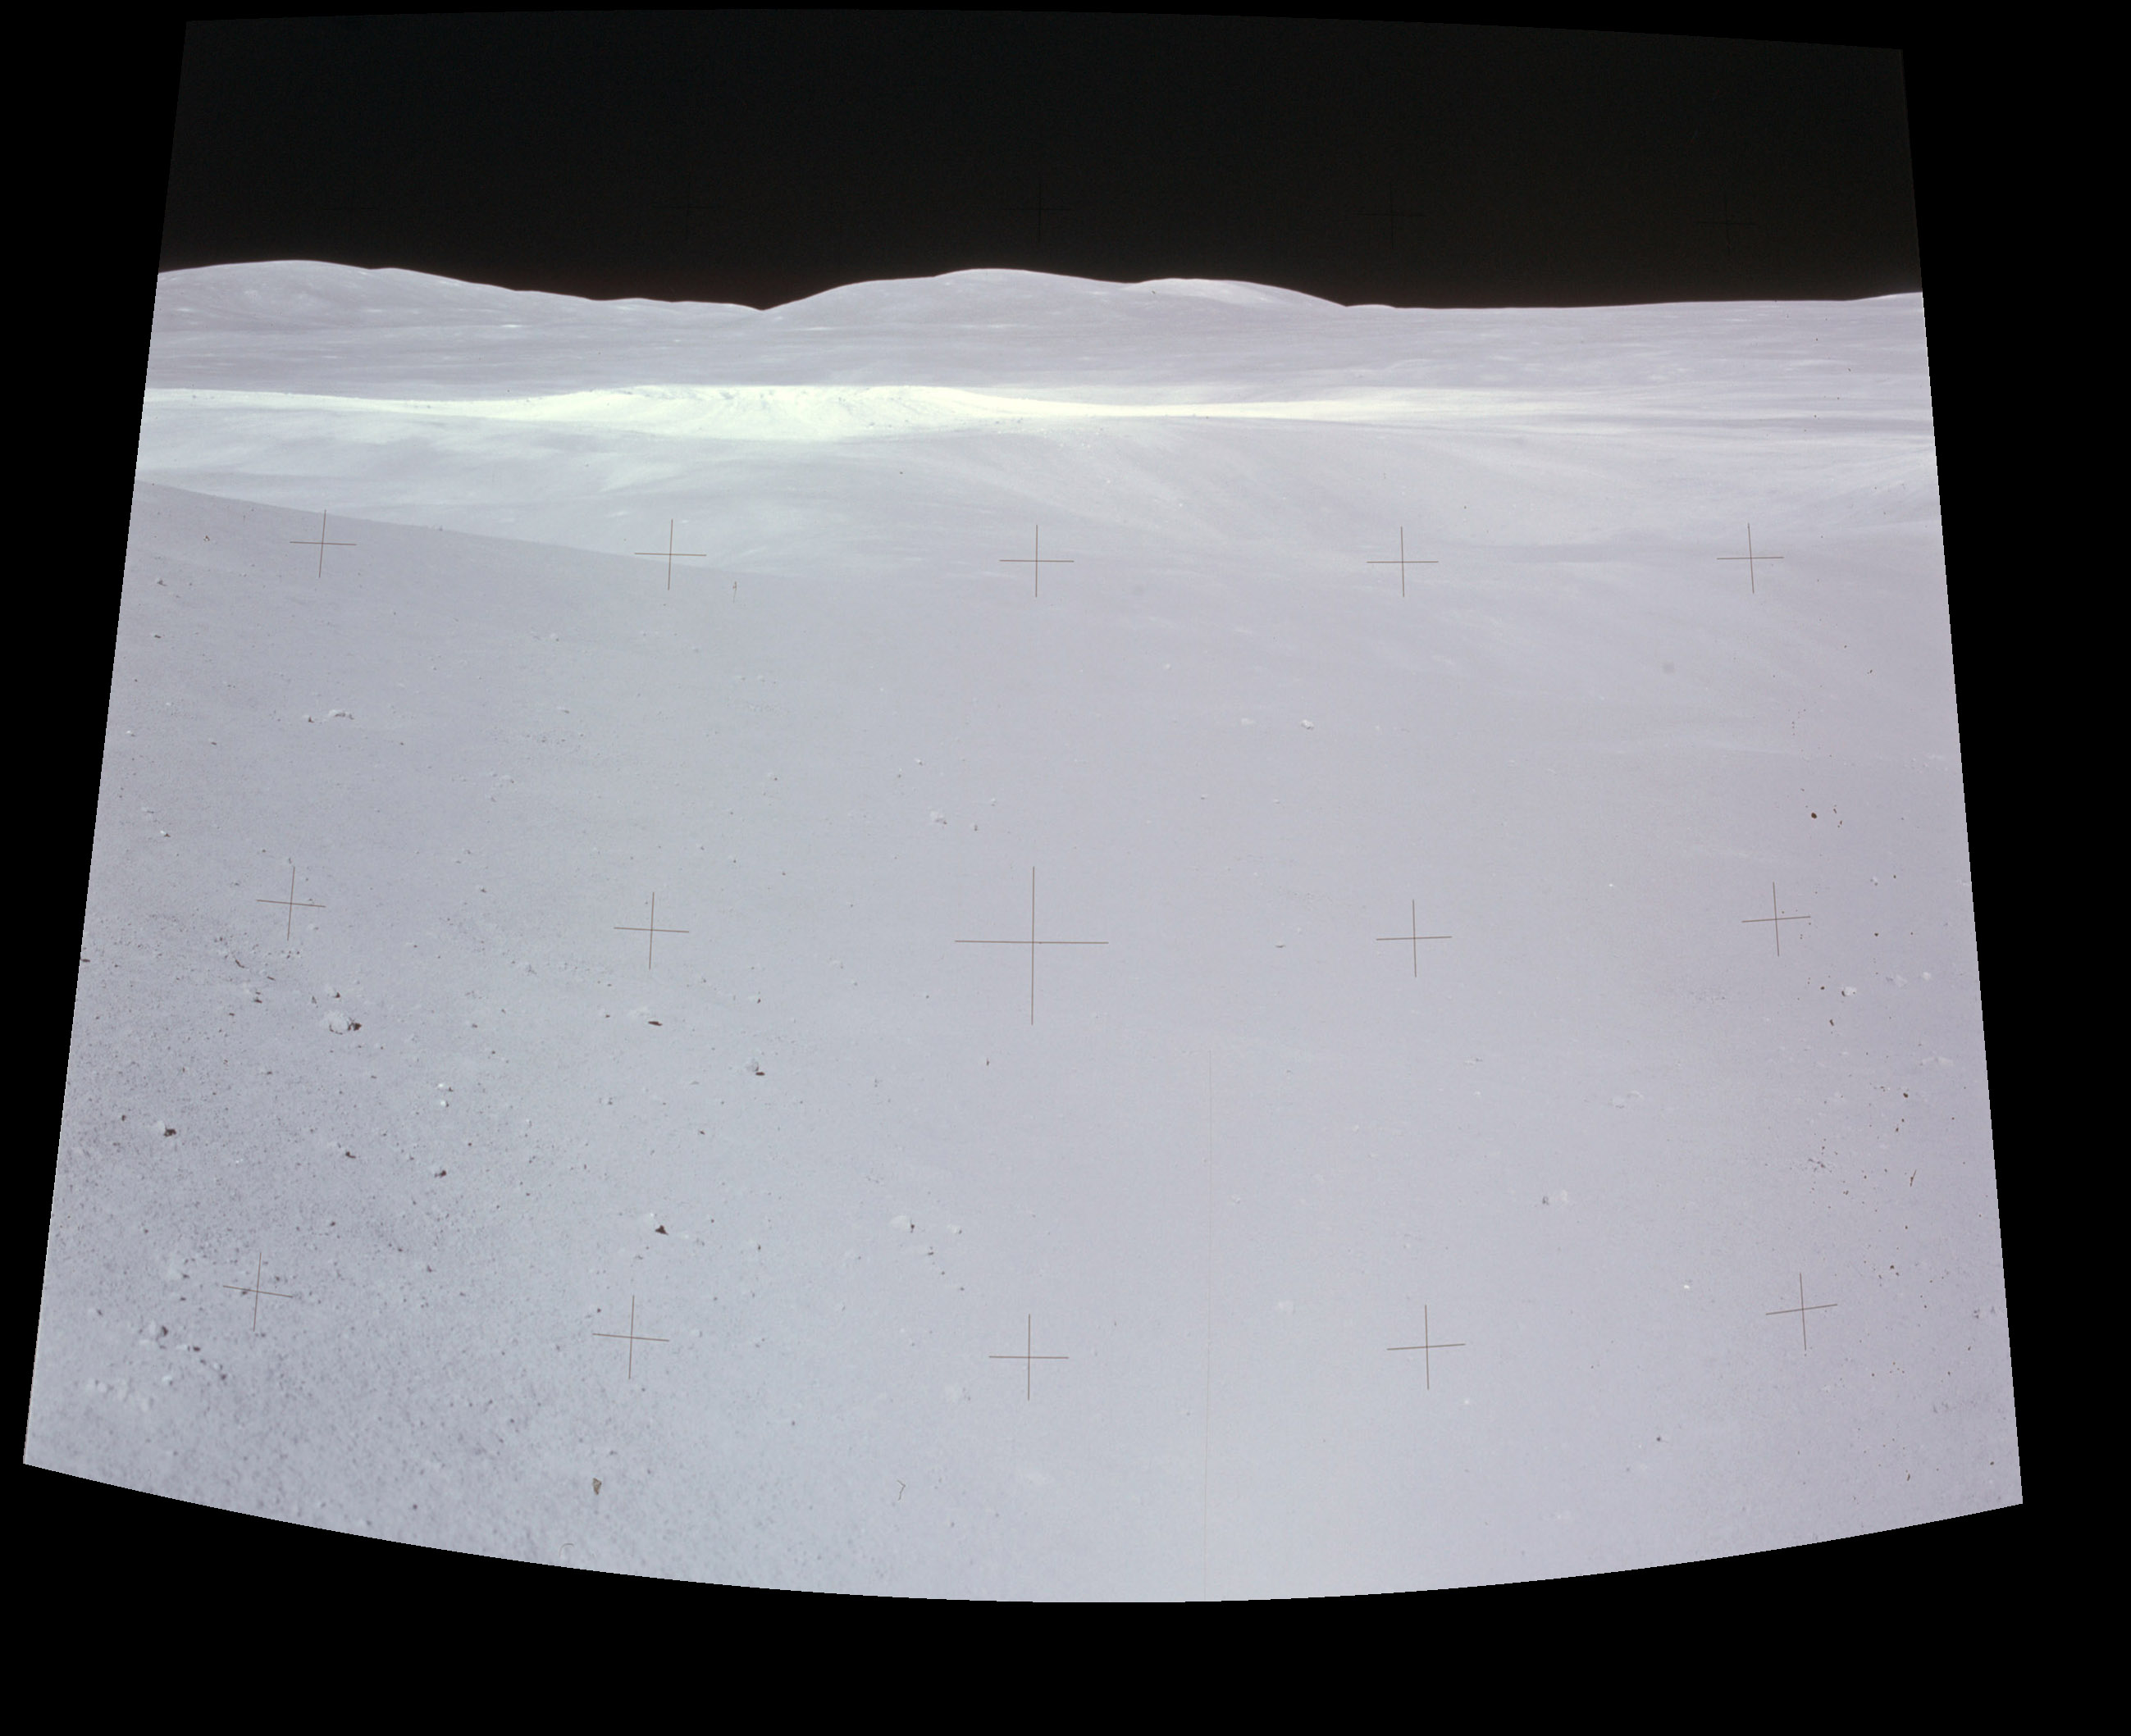
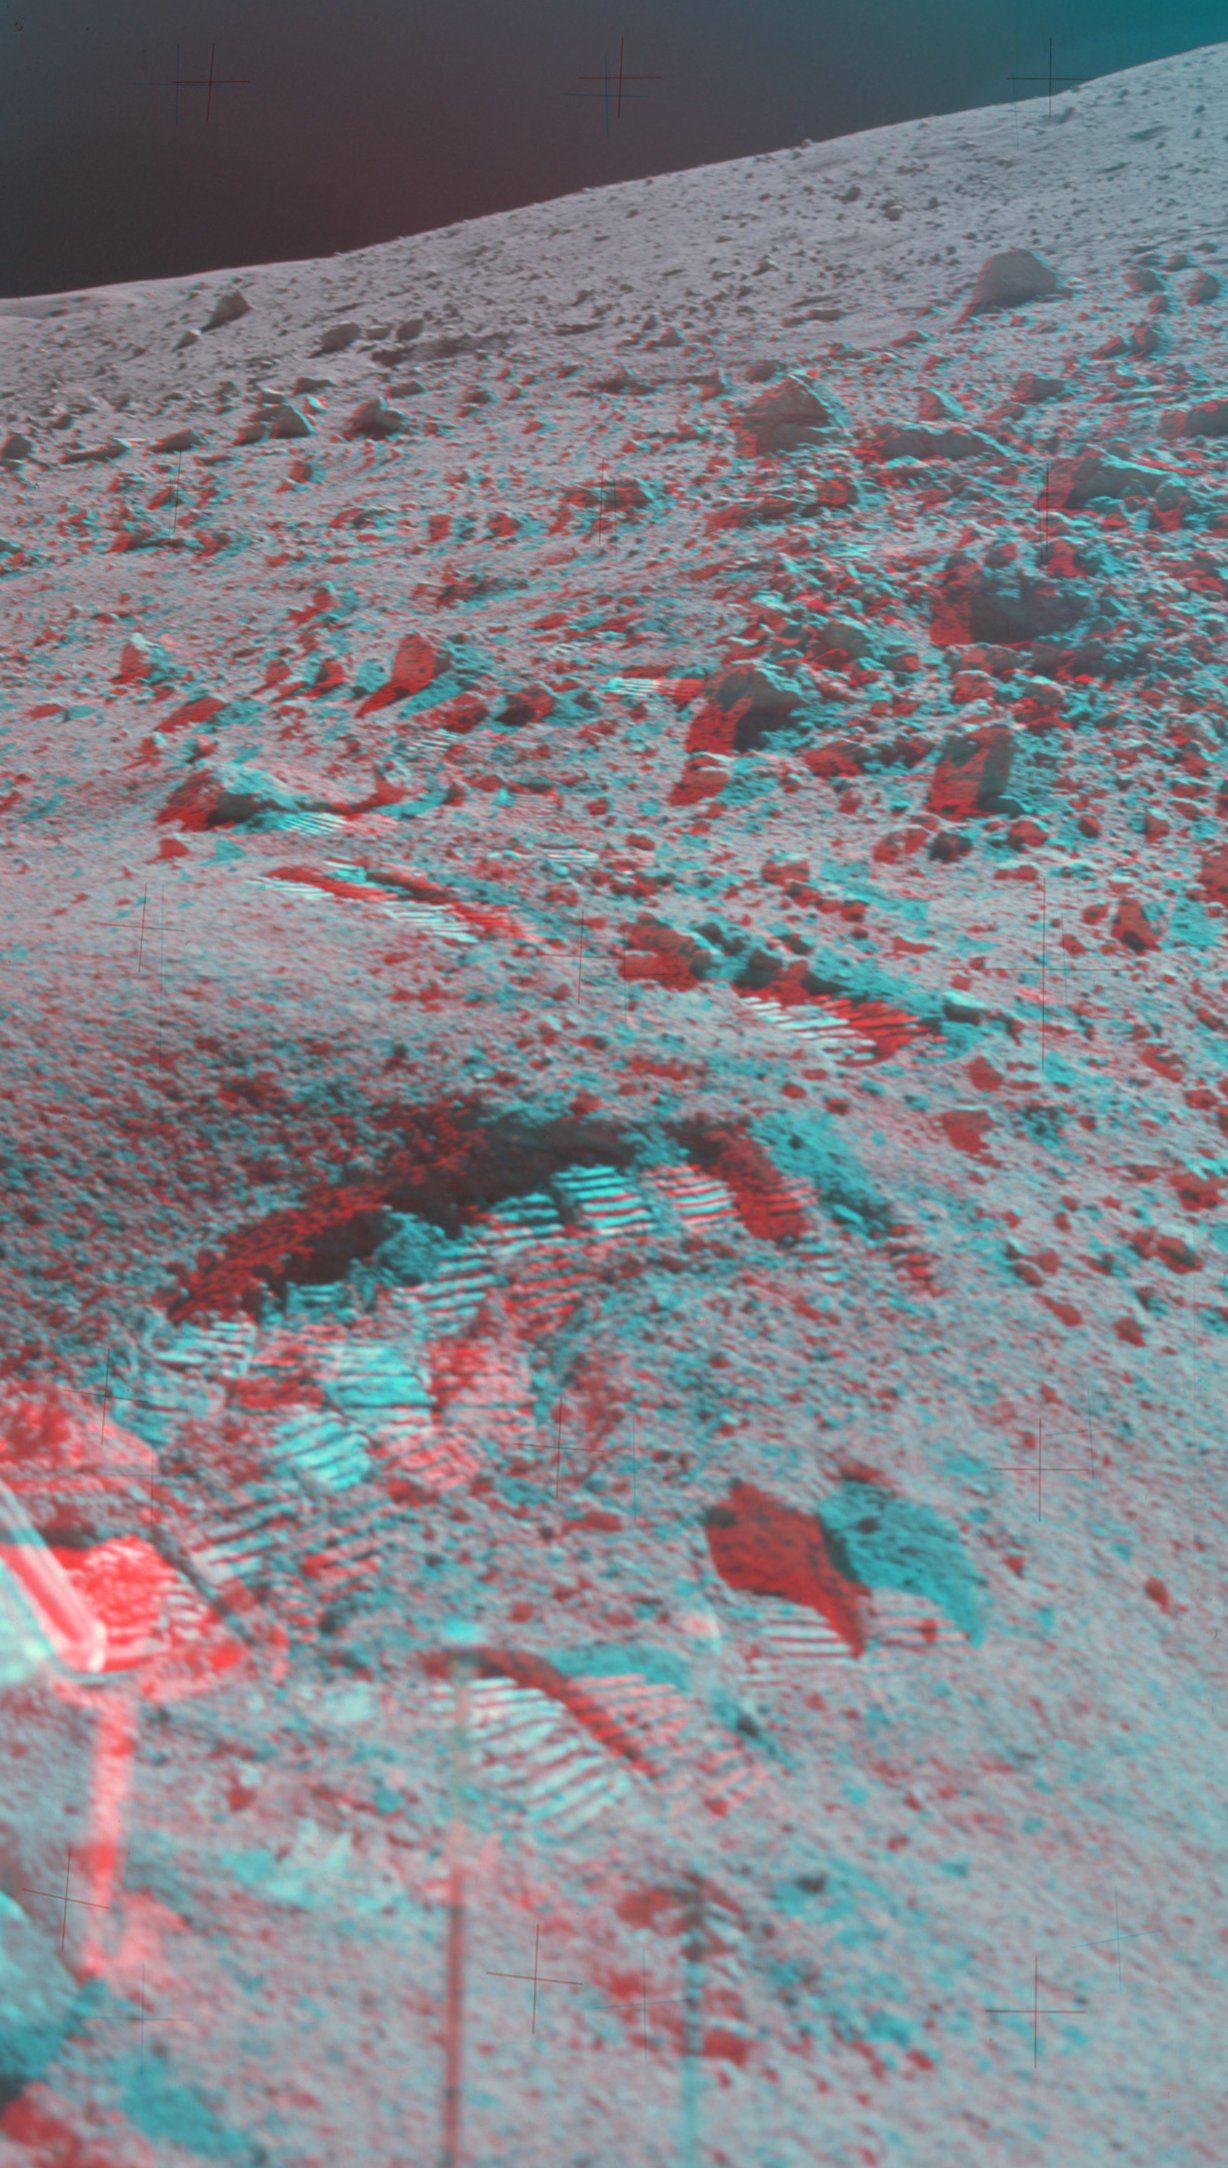
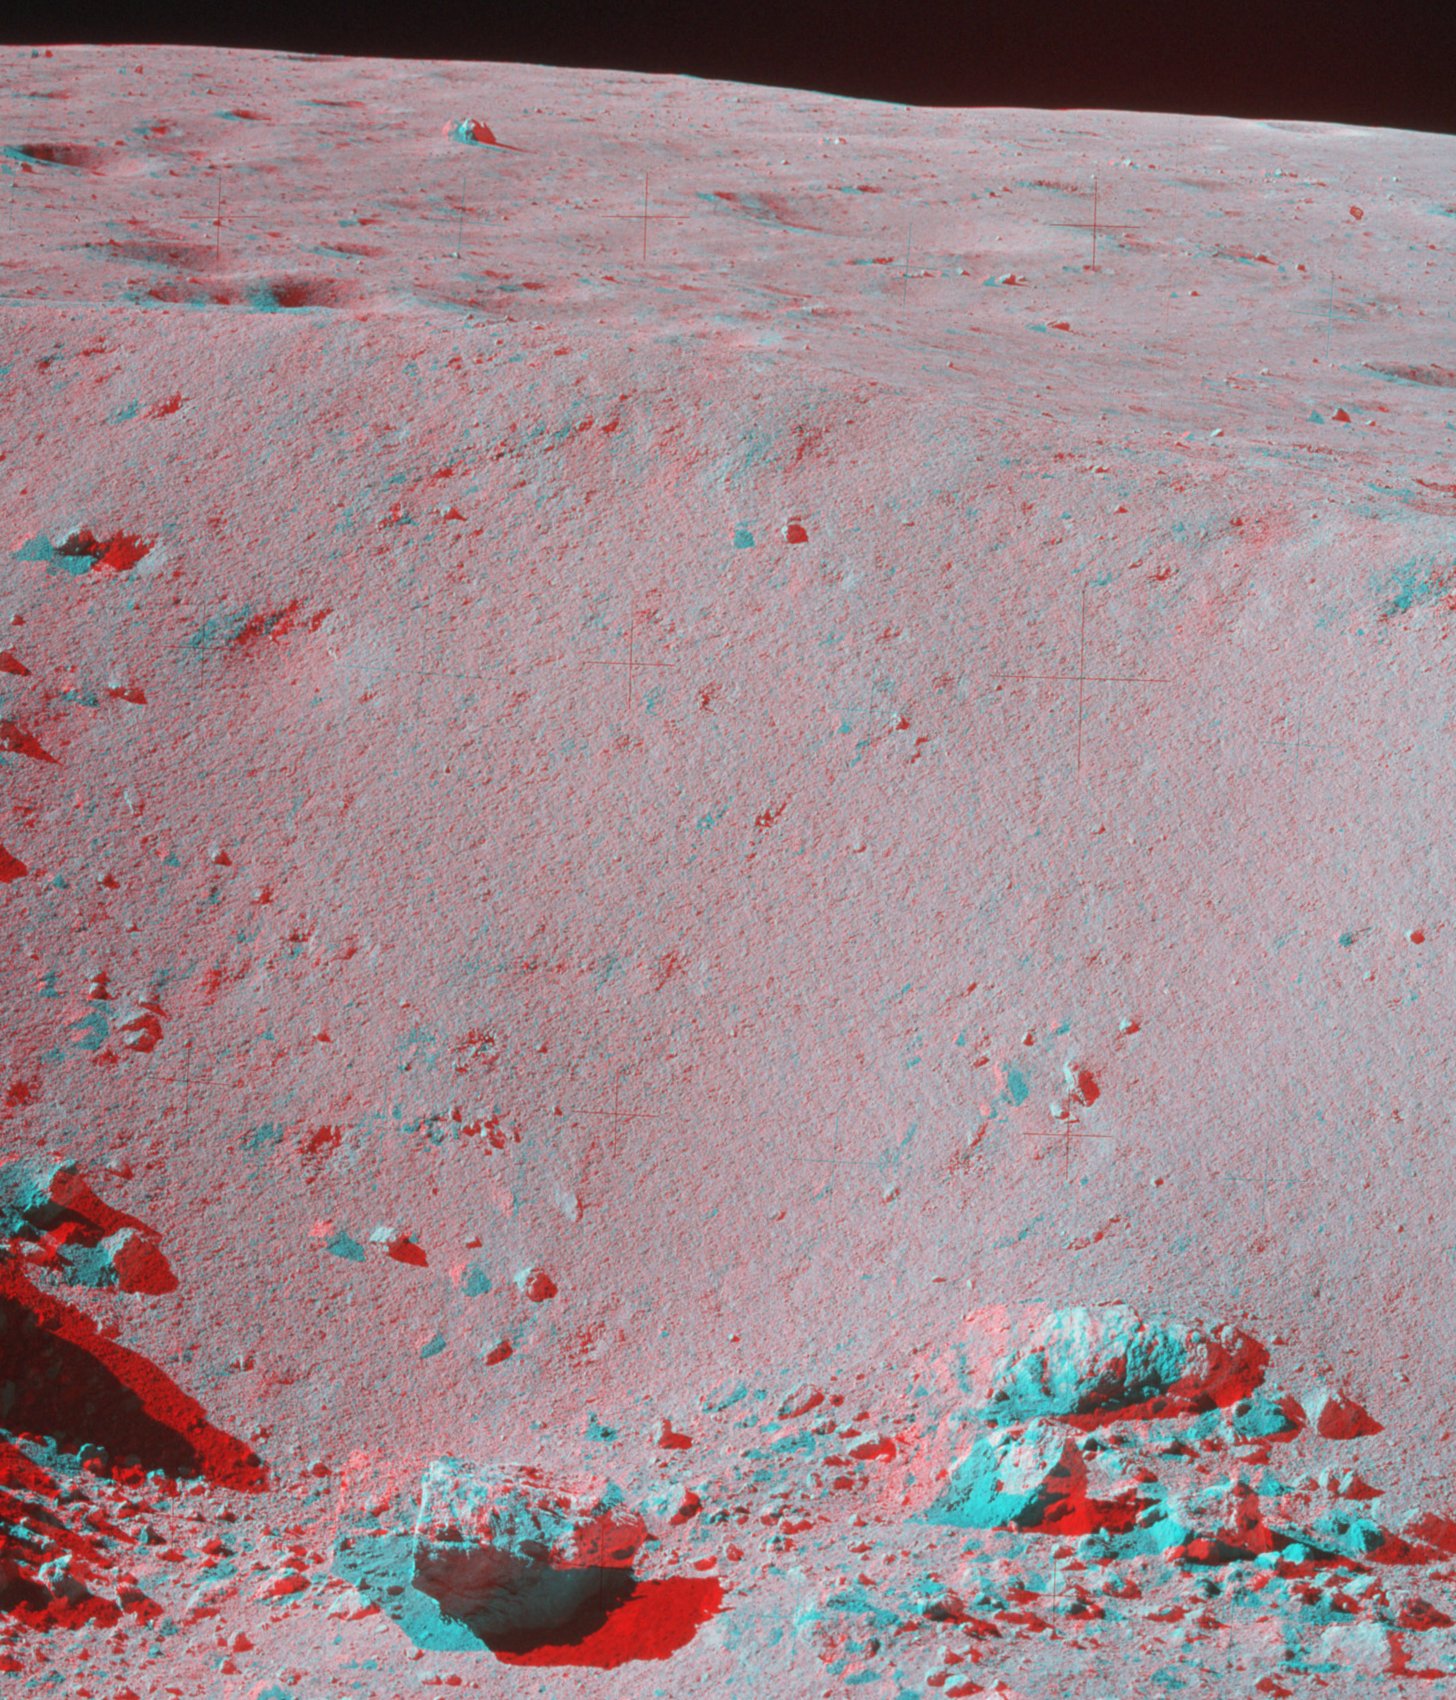
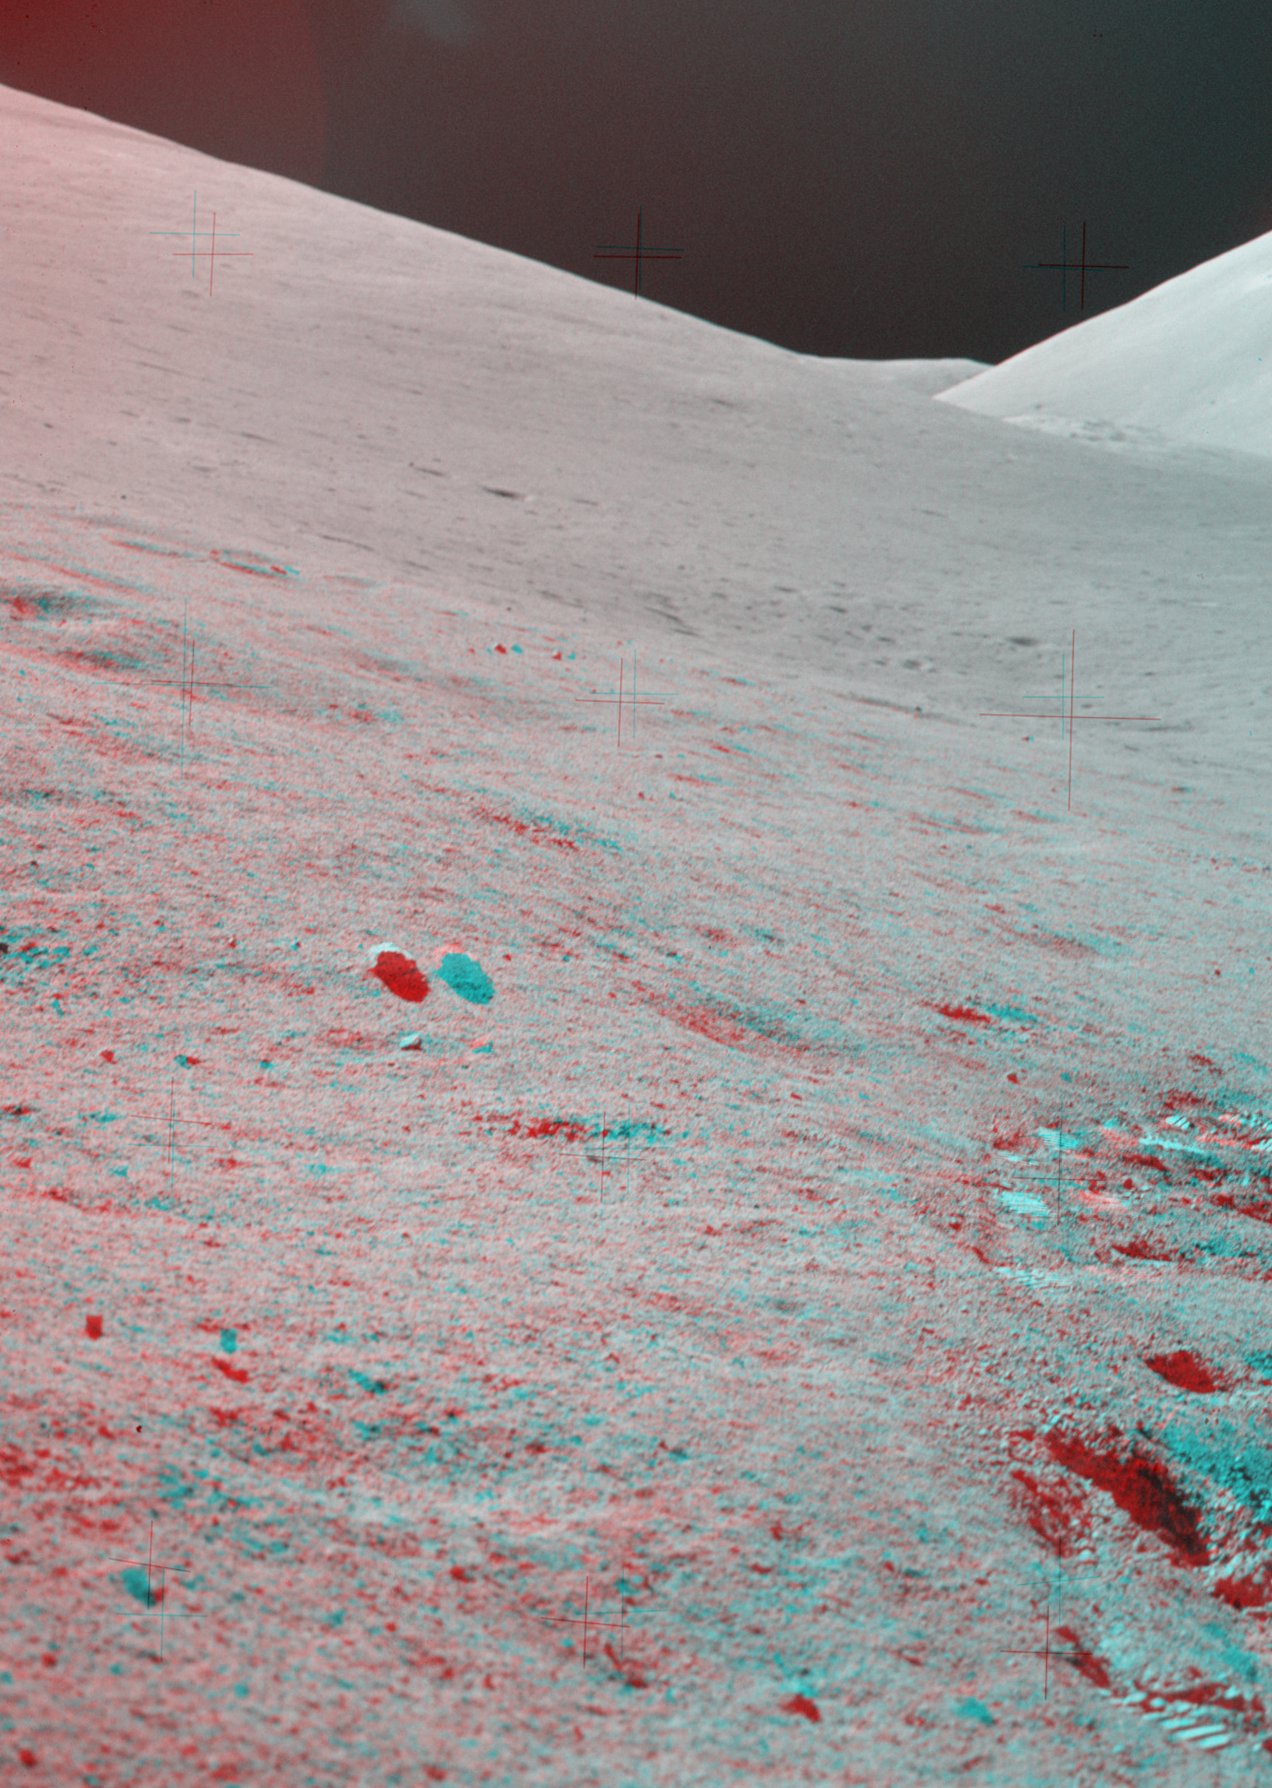
Two crews landed on more heavily cratered, highlands sites. The Apollo 14 crew visited hilly terrain that may represent ejecta from the Imbrium impact. As is characteristic of non-mare sites, the surface at Fra Mauro is much rougher than on the mare. Overlapping of eroded craters of sizes of tens of meters or more have produced an undulating surface which rises and falls by up to 10-20 meters over distances of several tens of meters. During their second EVA, the crew made a 1.4 km traverse up to the top of Cone Crater Ridge, which is about 85 meters above the LM location. The Apollo 16 crew landed on a site in the Central Highlands made up of ejecta from the Nectaris impact overlain in areas between hills with a blanket of ejecta from Mare Imbrium. The hills are known as the Descartes formation while the smoother area of Imbrium ejecta is known as the Cayley plains. The terrain at the Apollo 16 site is generally smoother than at the Apollo 14 site, although there are substantial elevations differences over distance of 100-200 meters in some places.
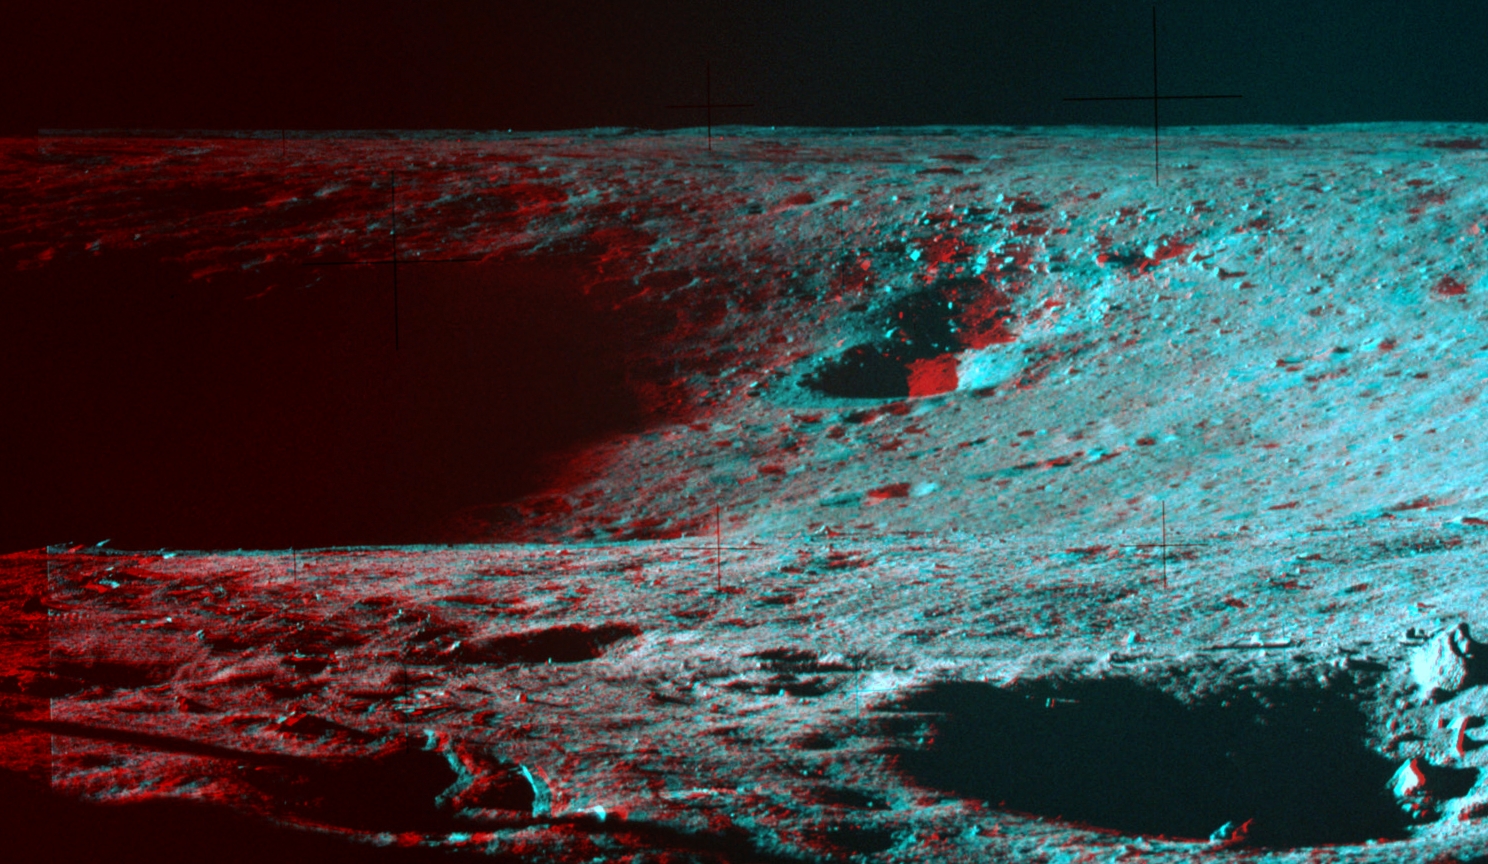
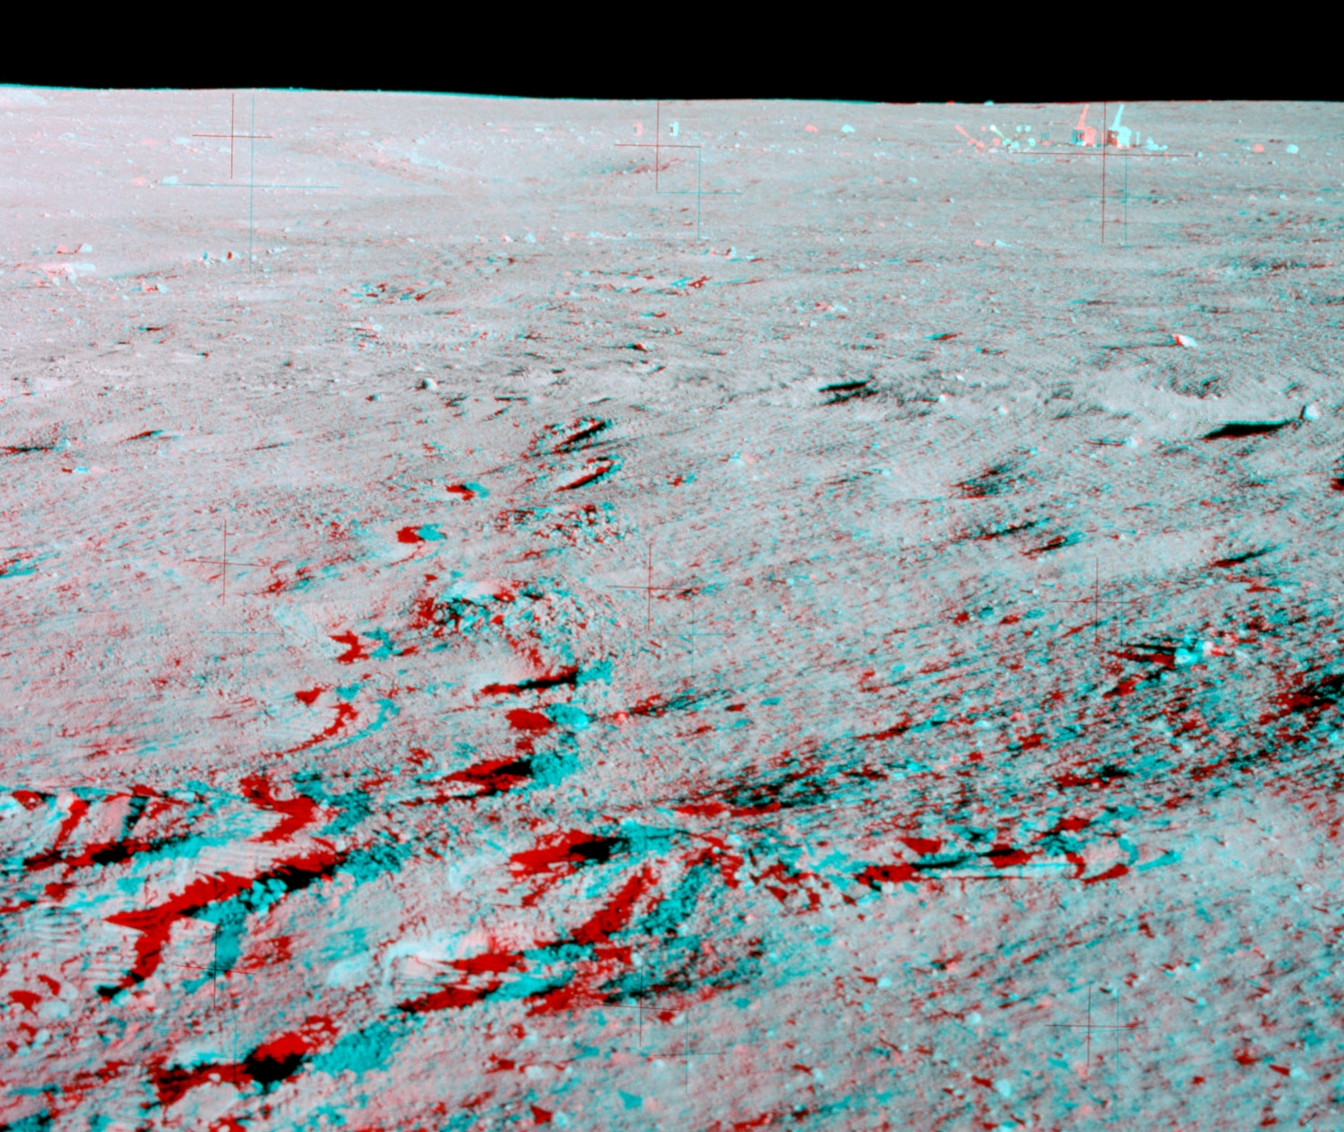
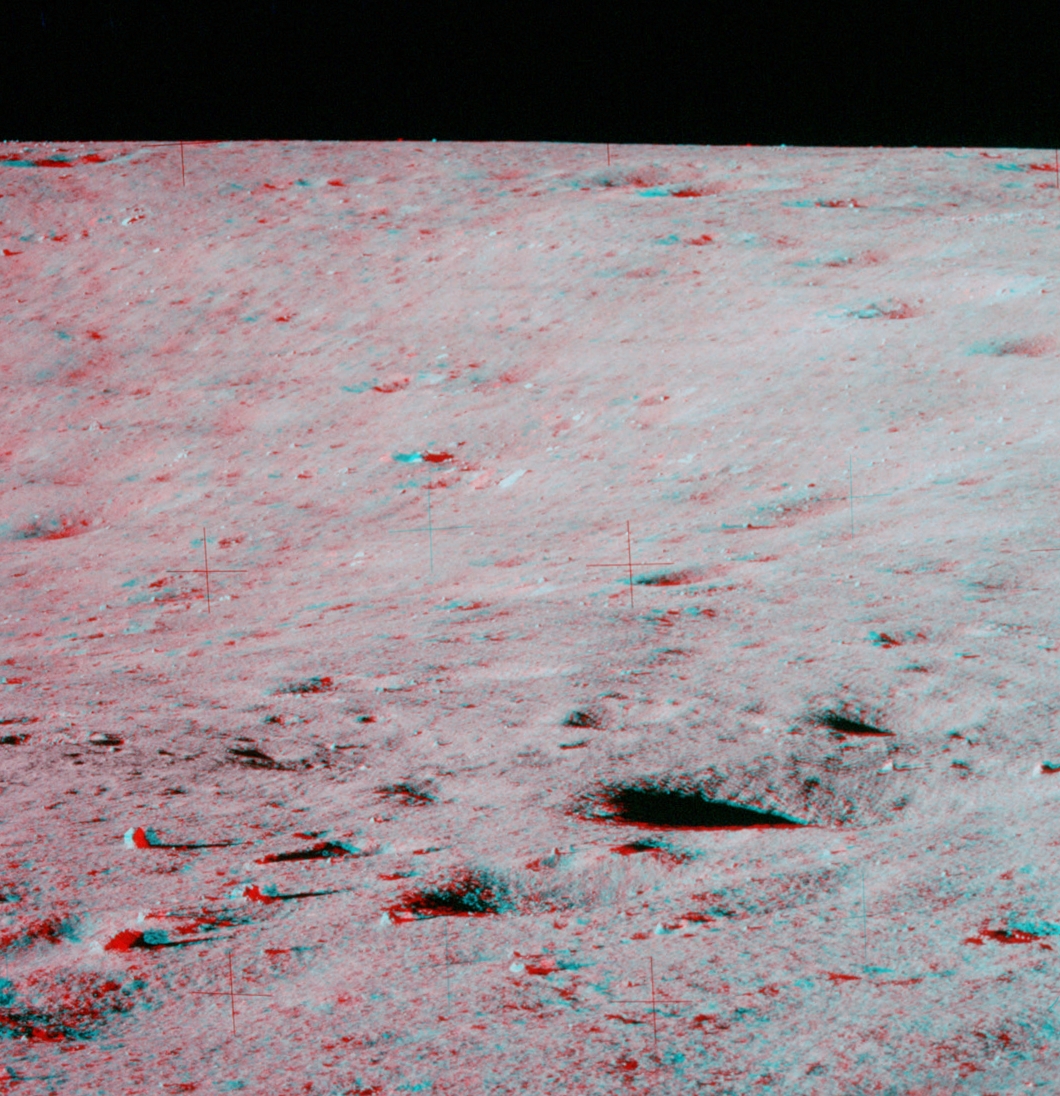
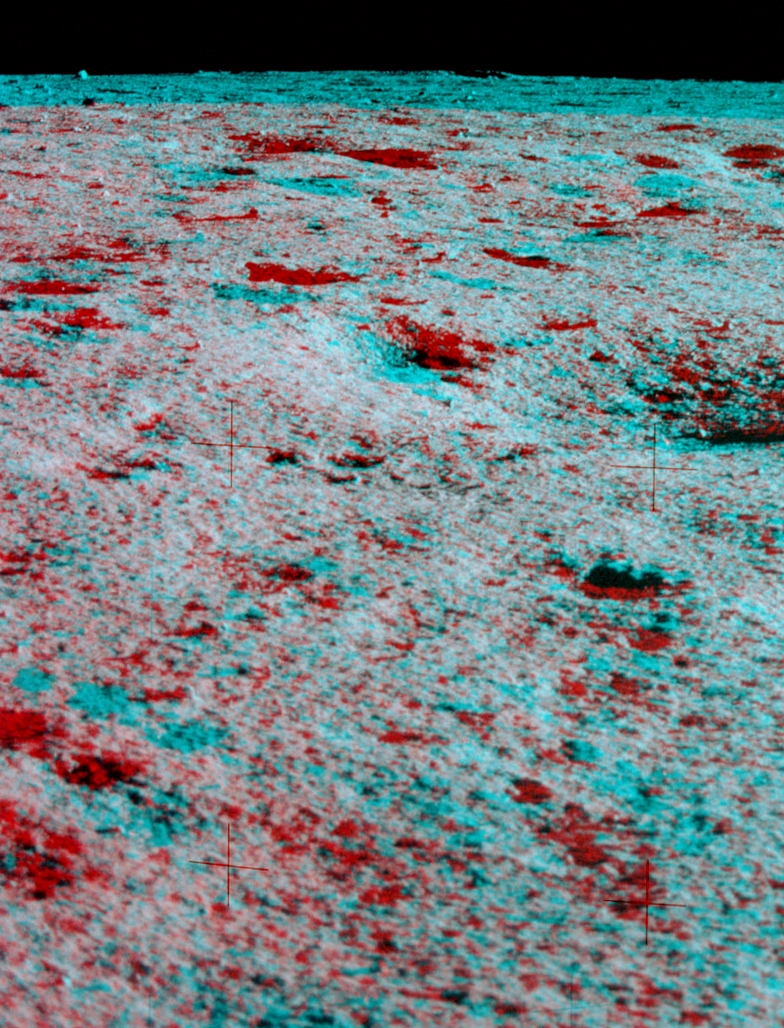
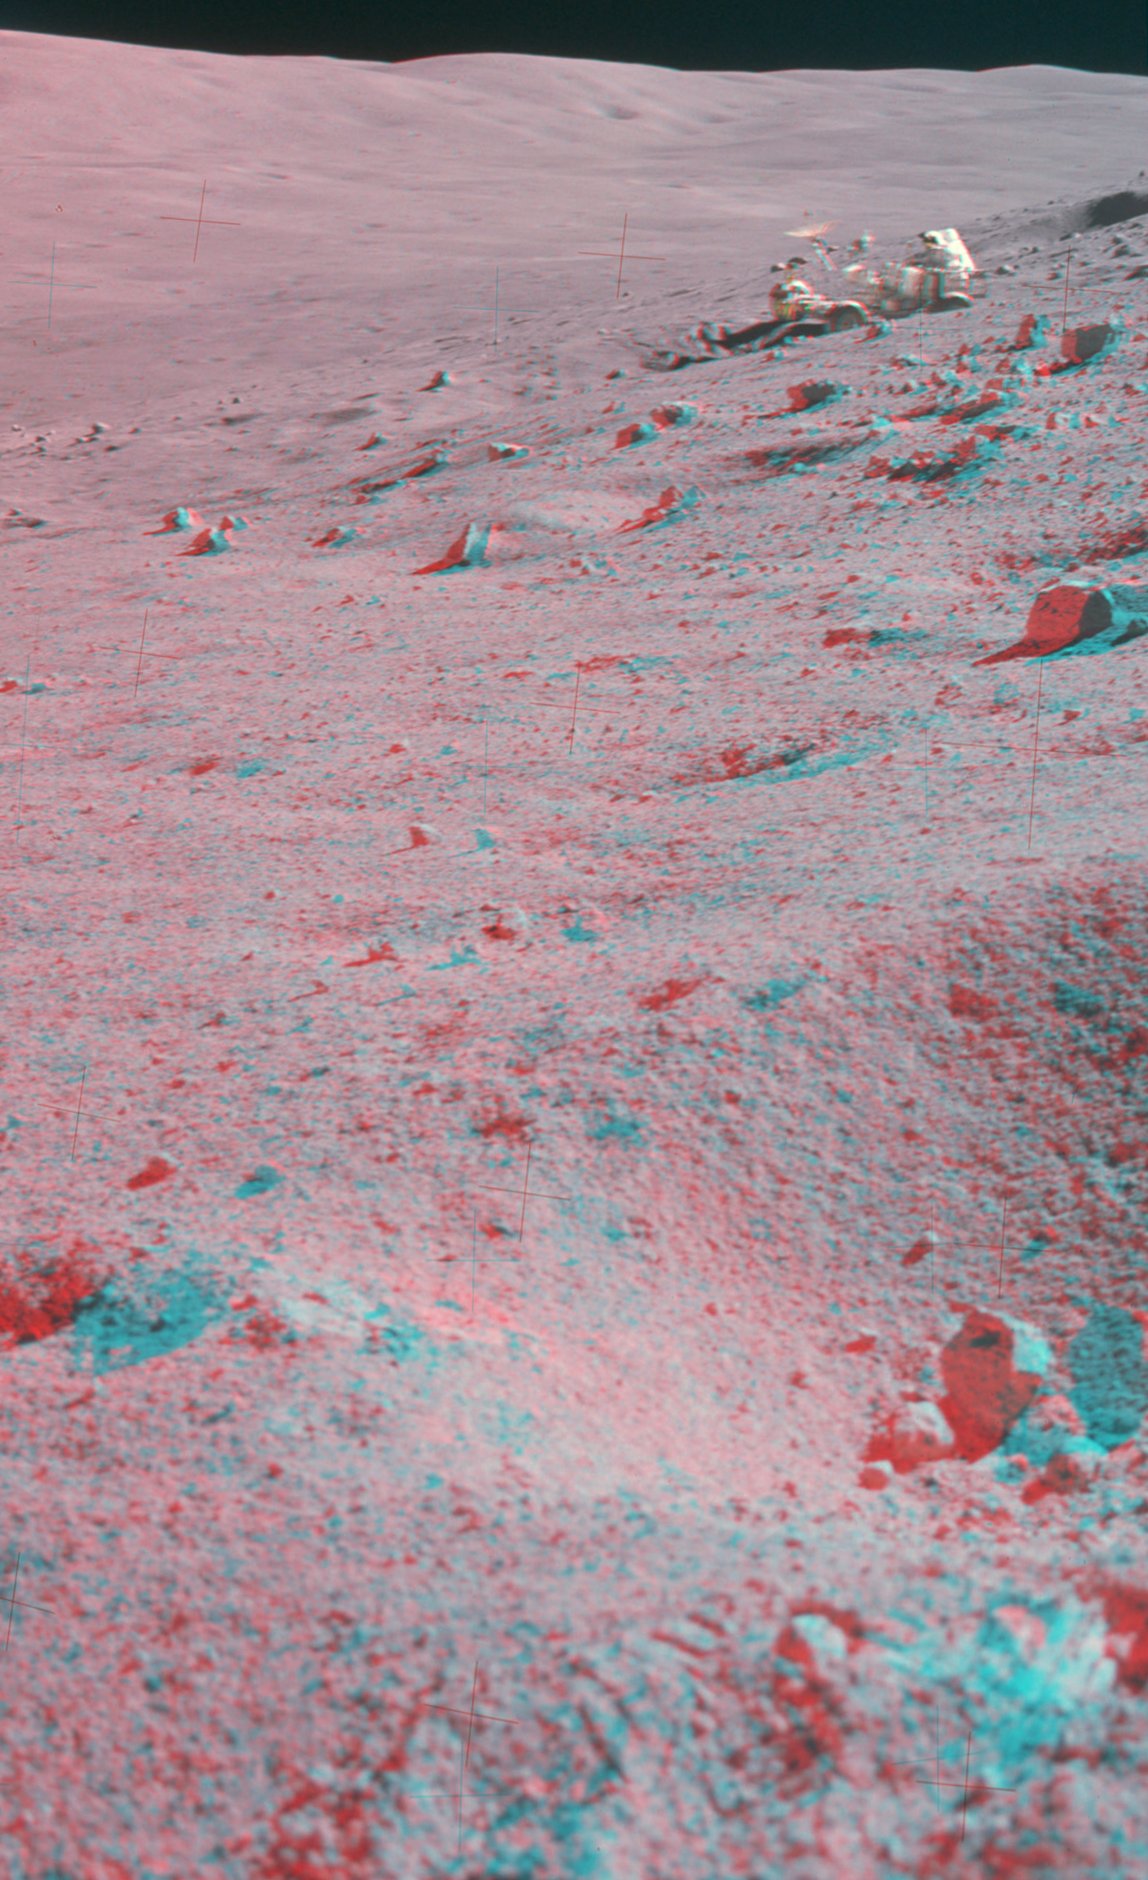
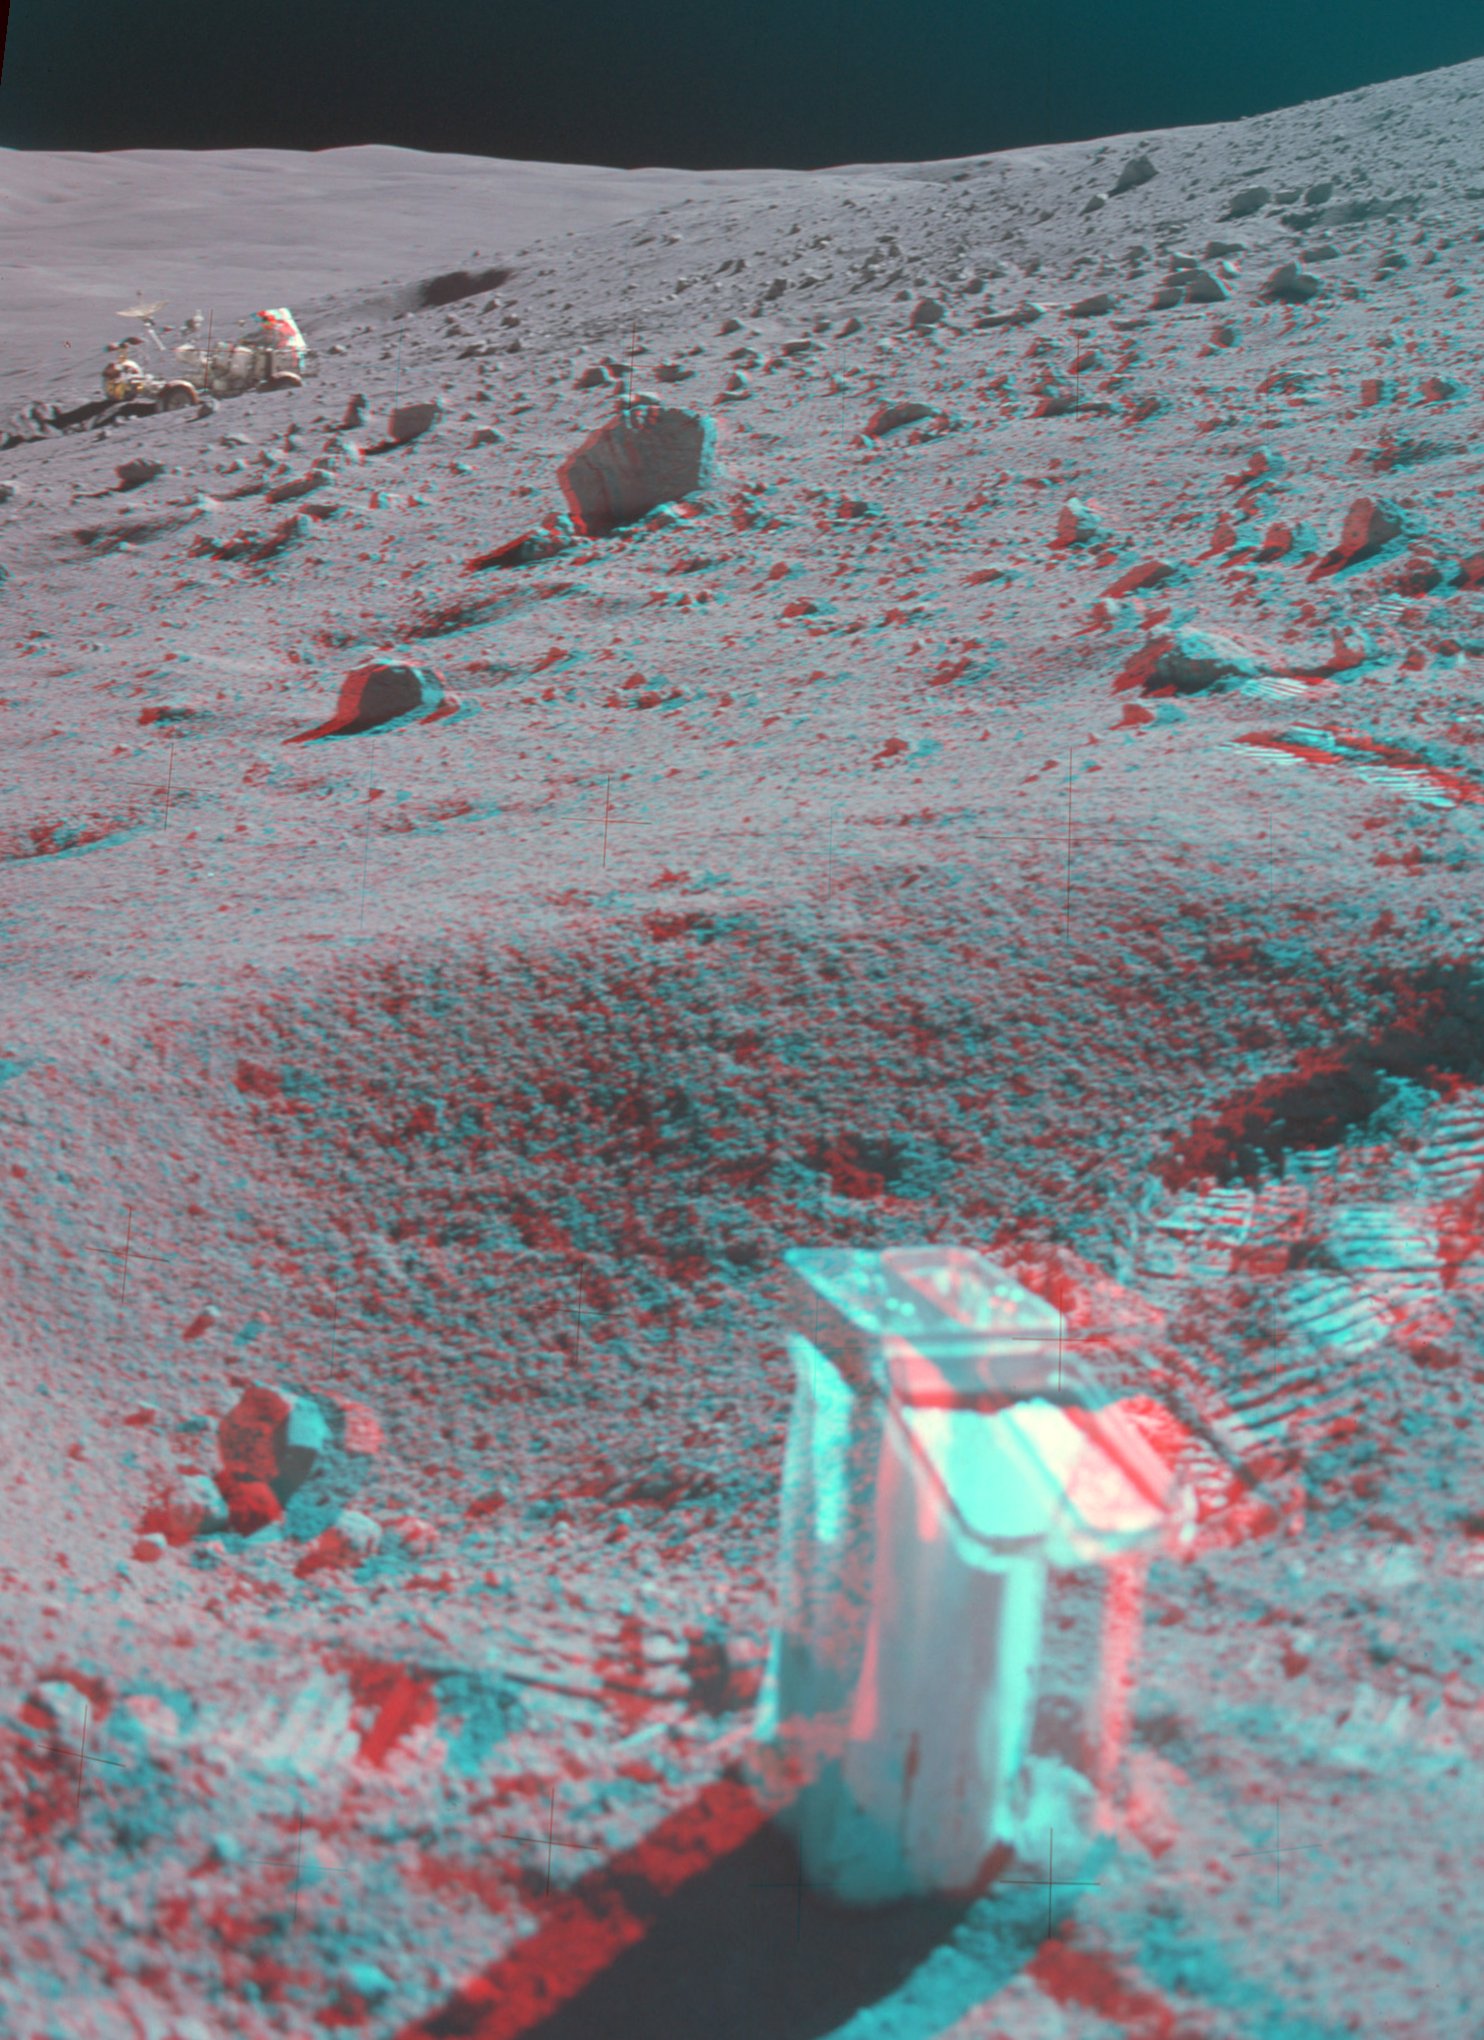
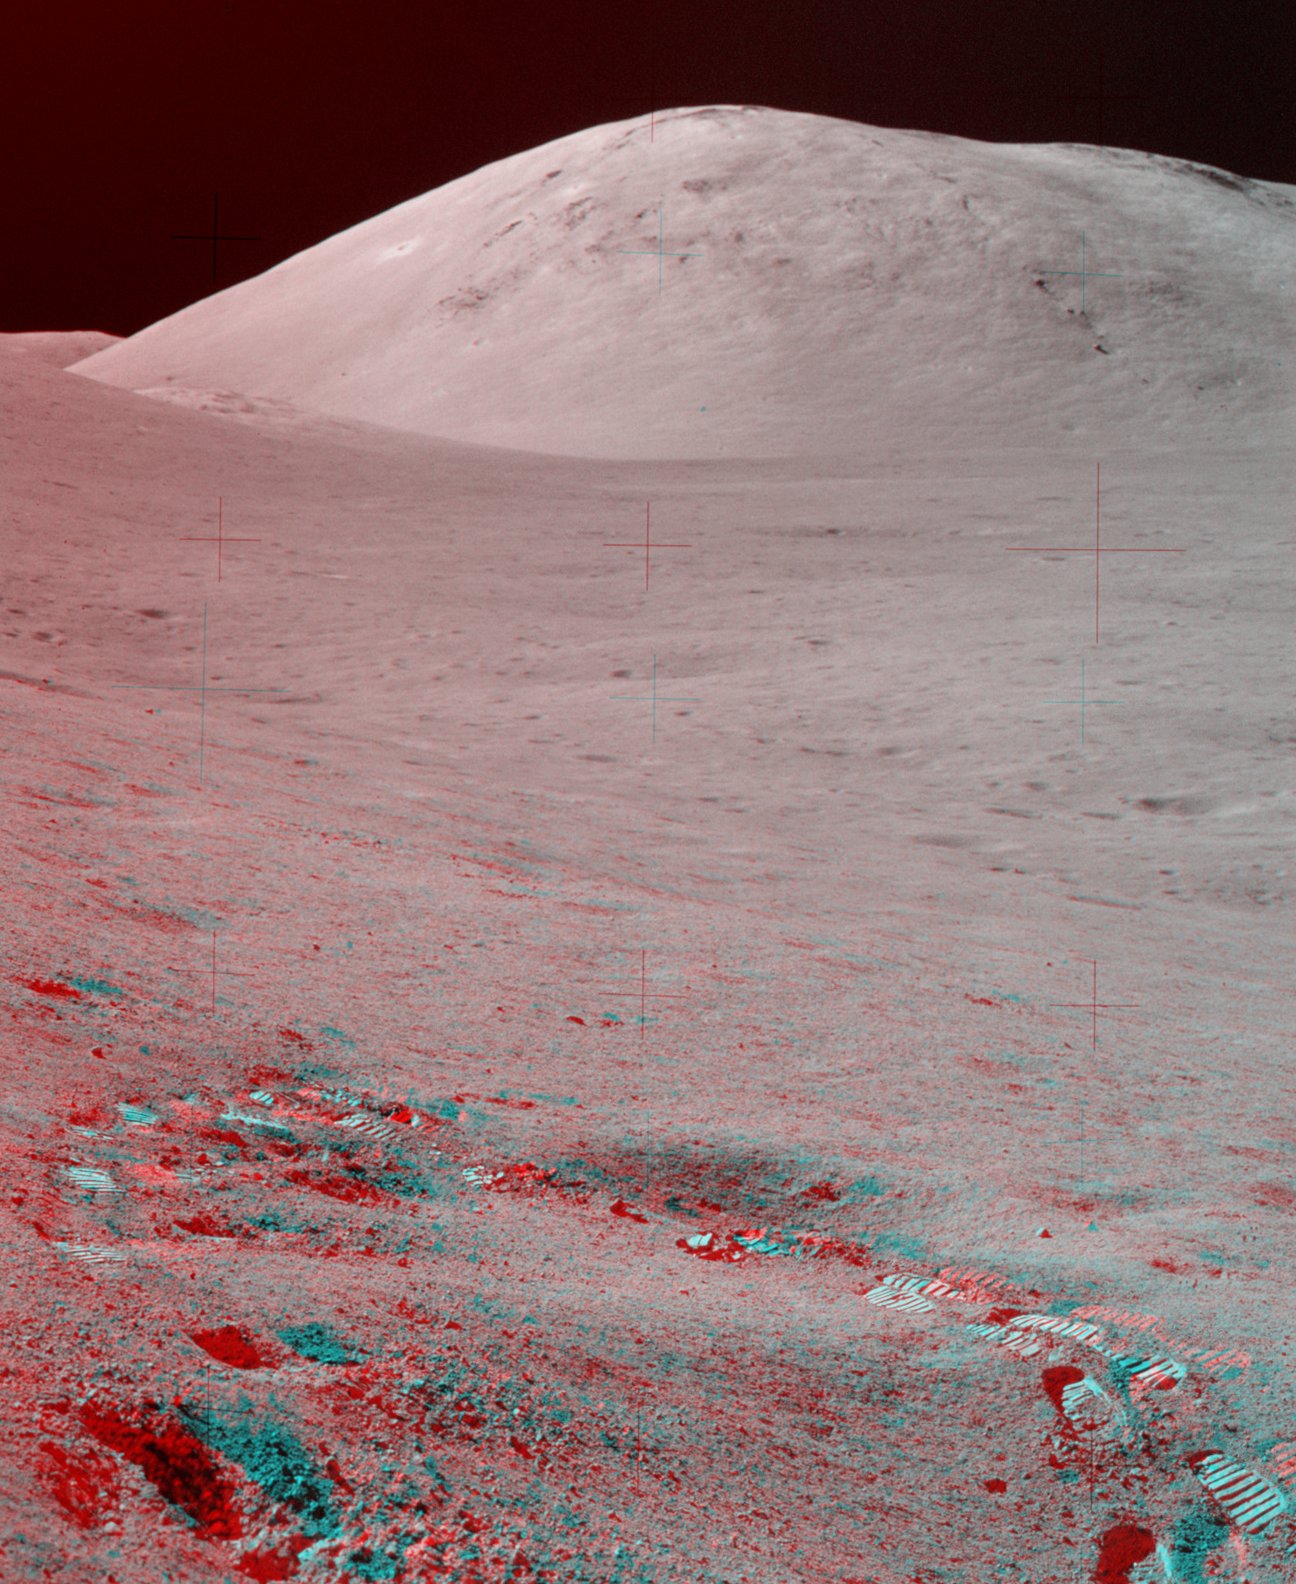
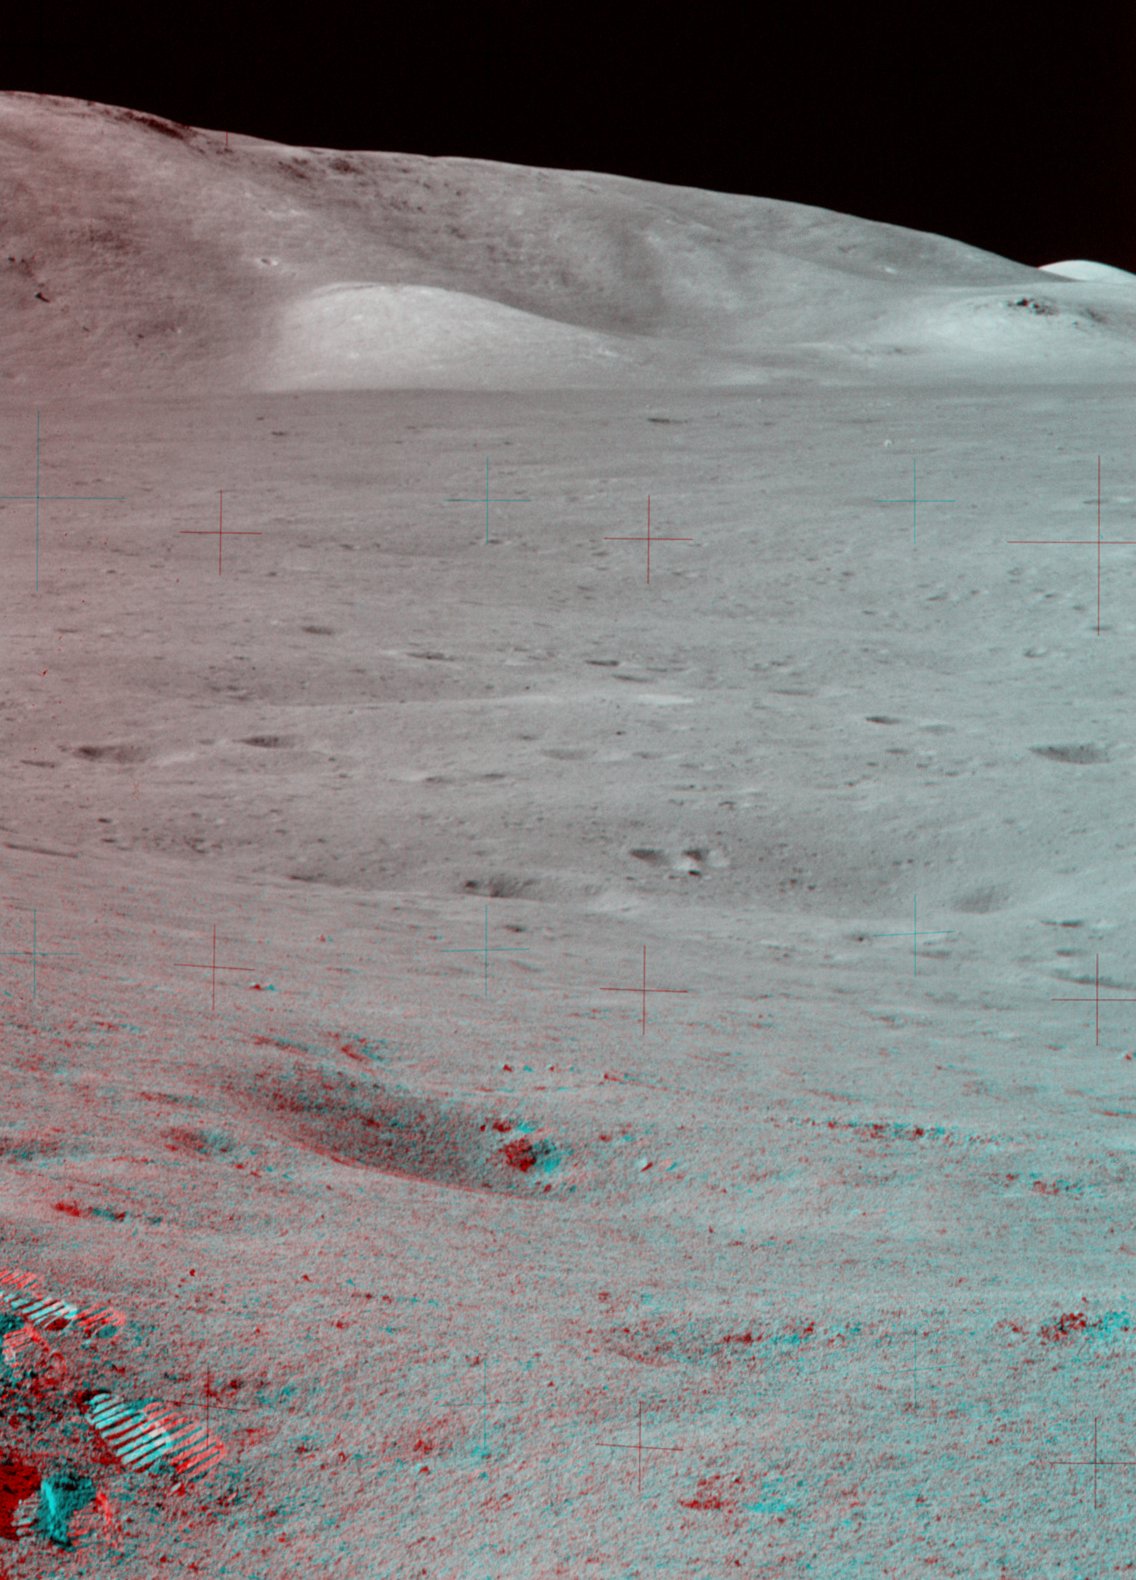
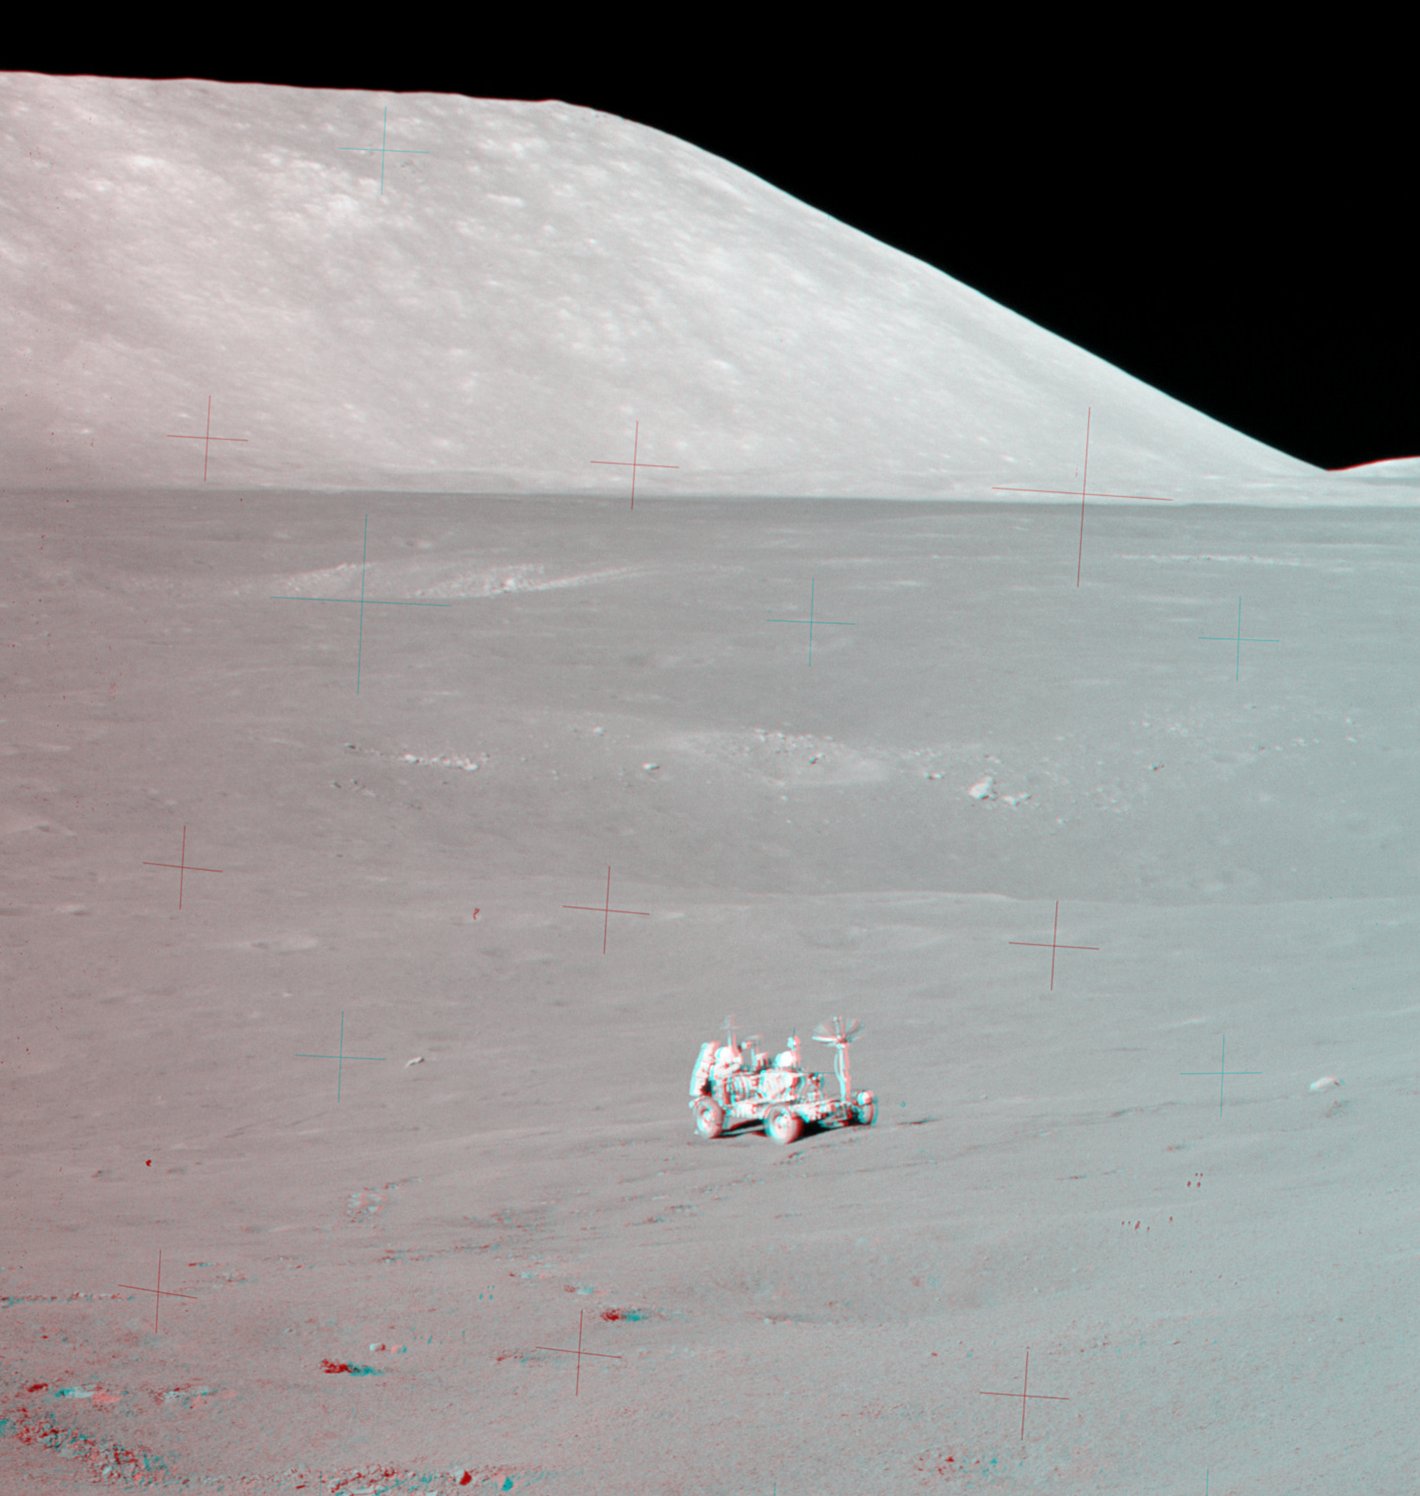
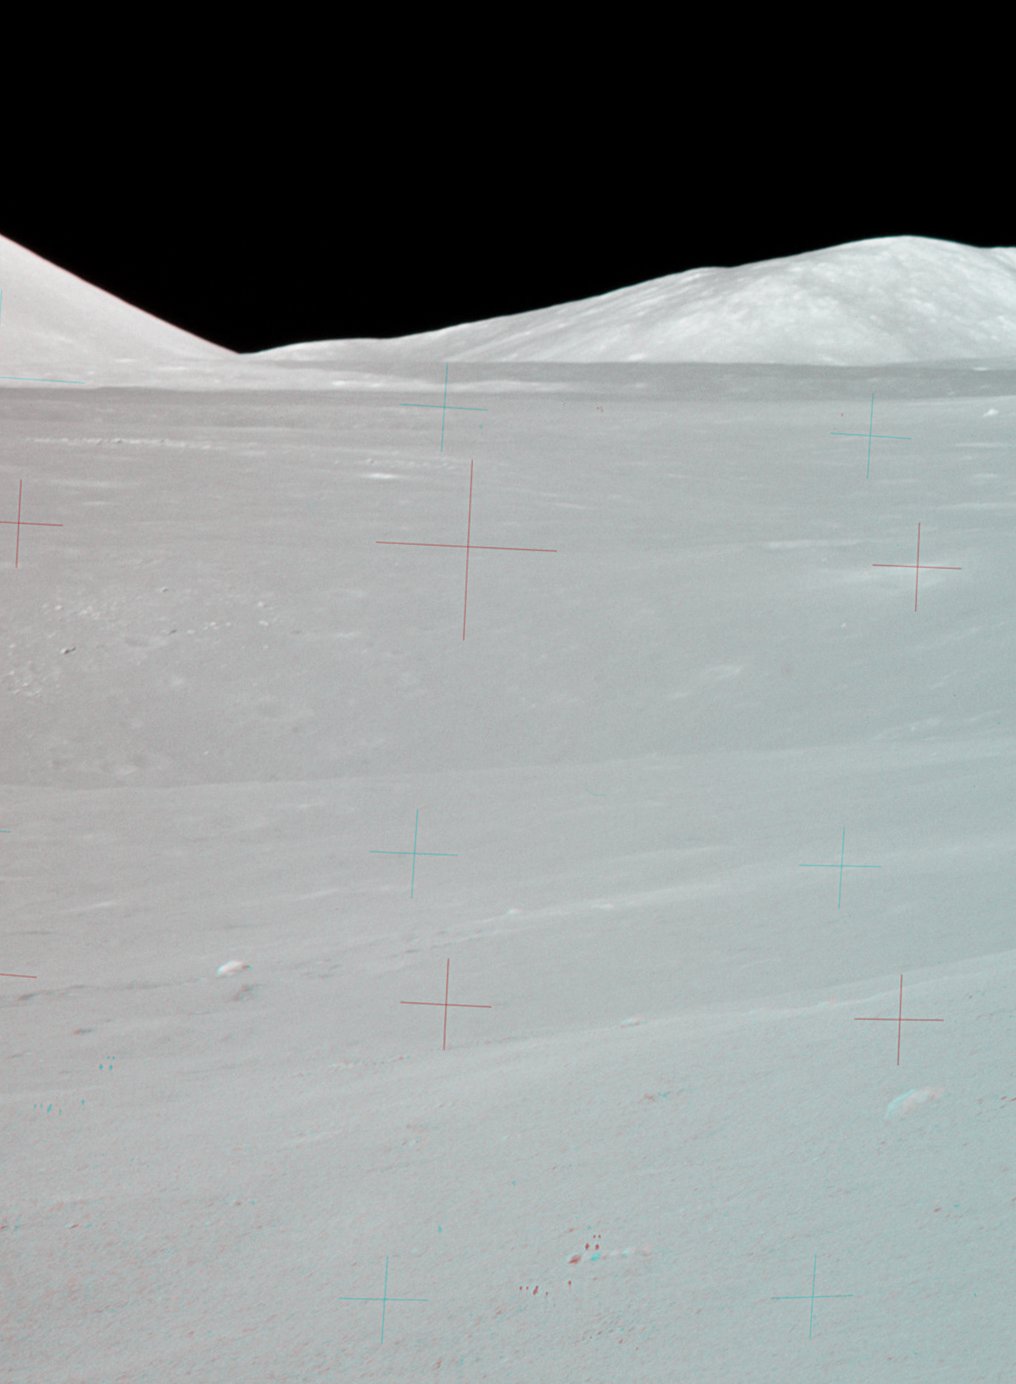
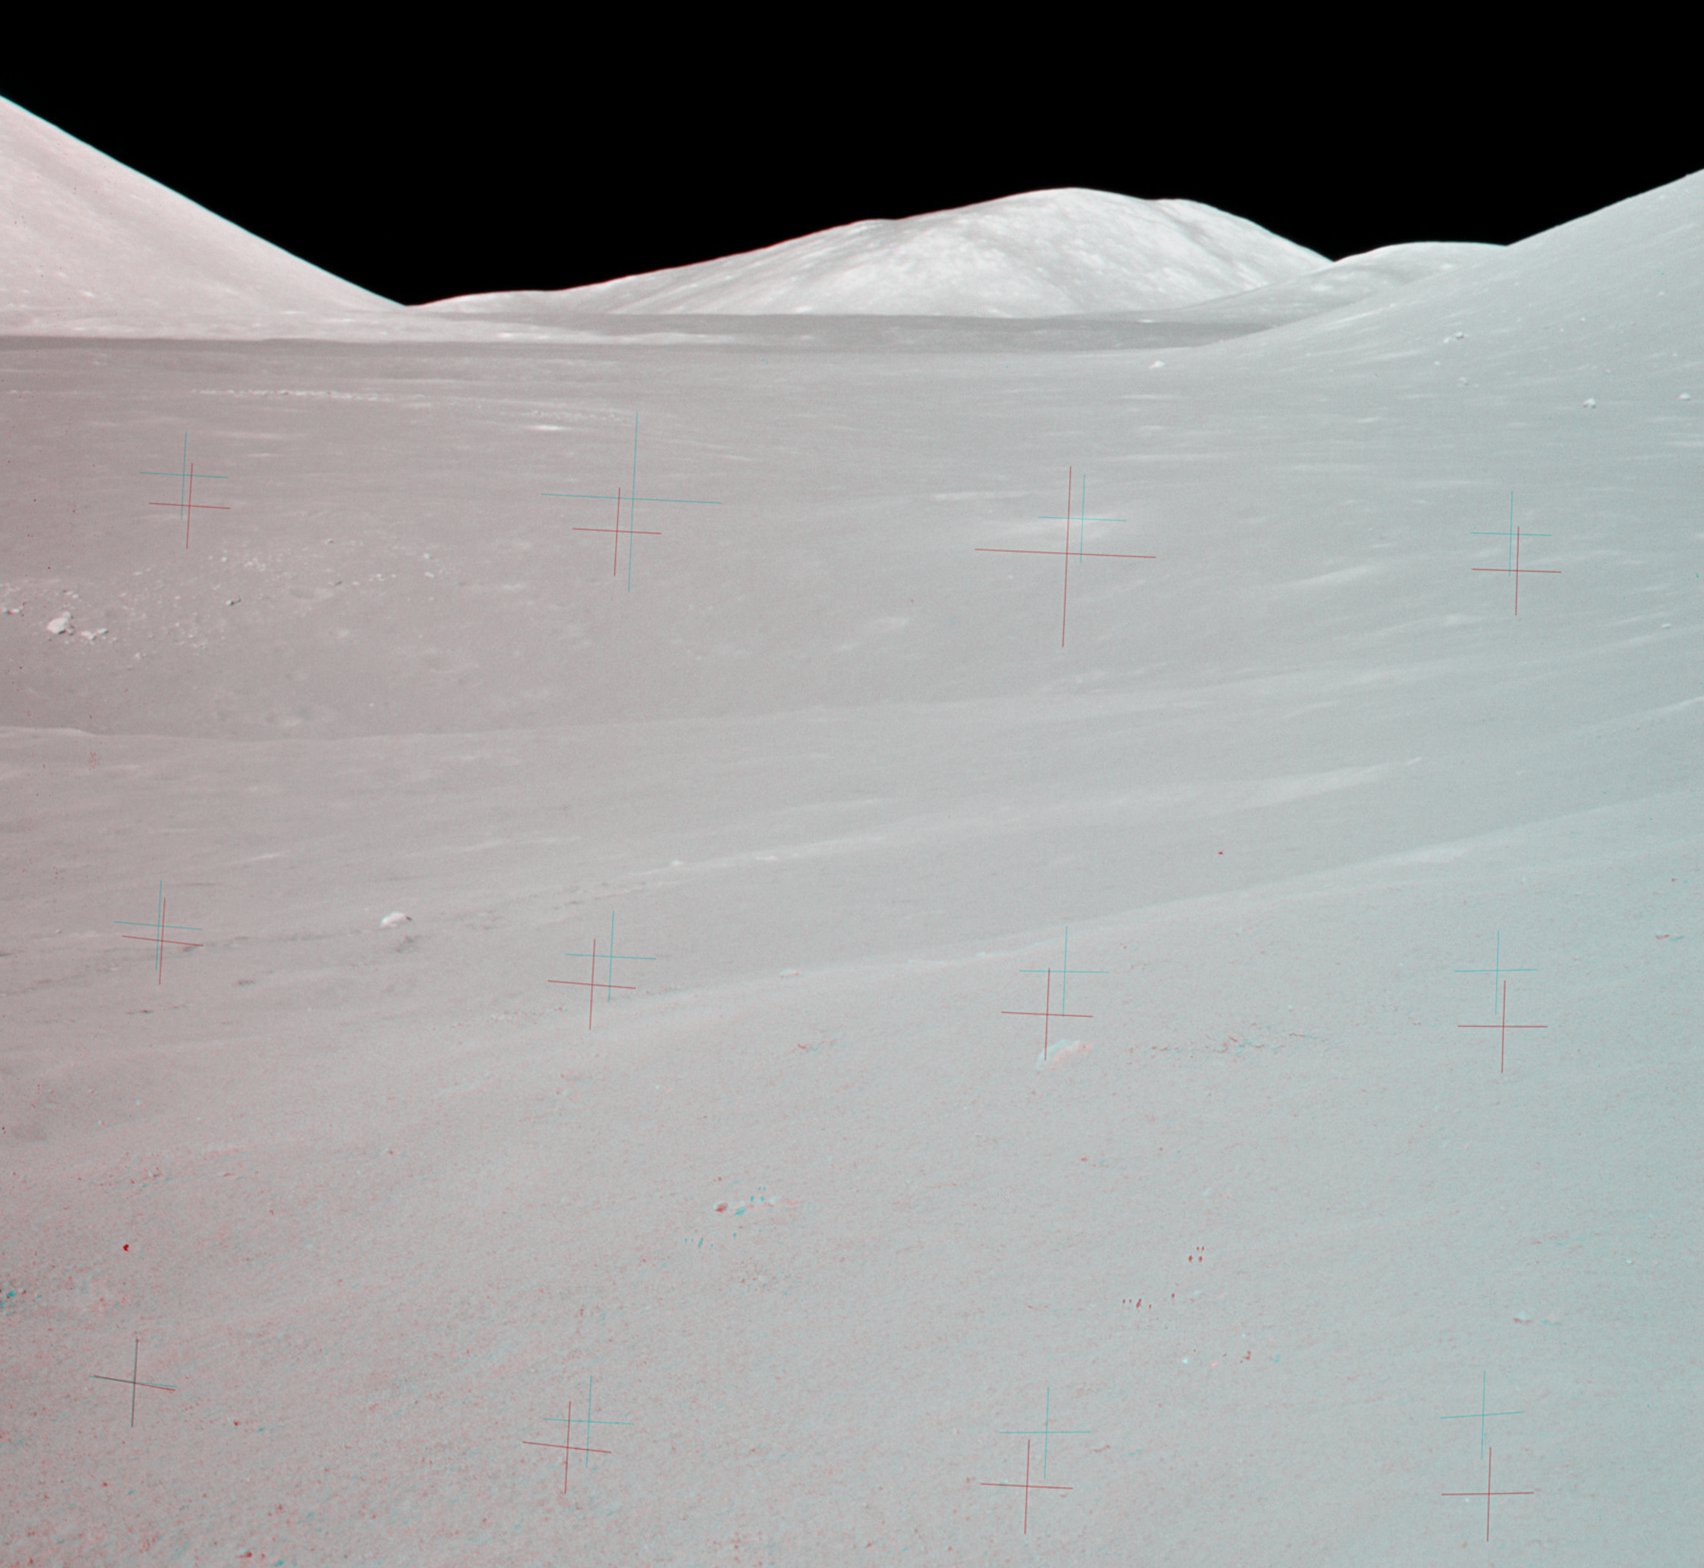
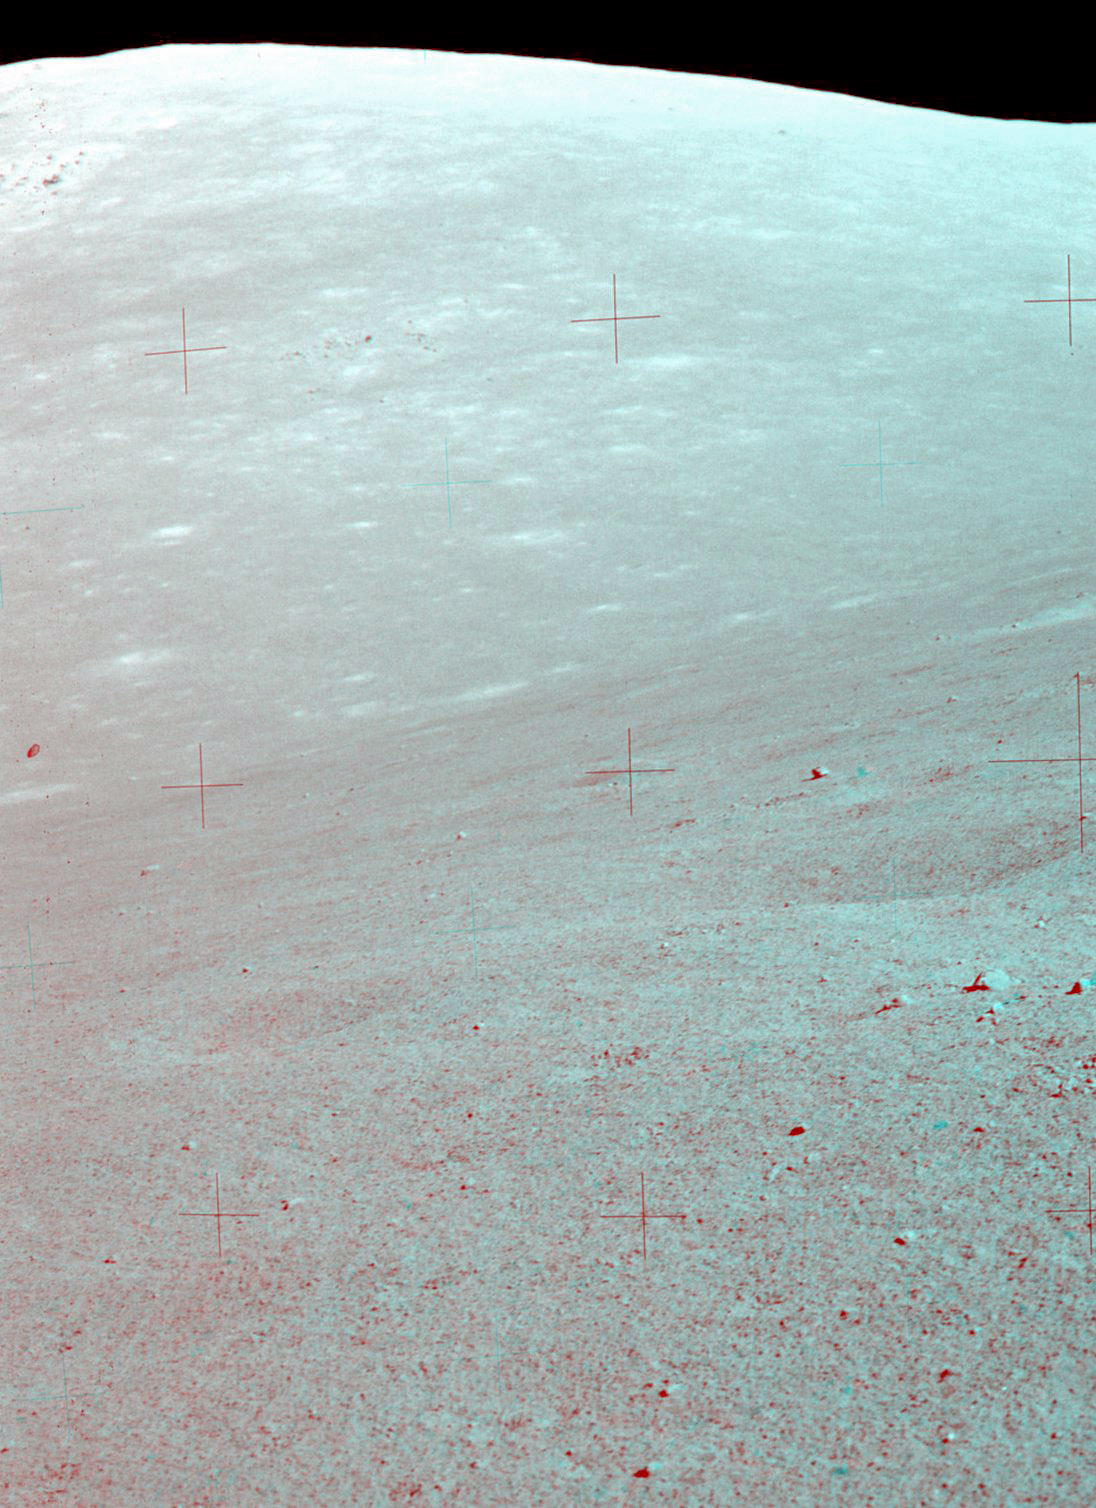
The remaining two crews visited sites where mare lava abutts substantial mountains uplifted during major impacts: Apollo 15 landed on a portion of Mare Imbrium bounded on the west by Hadley Rille, a lava flow channel 1500 meters wide and 300 meters deep, and on the south and east by the lunar Apennine Mountains, with summits reaching 3600-4200 meters above the valley floor. Apollo 17 landed in a narrow valley on the fringe of Mare Serentitatis and bounded by peaks of 2000-2400 meters. Both crews made geologic stops at various places on the mare, on the lower slopes of the mountains, at the edge of the rille, and at the base of an 80-m fault scarp that crosses the entrance to the Valley of Taurus-Littrow.
Each of the following sections begins with a brief description of a site or, in the case of the last three missions, a particular aspect of a site. These descriptions are followed by crew comments and lists of panoramas, traverse sequence, photographs, and red-blue anaglyphs that illustrate aspects of the terrain.
Demonstration of a precision landing on Apollo 12 allowed relaxation of site selection criteria and, thereby, visits to site of greater geologic interest and more varied terrain.
Two crews landed on more heavily cratered, highlands sites. The Apollo 14 crew visited hilly terrain that may represent ejecta from the Imbrium impact. As is characteristic of non-mare sites, the surface at Fra Mauro is much rougher than on the mare. Overlapping of eroded craters of sizes of tens of meters or more have produced an undulating surface which rises and falls by up to 10-20 meters over distances of several tens of meters. During their second EVA, the crew made a 1.4 km traverse up to the top of Cone Crater Ridge, which is about 85 meters above the LM location. The Apollo 16 crew landed on a site in the Central Highlands made up of ejecta from the Nectaris impact overlain in areas between hills with a blanket of ejecta from Mare Imbrium. The hills are known as the Descartes formation while the smoother area of Imbrium ejecta is known as the Cayley plains. The terrain at the Apollo 16 site is generally smoother than at the Apollo 14 site, although there are substantial elevations differences over distance of 100-200 meters in some places.
The remaining two crews visited sites where mare lava abutts substantial mountains uplifted during major impacts: Apollo 15 landed on a portion of Mare Imbrium bounded on the west by Hadley Rille, a lava flow channel 1500 meters wide and 300 meters deep, and on the south and east by the lunar Apennine Mountains, with summits reaching 3600-4200 meters above the valley floor. Apollo 17 landed in a narrow valley on the fringe of Mare Serentitatis and bounded by peaks of 2000-2400 meters. Both crews made geologic stops at various places on the mare, on the lower slopes of the mountains, at the edge of the rille, and at the base of an 80-m fault scarp that crosses the entrance to the Valley of Taurus-Littrow.
Each of the following sections begins with a brief description of a site or, in the case of the last three missions, a particular aspect of a site. These descriptions are followed by crew comments and lists of panoramas, traverse sequence, photographs, and red-blue anaglyphs that illustrate aspects of the terrain.
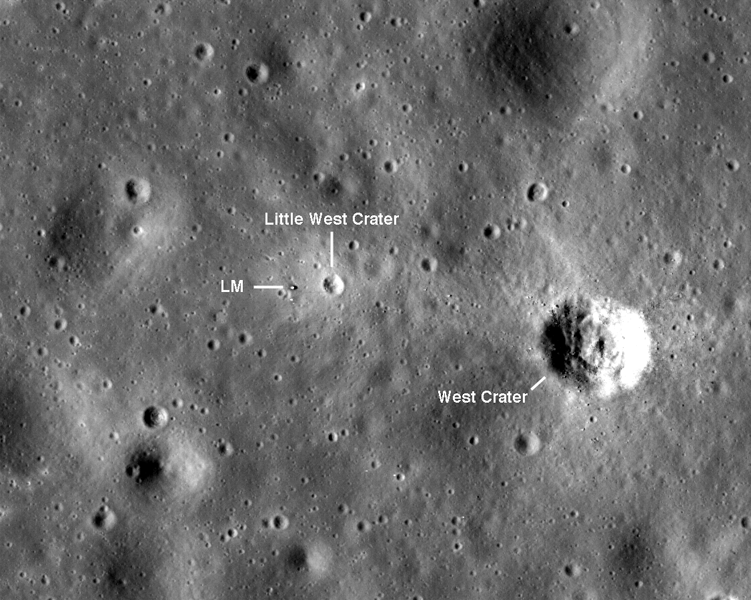
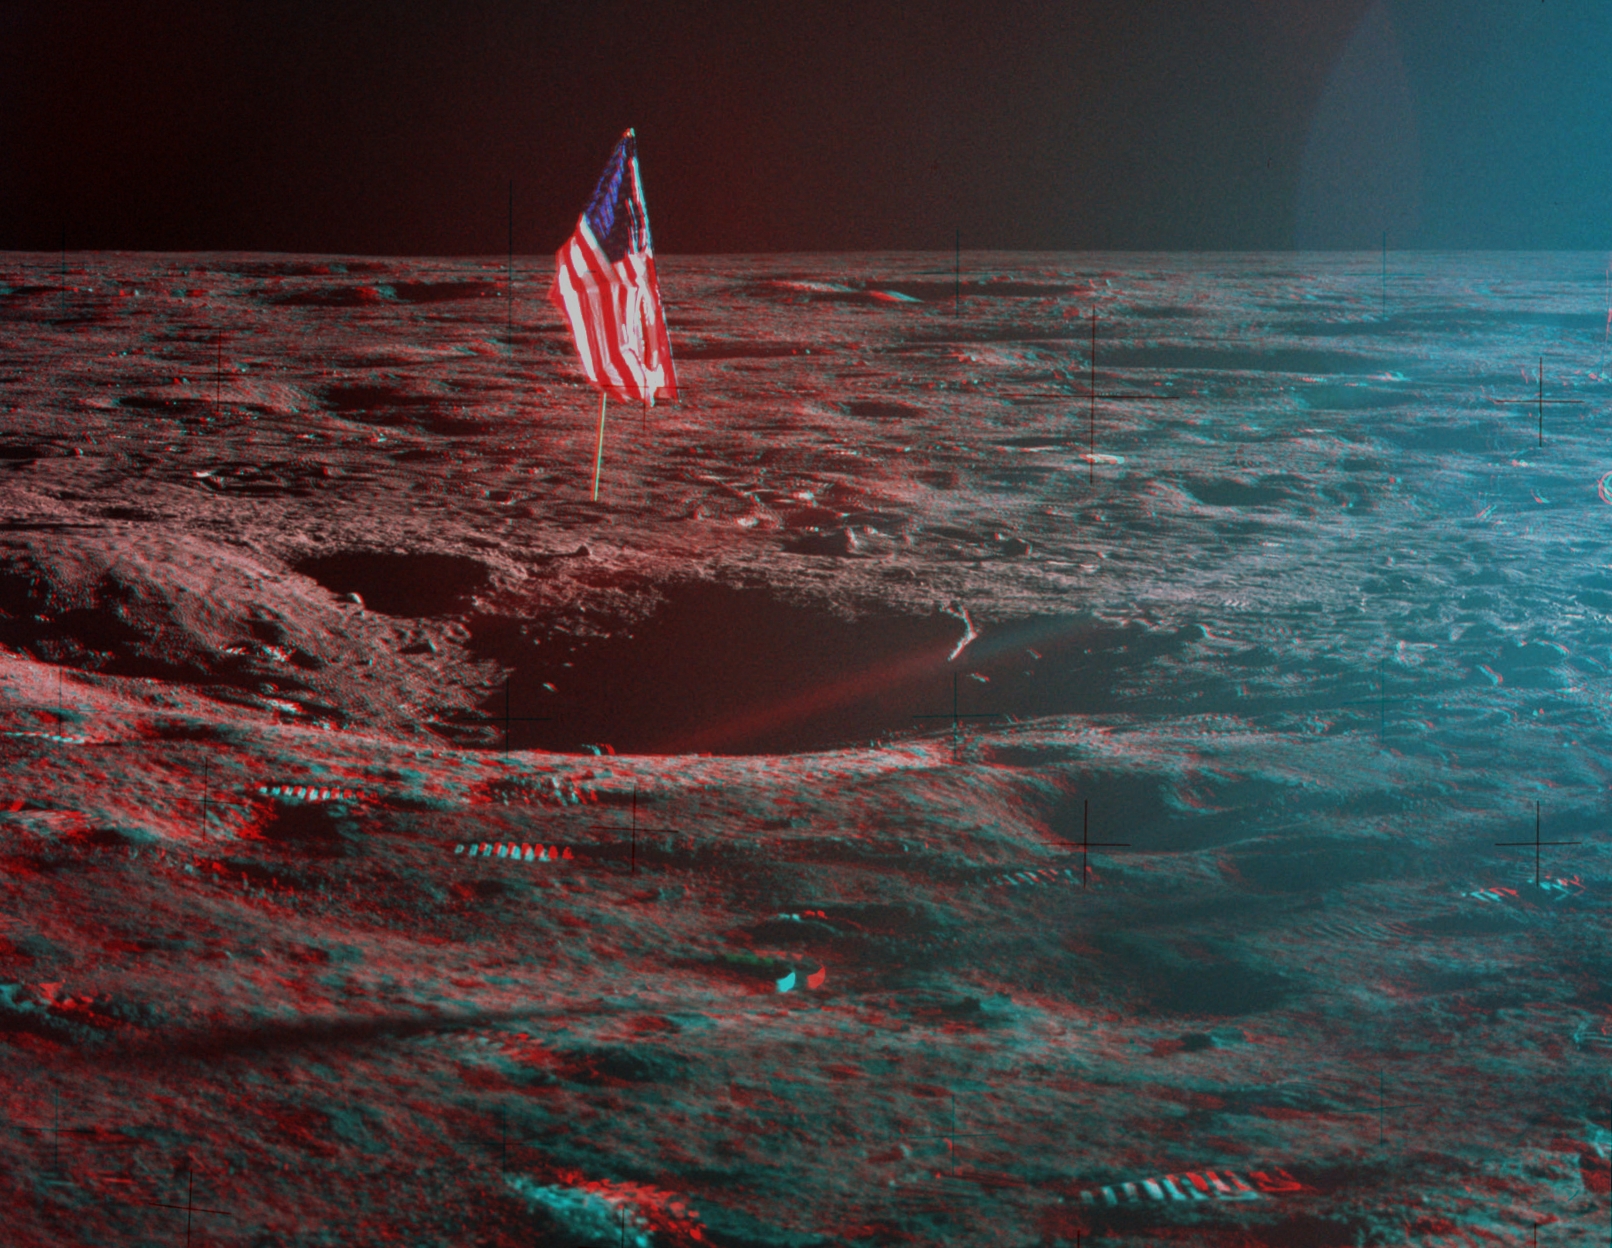
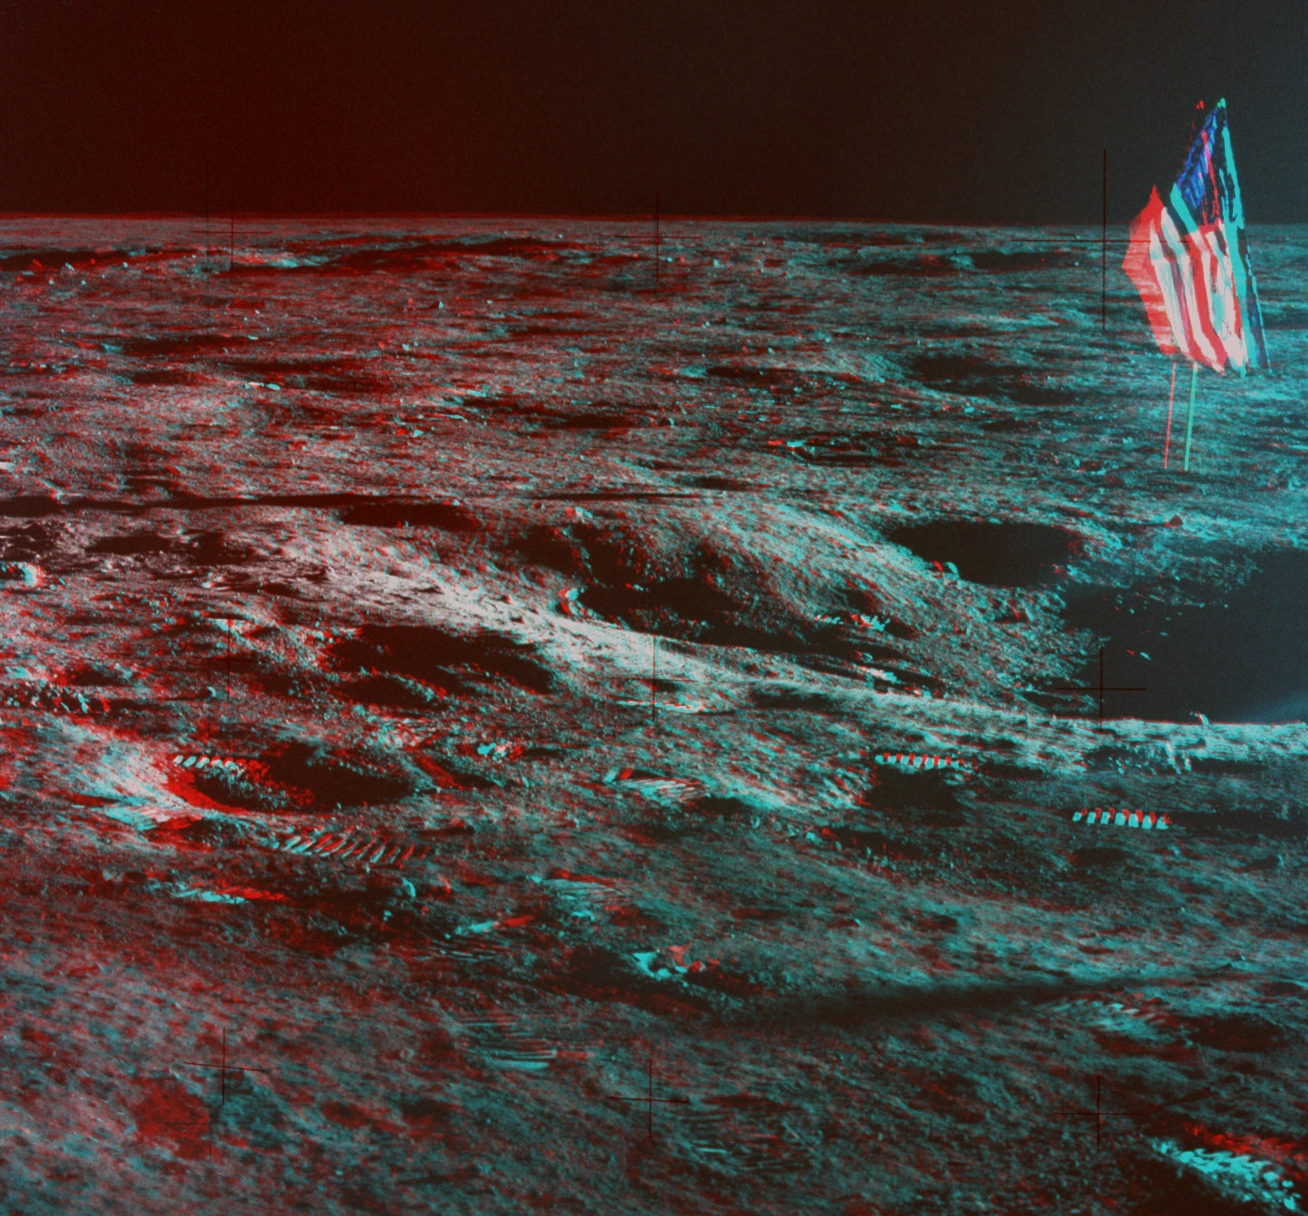
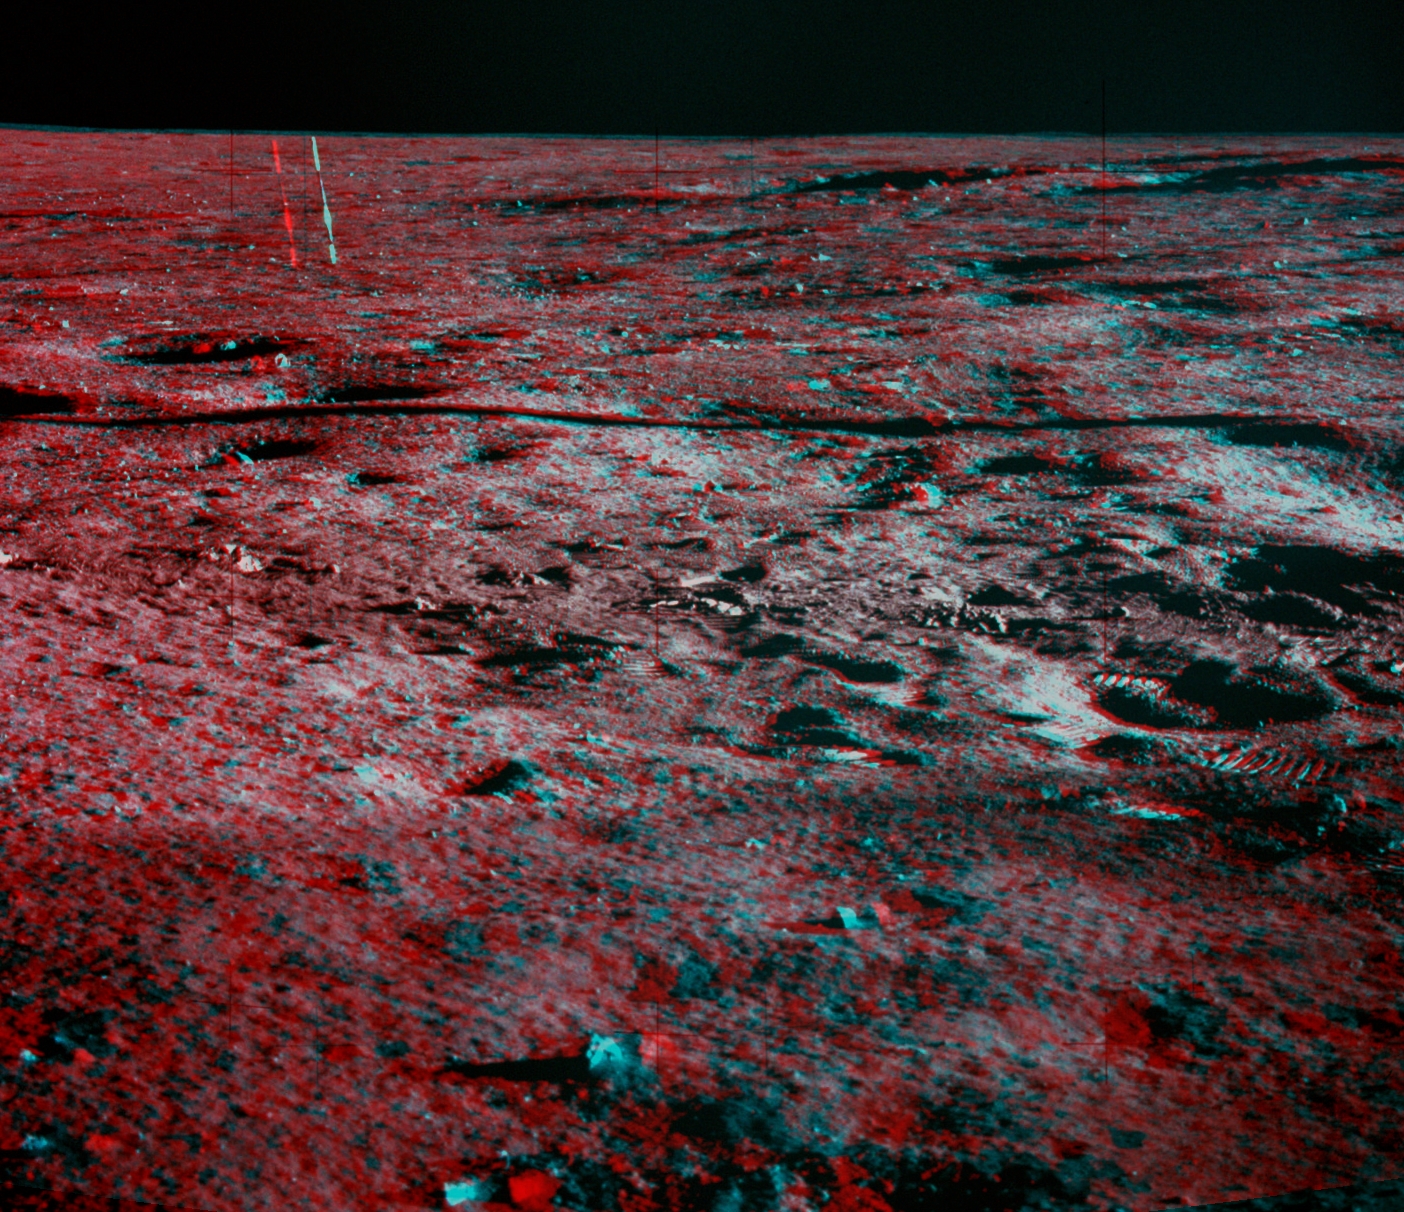
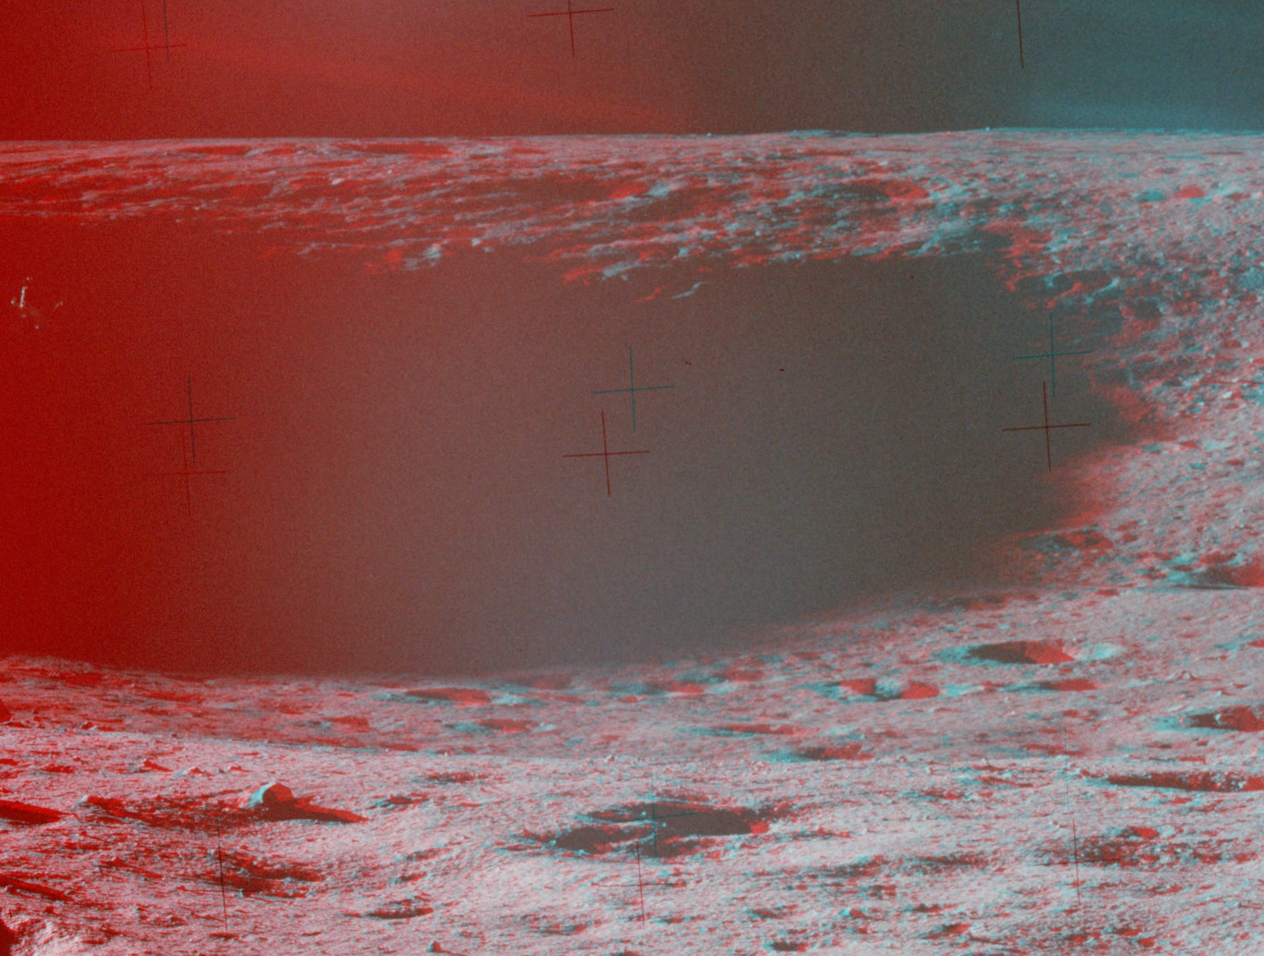
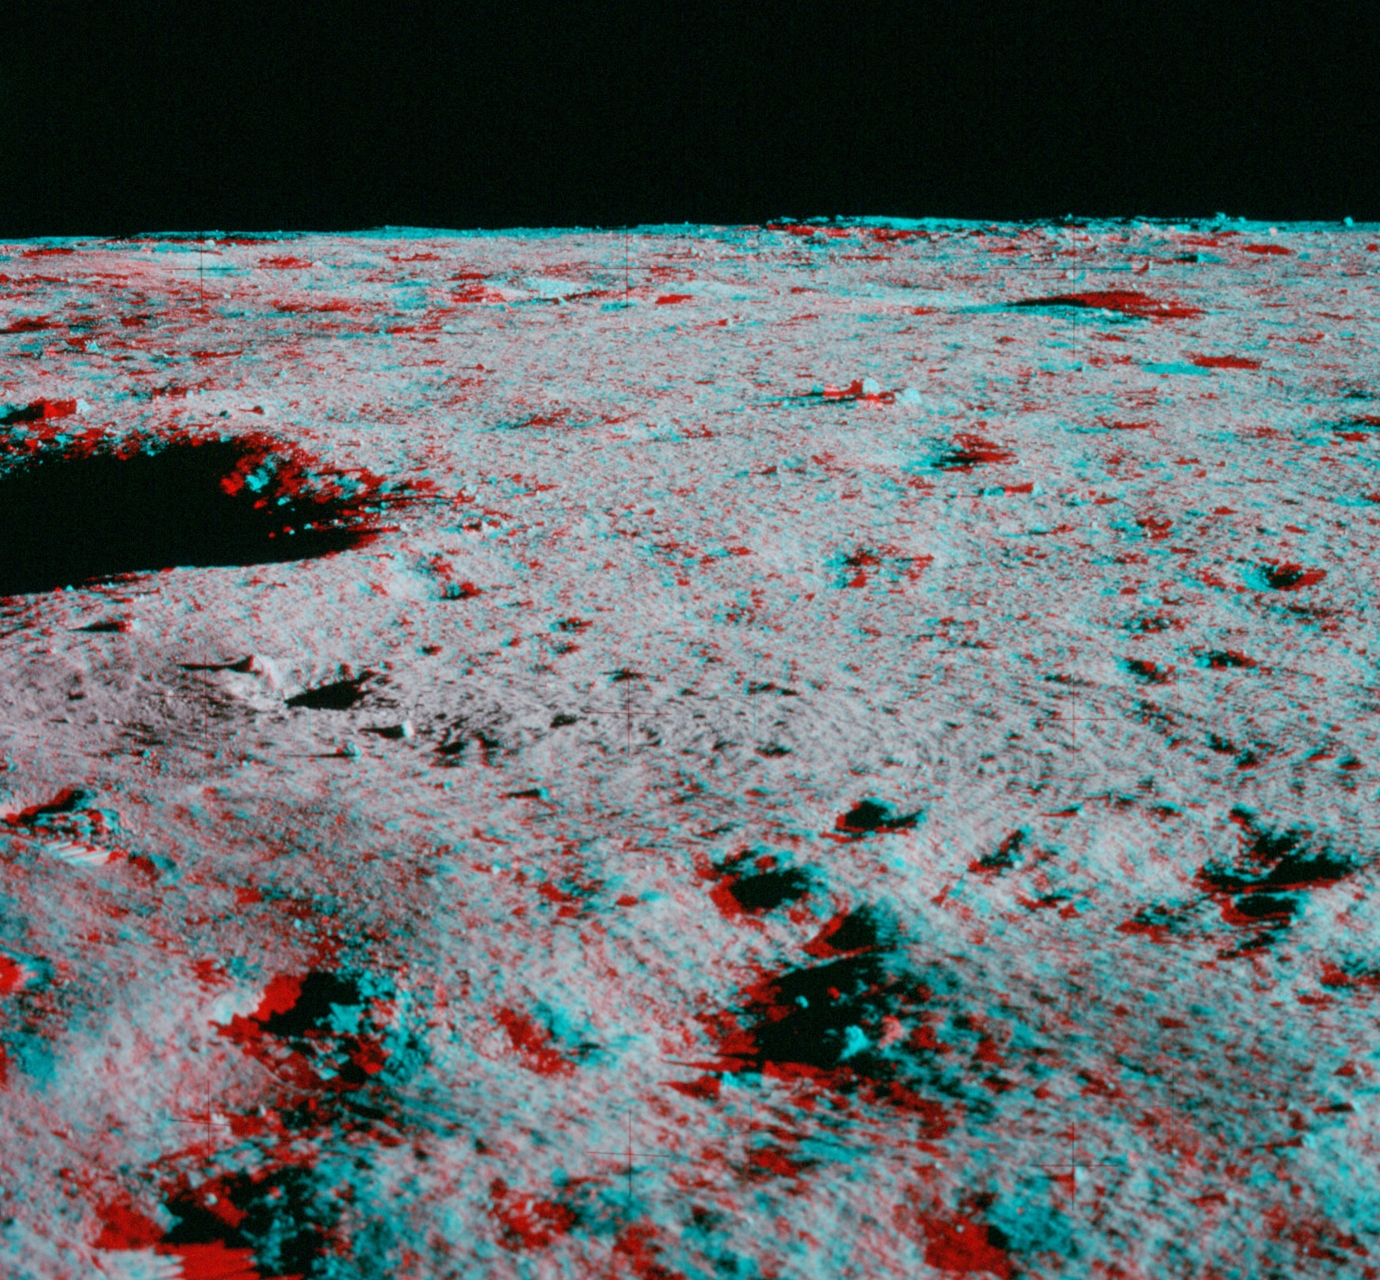
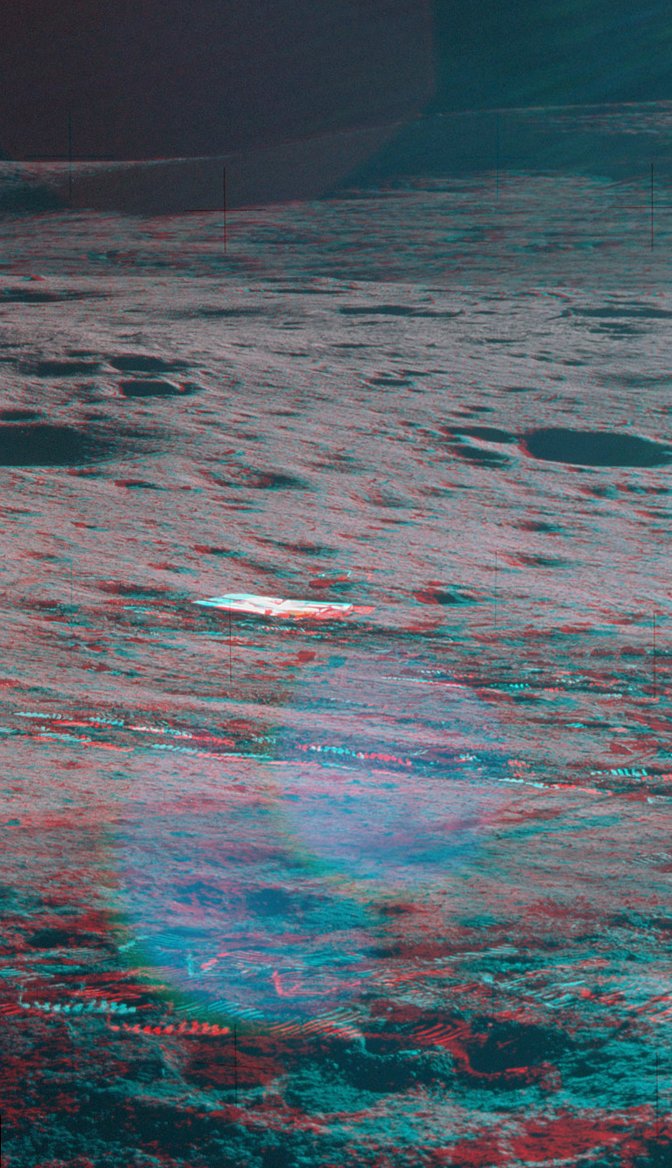
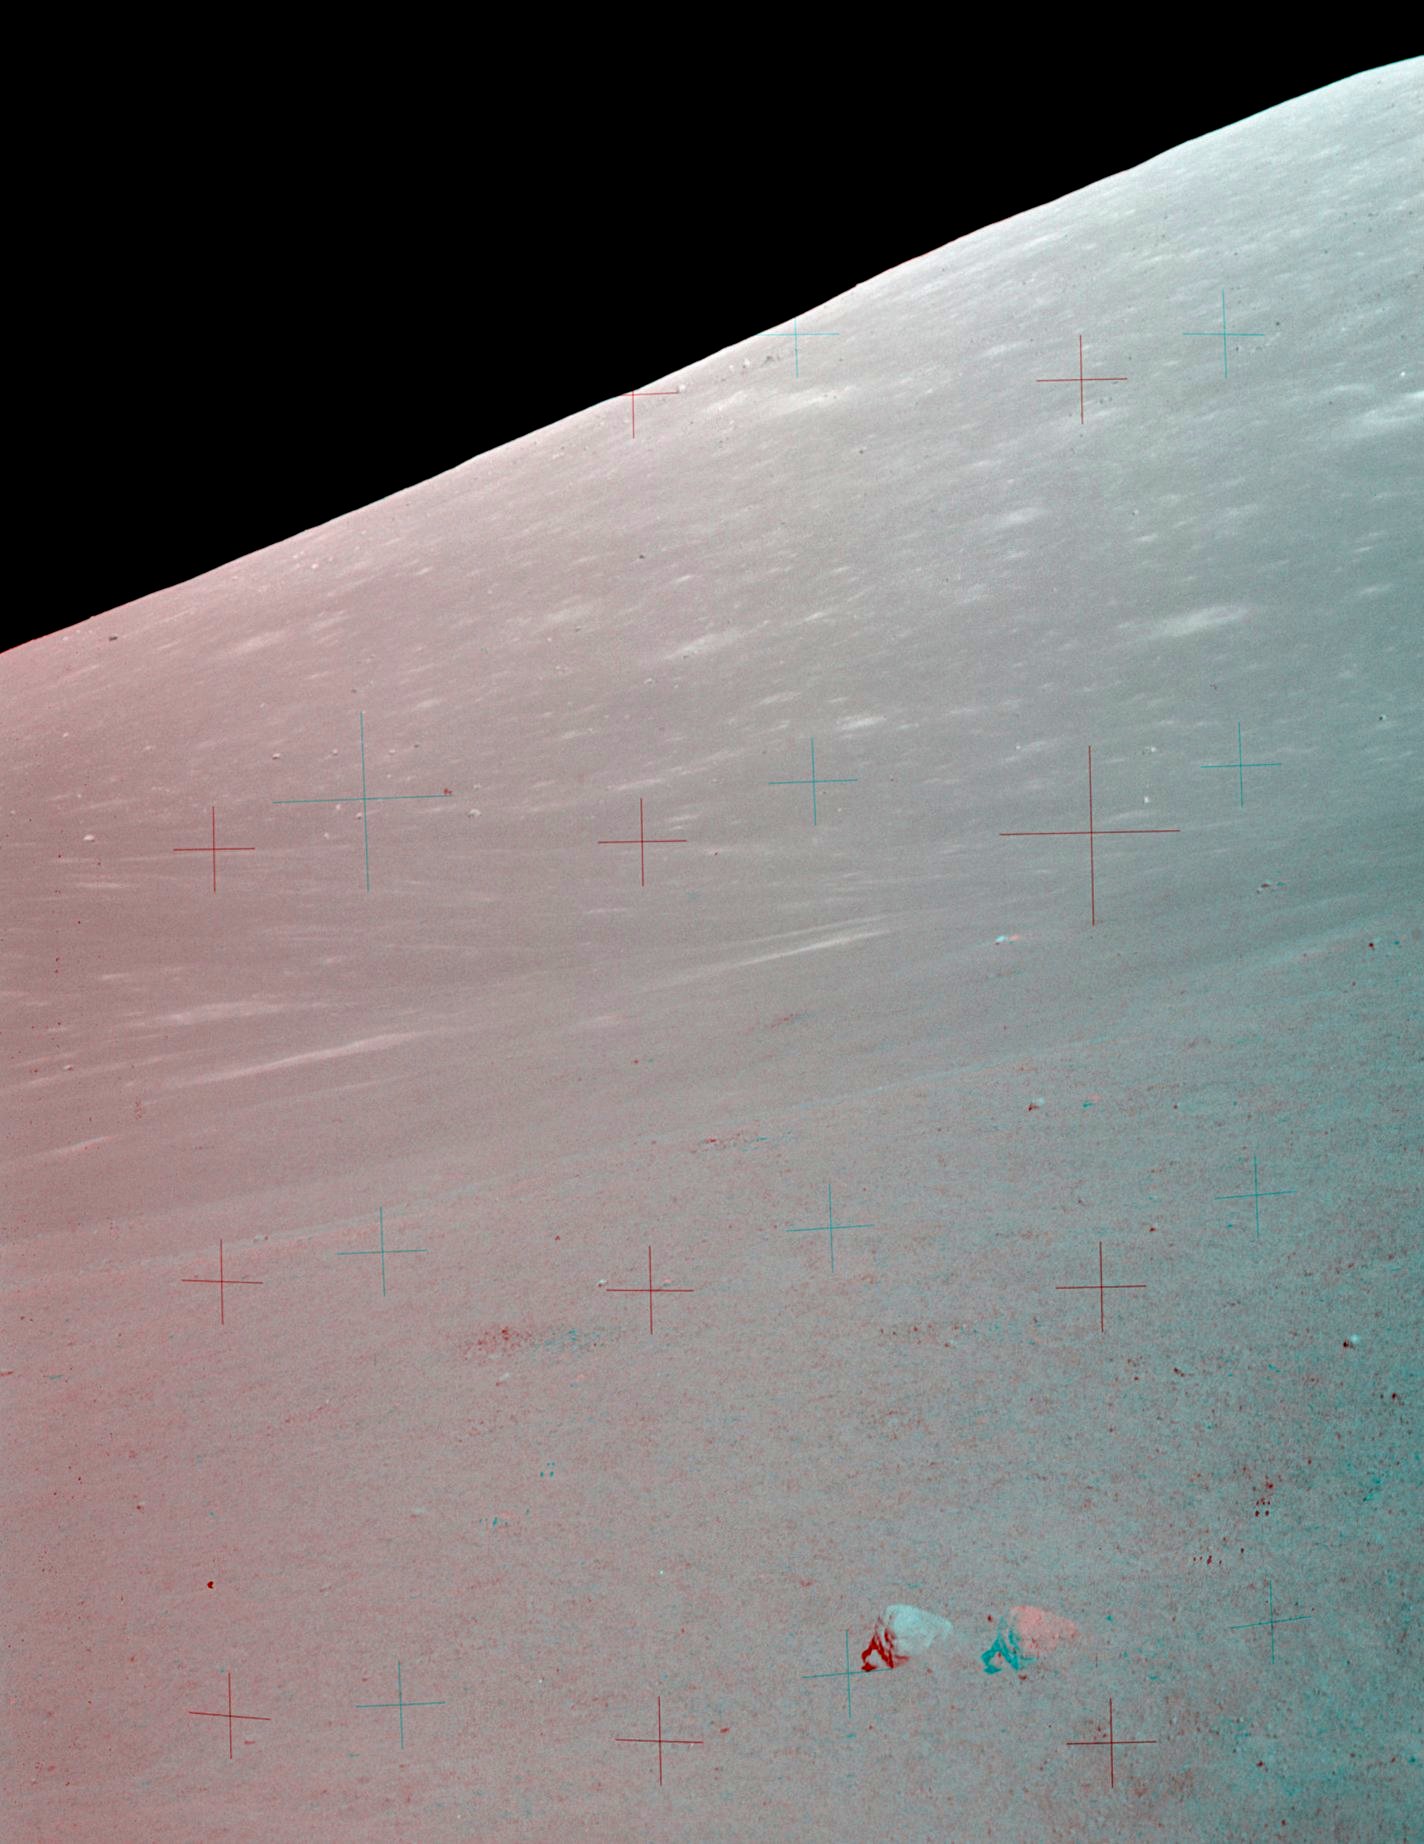
2. Apollo 11, Mare Tranquilitatis

Detail from Lunar Reconnaissance Orbiter image M104362199R, taken 8 August 2009 at
09:15:31 UTC. Resolution is 1.17 m/pixel and the solar elevation and azimuth were
36.1 and 269.0 degrees, respectively. On level ground, the shadow cast by the
3.23-m-tall descent stage was only 4.4 meters long.
(Click on the image for a larger version.)
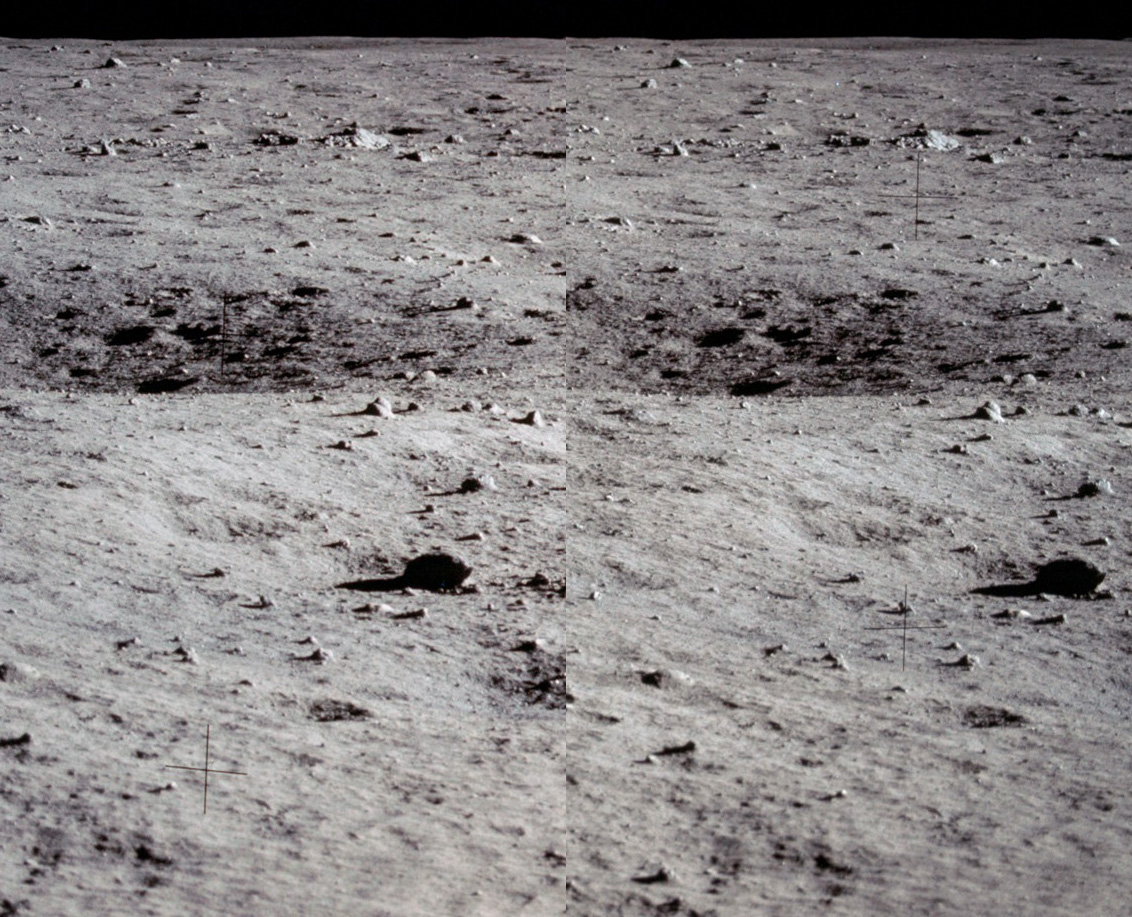
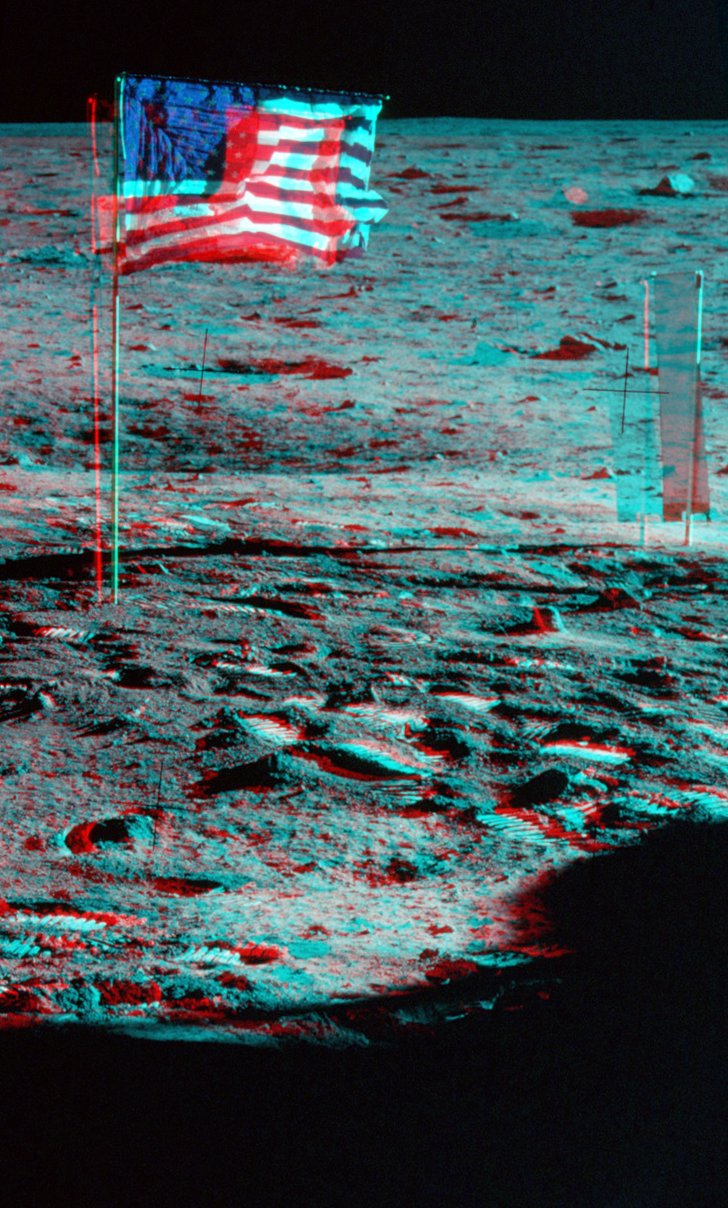
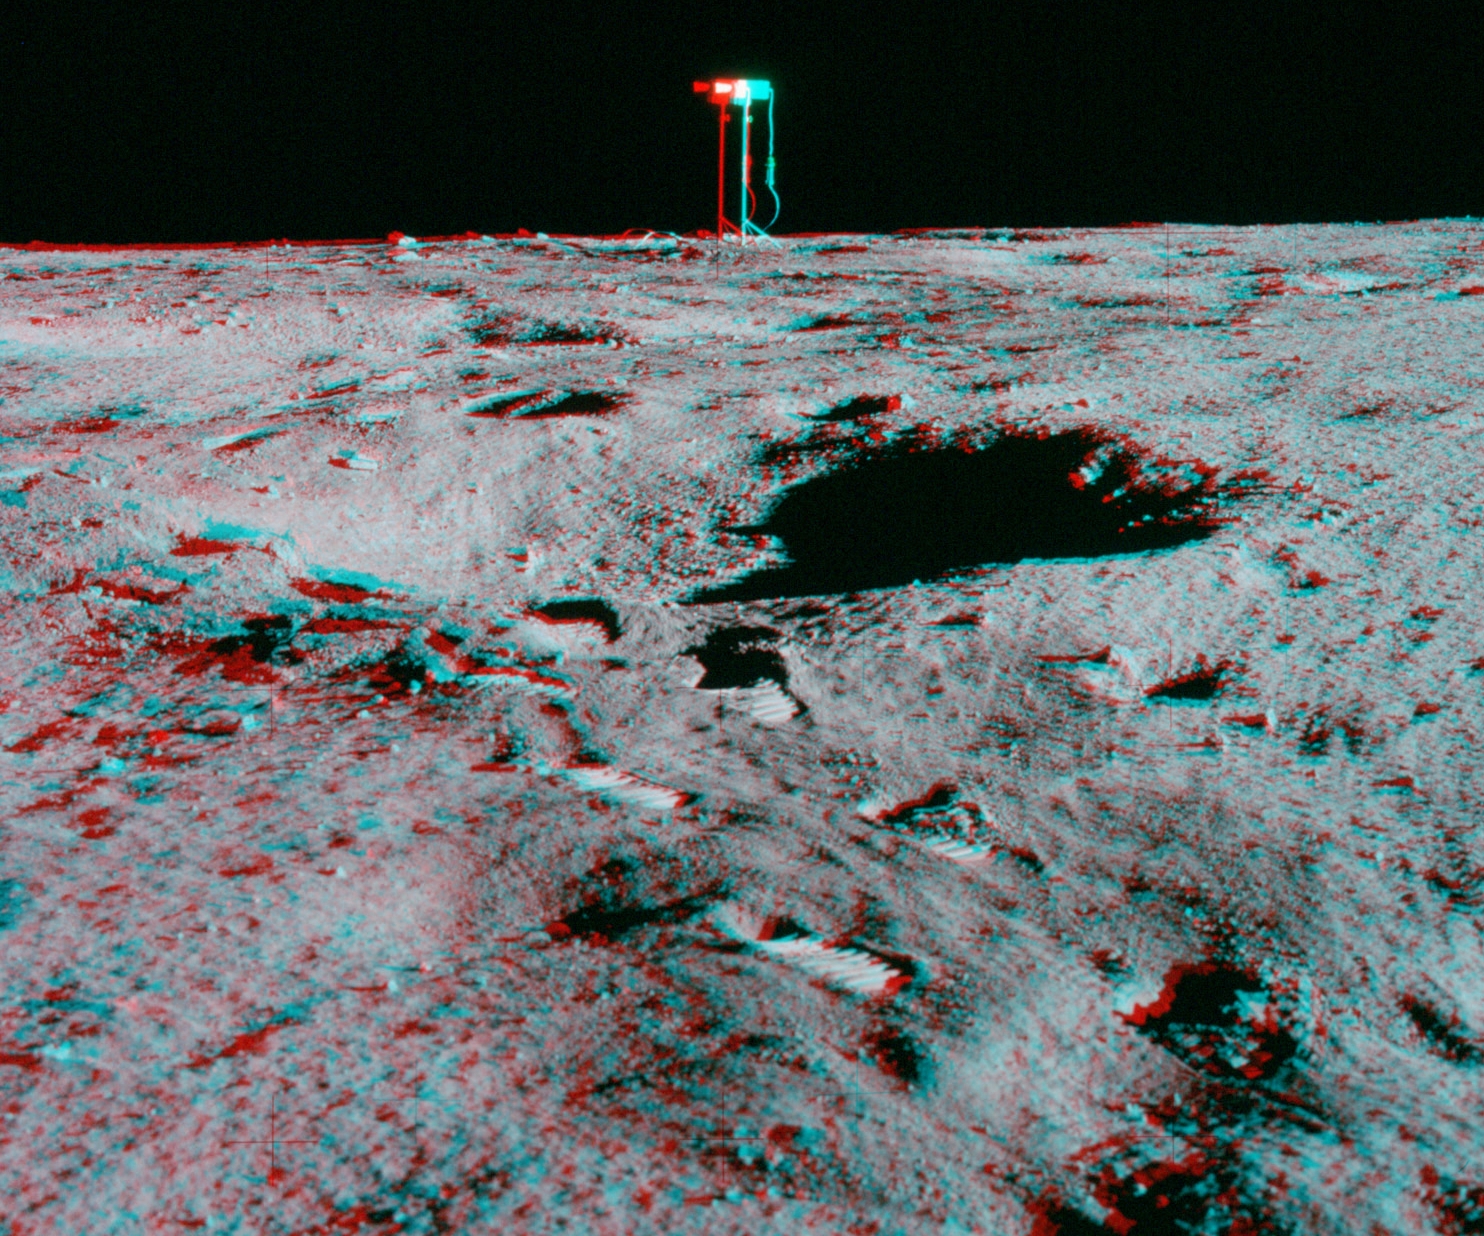
Armstrong and Aldrin stayed close
to the LM. Late in the EVA, Armstrong ran out to the
southwest rim of Little West Crater, about 60 meters from the
spacecraft. Except for that brief excursion, the
astronauts stayed within an area about the size of a baseball
diamond or a soccer
pitch. Armstrong and Aldrin took three complete pans and
two partials during the EVA. Although they didn't get many
instances of overlap, there are a few cases of overlapping
images that give us some stereo of the site. In the
following table, the white lines drawn on details from the LROC
image indicate the azimuths correponding to the centers of the
various images. These are based on Figure 3-15 in the Apollo 11
Preliminary Science Report. The black lines
represent approximate azimuths of the anaglyph centers.
The crew also took sequences of photos out both windows before
and after the EVA.
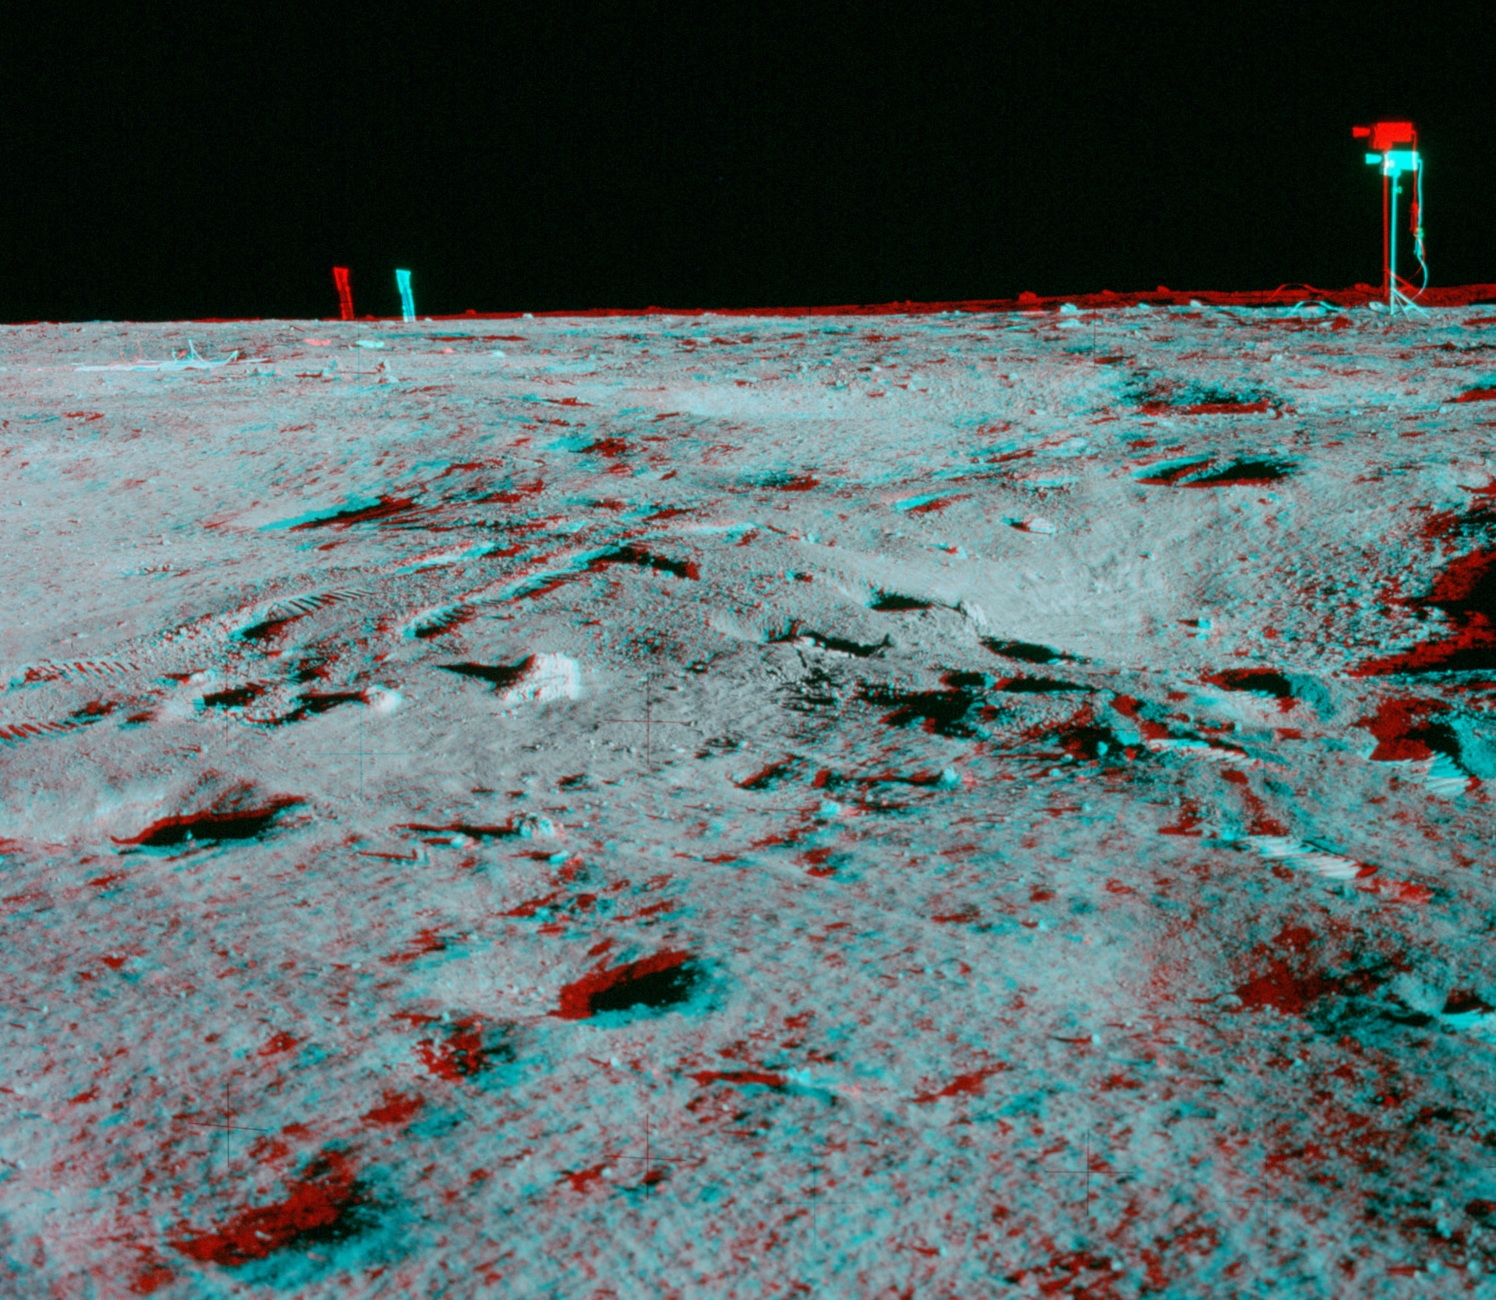
3. Apollo 12, Mare Insularum (formerly part of Procellarum)
5 Apollo 15, Hadley
6.2 EVA-1 Traverse and Station 1 and 2
6.3 500mm photos
6.4 EVA-2 Traverse: Cayley Plain south of the LM to Stone Mountain; Stations 8 and 9
6.5 EVA-2 Traverse: Stone Mountain and Stations 4, 5, and 6
6.6 EVA-3 Traverse and Station 13
(The following has been derived from the Apollo 17 Mission Report, Lunar Sourcebook, and USGS Apollo 17 Professional Paper.)
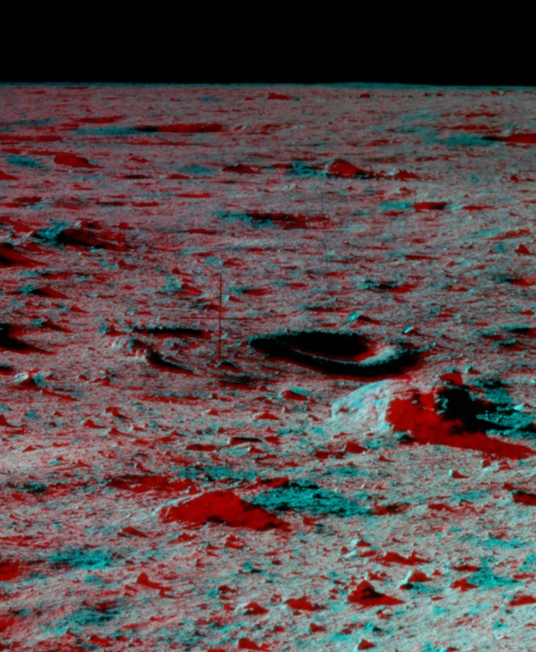
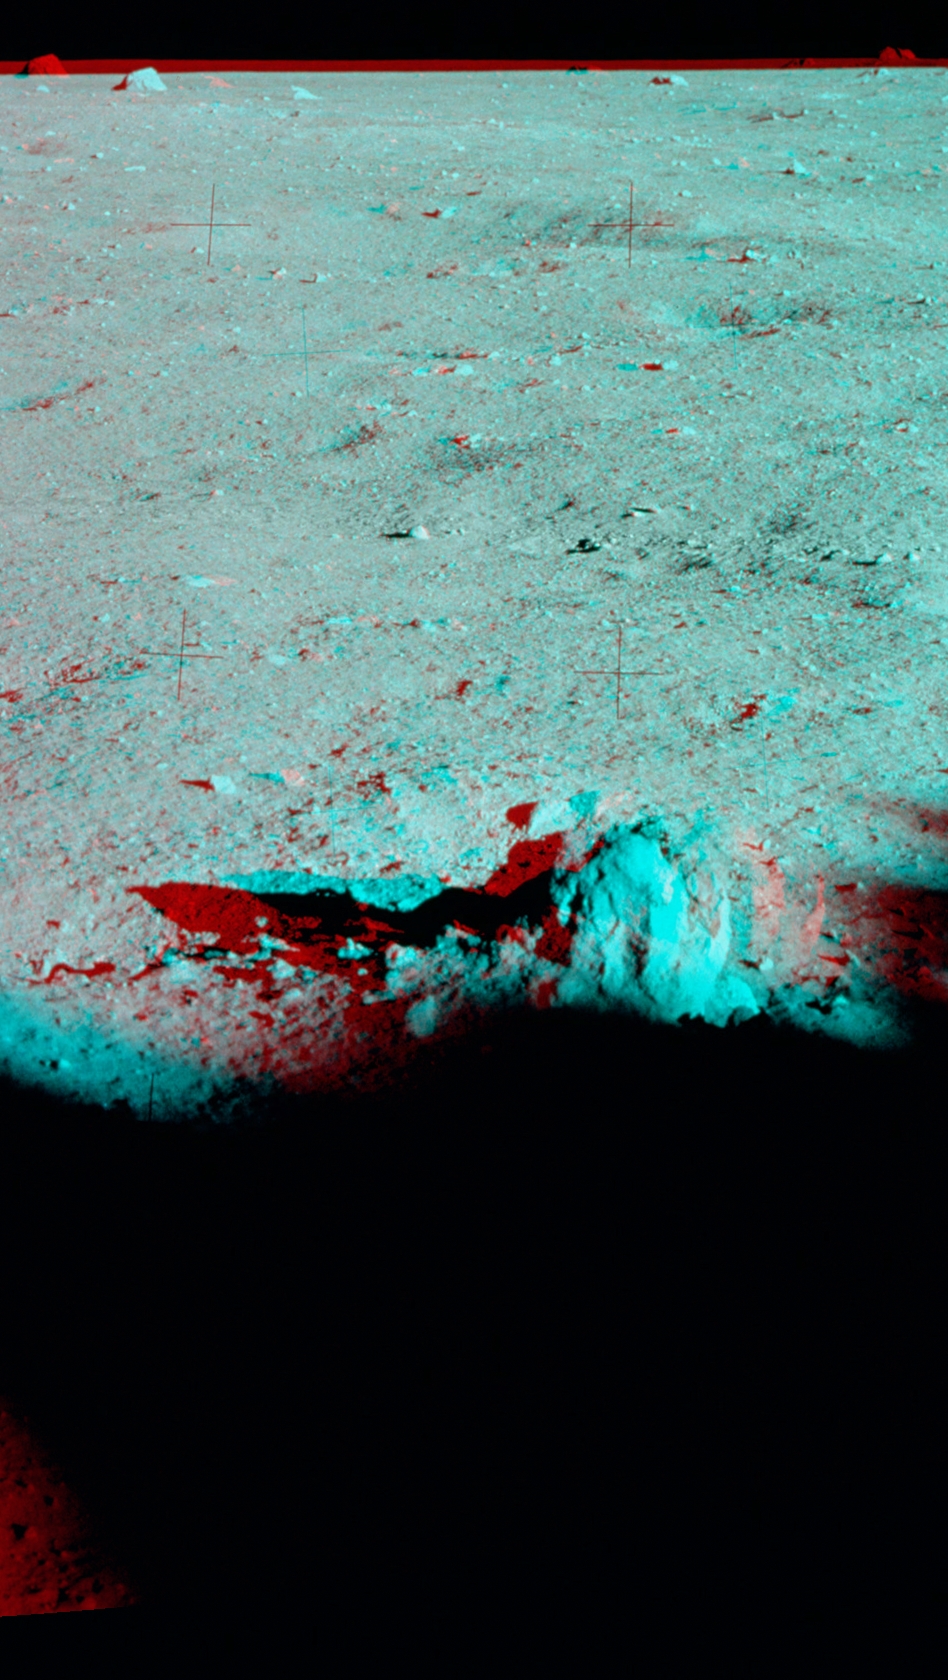
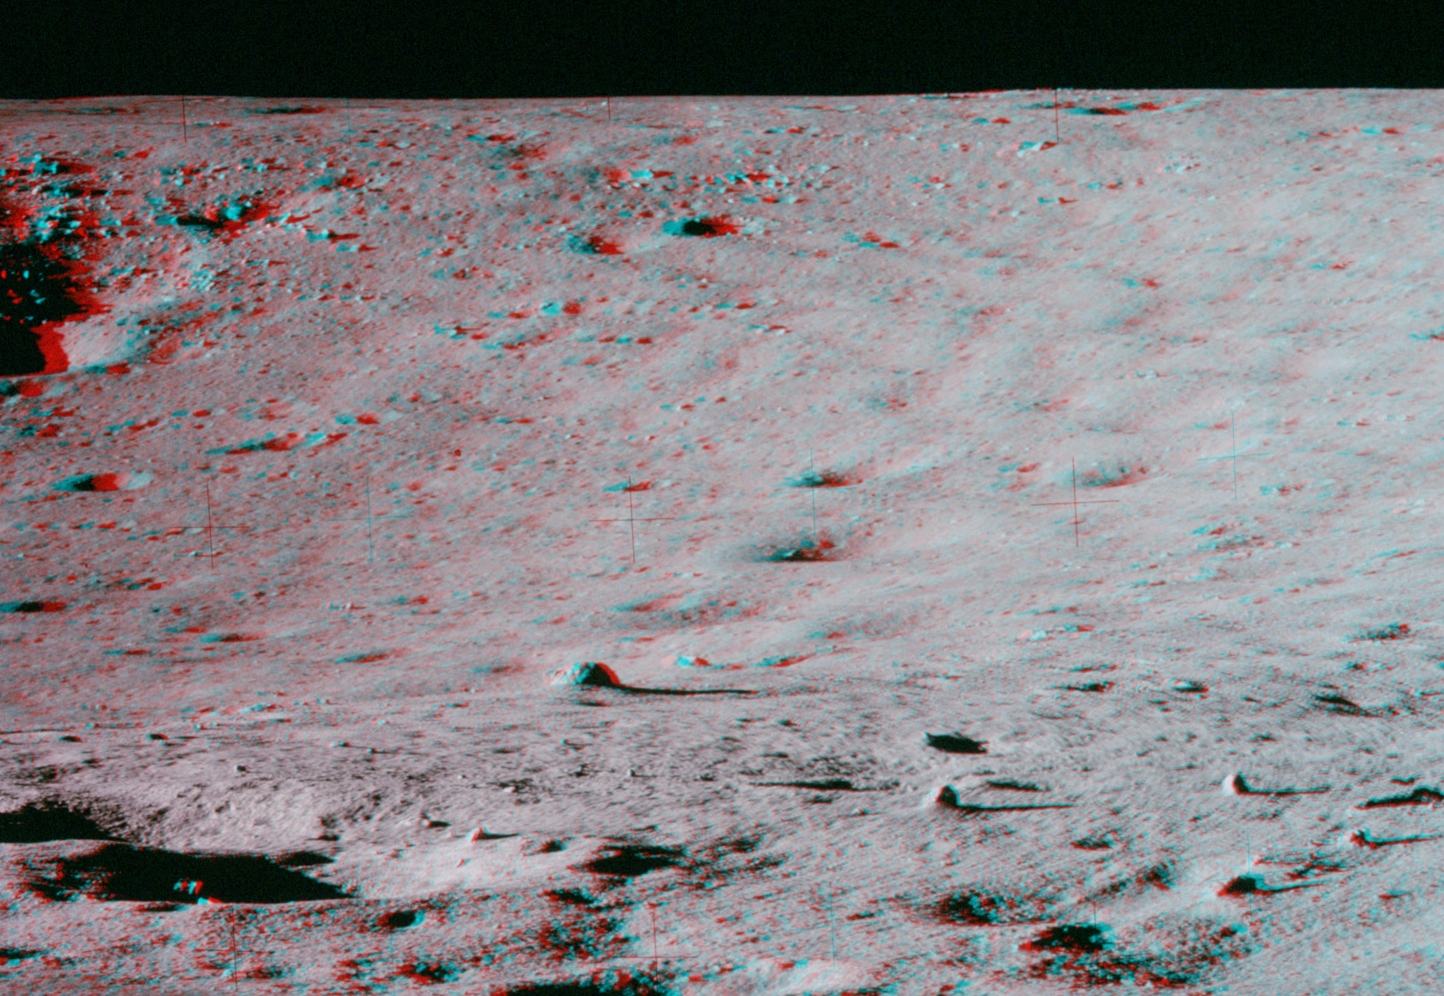
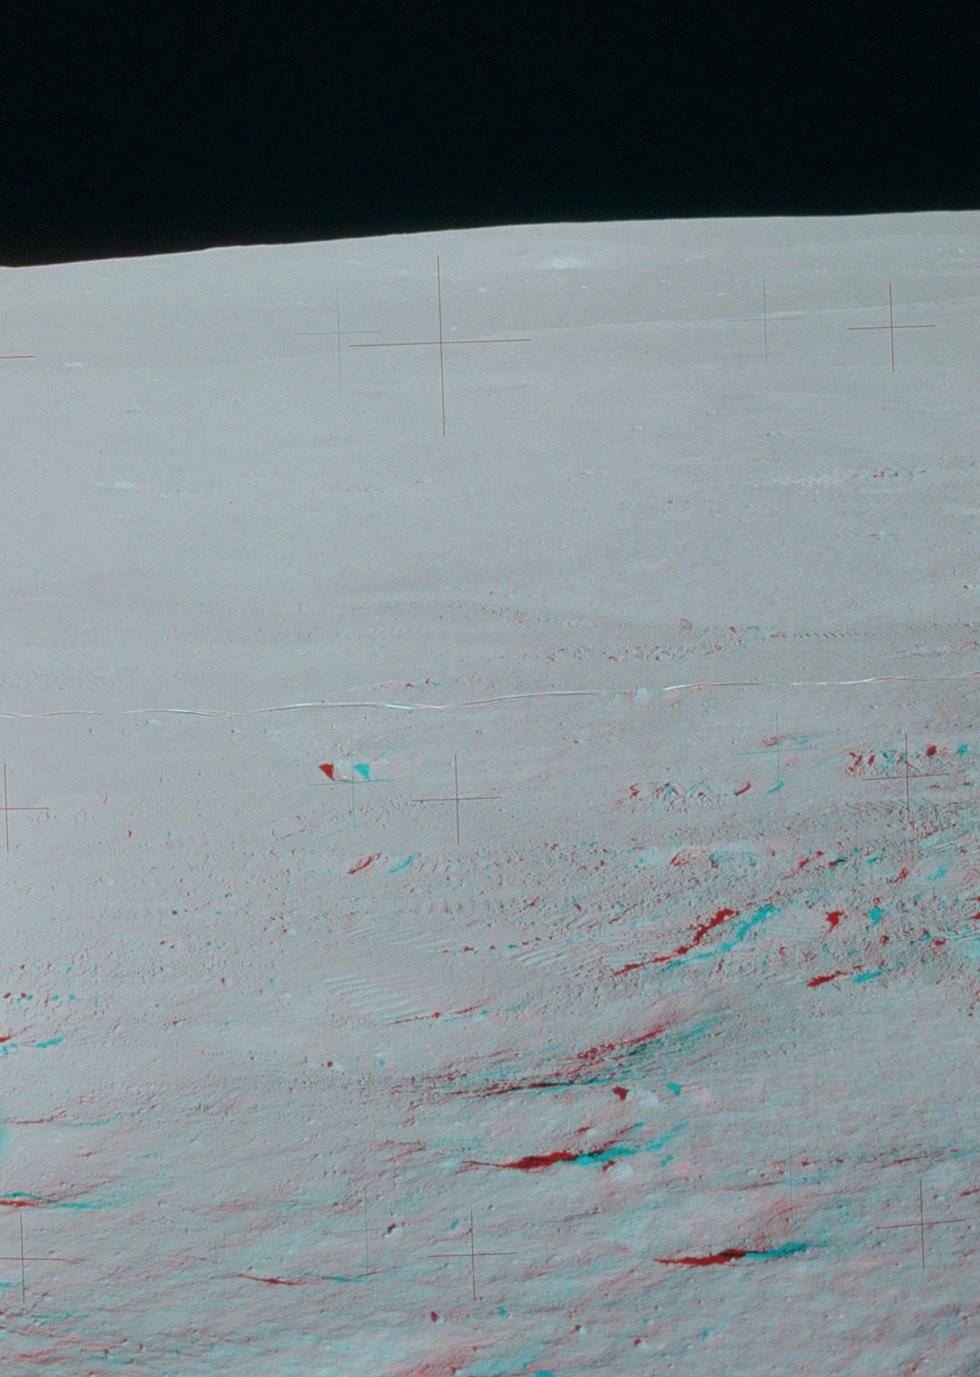
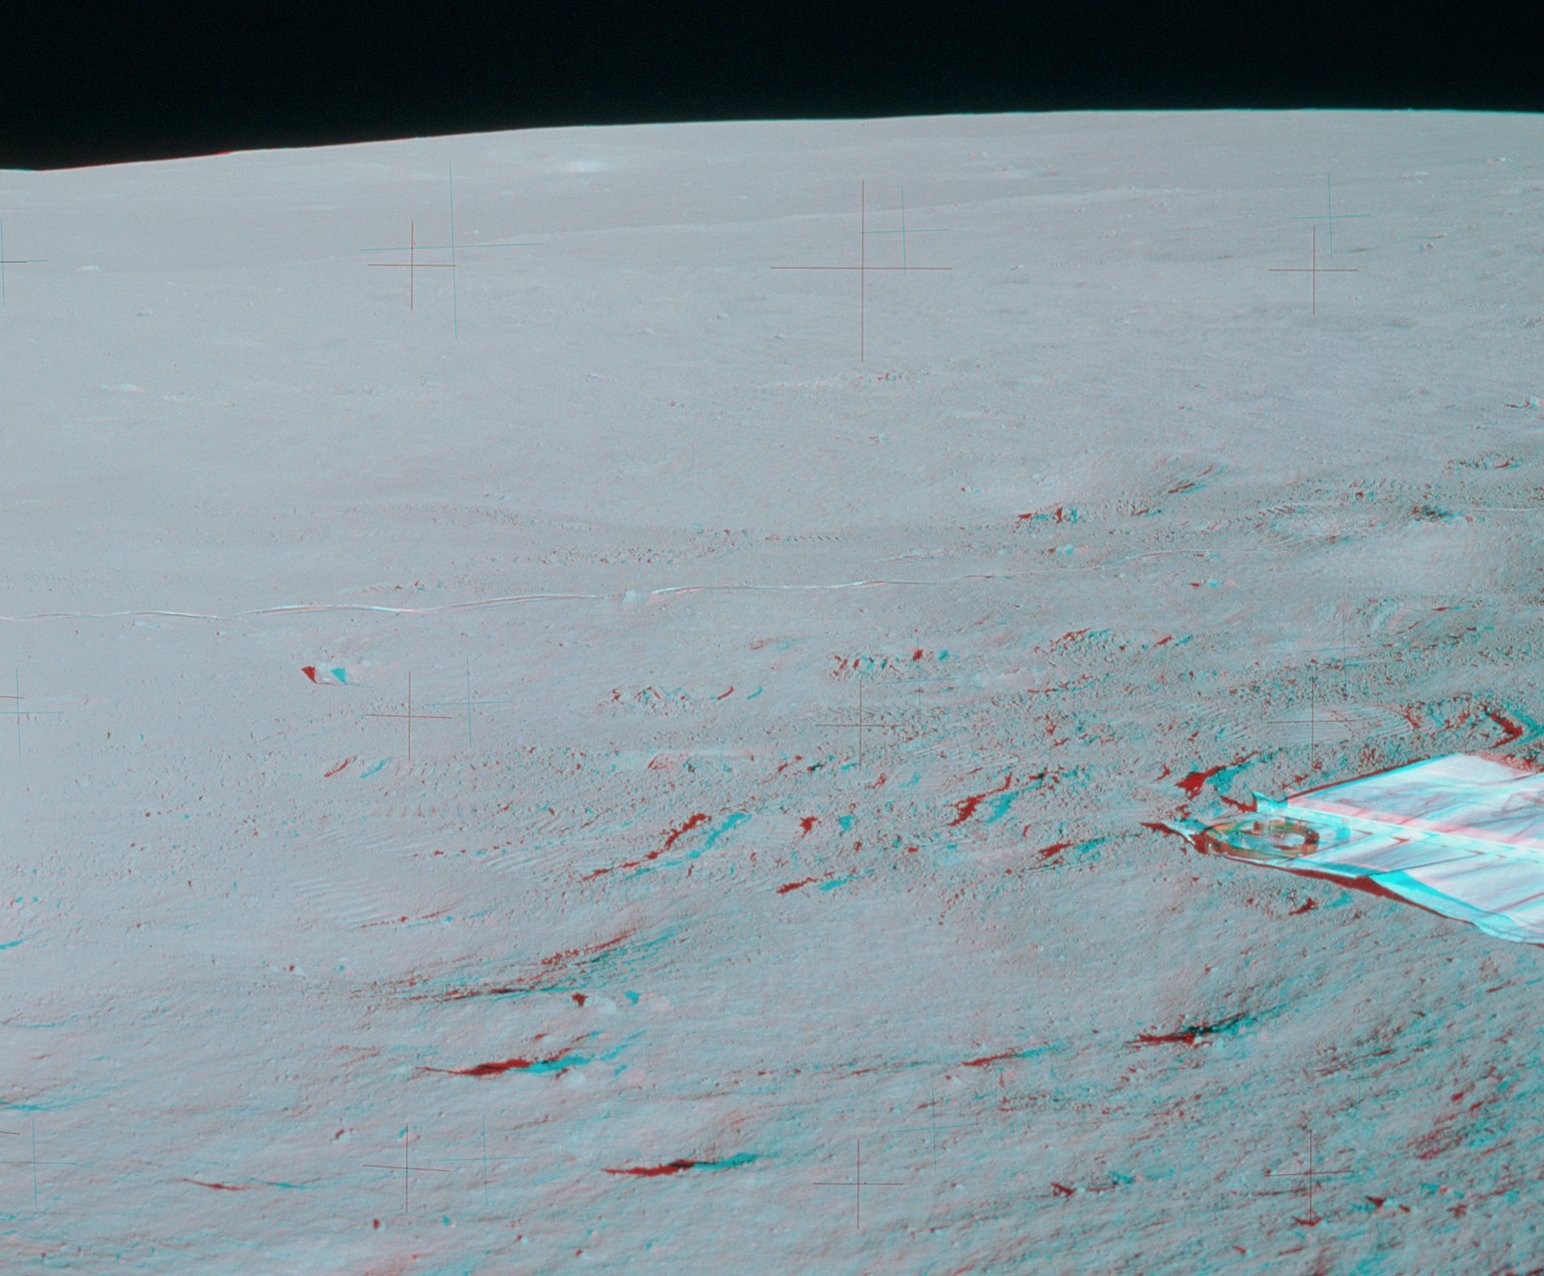
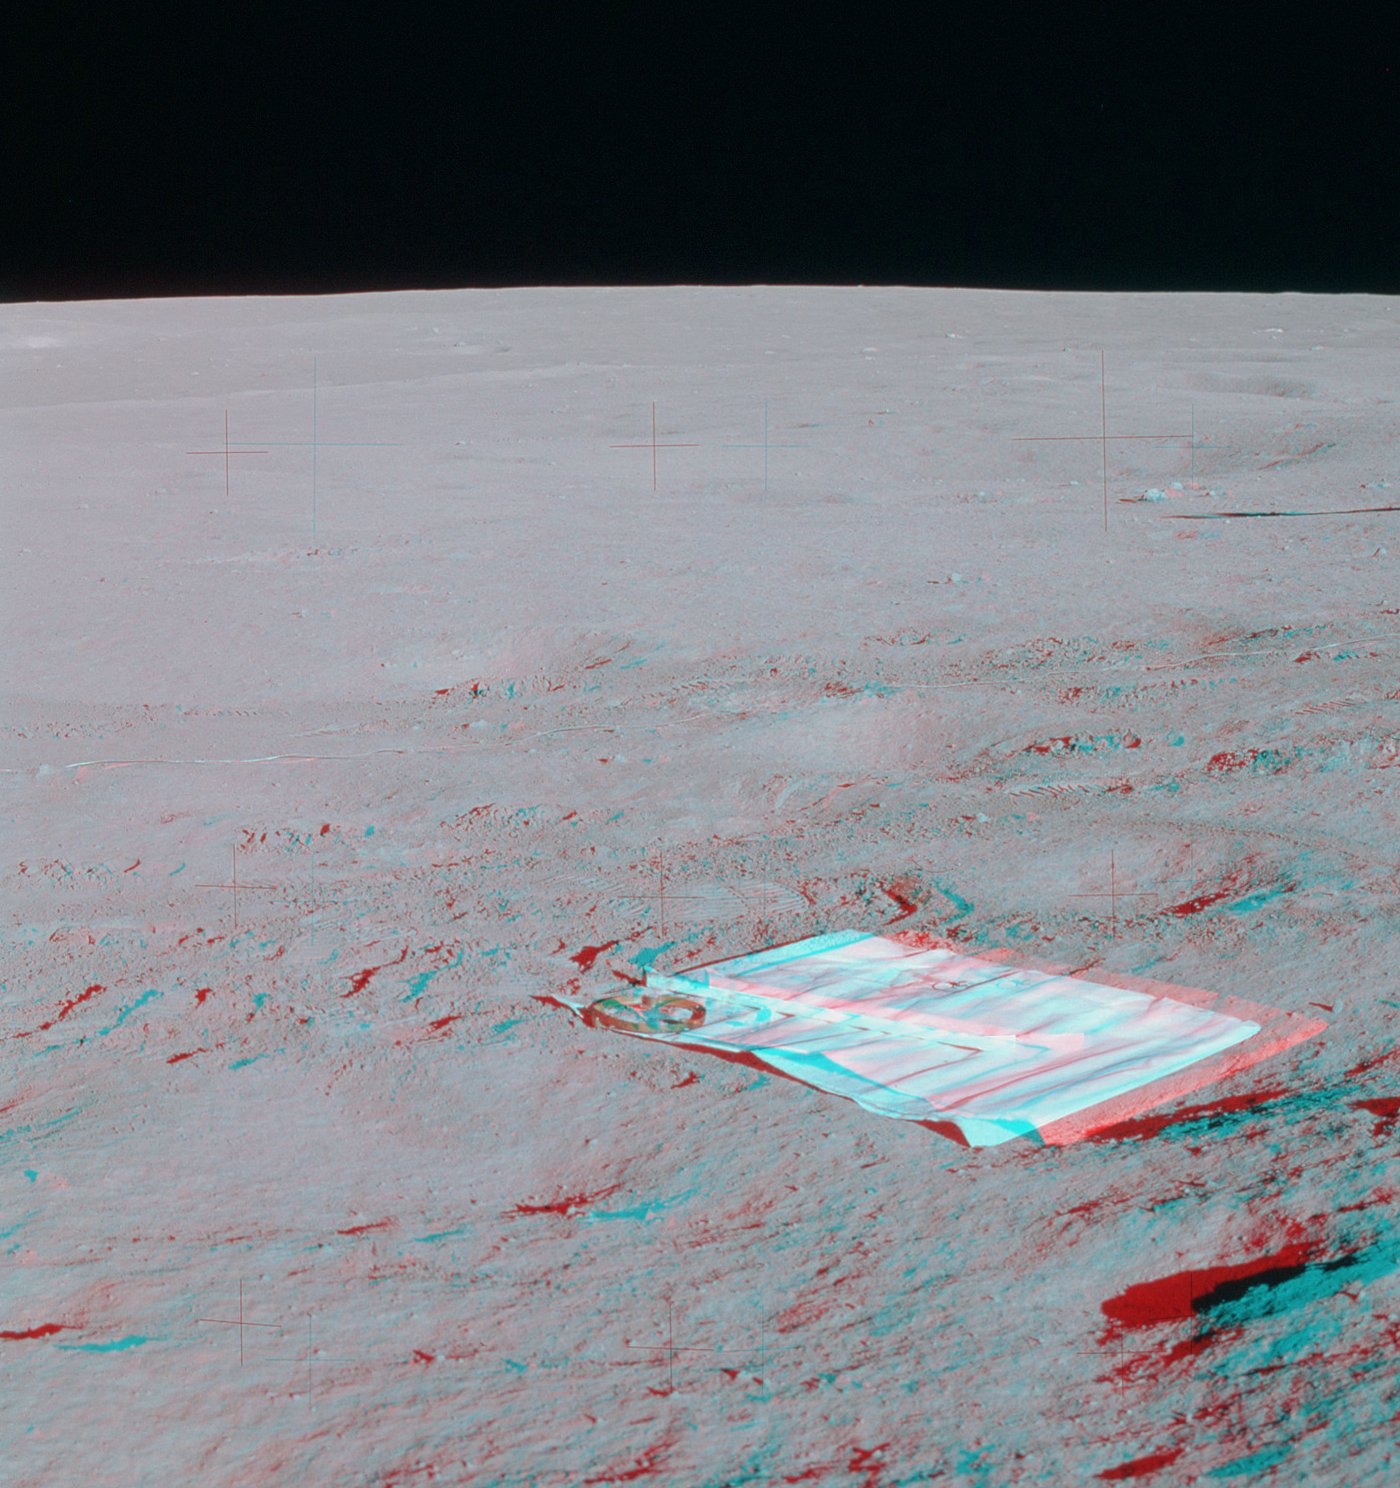
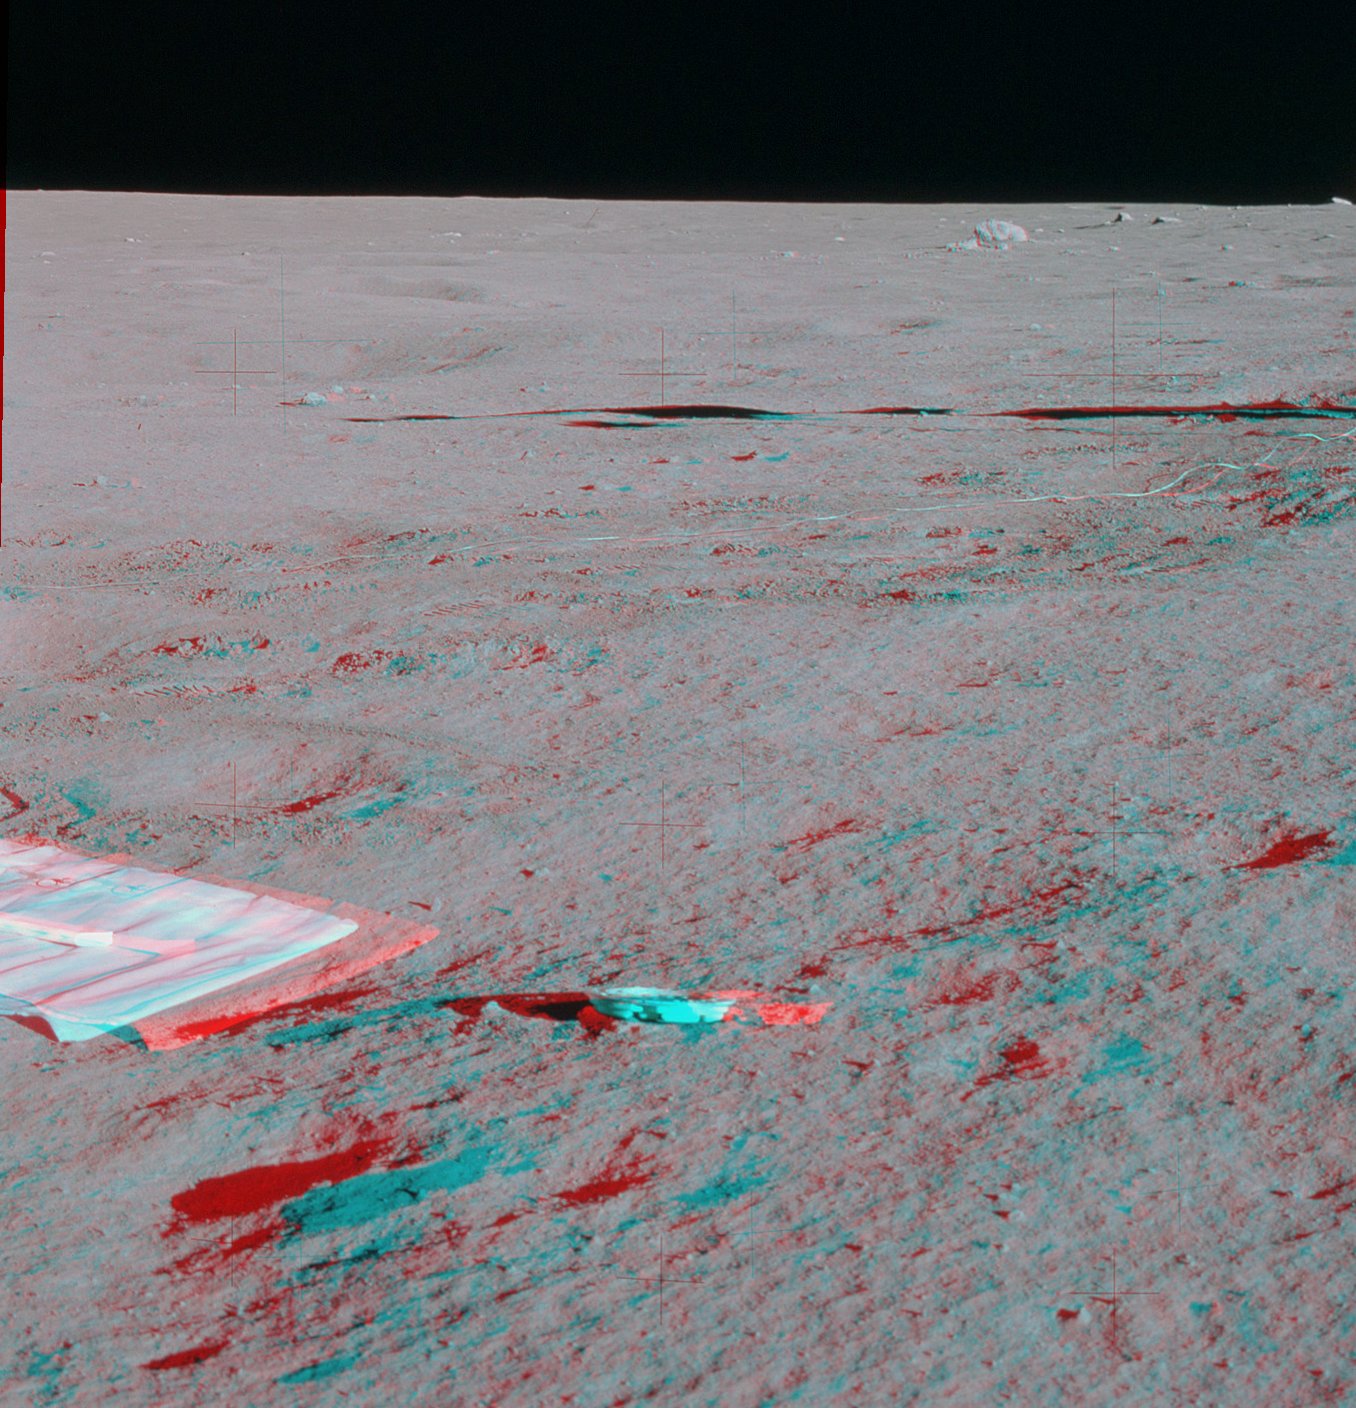
The Valley of Taurus-Littrow is on the southeast margin of the Serenitatis Basin, with its long axis pointing toward the center of the basin. It is flanked on the north and south by mountains that rise two km or more above the valley floor. The valley and mountains form a classic graben/horst geologic structure, which resulted from outward displacement of material at the edge of the basin during the impact, 3.87 billion years ago. Relatively soon after the impact event, lava began to fill the Serentitatis Basin. Geophysical measurements made during the mission suggest that the lava fill at Taurus-Littrow is about 1000 - 1200 m thick. The ages of the basalt samples returned by the crew indicate that the filling ended about 3.6 to 3.7 billion years ago. The thickness of the regolith layer accumulated since that time is not well determined at Taurus-Littrow. Typical thicknesses on the lunar mare are about 5 meters. Regolith sampled in the center of the valley is composed almost entirely of basalt fragments, indicating that material thrown off the mountains is not an important contributor. Serentitatis is a relatively old mare, suggesting that typical regolith thickness at Taurus-Littrow is greater than 5 meters. Evidence at Shorty Crater indicates a regolith thickness of 10 to 15 meters while, at Van Serg Crater, the regolith thickness is more than 15 meters. Like all mare surfaces, the valley floor has relatively few large craters but increasing numbers at smaller sizes. Overall, the valley is relatively flat, sloping down about 1 degree toward its eastern end. On smaller, local scales, the cumulative effect of randomly-distributed impacts is an surface between the larger craters that rises and falls a few meters over distances of several tens of meters.
Trafficability on the valley floor is good. During the three traverses, Cernan and Schmitt drove a map distance of 32.3 kilometers in 253.5 minutes, giving an average speed of 7.6 km/hr. At that speed Cernan had to keep his eye on the road to spot hazards but, generally, was able to see hazards in plenty of time to steer around them. The total odometer distance travelled during the three traverses was 36.0 kilometers, only 11.5 percent greater than the map distance. The most important hazards were fresh craters from about the same size as the Rover (3 meters long) up to a size where crater rims and ejecta are easily visible in the rolling terrain. Around the LM, the average spacing of fresh craters bigger than 3 meters is roughly 40 meters.
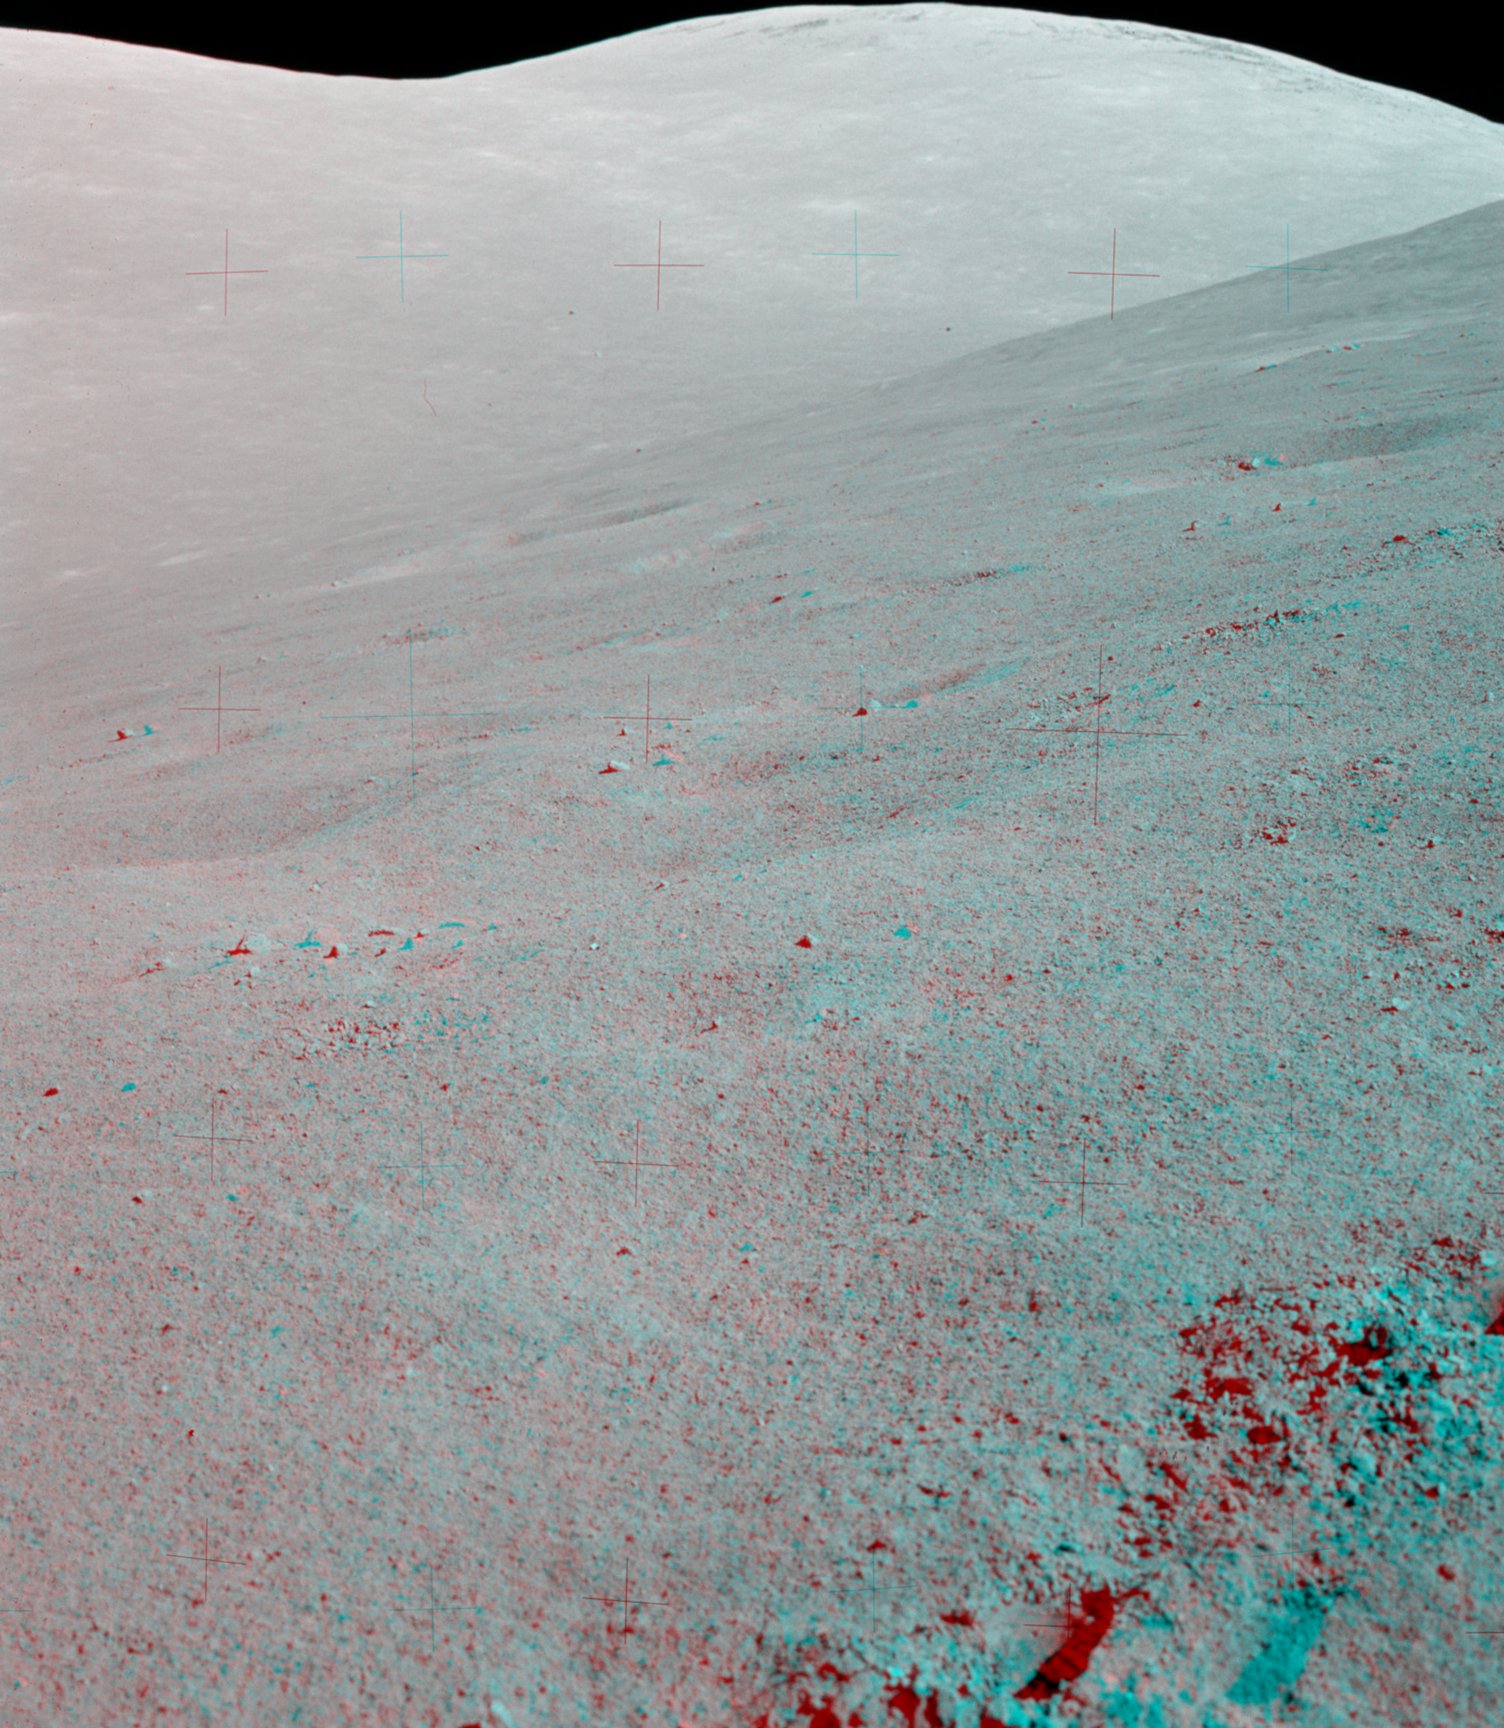
The mountains that bound the valley are composed of pre-Serentitatis material uplifted during the event. These were then draped with Serentitatis ejecta, much of it impact-melt breccias. During the second and third EVAs, the crew visited locations on the lower slopes of the North and South Masiffs and the Scultured Hills where they could examine and sample boulders that had tumbled down into reach from outcrops of Serenitiatis ejecta high on the mountains. The slopes above these locations are about 26 degrees.
Because of the slopes, impacts on the mountain flanks produces net downward motion of ejecta. Rock outcrops on the upper third of the South Massif and the upper two thirds of the North Massif indicate that the regolith on those parts of the mountains is thin. On the lower parts mountains, depth of the regolith increases toward the bottom and then decreases with distance out on the valley floor. At about the 4800 m contour at the base on the North Massif in the 1974 Lunar Topophotomap of the landing site, the slope changes for about 26 degrees to something like 16 degrees on the accumulated talus. Simplistic geometry suggests talus accumulations at the base of the mountain of up to 40 meters.
One notable feature of the mountain flanks are tracks made by boulders as they bounce, tumble, roll, and slide down from various outcrops after being dislodged by impacts or seismic activity. Figure 8-15 from the Apollo 17 Prelimiinary Science Report shows identified boulder tracks on the North Massif.
7.1 Valley Floor, LM/ALSEP/SEP
7.3 EVA-3 Traverse to North
Massif, Turning Point Rock, Station 6, and Station 7
Gene and Jack took multiple photographs at three locations on
the North Massif: Turning Point Rock, where they
maneuvered the Rover to get good photographic coverage but
didn't dismount; and Stations 6 and 7. These three sites
are marked in a CSM Pan Camera detail, along with three
boulders that serve are markers in some of the photographs.
7.3 EVA-3 Traverse to Sculptured
Hills, Station 8

North Massif Outcrops. Jack continued taken 500-mm photos out his window, taking this portrait of outcrops
on the upper part of the mountain. Assembly by Eric Jones. Click on the image for a full-resolution version.
Gene's 500mm shots taken outside the LM
Photographic Sites on the North Massif

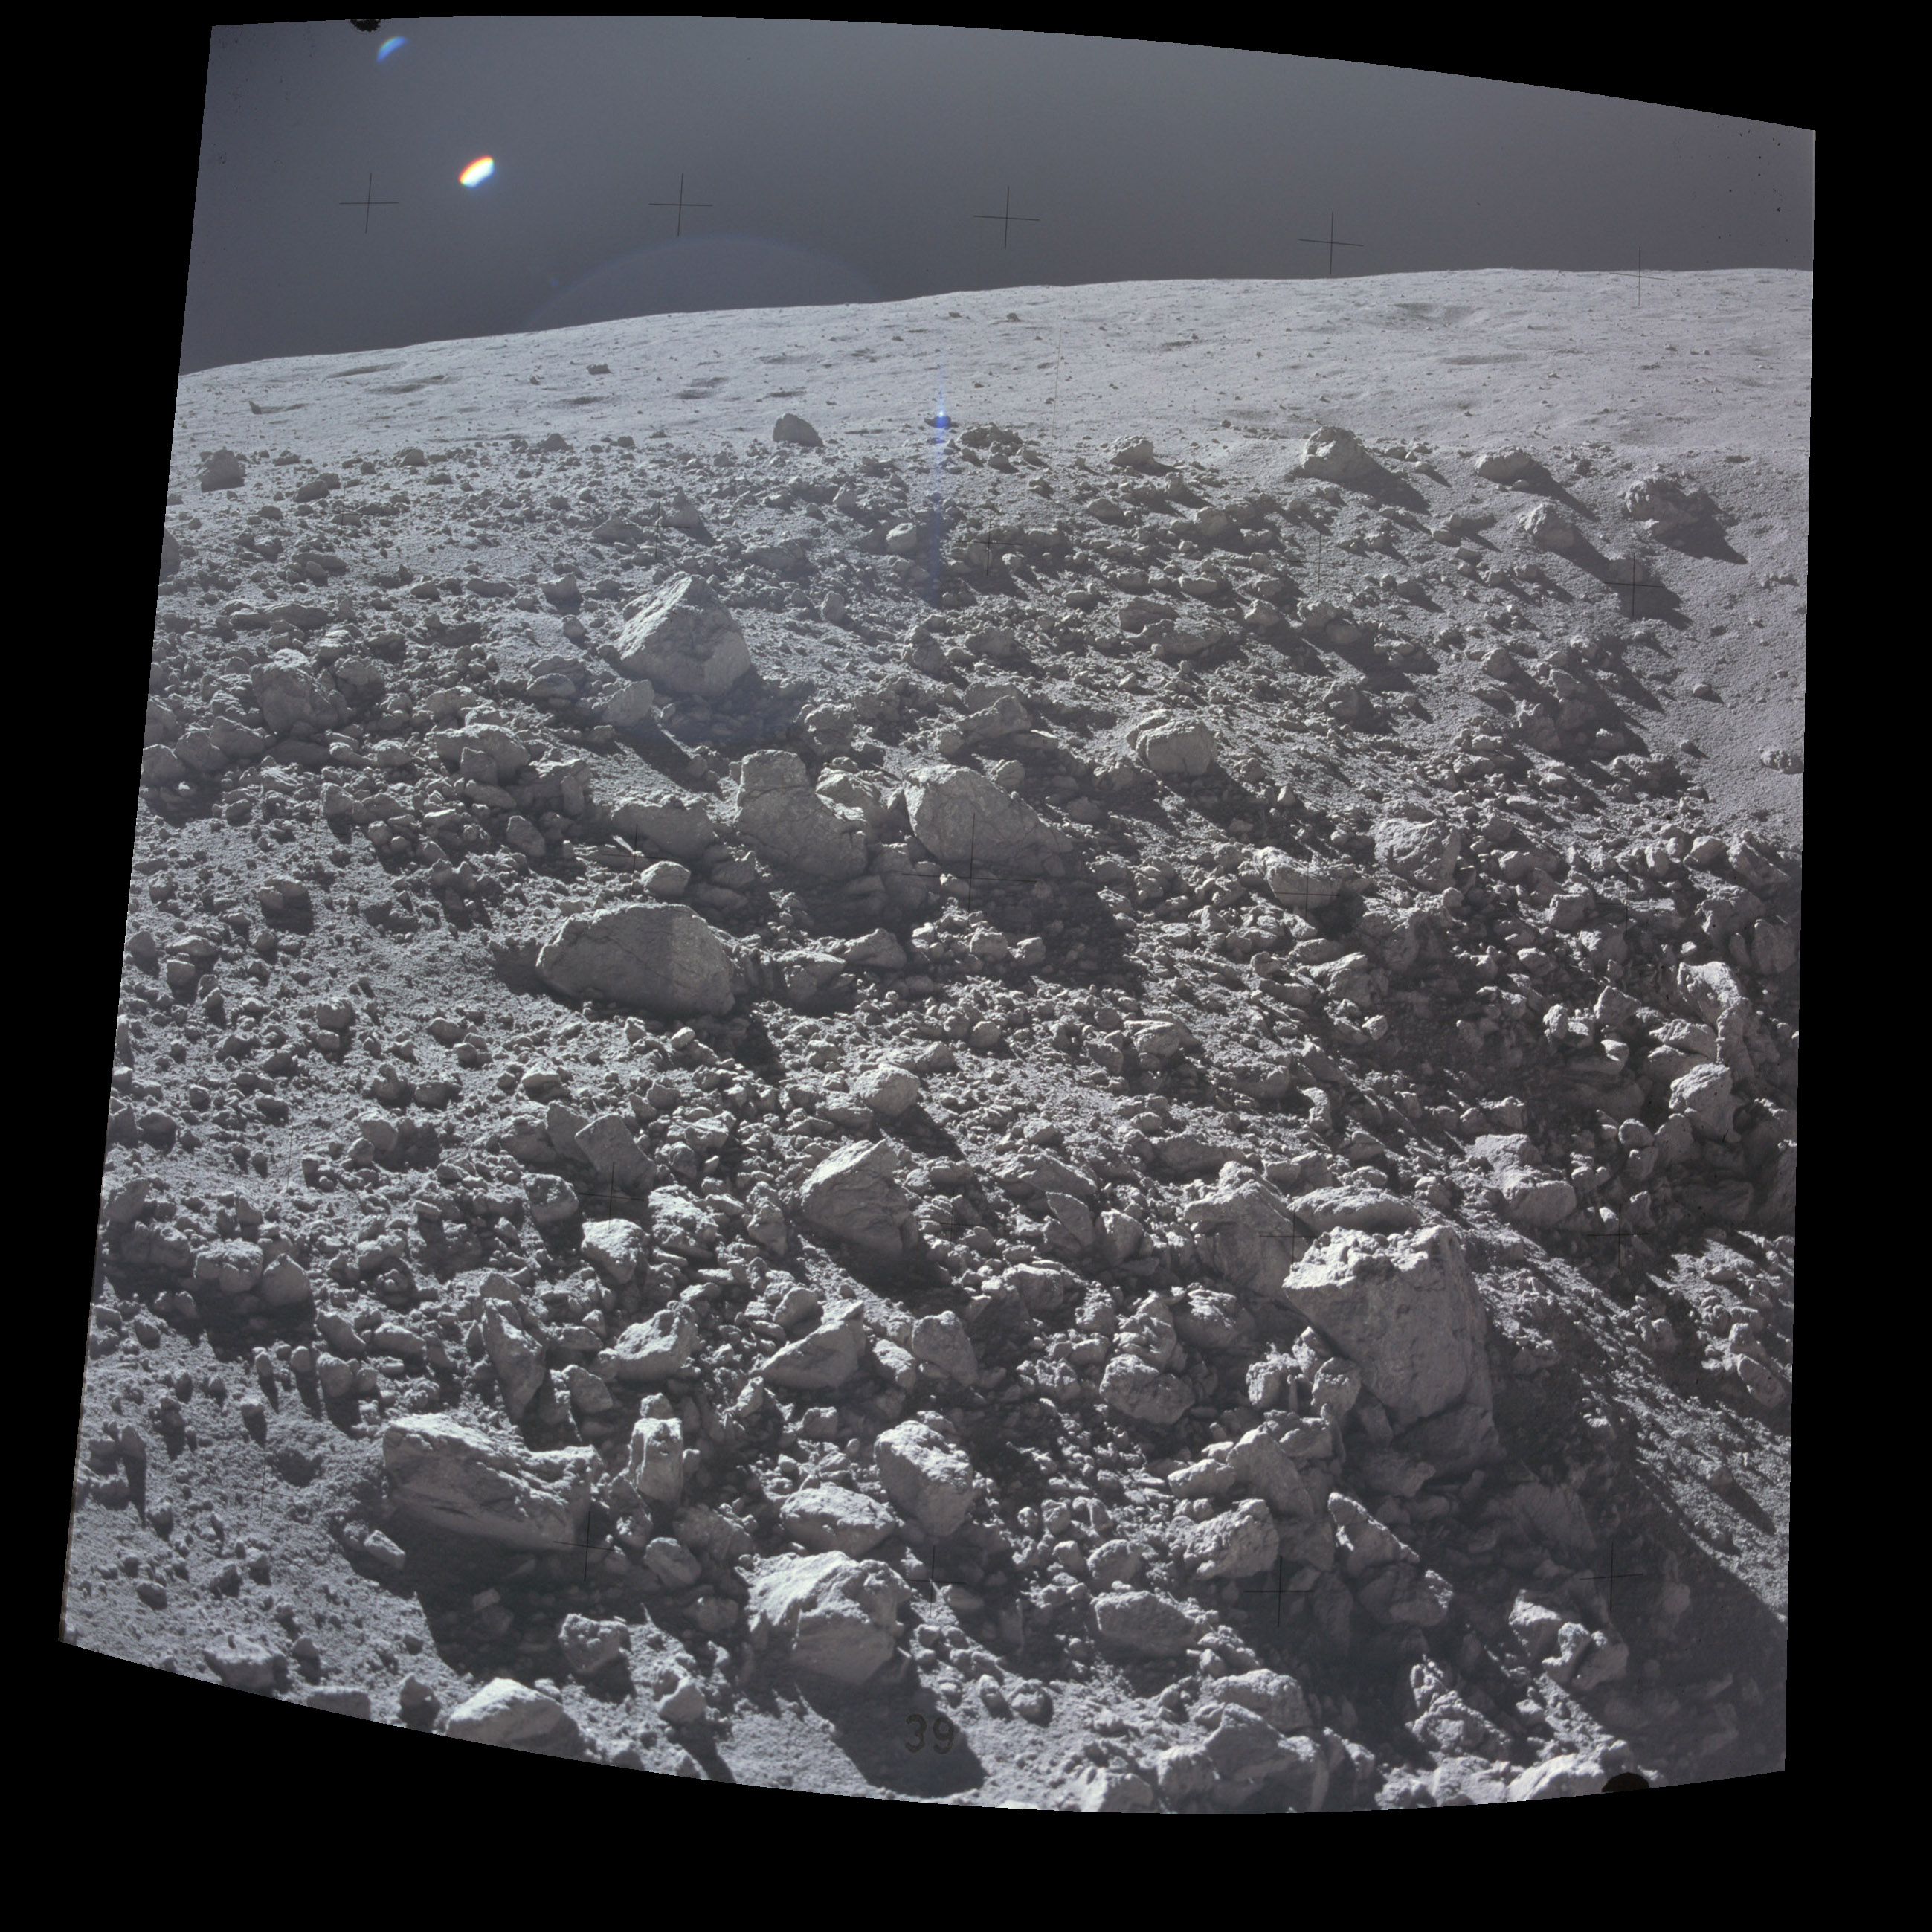
For this second EVA-3 geology stop on North Massif, Cernan and Schmitt parked near a a 3-m high boulder, which proved to have been at its current location (its emplacment age) for 28 million years. The maximum dimension of the boulder is about 5 meters. From page 6-27 in the Preliminary Science Report), Although there is no visible boulder track, there is little doubt that the Station 7 boulder was derived from the North Massif because of its similarity in composition ahd structure to other material collected from the Massif. Because it is considerably smaller than the Station 6 boulder, it probably bounded downslope - as did those of comparable size on the South Massif (fig 6-6) - rather than rolled." As shown in the superposition of the 1974 contour map on the pan camera frame for Stations 6 and 7, Station 7 is at an elevation of about 4720 m, which is 40 to 60 meters above the valley floor at this east-west location. The local slope is about 9 degrees.
Return to Table of Contents
| Mission Elapsed Time |
Location |
Assembly Link |
Frames |
Anaglyphs |
Additional Material |
Notes |
| 104:02:26 |
LM Cabin |
CDR Window Pan (5
Mb) |
AS11-37- 5449-53 plus59 (color) |
Taken by Armstrong out
his window about 1.5 hours after the landing. A
crater doublet is visible below his window, with the
younger of the two craters on the right. Assembly by Syd Buxton. |
||
| 104:02:26 | LM Cabin |
LMP Window Pan |
AS11-37- 5454-58 (color) |
Taken by Aldrin out his
window. Assembly by Syd Buxton. |
||
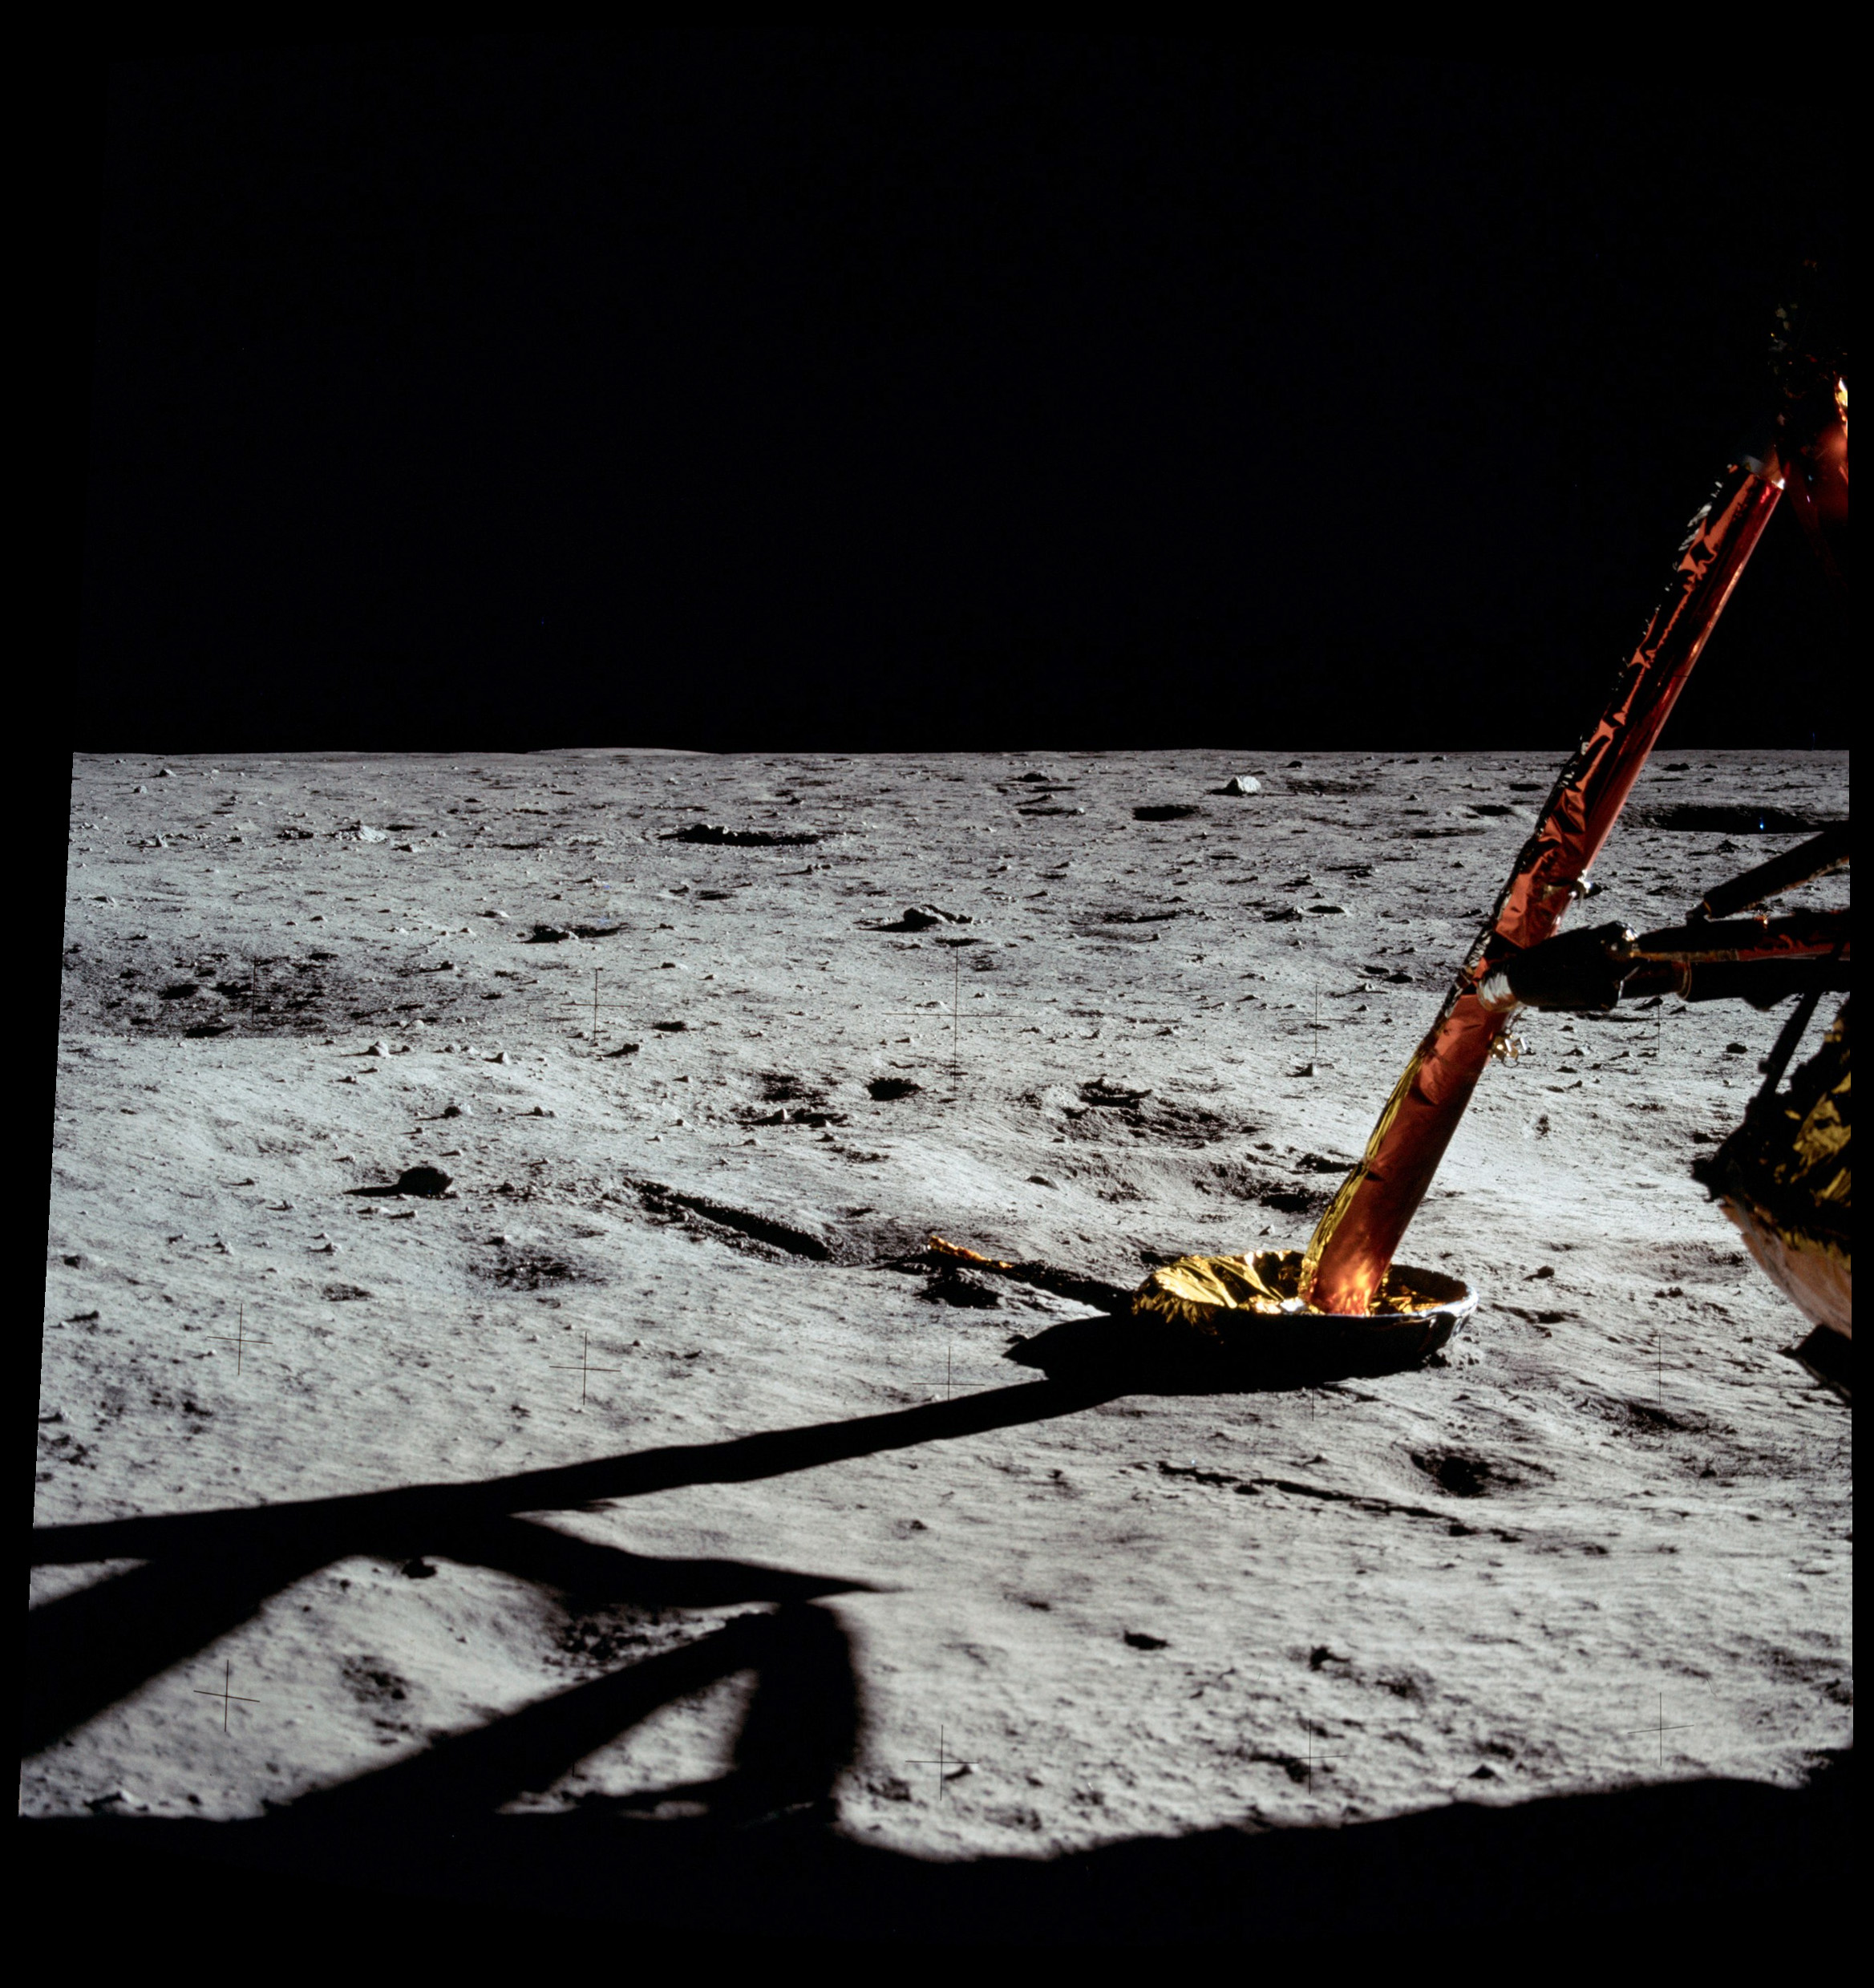
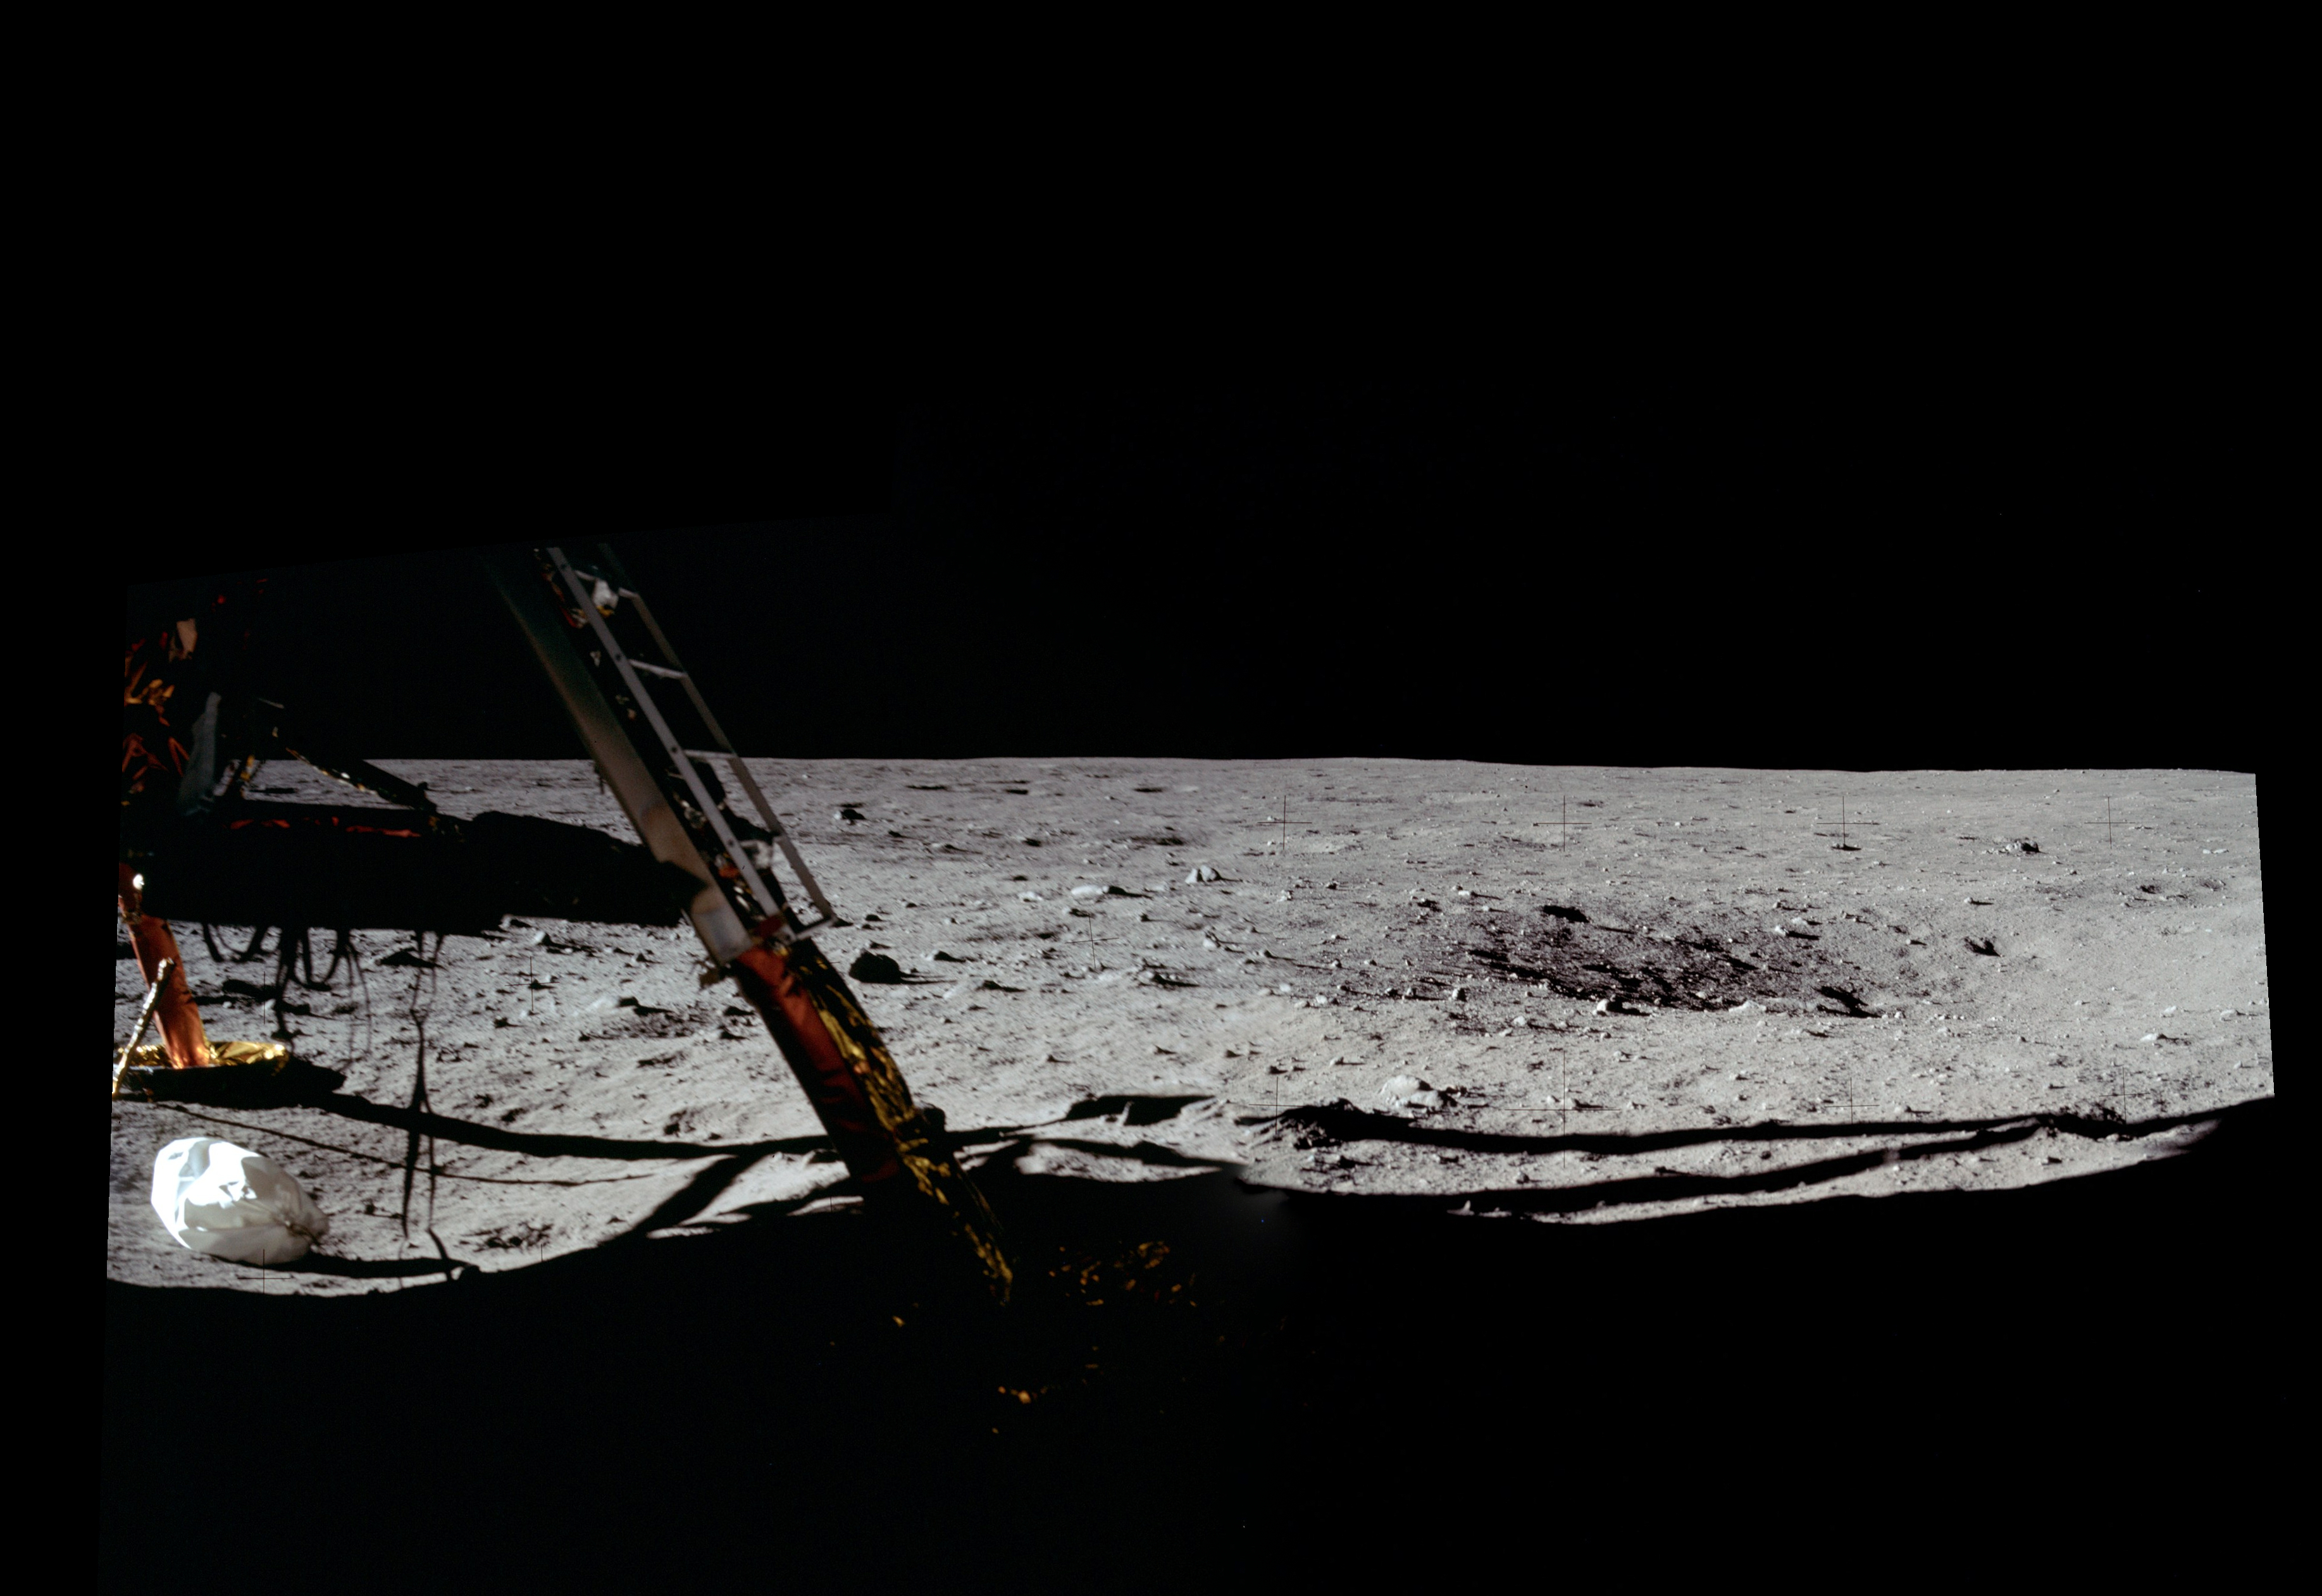
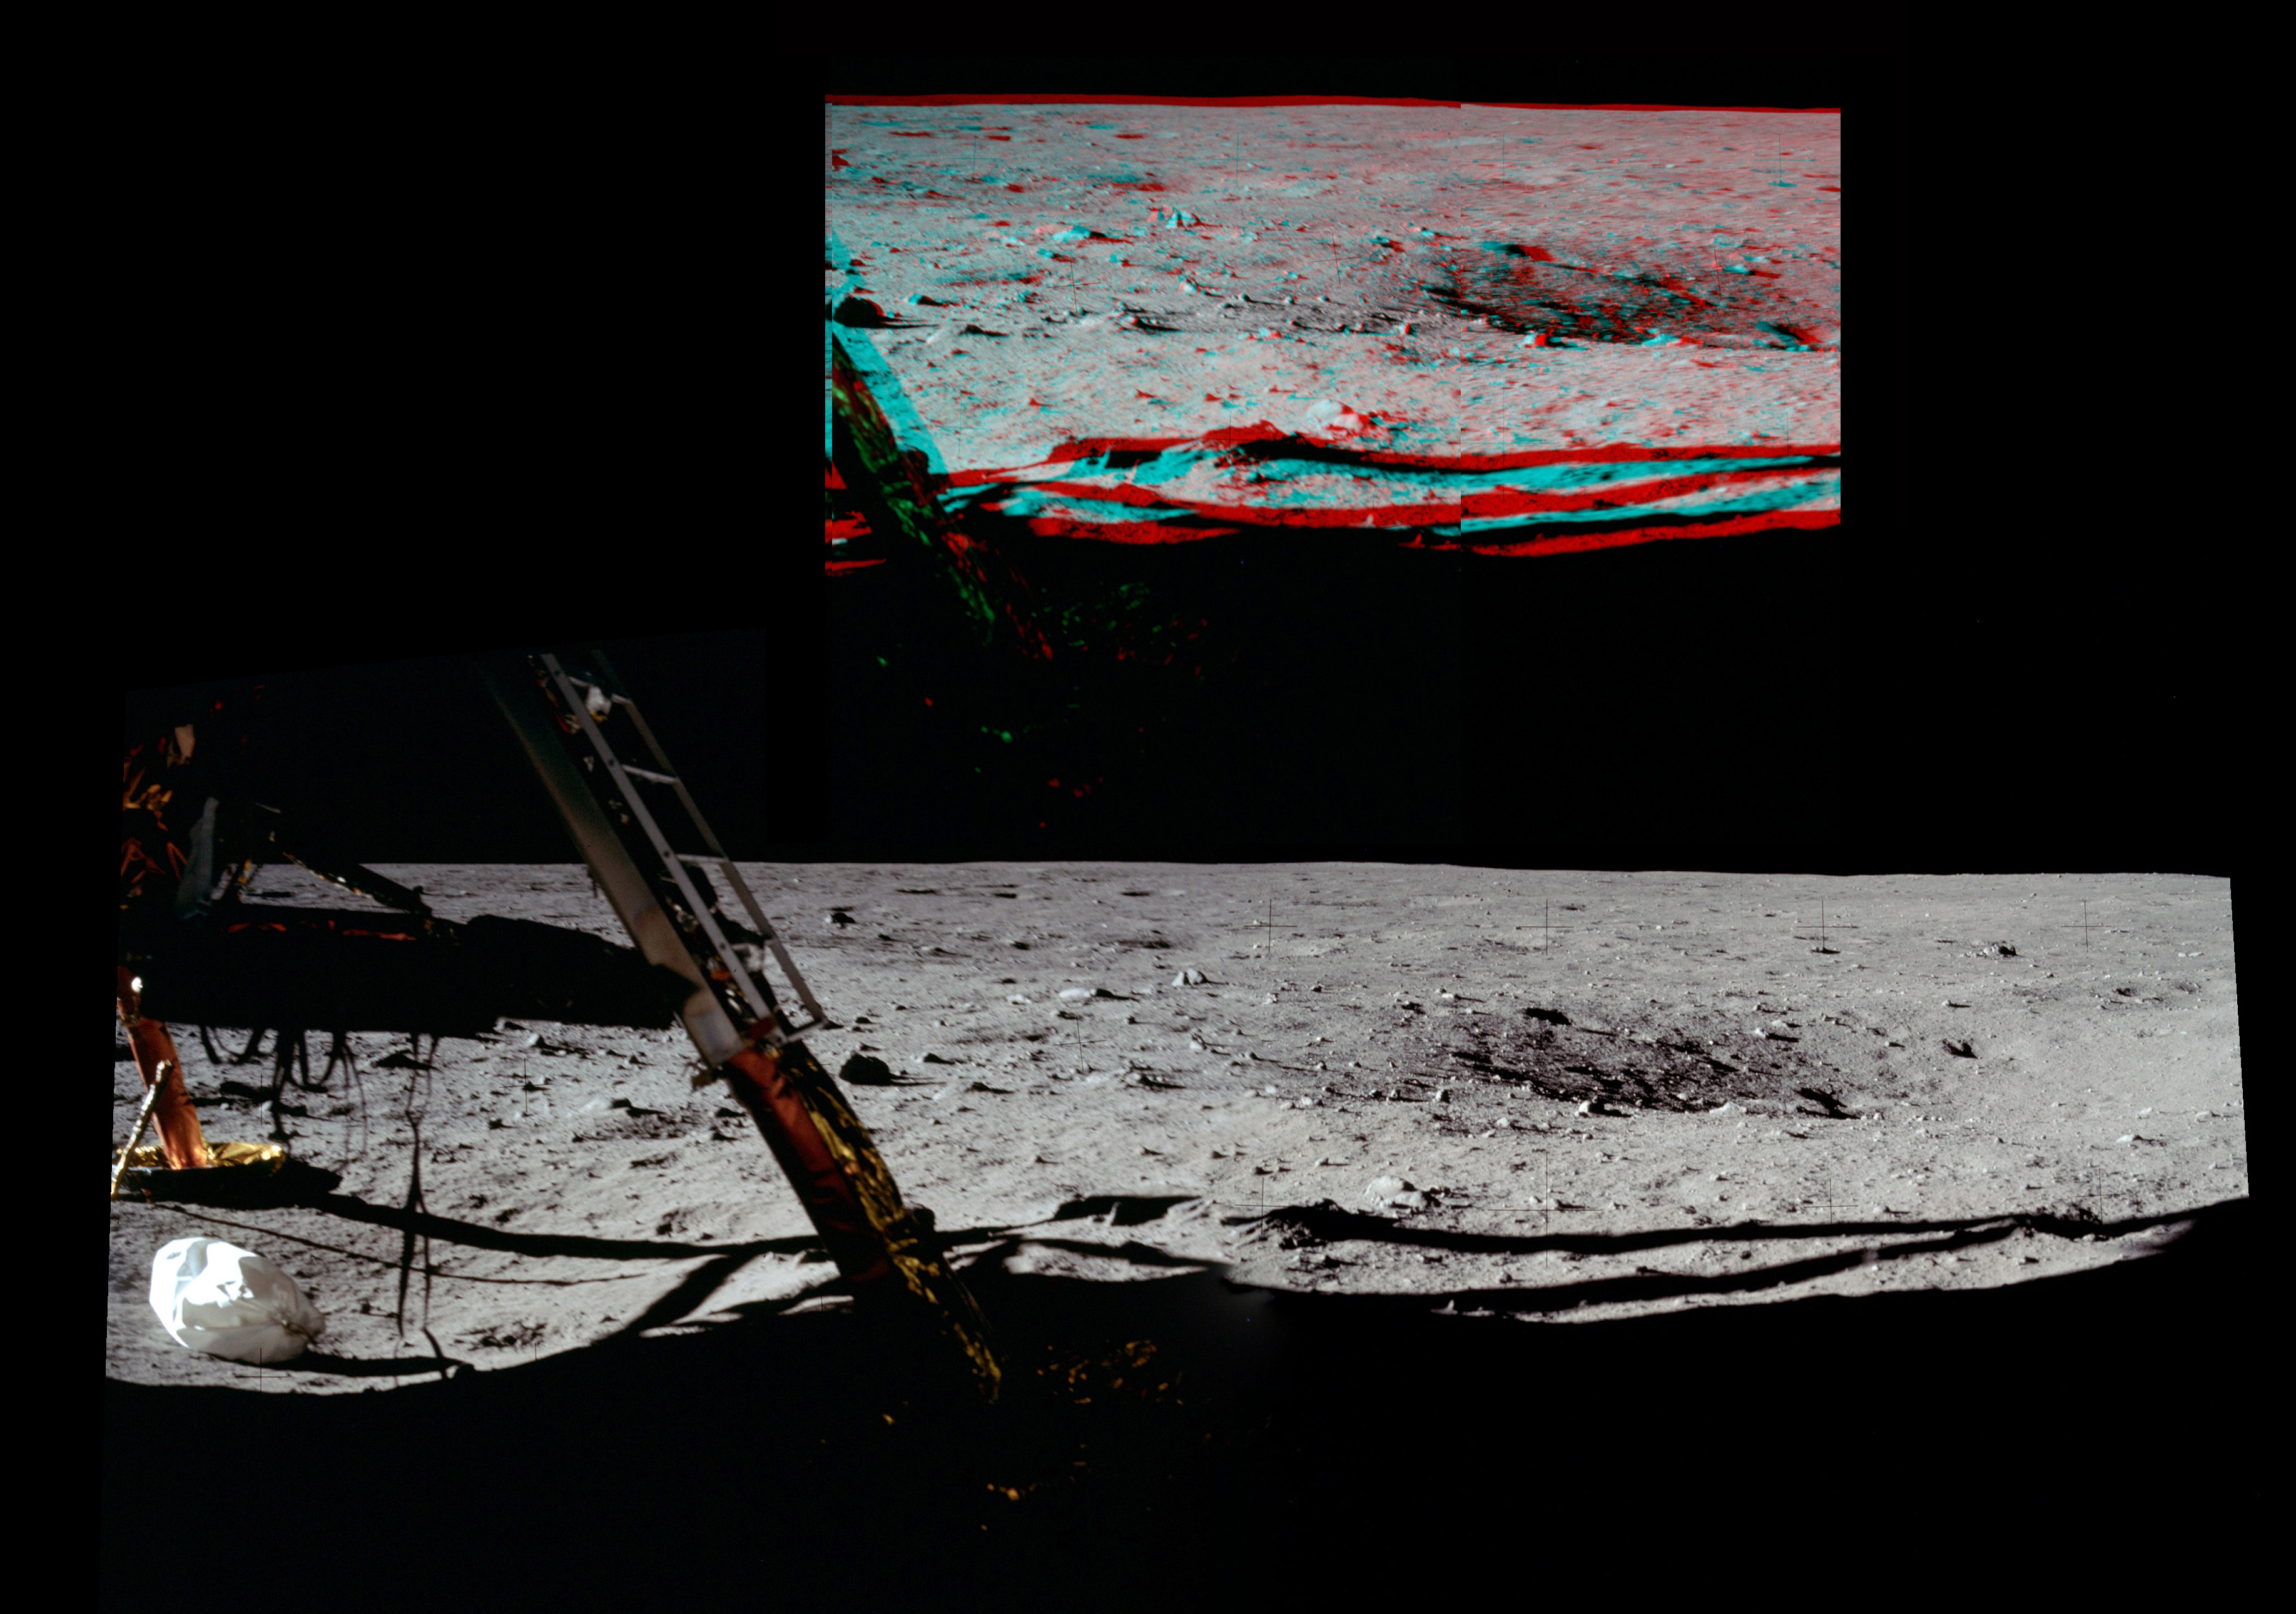
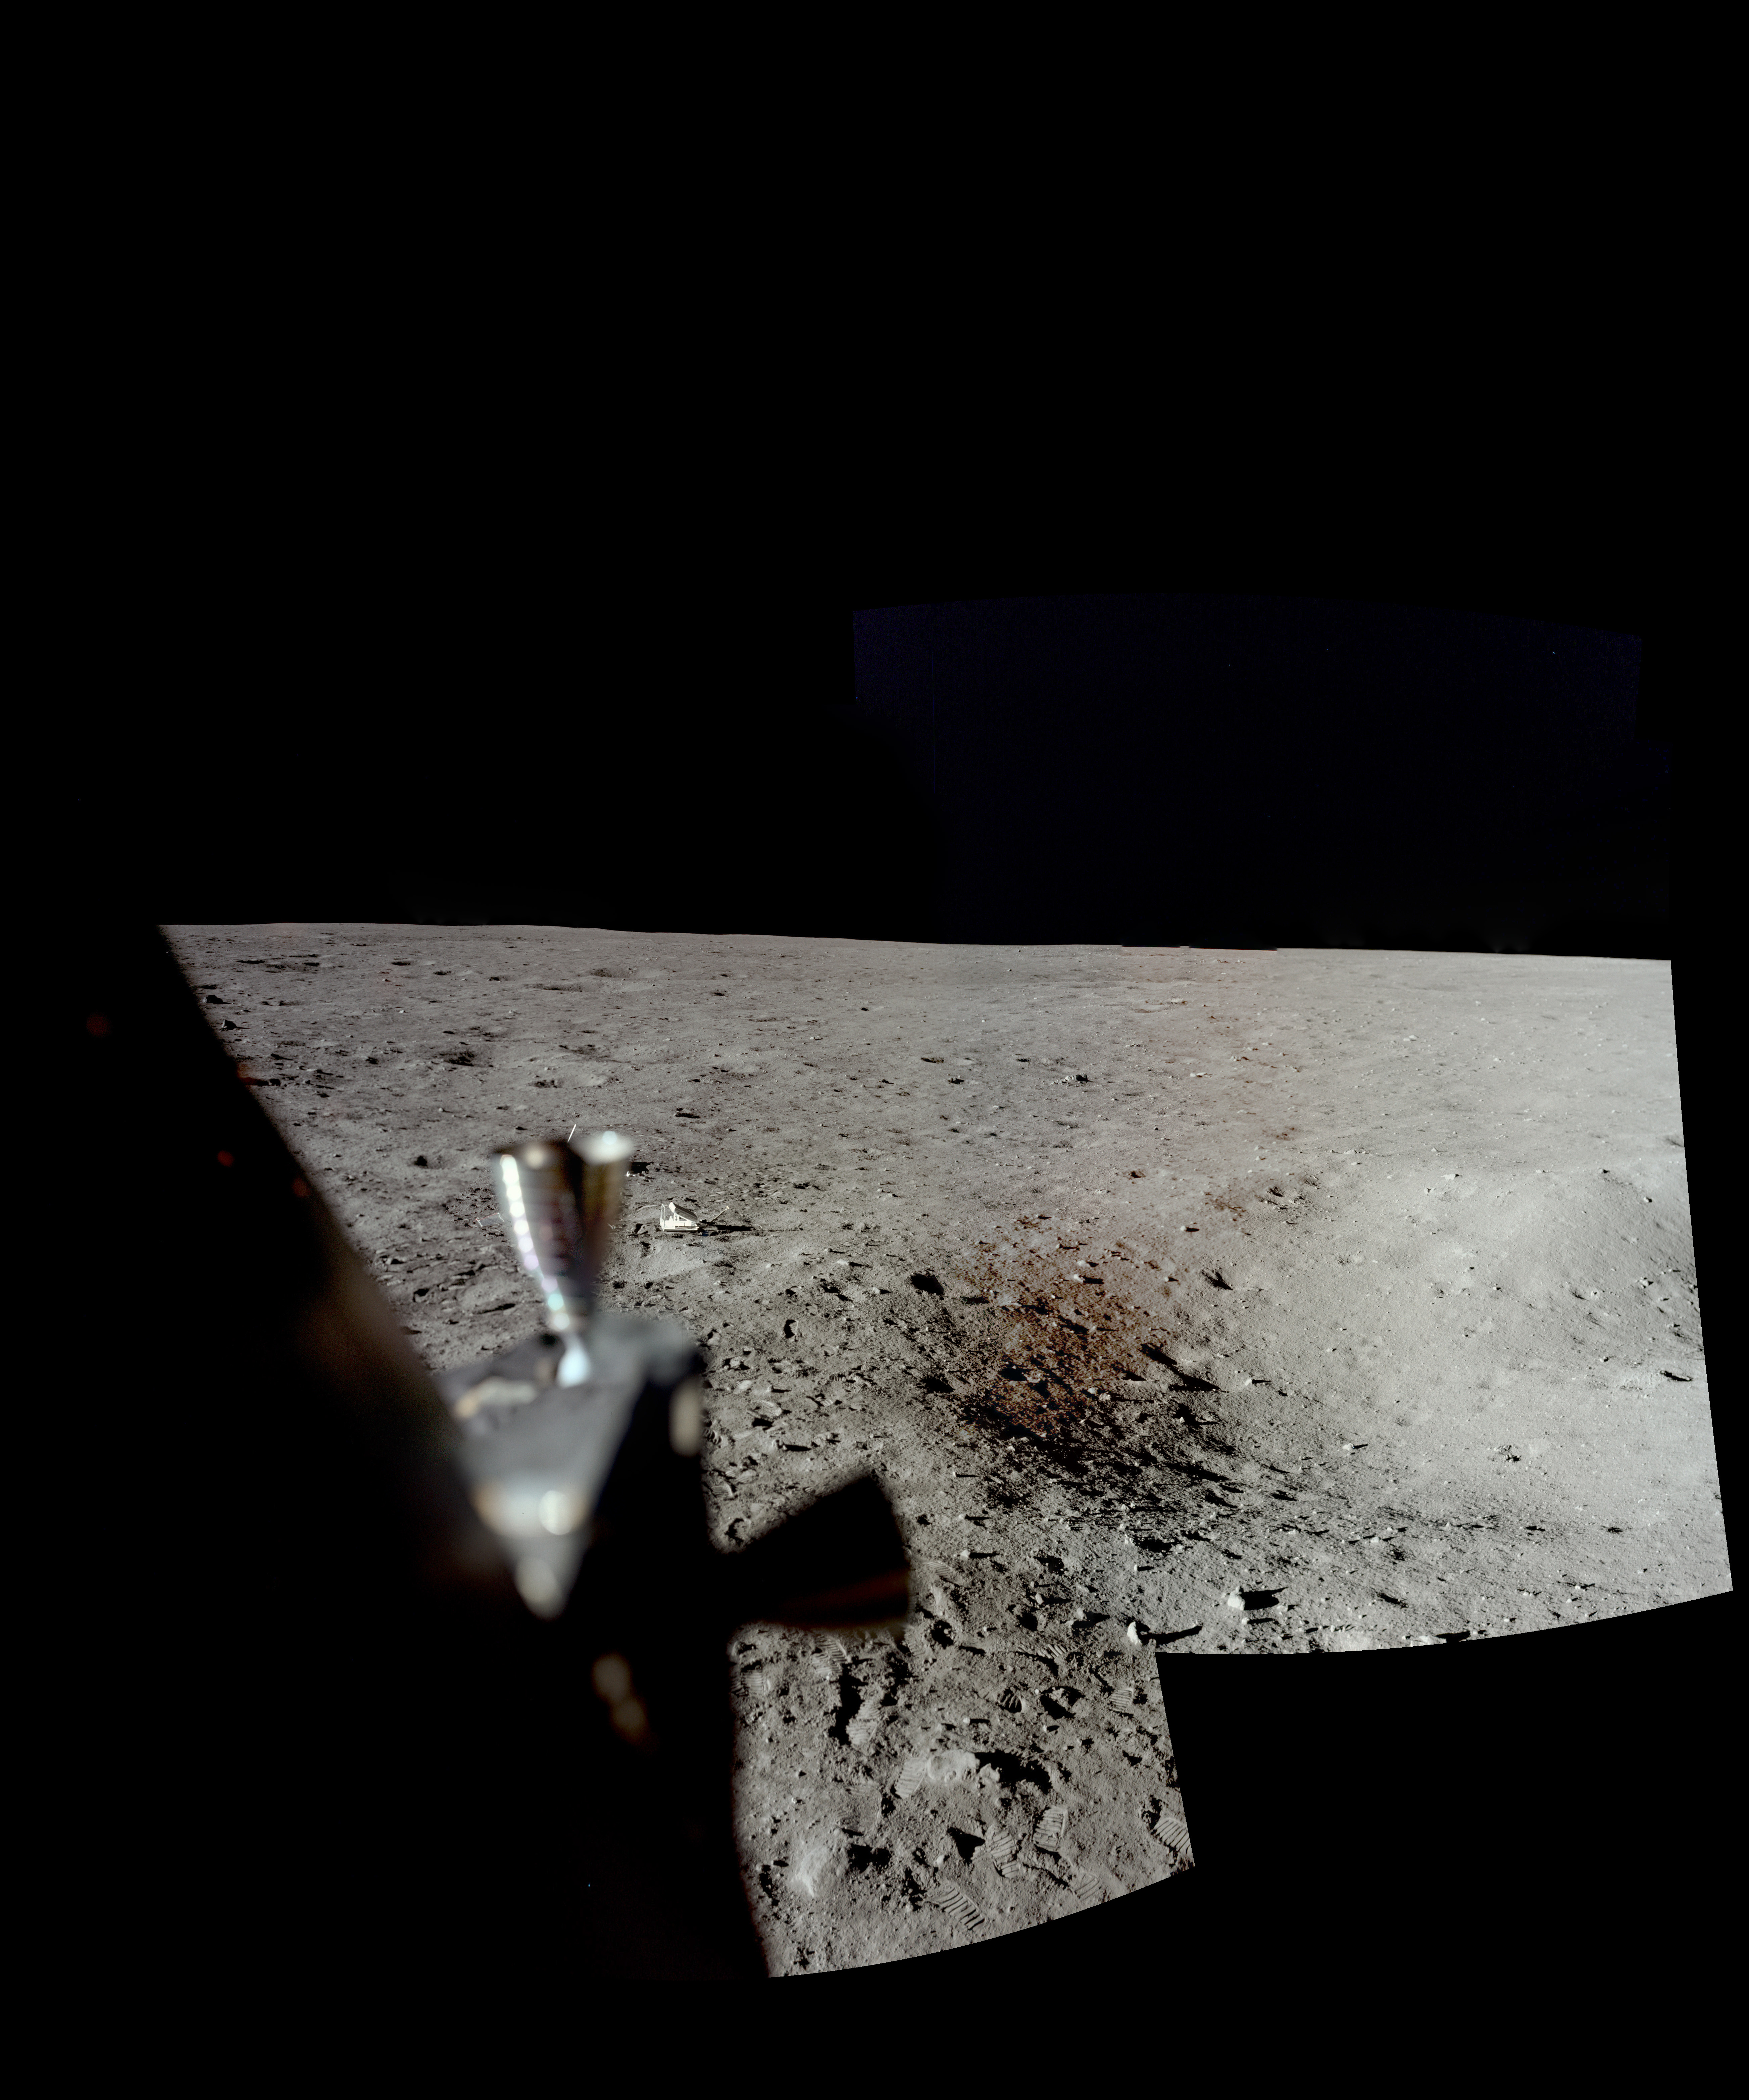
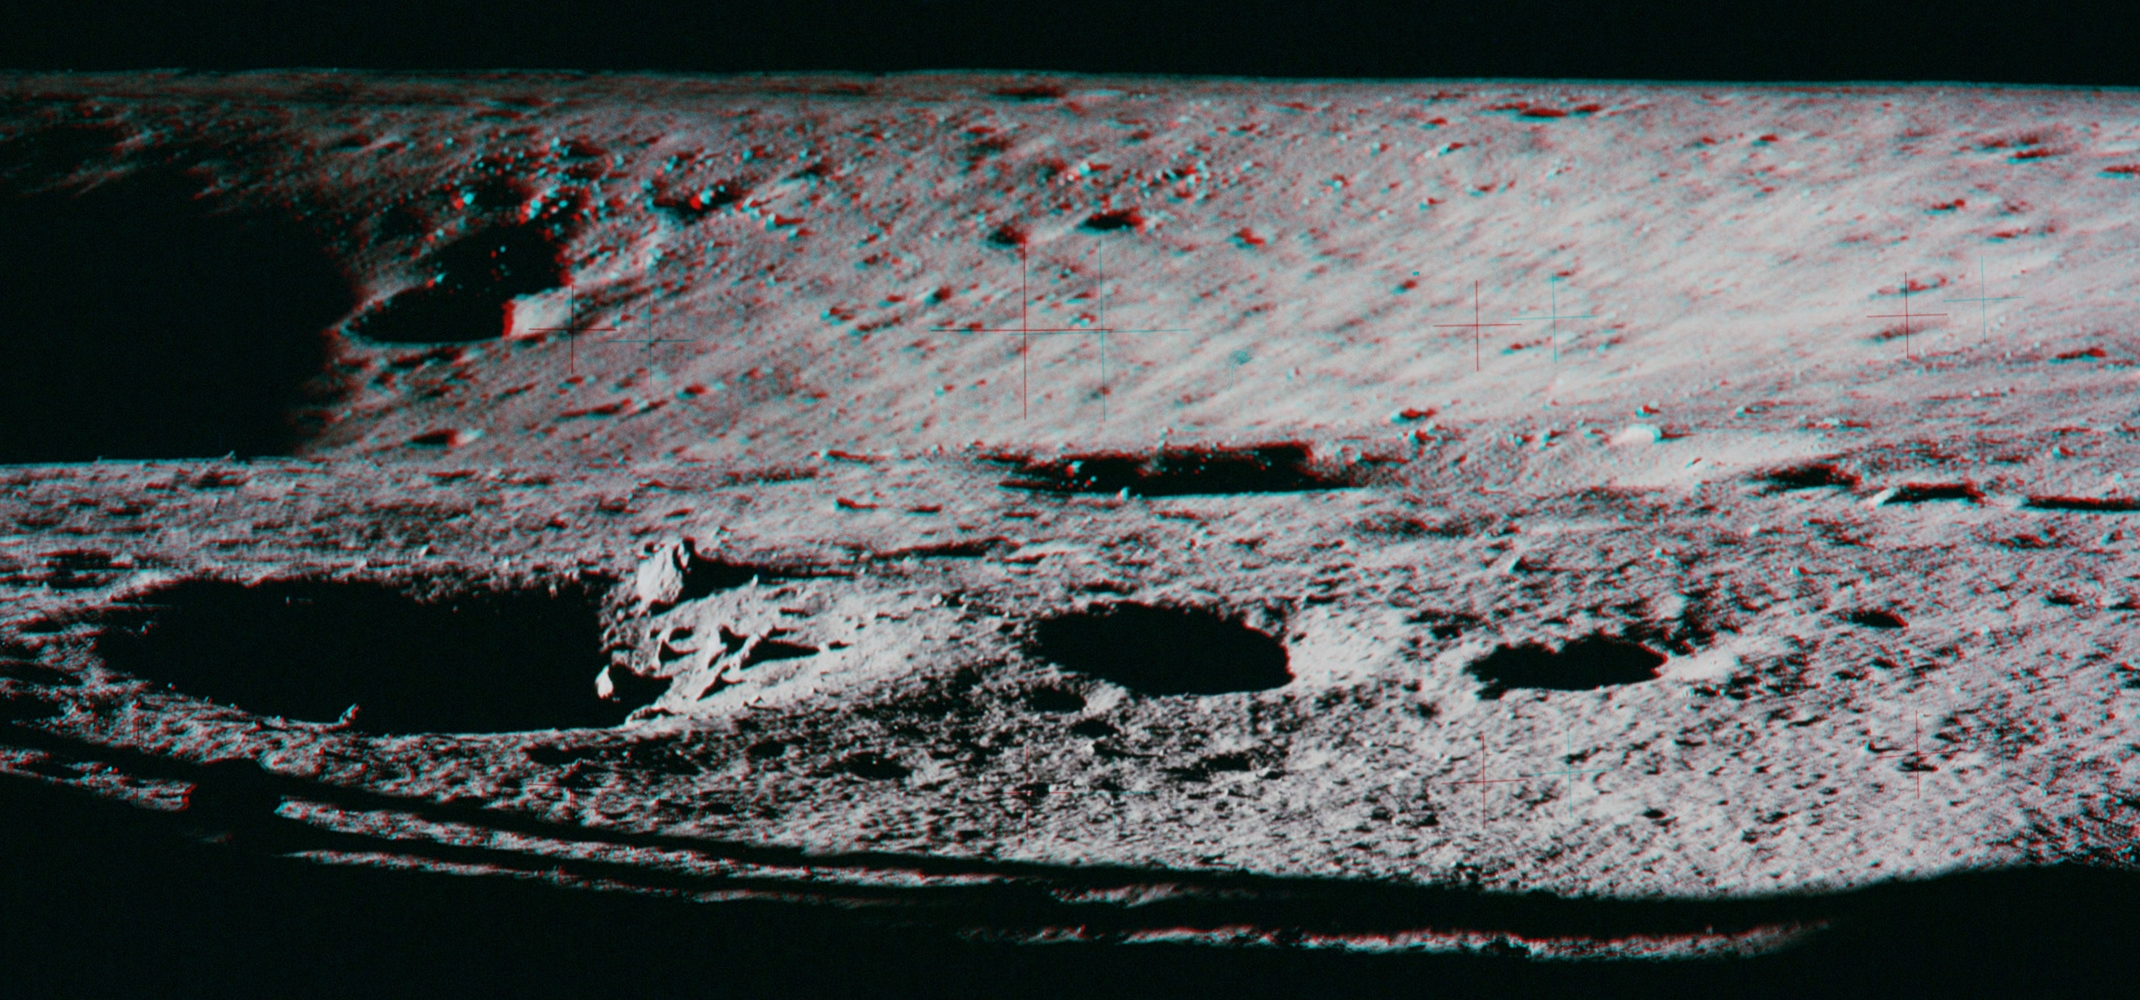
| 109:32:26 |
Foot of the Ladder |
Ladder Pan Assembly by Dave Byrne. |
AS11-40- 5850-58 (color) |
Anaglyphs with
context (5Mb) |
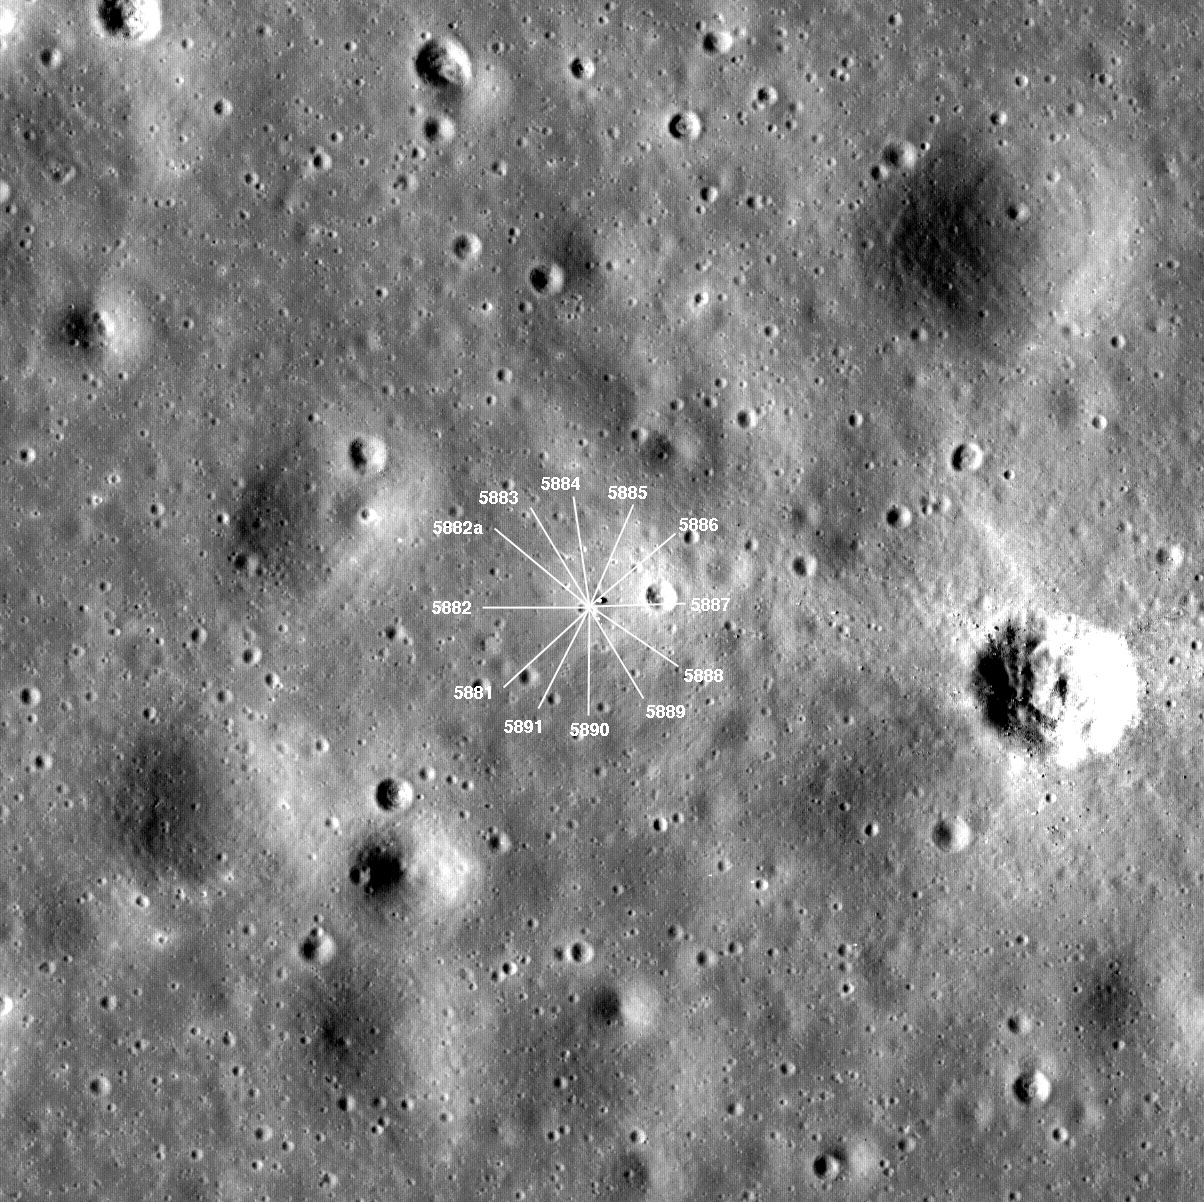
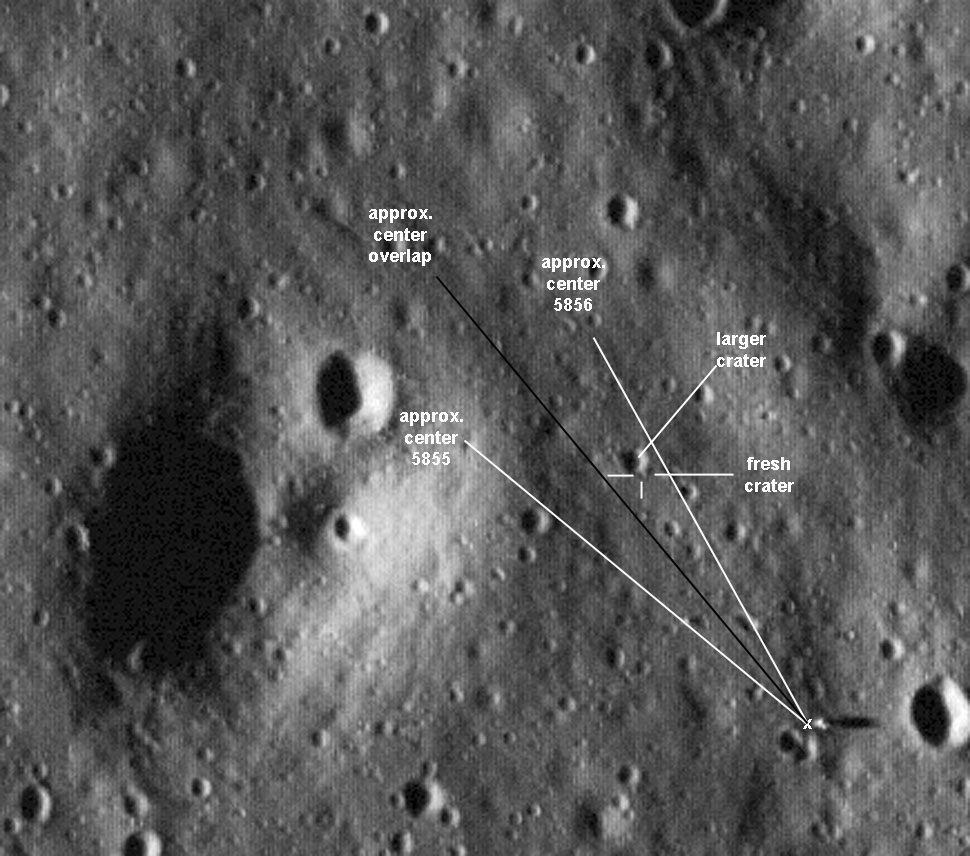
LRO map Remapped images: 5850, 5851, 5852, 5853, 5854, 5855, 5856, 5857, 5858 Indiv. anaglyphs: 5850-51 5852-53 5853-54 5855-56 5856-57 5857-58 Side-by-side l-r (parallel) stereo pairs: 5850-51 5852-53 5853-54 5855-56 5856-57 5857-58 |
Taken by Armstrong from
near the foot of the ladder. See Fig. 3-15 from the Apollo
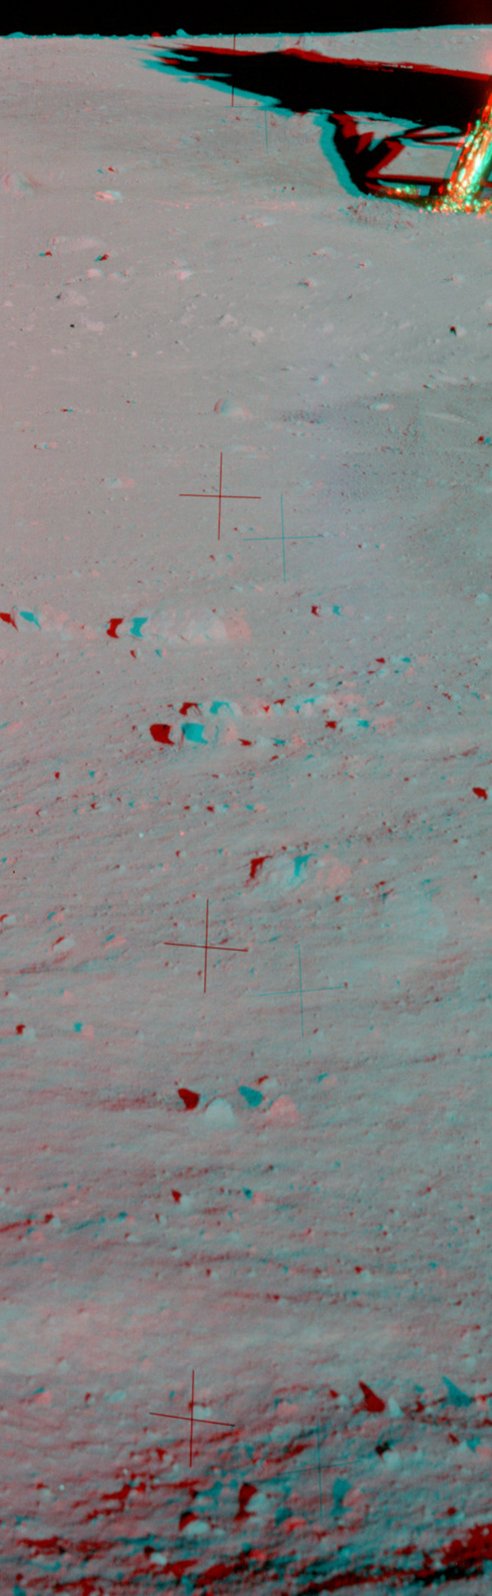
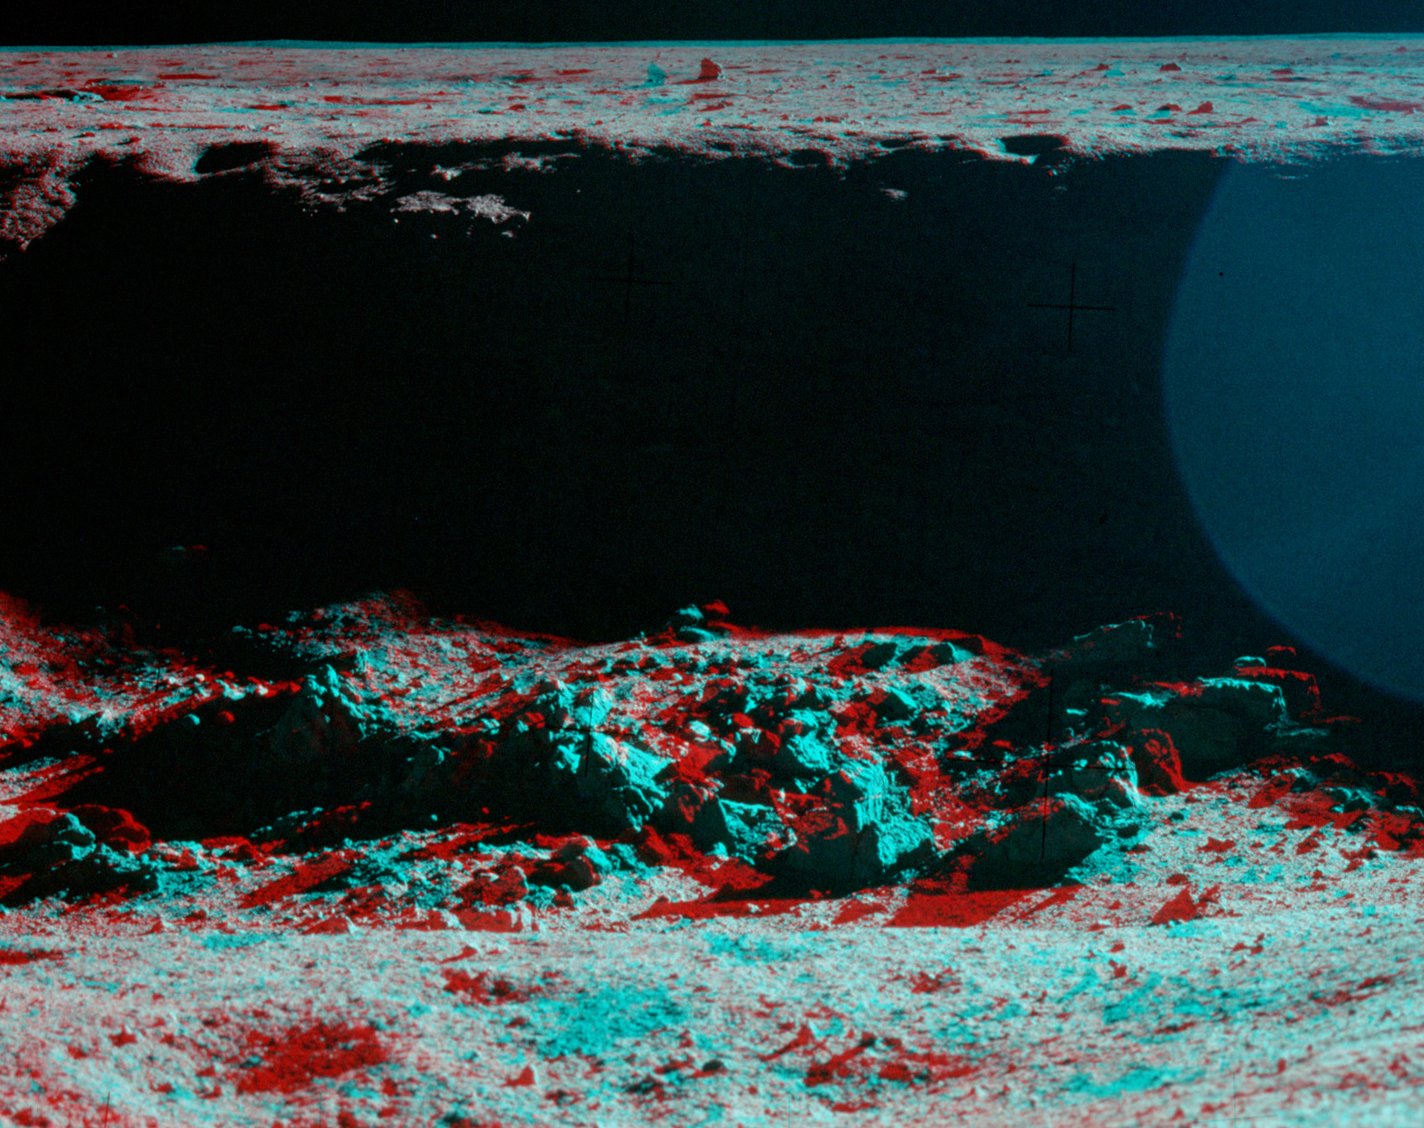
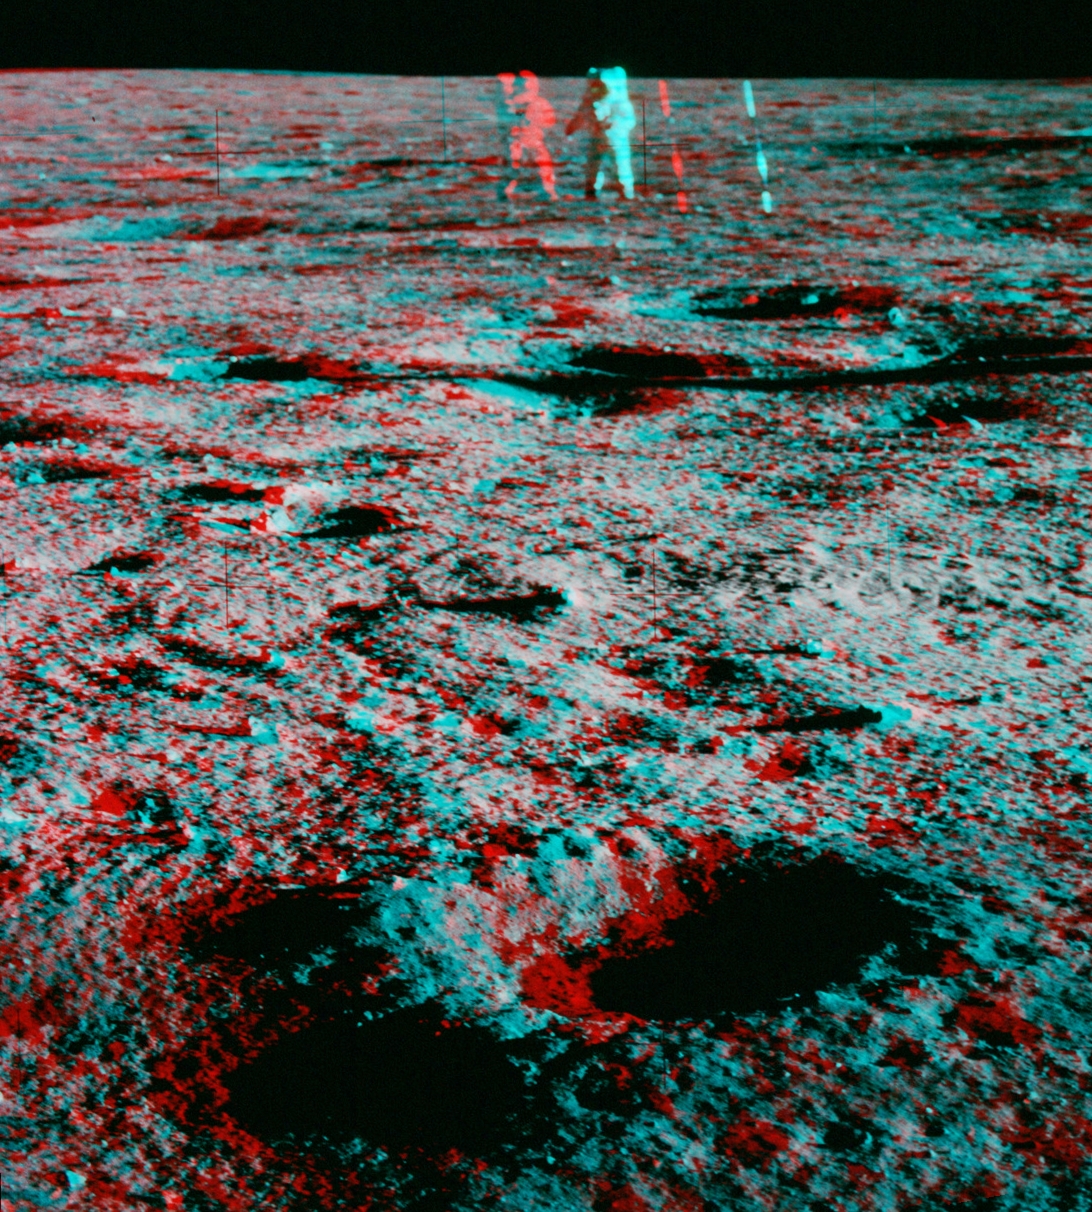
11 Preliminary Science Report The fresh crater on the right edge of the 5855-56 anaglyph is at the center of 5856; and can also be seen beyond the TV in AS11-37-5512, a photo Aldrin took out his window after the EVA. In 5512, note that the larger boulders visible in the anaglyph seem to be associated an older, larger crater beyond the small, fresh crater. In the 5855-56 anaglyph, the larger crater is hidden by its own rim. The fresh crater is marked on the map made from the 8 August 2009 LROC image of the site. It is about 70 meters from the LM. Done to here |
| 109:32:26 | Near the ladder |
Ladder Mini-Pan (4Mb) | AS11-40- 5859-61 (color) |
Anaglyphs with
context (2Mb) |
Indiv. anaglyphs: 5859-60 5859-61 5860-61 |
Neil stepped a short way
from the ladder and took three frames looking past the
ladder toward the south |
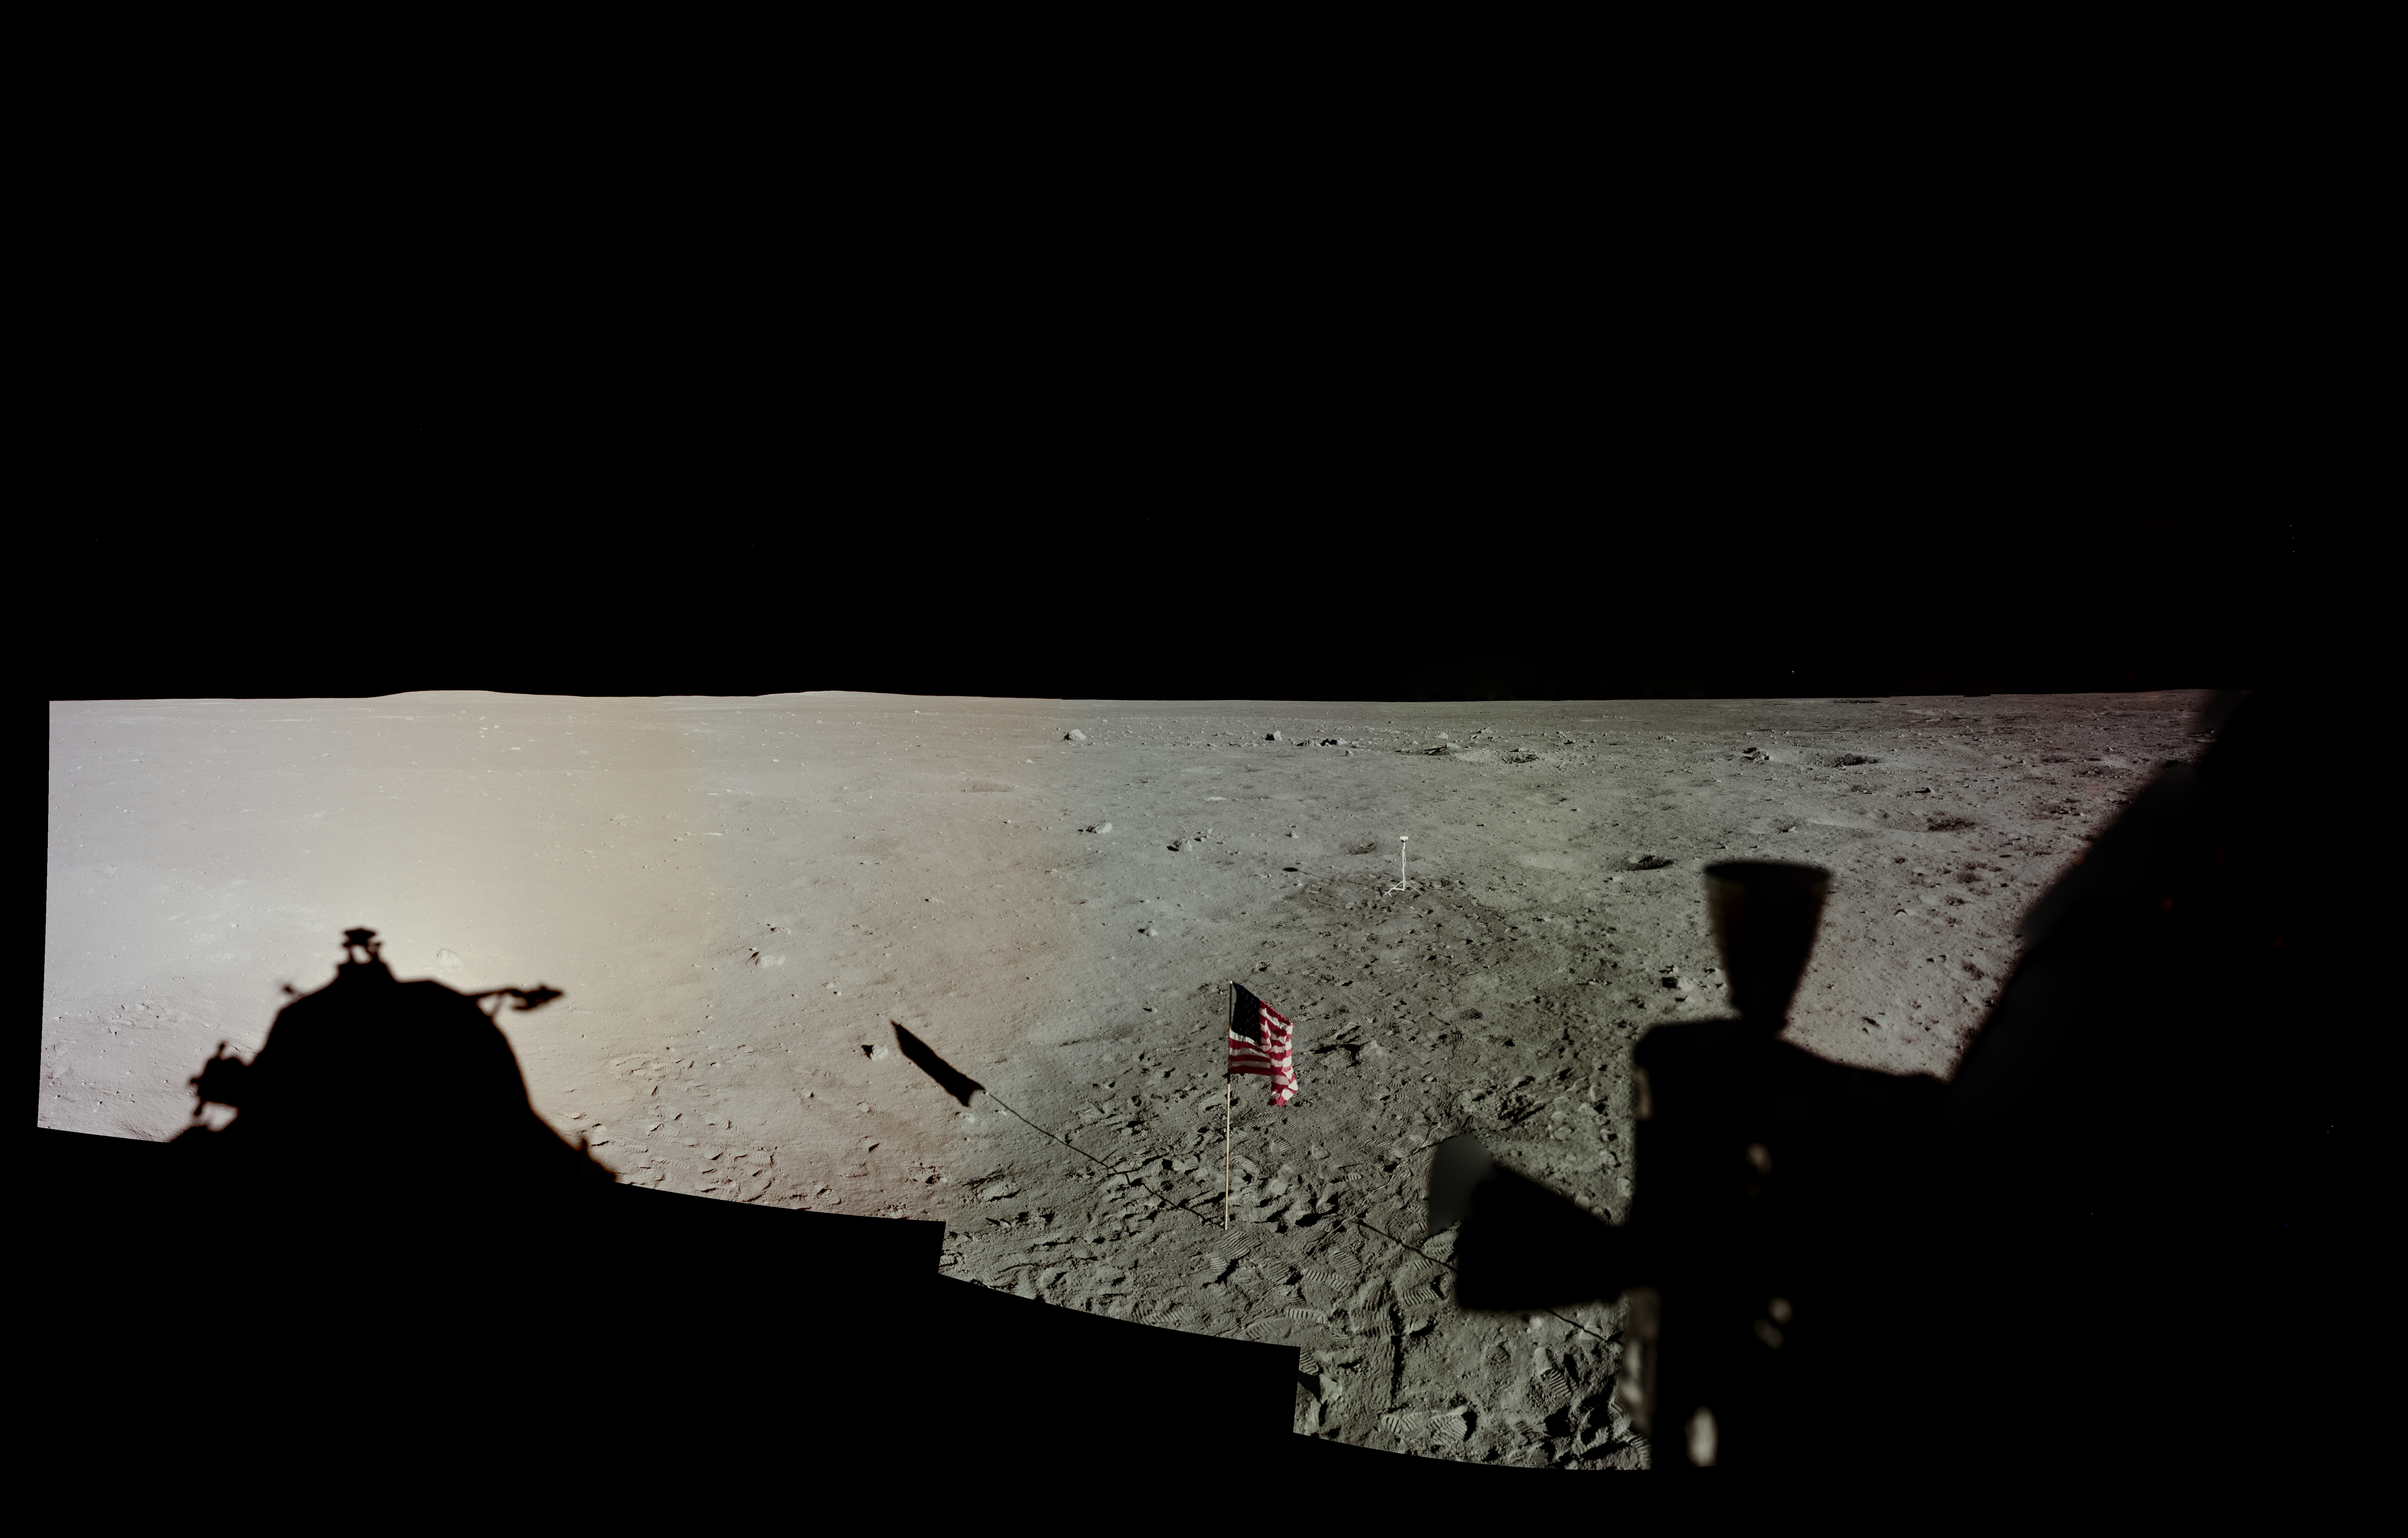
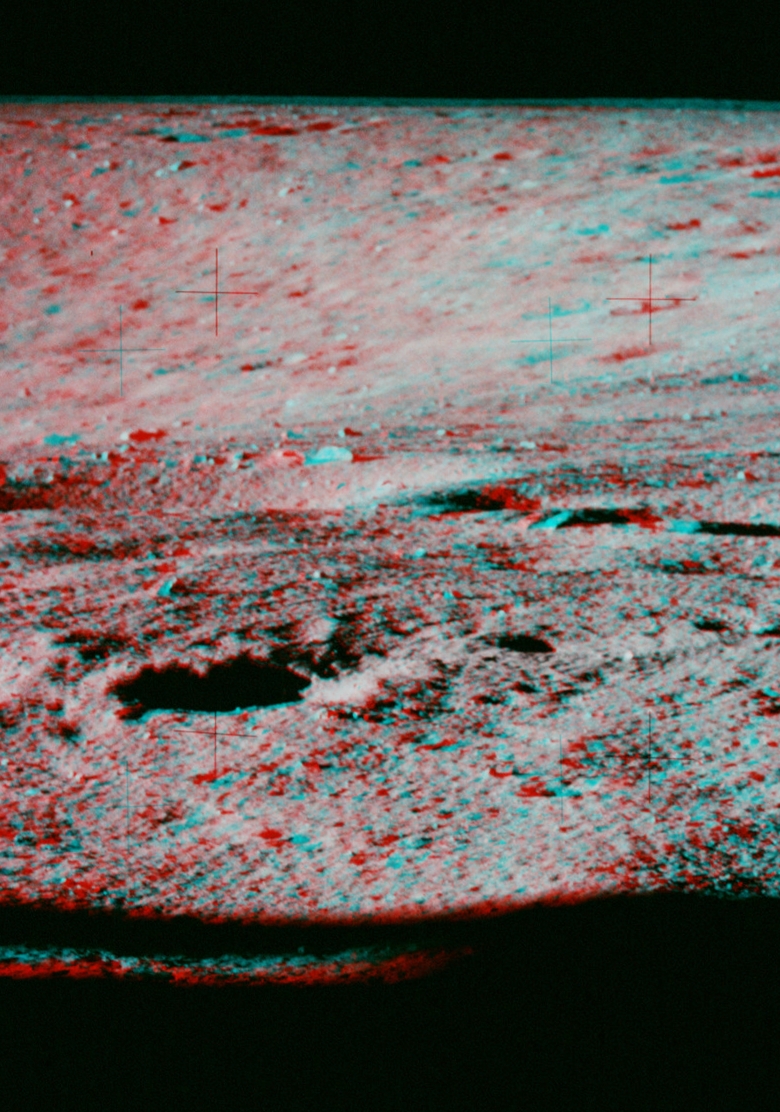
| 110:31:47 |
About 7 meters west of
the ladder |
Plus-Z (west) Pan
(7Mb) |
AS11-40- 5881-91 (color) |
Anaglyphs with
context (9Mb) |
LRO Map Indiv. anaglyphs: 5882a-83 5883-84 5884-85 5885-86 5888-89 5889-90 5890-91 |
Taken by Aldrin about 7
meters west and a bit south of the ladder. See Fig. 3-15 from the Apollo
11 Preliminary Science Report. Contains the
only good Hasselblad image of Armstrong taken during the
EVA. The 5883-84 anaglyph shows the small, fresh
crater seen in the 5855-56 anaglyph above. |
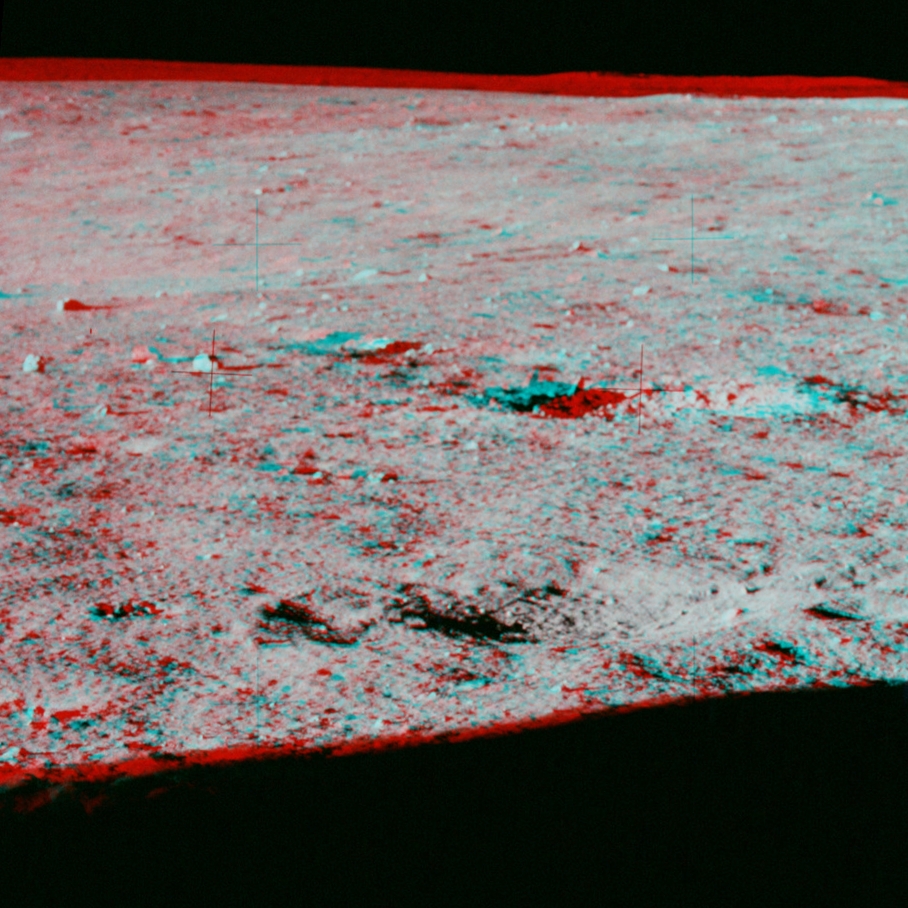
| 110:43:33 | About 10 meters north of
the Plus-Y (north) footpad Assembly by Yuri Krasilnikov |
Plus-Y (north) Pan
(7Mb) |
AS11-40- 5905-16 |
Anaglyphs with
context (11Mb) |
LRO Map Indiv. anaglyphs: 5907-08 5908-09 5909-10 5910-11 5913-14 5914-15 |
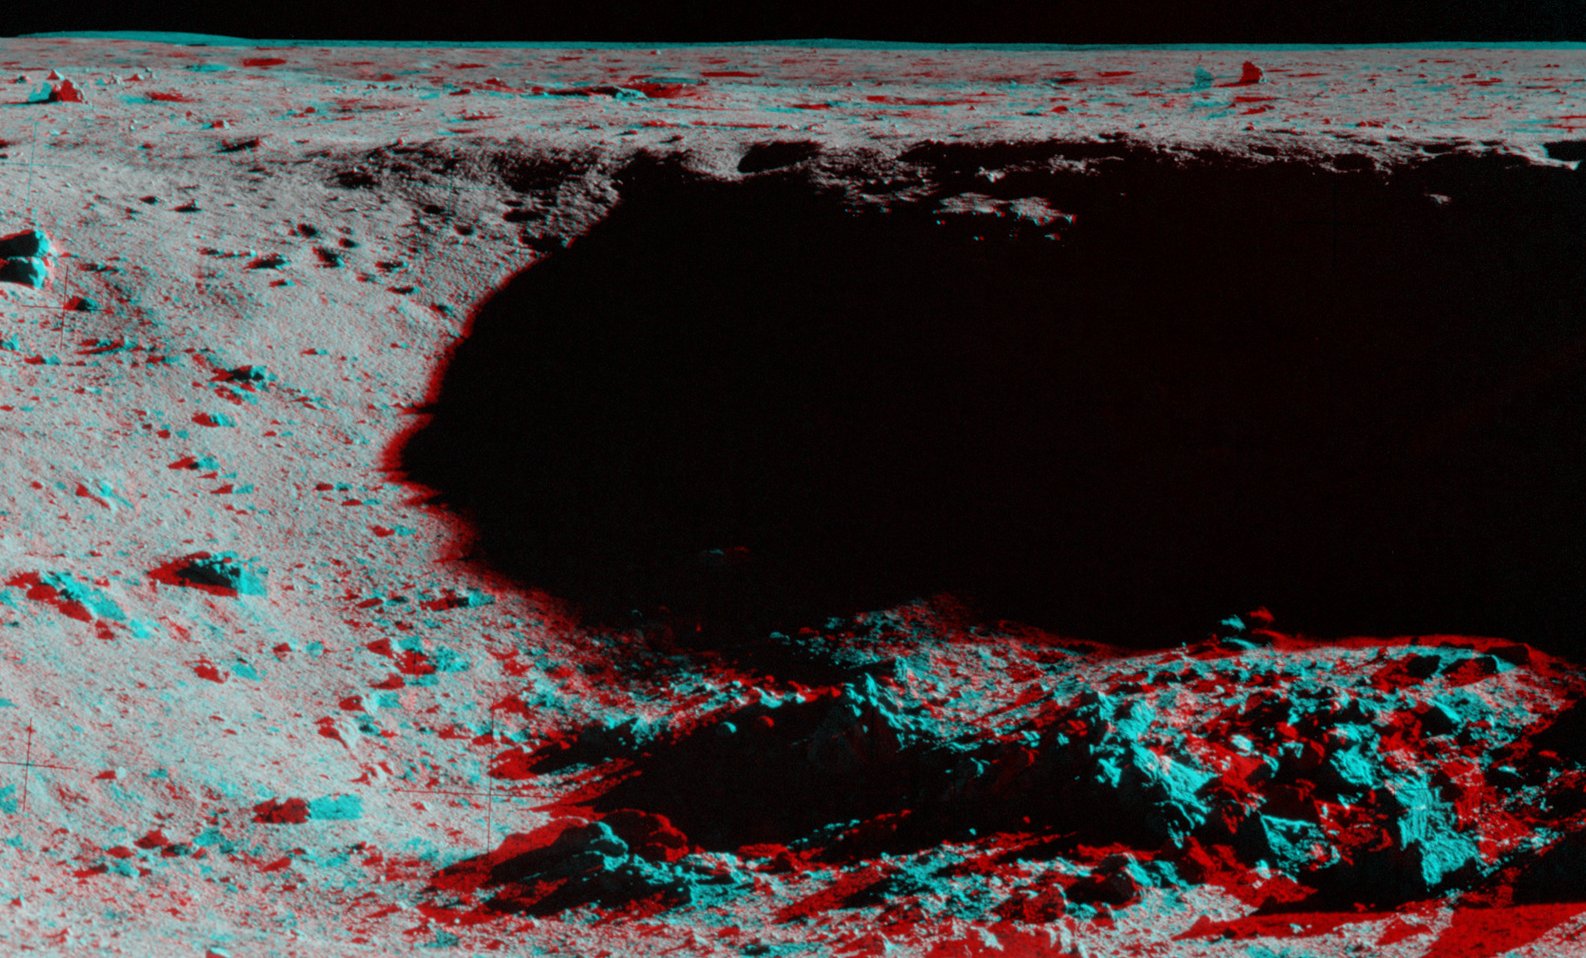
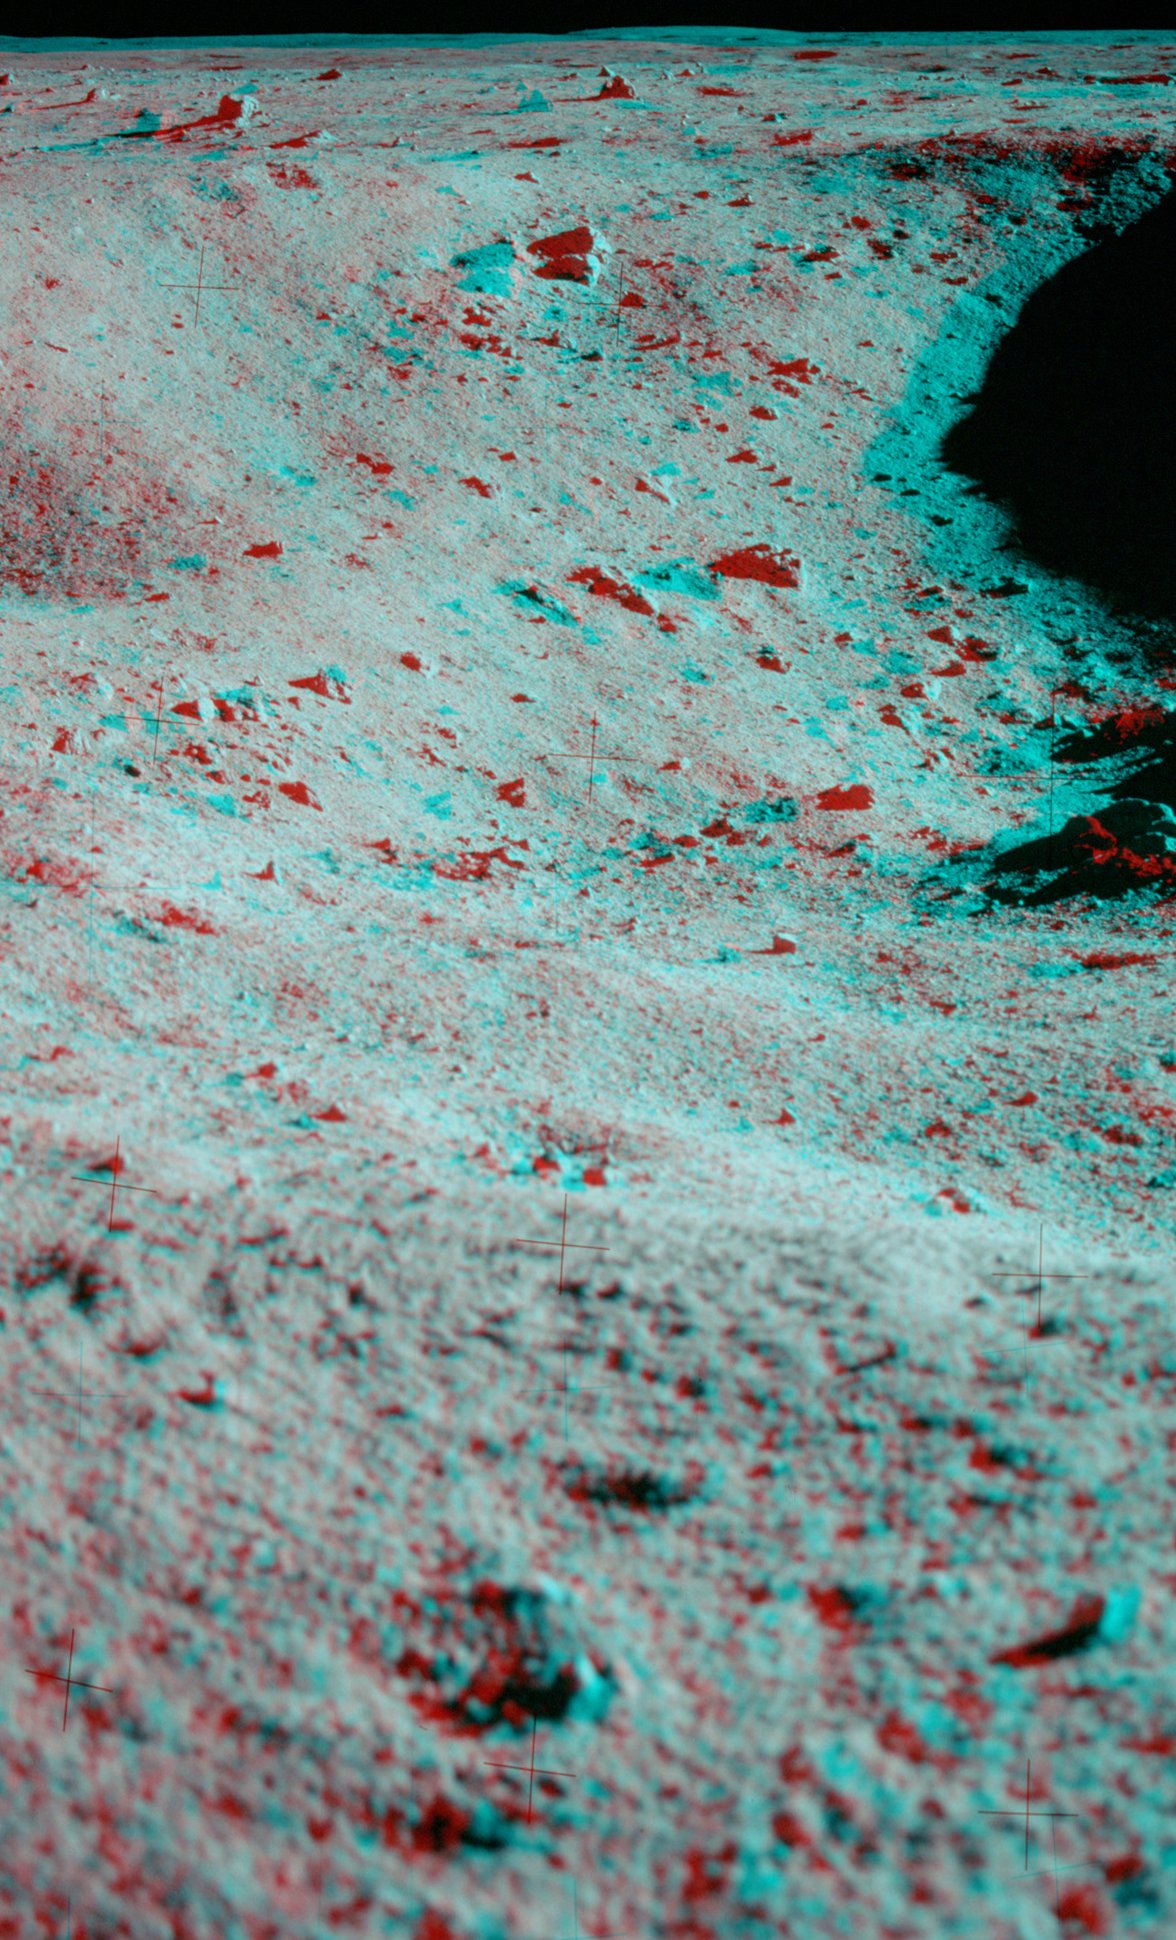
Buzz took this pan while standing on the southeast rim of a 5-m crater. See Fig. 3-15 from the Apollo 11 Preliminary Science Report. |
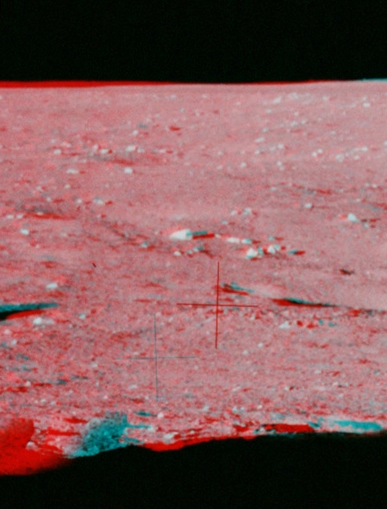
| 110:55:49 |
About 15 meters radially
outward from the SEQ Bay Assembly by Yuri Krasilnikov |
8 O'Clock Pan (6Mb) |
AS11-40- 5930-41 |
Angalyphs with
context (8Mb) |
LRO Map Indiv. anaglyphs: 5930-31 5931-32 5932-33 5933-34 5937-38 5938-39 5939-40 5940-41 |
Neil took this pan while
Buzz was offloading the scientific packages. See Fig. 3-15 from the Apollo
11 Preliminary Science Report. The 5931-32
anaglyph gives a view past the minus-Z (east) strut
toward the fresh crater noted previously. In the
middle distance, we see a crater past the strut with
footprints on its southeast rim, where Buzz stood to
take the plus-Y (north) pan. |
| 111:12:31 |
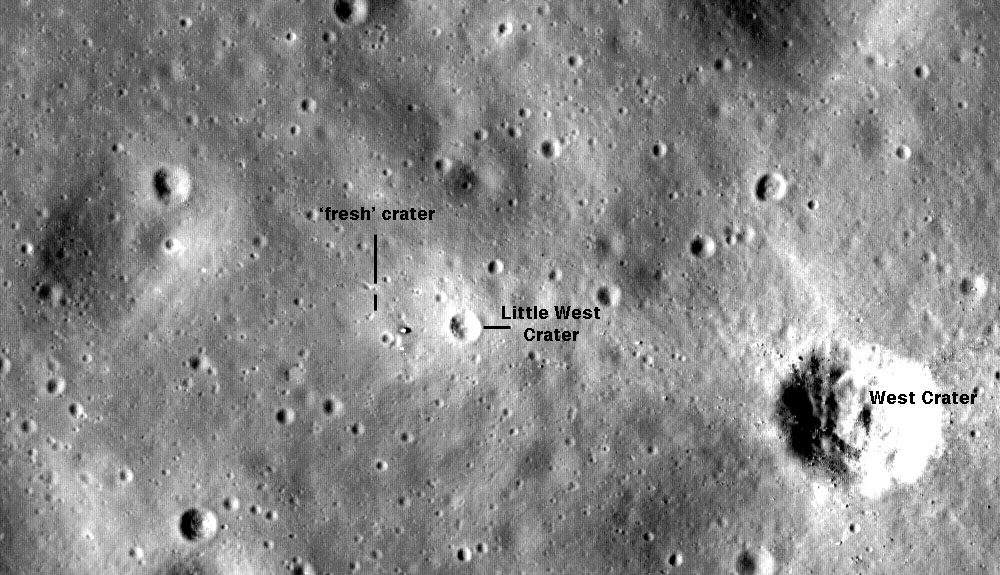
Southwest rim of Little
West Crater |
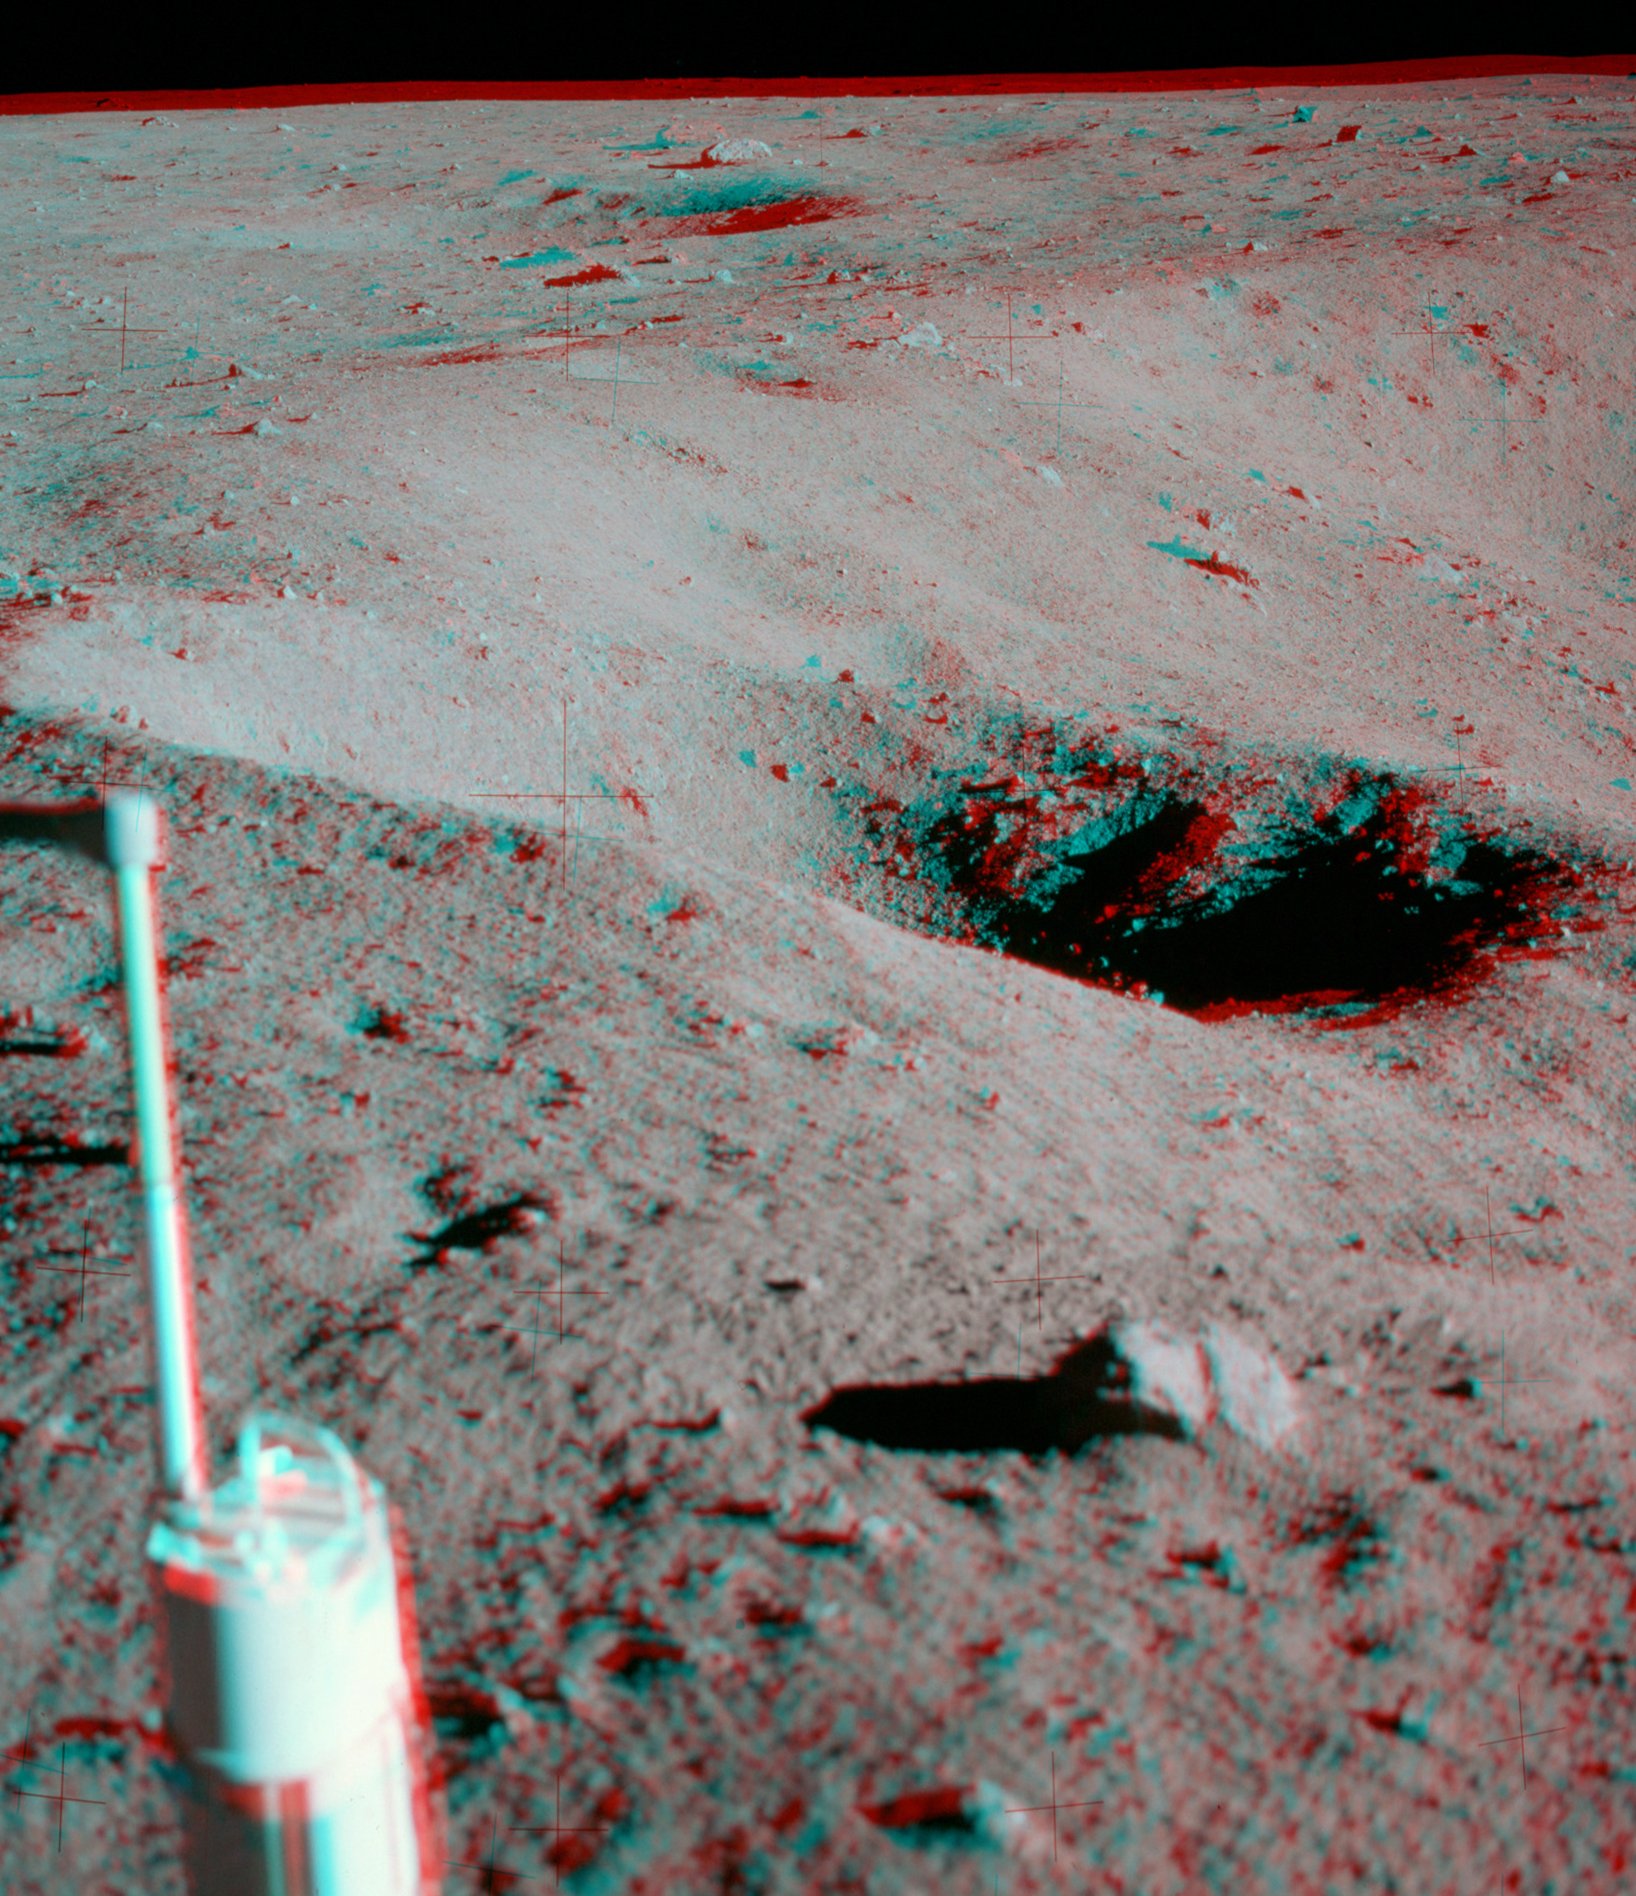
Little West Crater
Partial Pan |
AS11-40- 5954-61 |
Anaglyphs with context
(8 Mb) |
LRO map Indiv. anaglyphs: 5954-55 5954-56 5957-56 5958-59 |
On his own initiative,
Neil ran out to the crater late in the EVA, took the
partial pan, and then ran back to the LM. The
crater diameter is about 33 meters. See Fig. 3-15 from the Apollo
11 Preliminary Science Report. |
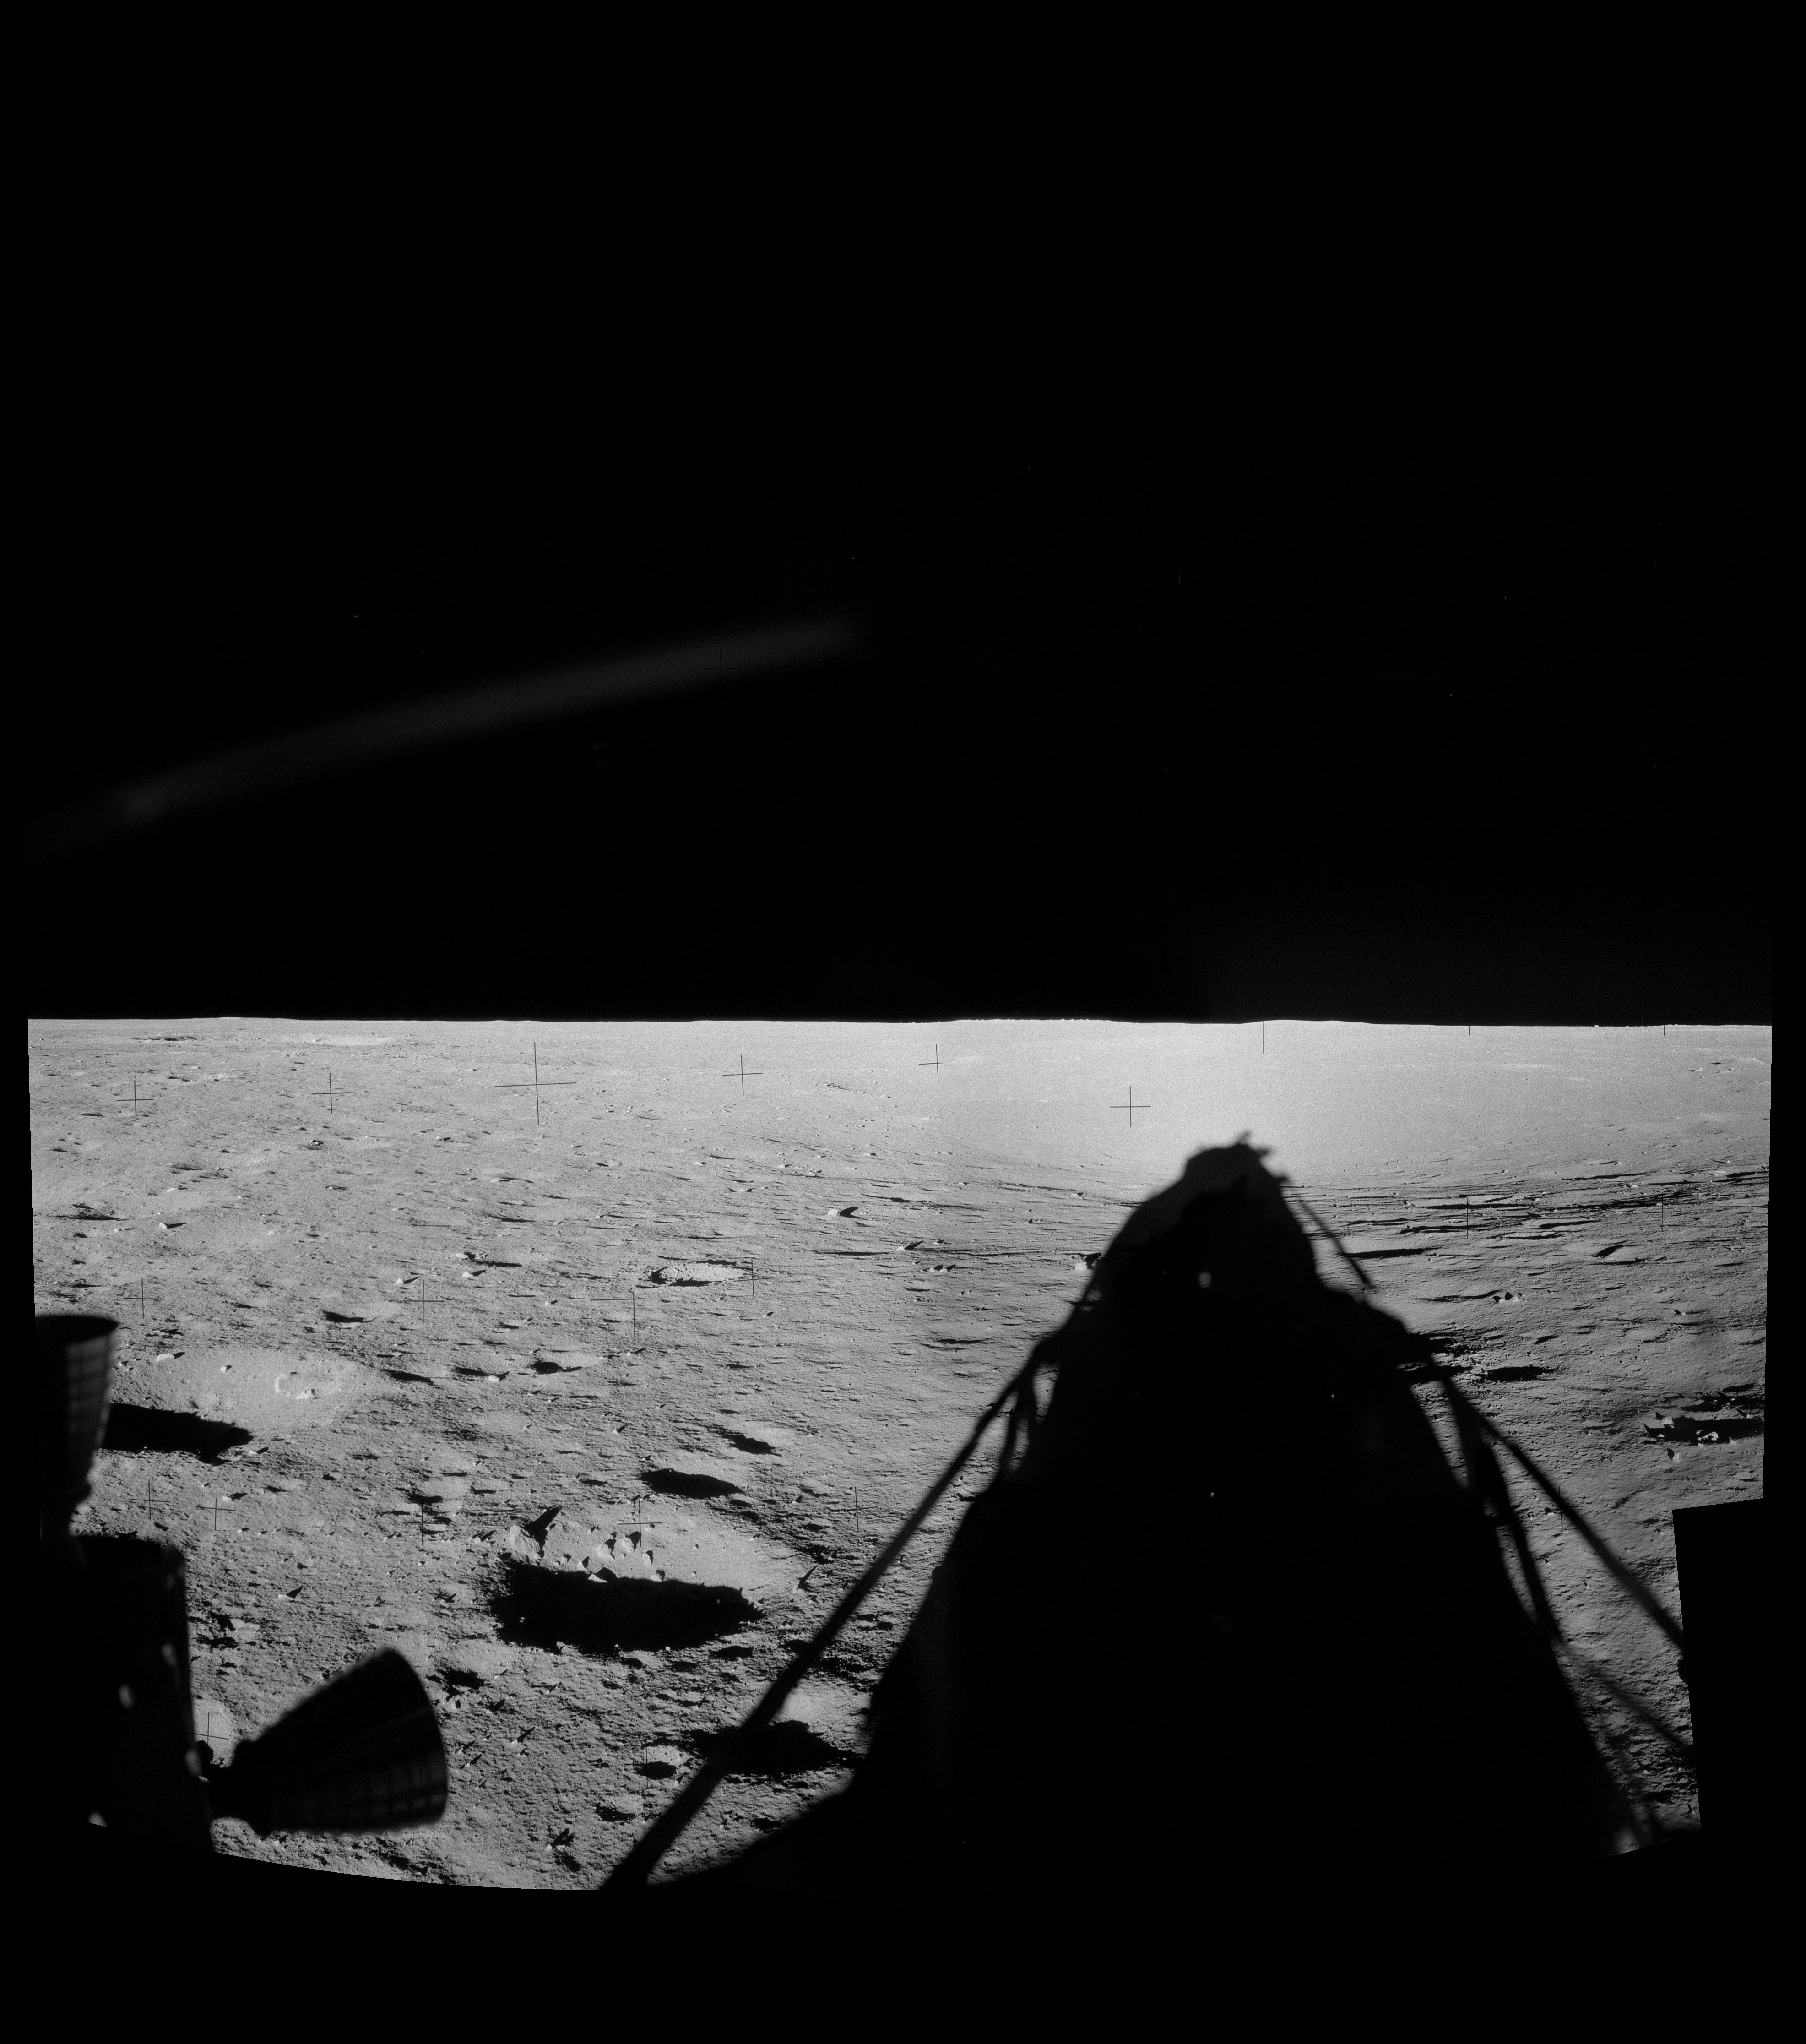
| 112:20:56 | LM cabin |
Neil Post-EVA pan |
AS11-37- 5496-5505 |
View to the south.
The Passive Seismic experiment is mostly hidden behind
the upper thruster. |
||
| 112:20:56 |
LM cabin |
Buzz Post-EVA pan |
AS11-37- 5510-17 |
LRO map | The TV camera is about 20
meters from Buzz's window, compared with 150 meters for
the fresh crater noted previously. |
3. Apollo 12, Mare Insularum (formerly part of Procellarum)
| Mission Elapsed Time |
Location | Color/ B&W |
Assembly Link | Frames | Anaglyphs |
Additional Material |
Notes |
| 111:58:43 |
LM Cabin |
BW |
CDR Window Pan (2Mb) |
AS12-48- 7023-27 |
LRO
Map (animated gif by Yuri Krasilnikov) |
Taken out Pete's window
about 1.5 hours after landing. The LM shadow is
about 65 to meters long. It's tip falls in a
shallow depression immediately west of the LM. On the horizon, just to the left of the LM shadow is a crater with a raised rim and a large number of sizeable blocks. As discussed at 112:15:41, that crater is actually 4.5 km from the LM and has a diameter of 0.5 km. Details from 7024 and 26 show a small rock and a small crater in the patch of soil in the middle of the LM shadow illuminated by sunlight shining through a small gap between the LM stages next to the ascent engine bell. |
|
| 111:58:43 | LM Cabin |
BW |
LMP Window Pan (3Mb) |
AS12-48- 7028-32 |
The large mound is about
one fiducial spacing in from the right edge of the
image, not far below the horizon |
||
| 116:22:29 |
Color |
12 o'clock LM pan
(5Mb) |
AS12-46- 6730-45 |
Anaglpyhs with
context (9Mb) |
Indiv. anaglyphs: 6730-31 6731-32 6732-33 6733-34 6734-35 6735-36 6736-37 6737-38 6740-41 6741-42 6742-43 6743-44 6744-45 6745-30 |
Pete mistakenly took this
pan at 15-foot focus, rather than 74-feet. |
|
| 116:24:47 |
Color | 4 o'clock LM pan (Mb) |
AS12-46- 6746-63 |
Taken at 15-foot focus |
|||
| 116:27:03 |
Color | 8 o'clock LM pan (Mb) |
AS12-46- 6764-82 |
Taken at 15-foot focus |
|||
| 116:57:52 |
Color | ALSEP Site Pan (Mb) |
AS12-46- 6796-811 |
||||
| 118:18:09 |
Color | 1st Middle Crescent
Partial Pan (Mb) |
AS12-46- 6836-44 |
||||
| 118:18:41 |
Color | 2nd Middle Crescent Partial Pan (Mb) | AS12-46- 6945-52 |
||||
| 118:28:21 |
Color |
12 o'clock LM Pan
(4Mb) |
AS12-47- 6941-60 |
Anaglyphs with
context (8Mb) |
Indiv. anaglyphs: 6942-43 6943-44 6944-45 6945-46 6946-47 6947-48 6948-49 6952-53 6953-54 6954-55 6955-56 6956-57 6957-58 6958-59 6959-60 |
Pete asked Al to take an unscheduled, 12 o'clock pan at the end of EVA-1, this time at 74-foot focus. | |
| 118:30:43 |
6 o'clock LM Pan (5Mb) |
AS12-47- 6961-81 |
Anaglyphs with
context (10Mb) |
Indiv. anaglpyhs: 6962-63 6963-64 6964-65 6965-66 6966-67 6967-68 6968-69 6973-74 6974-75 6975-76 6976-77 6977-78 6978-79 |
|||
| 118:33:10 |
4 o'clock LM Pan (Mb) |
AS12-47- 6982-7006 |
|||||
| 132:31:20 |
Triple Crater Portrait |
AS12--7056-58 |
|||||
| 132:31:52 |
Triple Crater Pan |
AS12-49-7201-16 |
|||||
| 132:38:22 |
Bench Crater Partial Pan
Left-to-Right |
AS12-49-7223-27 |
|||||
| 132:38:22 |
Bench Crater Partial Pan Right-to-Left | AS12-49-7228-32 |
|||||
| 132:53:22 |
Traverse-to-Sharp Pan |
AS12-49-7244-62 |
|||||
| 132:56:44 |
Sharp Crater Partial Pan Right-to-Left |
AS12-49-7263-69 |
|||||
| 132:57:33 |
Sharp Crater Partial Pan Left-to-Right |
AS12-49-7270-75 |
|||||
| 133:36:44 |
Halo Crater |
AS12-49-7289-311 |
|||||
| 133:45:36 |
Surveyor Crater Partial
Pan |
AS12-49-7321-24 |
|||||
| 133:59:16 |
Surveyor III Portrait |
AS12-7094-96 |
|||||
| 133:59:16 | Surveyor III Portrait |
AS12-48-7094-96 plus 7092
and 7097 |
|||||
| 134:06:25 |
Surveyor III Scoop Arm |
AS12-48-7101-04 |
|||||
| 134:40:09 |
Blocky Crater Partial Pan 1 |
AS12-48-7141-43 |
|||||
| 134:40:09 |
Blocky Crater Partial Pan 2 |
AS12-48-7144-47 |
|||||
| 135:45:48 |
Post-EVA Window Pans |
AS12-48-7153-7171 |
4. Apollo 14, Fra Mauro Formation
| Mission Elapsed Time | Location | Color/ B&W |
Assembly Link | Frames | Anaglyphs |
Additional Material |
Notes |
| 109:46:23 |
LM
Cabin |
B&W |
LMP Window Pan (10
Mb) |
AS14-65- 9203-07 |
|||
| CDR Window Pan (4 Mb) |
AS14-65- 9209-15 |
||||||
| 114:53:38 |
NE of LM |
Color |
4 o'clock LM Pan (11 Mb) | AS14-66- 9236-57 |
Anaglyphs with
context (6.3 Mb) |
Indiv. anaglyphs: 9236-37 9237-38 9238-39 9239-40 9240-41 9241-42 9242-43 9243-44 9244-45 9249-50 9250-51 9251-52 9252-53 9253-54 9255-56 |
Al Shepard got sharp
images with good overlap throughout the sequence.
Because the site has height variations of several meters
over distances of several tens of meters, the horizon is
generally quite close. |
| SE of LM |
Color |
8 o'clock LM Pan (Mb) |
AS14-66- 9271-93 |
||||
| 114:57:20 |
W
of LM |
Color |
12 o'clock LM Pan
Eastern part (9 Mb) |
AS14-66- 9298-312 |
Anaglyphs with
context (15 Mb) |
Indiv. anaglyphs 9298-99 9299-01 9301-02 9302-04 9304-05 9305-06 9306-07 9307-09 9309-10 9310-11 9311-12 |
|
| Western
part (8 Mb) |
AS14-66- 9294-300 plus 9310-16 |
Anaglyphs
with context (12 Mb) |
Indiv. anaglyphs 9294-95 9295-96 9296-97 9297-98 9298-99 9299-300 9310-11 9311-12 9312-13 9313-14 9314-15 |
||||
| 119:42:01 |
Post-EVA1 Window Pan (Mb) |
AS14-66- 9317-26 |
|||||
| 132:16:44 |
Station A Pan (Mb) |
AS14-68- 9394-408 |
|||||
| 132:34:22 |
Station B Pan |
AS14-64-9049-9072 |
|||||
| 132:50:31 |
Station B1 Pan |
AS14-64-9075-9097 |
|||||
| 132:57:52 |
Station B2 Pan |
AS14-68-9415-9429 |
|||||
| 133:14:34 |
Station B3 Pan |
AS14-68-9430-42 |
|||||
| 133:23:40 |
Station C-prime pan, Southern portion (6Mb) |
AS14-64-9111-21 |
Anaglyphs with
context (11Mb) |
Indiv. anaglyphs: 9111-12 9112-13 9113-14 9114-15 9115-16 9116-17 9117-18 9118-19 9119-21 |
|||
| 133:40:48 | Station C1- Saddle Rock Portrait | AS14-68-5449-51 | |||||
| 134:07:18 |
Station F Pan |
AS14-64-9137-57 |
|||||
| 134:36:42 |
Station G Pan |
AS14-64-9167-87 |
|||||
| 135:01:30 |
Station H Pan |
AS14-68-9477-91 |
|||||
| 136:26:06 |
LM Cabin |
Color |
LMP Window Pan
(5Mb) |
AS14-66-9335-43 |
5 Apollo 15, Hadley
| Mission Elapsed Time | Location | Color/ B&W |
Assembly Link | Frames | Anaglyphs | Additional Material | Notes |
| 106:53:45 02:09 31 July 1971 UTC |
Docking Hatch | B&W | SEVA pan, Northern portion (1.5Mb) | AS15-85- 11355-62 |
The Stand-up EVA provided
an opportunity to assess trafficability for the
LRV. Dave stood on the ascent engine cover with
his arms and shoulders above the rim of the docking
hatch. Because he was constrained by the hatch
opening and because most things in the field-of-view
were at considerable distance from the LM, little useful
stereo that can be extracted from the pan. |
||
| Eastern portion (3Mb) |
AS15-85- 11363-71 |
11370-71 |
|||||
| Southern portion
(2.5Mb) |
11373+75 |
||||||
| 106:56:54 |
Docking Hatch | B&W |
500-mm, Hill 305
(2Mb) |
AS15-84- 11239-41 |
Metric camera frames
A15-M1134-5 (labelled) |
The base of Hill 305 is
about 15 km from the LM on a bearing of 295. |
|
| 106:56:54 | Docking Hatch | B&W |
500-mm, Pluton Crater (2Mb) | AS15-84- 11242-43 |
Metric camera frames A15-M1134-5 (labelled) | Pluton Crater, 800 meters
across, is about 3 km from the LM on a bearing of
346. Although Dave was usually able to keep the
long lens steady; here, the righthand frame is
particularly blurred. |
|
| 106:56:54 |
Docking Hatch | B&W |
500-mm, Chain Crater
(3Mb) |
AS15-84- 11244-46 |
Detail (0.5Mb)
from June 1971 Apollo 15 Shaded Relief Map (6Mb) |
Chain Crater is
immediately southwest of Pluton. |
|
| 106:57:25 |
Docking Hatch |
500-mm, northern Hill
305 (5.6Mb) |
AS15-84- 11247-49 |
Detail (0.3Mb) from LTO41B4 (12Mb) |
A deeply-shadowed face of
Mt. Hadley is on the right. Beyond the point where
it reaches the MESA surface is a northern portion of
Hill 305. Distances from the LM are shown in the
detail. |
||
| 106:58:07 02:13 31 July 1971 UTC |
Docking Hatch |
500-mm, Silver Spur
(9Mb) |
AS15-84- 11250-53 |
Labeled comparison (0.2Mb) of AS15-85-11371
with a detail from AS15-M-0414
|
B&W pan image 11371
taken at 02:09 UTC. Mapping Camera image M-0414 (13Mb med. res.)
taken at 02:13 UTC. |
||
| 106:58:27 |
SEVA Color Pan |
AS15-87-11730-58 |
|||||
| 107:31:57 |
Post-SEVA CDR Window Pan |
AS15-85-11383-93 |
|||||
| 107:31:57 | Post-SEVA LMP Window Pan | AS15-85-11394-97 |
|||||
| 122:14:35 |
Station 1 |
B&W |
Northern portion (6Mb) |
AS15-85- 11398-407 |
Anaglyphs with
context 11398-407 (14Mb) |
Indiv. anaglyphs: 11398-99 11399-00 11400-01 11401-02 11402-03 11403-04 11404-05 11405-06 11406-07 |
|
| 122:38:47 |
First Station 2 Pan |
AS15-85-11422-38 |
|||||
| 123:17:15 |
Second Station 2 Pan |
AS15-85-11446-65 |
|||||
| 123:19:35 |
Station 2 500mm Left-to-Right strip of
rille wall at Trophy Point |
AS15-84-11254-68 |
|||||
| 123:20:51 | Station 2 500mm Left-to-Right strip
slightly below the prior strip |
AS15-84-11269-75 |
|||||
| Station 2 500mm Vertical Strip at Trophy
Point |
AS15-84-11276-83 |
||||||
| 123:21:30 |
Station 2 500mm rill bottom |
AS15-84-11284-88 |
|||||
| 123:45:01 |
Seatbelt Basalt |
AS15-86-11583-587 |
|||||
| 125:45:12 |
EVA-1 Close-out |
AS15-86-11600-02 |
|||||
| 143:38:21 |
EVA-2 Outbound Traverse Pan |
AS15-85-11472-80 |
|||||
| 143:55:26 |
First Station 6 Pan |
AS15-85-11481-97 |
|||||
| 144:14:17 |
Second Station 6 Pan |
AS15-85-11507-22 |
|||||
| 144:46:38 |
Station 6 500mm |
Mount Hadley summit 1st strip |
AS15-84-11292-301 |
||||
| 144:47:51 |
Station 6 500mm |
Mount Hadley summit - 2nd strip |
AS15-84-11302-8 |
||||
| Station 6 500mm |
Mt. Hadley Vertical Sequence |
AS15-84-11309-15 |
|||||
| 144:50:48 |
Station 6 500mm |
"Leading edge of Swann Mountain" | AS15-84-11316-7 |
||||
| 144:50:48 |
Station 6 500mm |
Left flank of Mt. Hadley | AS15-84-11318-22 |
||||
| 144:50:48 |
Station 6 500 mm |
LM and Pluton Crater | AS15-84-11324-5 |
||||
| 144:50:48 | Station 6 500mm |
Mt. Hadley striations | AS15-84-11326-7 |
||||
| 144:50:48 |
Station 6 500mm |
lower left flank of Mt. Hadley | AS15-84-11328-30 |
||||
| 144:50:48 | Station 6 500mm |
Mt. Hadley composite (6Mb) |
AS15-84-11292-330 |
High-resolution composite created by
David Harland by superimposing the frames taken with the
500mm lens on AS15-90-11488, a frame from Jim's first
Station 6 Pan. |
|||
| 144:50:48 | Station 6 500mm |
Hadley Rille |
AS15-84-11333-5 |
||||
| 144:50:48 | Station 6 500mm | Mt. Hadley Delta summit outcrops |
AS15-84-11336-46 | ||||
| 144:50:48 | Station 6 500mm | View to the East |
AS15-84-11347-49 | ||||
| 145:07:26 |
Station 6a Pan |
Portion taken before Dave moved the LRV |
AS15-90-12179-93 |
||||
| Station 6a Pan | Pan completion |
AS15-90-12193-8 | |||||
| 145:28:12 | Station 7 Pan |
AS15-90-12201-22 | |||||
| 145:55:13 |
Station 7 mosaic |
Breccia boulder |
AS15-86-11682, 84, and 88 |
||||
| 146:30:33 |
Station 4 Pan |
Dune Crater |
AS15-90-12237-48 |
Partial pan ended when Jim's film
magazine jammed. |
|||
| 147:27:12 |
EVA-2 LM pans |
12 o'clock pan |
AS15-87-11785-804 |
||||
| 147:27:12 |
4 o'clock pan |
AS15-87-11805-21 | |||||
| 147:27:12 | 8 o'clock pan |
AS15-87-11822-40 | |||||
| 147:38:40 |
EVA-2 ALSEP pan |
AS15-87-11843-58 | |||||
| 148:02:20 |
ALSEP site |
'Station 8 pan' | AS15-92-12420-38 |
||||
| 164:23:13 |
ALSEP site |
Partial Pan |
AS15-88-11878-81 |
||||
| 164:26:56 |
ALSEP site |
Pan |
AS15-82-11047-64 |
Pan taken after core extraction |
|||
| 165:05:09 |
Station 9 Pan |
AS15-82-11066-92 |
Rim littered with regolith breccias, like
Apollo 17s Van Serg Crater |
||||
| 165:21:14 |
Station 9a Pan |
Hadley Rille |
AS15-82-11110-27 | ||||
| 165:26:44 |
Station 9a 500mm |
Hadley Rille, horizontal strip inc.
outcrops |
AS15-89-12015-27 |
||||
| 165:27:24 |
Station 9a 500mm |
Talus slope below outcrops |
AS15-89-12028-44 | Combined versions to link |
|||
| 165:28:46 |
Station 9a 500mm |
Outcrops, vertical strip |
AS15-89-12045-8 | ||||
| 165:28:46 | Station 9a 500mm | Outcrops, 2nd vertical strip | AS15-89-12049-52 | ||||
| 165:28:46 | Station 9a 500mm | Outcrops, 3rd vertical strip | AS15-89-12053-56 | ||||
| 165:29:16 |
Station 9a 500mm | Debris-filled crater in the west wall |
AS15-89-12057-62 | ||||
| 165:29:51 |
Station 9a 500mm |
Debris-filled crater and mare surface
west of the rille |
AS15-89-12063-68 | ||||
| 165:29:51 | Station 9a 500mm | Debris-filled crater, vertical sequence | AS15-89-12069-73 | ||||
| 165:31:38 |
Station 9a 500mm | Line of boulders in west wall |
AS15-89-12075-78 | ||||
| 165:31:38 | Station 9a 500mm | Debris-filled crater to Trophy Point |
AS15-89-12079-82 | ||||
| 165:31:38 | Station 9a 500mm | Debris-filled crater and slope below | AS15-89-12083-86 | ||||
| Station 9a 500mm | Debris-filled crater composite |
AS15-89-12057-73 plus AS15-89-12083-86 |
|||||
| 165:35:02 |
Station 9a 500mm | East side of the rille to the south |
AS15-89-12087-94 | ||||
| AS15-89-12095-96 | ? |
||||||
| 166:18:56 |
Station 10 |
Jim's pan |
AS15-82-11165-84 |
||||
| 166:20:02 |
Station 10 |
B&W |
Portion showing Rim
Crater (4Mb) |
AS15-82- 11177-82 |
Anaglyphs with
context 11177-82 (8Mb) |
Indiv. anaglyphs: 11177-78 11178-79 11179-80 11180-81 11181-82 |
The pan location is
marked in a labeled
map (6Mb) made from LROC image M111571816R |
| 166:20:51 |
Station 10 500mm |
West wall outcrops |
AS15-89-12097-116 |
||||
| 166:20:51 | Station 10 500mm | West wall outcrops farther south |
AS15-89-12117-21 | ||||
| 166:20:51 | Station 10 500mm | Debris-filled crater |
AS15-89-12122-26 | ||||
| 166:20:51 | Station 10 500mm | Mare surface beyond debris-filled crater |
AS15-89-12127-31 | ||||
| 166:20:51 | Station 10 500mm | Below debris-filled crater |
AS15-89-12132-36 | ||||
| 166:20:51 | Station 10 500mm | Crater composite |
AS15-89-12122-36 |
||||
| 166:20:51 | Station 10 500mm | Vertical through West Wall Crater |
AS15-89-12137-42 | ||||
| 166:20:51 | Station 10 500mm | Top of talus slope |
AS15-89-12143-44 | ||||
| 166:20:51 | Station 10 500mm | Trophy Point |
AS15-89-12145-48 | ||||
| 166:20:51 | Station 10 500mm | West Wall composite |
AS15-89-12122-48 | ||||
| AS15-89-12149-51 |
? |
||||||
| 166:20:51 | Station 10 500mm | West Wall vertical sequence |
AS15-89-12152-56 | ||||
| 166:20:51 | Station 10 500mm | West Wall 2nd vertical sequence | AS15-89-12157-59 | ||||
| Station 10 500mm | Outcrop composite |
AS15-89-12097-116 and AS15-89-12151-59 |
|||||
| 166:20:51 | Station 10 500mm | Slope into the rille from the East rim |
AS15-89-12160-62 | ||||
| 166:41:17 |
Return to the LM |
LM and Swann Hills from the LRV |
AS15-82-11192-4 |
||||
| 167:10:16 |
EVA-3 Close-out 500mm |
Big Rock Mountain |
AS15-89-12165-71 | ||||
| 167:10:16 | EVA-3 Close-out 500mm | Hadley Delta Summit |
AS15-89-12173-4 | ||||
| 167:10:16 | EVA-3 Close-out 500mm | Left flank of "leading edge' hill |
AS15-89-12172 and 77 |
||||
| 167:10:16 |
EVA-3 Close-out 500mm | outcrops |
AS15-89-12175-76 |
||||
| 169:37:47 |
Post-EVA LMP Window |
Pluton Crater (4 Mb) |
AS15-82-11204-17 |
||||
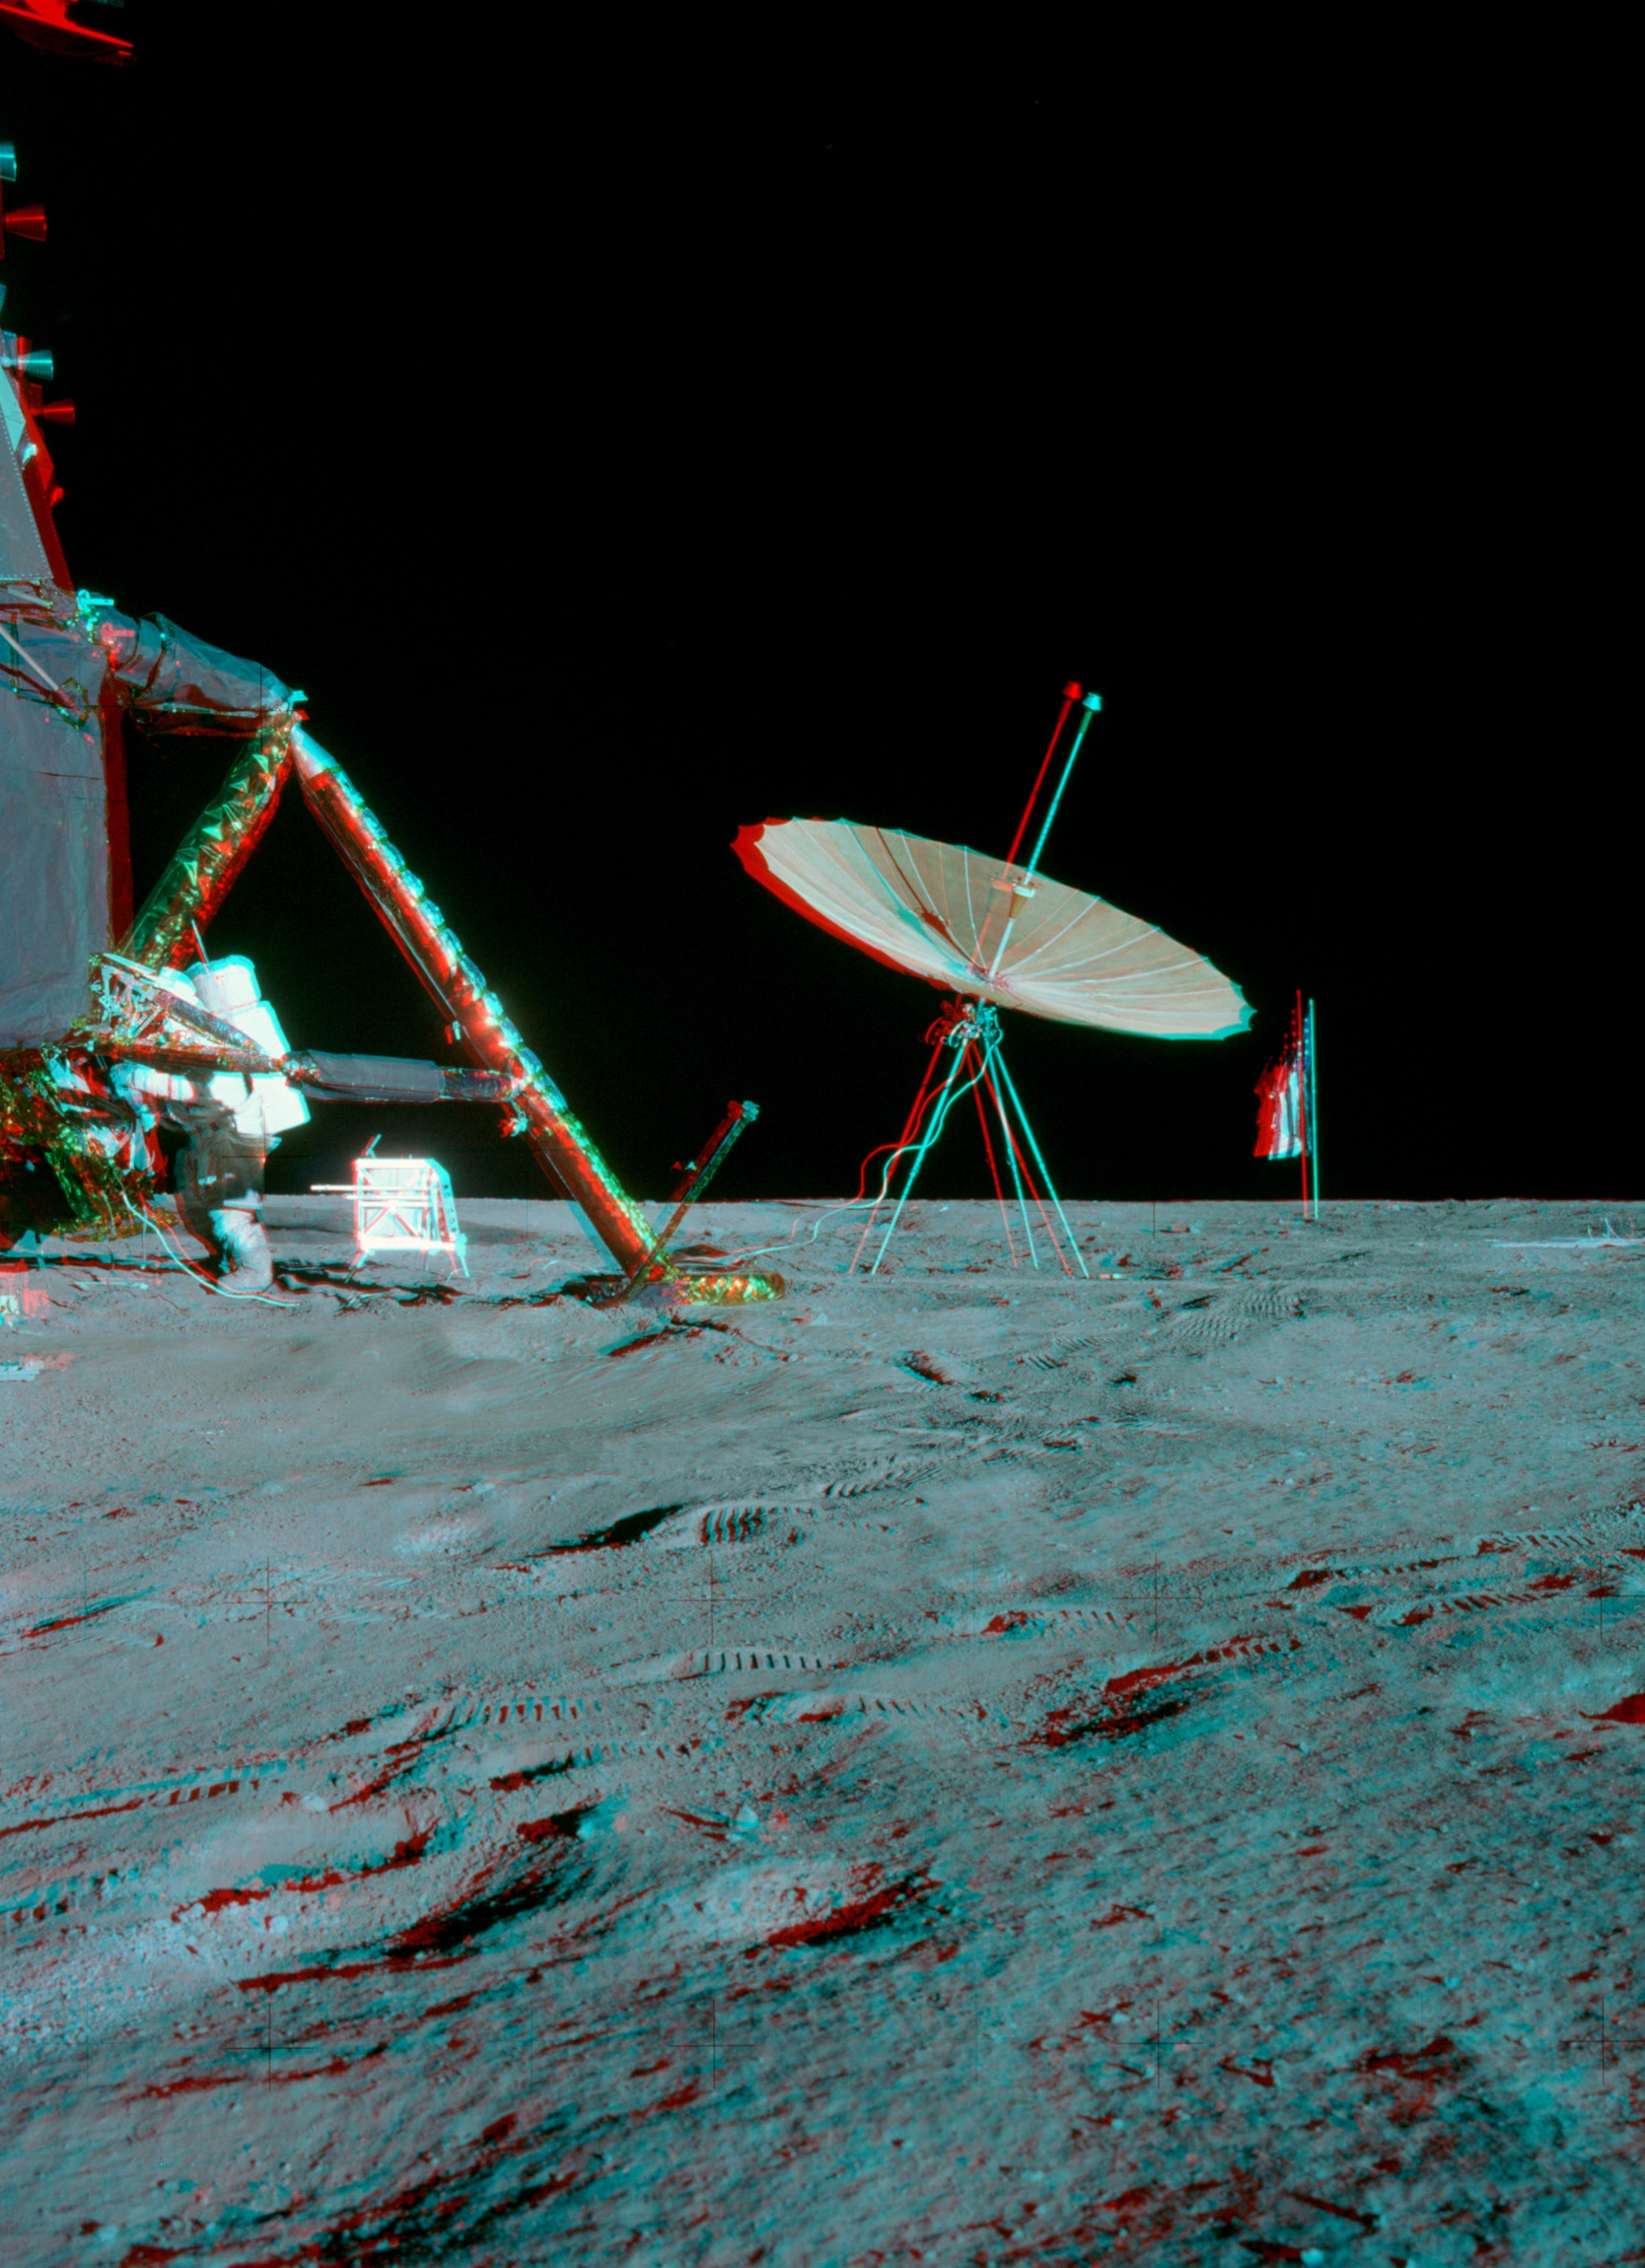
6. Apollo 16, Descartes Highlands
6.1 LM/ALSEP| Mission Elapsed Time | Location | Color/ B&W |
Assembly Link | Frames | Anaglyphs |
Additional Material | Notes |
| 106:15:45 |
LM Cabin, CDR Window |
C |
Post-landing CDR
Window pan |
AS16-113- 18296-303 |
|||
| 106:15:45 | LM Cabin, LMP Window | C |
Post-landing LMP
Window pan |
AS16-113- 18304-10 |
|||
| 119:33:46 |
LM |
C |
4 o'clock pan |
AS16-113- 18313-30 |
|||
| Northern portion |
18313-21 |
||||||
| Southern portion |
18321-30 |
||||||
| 120:33:48 |
LMP walks from LM to
ALSEP |
TV |
5 x normal speed TV clip
( 6.8 Mb ) |
Shows Charlie carrying
the ALSEP packages west from the LM. He has to climb a
noticeable slope in the later parts of the clip. 120:38:28 Duke: (Turning to his right and facing north) I just climbed a little ridge. 120:38:33 England: Good show, Charlie. Don't strain yourself there. Just take it easy ... In fact, just stand there for a while. 120:38:40 Duke: (Turning to his right and facing north) I just climbed a little ridge. (Responding) I am. |
|||
| 122:12:32 |
ALSEP |
C |
ALSEP pan |
AS16-113- 18349-69 |
|||
| Northern portion |
18349-60 |
||||||
| Southern portion |
18361-70 |
||||||
| 143:13:46 | LM, early EVA-2 | 4 o'clock pan
(8Mb) |
AS16-107- 17420-40 |
||||
| 4 o'clock pan Northern portion (4Mb) |
AS16-107- 17420-30 |
Anaglyphs with
context (7Mb) |
Indiv. anaglyphs: 17420-21 17421-22 17422-23 17423-24 17424-25 17425-26 17426-27 17427-28 17428-29 17429-30 |
||||
| Southern portion (3Mb) | AS16-107- 17430-40 |
Anaglyphs with context (6Mb) | Indiv. anaglyphs: 17430-31 17431-32 17432-33 17433-34 17434-35 17435-36 17436-37 17437-38 17438-39 17439-40 |
||||
| Station 10 |
|||||||
| Station 10-prime |
|||||||
6.2 EVA-1 Traverse and Station 1 and 2
| Mission Elapsed Time | Location | Color/ B&W |
Assembly Link | Frames | Anaglyphs |
Additional Material | Notes |
| 122:58:46 |
Cayley Plains, west of
the LM |
B&W |
Traverse photos: LM to just south of Halfway Crater (13Mb) |
AS16-109- 17747-68 |
EVA-1 map based on LRO
frame nacr00000ad8,
taken 12 July 2009 19:04:51 UTC, and Figures 3 and 6 in Chapter D1 of the USGS Professional Paper. |
||
| 123:18:46 |
Cayley Plain, west of the
LM |
B&W |
Traverse photos: Halfway Crater to Plum Crater (4Mb) |
AS16-109- 17769-74 |
Begins with a shot at the
rim of the crater they mistook for Plum, taken after
they got back on the Rover. |
||
| 123:25:08 |
Station 1 |
B&W |
Charlie's pan (8Mb) |
AS16-109- 17775-93 |
Station 1 map, Figures 11 and 12 in Chapter D1 of the USGS Professional Paper. | Charlie's pan is Pan 4,
taken at the corresponding 'A' in the Station map. |
|
| Northern portion
(3Mb) |
17775-17785 |
Anaglyphs with
context (10Mb) |
Indiv. anaglyphs: 17776-77 17777-78 17778-79 17779-81 17779-80 17780-81 17781-82 17782-83 17783-84 17784-85 |
17783-84 not used in the stereo assembly |
|||
| Southern portion
(2.4Mb) |
17787-93 |
Anaglyphs with
context (5Mb) |
Indiv. anaglyphs: 17787-88 17789-90 17790-91 17791-92 17792-93 |
||||
| 124:02:22 |
Station 1 |
c |
John's pan (12Mb) |
AS16-114- 18415-32 |
Station 1 map | John's pan is Pan 5 in
the Station map. Apparently, at about the time
John took 18426,
Charlie started moving south from where he'd been
sampling when John took 18423
and 24. John may have decided to wait for
Charlie to get into the field-of-view before taking 18427. |
|
| Northern portion
(7Mb) |
18416-23 |
||||||
| Southern portion
(6Mb) |
18425-32 |
||||||
| 124:23:34 |
Station 2 |
Charlie's Spook pan
(9Mb) |
AS16-109- 17811-27 |
LRO detail from nacr00000ad8 Station 2 Map |
Pan taken halfway between
the LRV and the rim of Spook Crater |
||
| Northern portion
(3Mb) |
17811-19 |
Anaglyphs with
context (7Mb) |
Remapped images: 17811, 17812, 17813, 17814, 17815, 17816, 17817, 17818, 17819 Indiv. Anaglyphs: 17811-12 17812-13 17813-14 17814-15 17815-16 17816-17 17817-18 17818-19 Side-by-side l-r (parallel) stereo pairs: 17811-12 17812-13 17813-14 17814-15 17816-17 17817-18 17818-19 |
Buster Crater is beyond
the LRV. The LRV is about 20m from where
Charlie took the pan and the near rim of Bust is about
75 m. Tire tracks made when they drove up
close to the rim of Buster at about 123:08:09
can be seen beyond the Rover on the right. |
|||
| Southern portion
(5Mb) |
17819-27 |
Anaglyphs with
context (6Mb) |
Indiv. Anaglyphs 17819-20 17820-21 17821-22 17822-23 17823-24 17824-25 17825-26 17826-27 |
||||
| 124:23:34 |
Charlie's partial
Buster pan (3Mb) |
AS16-109- 17828-36 |
Stereo partial pan (6Mb) | Indiv. anaglyphs: 17828-29 17832-33 17835-36 |
|||
| 124:48:20 |
Cayley Plain, west of LM |
B&W |
Traverse photos: Station 2 to LM (7Mb) |
AS16-109- 17849-62 |
Following the outbound
tracks, and doing some tacking to avoid up-Sun. |
||
6.3 500mm photos
| MIssion Elapsed Time |
Location |
Color/B&W |
Assembly Link |
Frames |
Anaglyphs |
Additional Material |
Notes |
| 124:28:40 |
Station 2 |
B&W |
Stone
Mtn Portrait (0.4 Mb) |
AS16-112-18193-232 |
Charlie seems to have rushed this
sequence. Many frames are badly blurred. Assembly
by Dave Byrne |
||
| 124:28:40 | Station 2 | B&W | South Ray Crater |
AS16-112-18233-39 | Assembly by Dave Byrne | ||
6.4 EVA-2 Traverse: Cayley Plain south of the LM to Stone Mountain; Stations 8 and 9
| Misison Elapsed Time |
Location | Color/ B&W |
Assembly Link |
Frames | Anaglyphs | Additional Material |
Notes |
| Outbound
from
the LM to the base of Stone Mountain |
|||||||
| 143:31:21 | Cayley Plain south of the LM | B&W |
Traverse photos: LM to Survey Ridge (3Mb) |
AS16-110- 17870-88 |
Drive from the LM to Survey Ridge, a
linear feature that runs NE to SW and rise perhaps 10
meters above its surroundings |
||
| 143:42:15 |
Cayley Plain, Survey
Ridge |
B&W |
Traverse photos: on Survey Ridge
(4Mb) |
AS16-110- 17889-907 |
Survey Ridge is on a
bright part of a ray extending out from South Ray
Crater. It has a large concentration of ejecta,
generally of a larger average size than than the South
Ray ejecta seen on other segments of this traverse. |
||
| 143:52:23 |
Cayley Plain |
B&W |
Traverse photos: Survey Ridge to
Stone Mountain (5Mb) |
AS16-110- 17908-17 |
Drive from the
southwestern end of Survey Ridge to the base of Stone
Mountain |
||
| Inbound
from
the base of Stone Mountain |
|||||||
| 146:29:22 | Cayley Plain south of the LM | B&W | Traverse photos: Station 6 to Station 8 (3 Mb) |
AS16-108- 17634-62 |
The route is largely on a ray of blocky ejecta from South Ray Crater. | ||
| 1474815 | Cayley Plain south of the
LM |
B&W | Traverse photos: Station 8 to Station 9 (5 Mb ) |
AS16-108- 17703-13 |
|||
6.5 EVA-2 Traverse: Stone Mountain and Stations 4, 5, and 6
| Misison Elapsed Time |
Location | Color/ B&W |
Assembly Link |
Frames | Anaglyphs | Additional Material |
Notes |
| 143:54:47 |
Stone Mountain |
B&W |
Traverse photos: Outbound
climb to Station 4 (Part 1) (Mb) |
AS16-110- 17918-31 |
|||
| 144:48:00 |
Station 4 |
Color |
John's Pan (11 Mb) |
AS16-107- 17467-89 |
Anaglyphs with context (19Mb) |
Remapped images: 17470, 17471, 17472, 17473, 17374, 17475, 17476, 17477, 17478, 17479, 17485, 17486, 17487, 17488, 17489 Individual anaglyphs: 17470-71, 17471-72, 17472-73, 17473-74, 17474-75, 17475-76, 17476-77, 17477-78, 17478-79, 17479-85, 17485-86, 17486-87, 17487-88, 17488-89 |
The following images in
the pan were not used in the assembly: 17467-69 and
17480-84 |
| 145:58:36 | Stone Mountain | B&W |
Traverse photos: Drive from Station 5 to Station 6 ( 3Mb ) |
AS16-108- 17585-605 |
Station 6 is at the foot of of Stone Mountain. The map distance is 600 meters and the average slope is about 7/60 or about 6.7 degrees. | ||
6.6 EVA-3 Traverse and Station 13
| Misison Elapsed Time |
Location | Color/ B&W |
Assembly Link |
Frames | Anaglyphs | Additional Material |
Notes |
| 168:09:26 | North Ray Ridge |
B&W | Traverse photos: Station 11 to Station 13 - Part 1 (8Mb) | AS16-106- 17357-73 |
Drive down a steep slope
from the rim of North Ray crater onto the North Ray Ridge, as far
as the tip. |
||
| 168:14:31 |
North Ray Ridge, Cayley
Plain |
B&W |
Traverse photos: Station 11 to
Station 13 - Part 2 (7Mb) |
AS16-106- 17373-85 |
Final descent off North Ray ridge and onward to Station 13 | ||
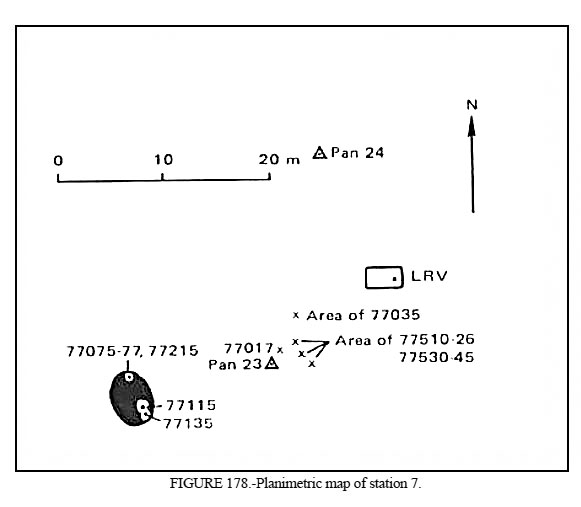
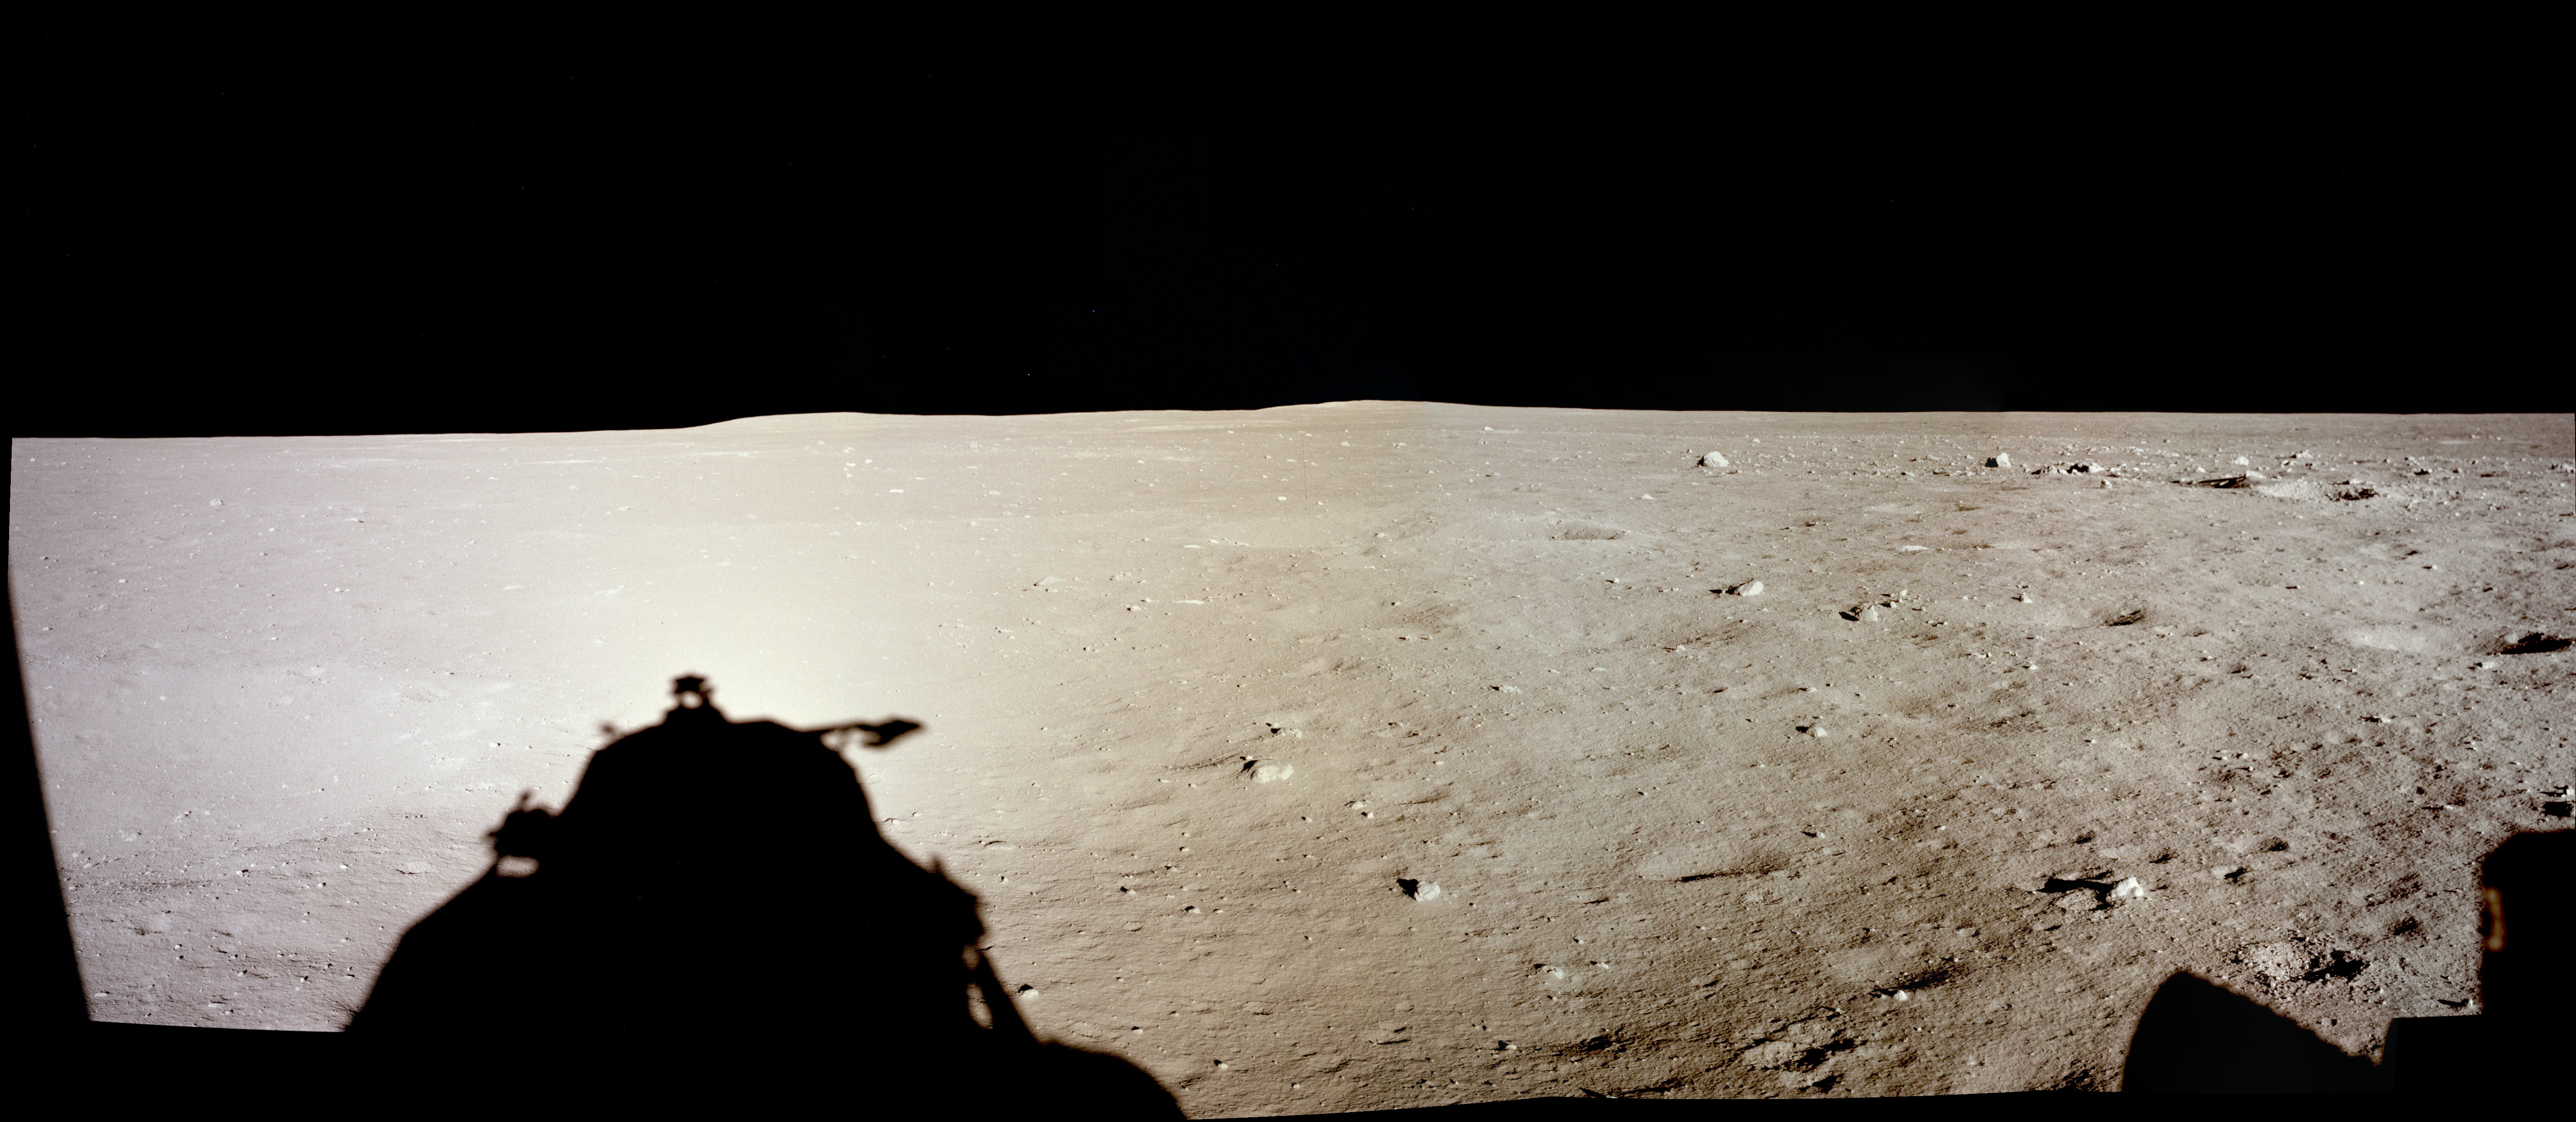
7. Apollo 17, Valley of Taurus-Littrow
(The following has been derived from the Apollo 17 Mission Report, Lunar Sourcebook, and USGS Apollo 17 Professional Paper.)
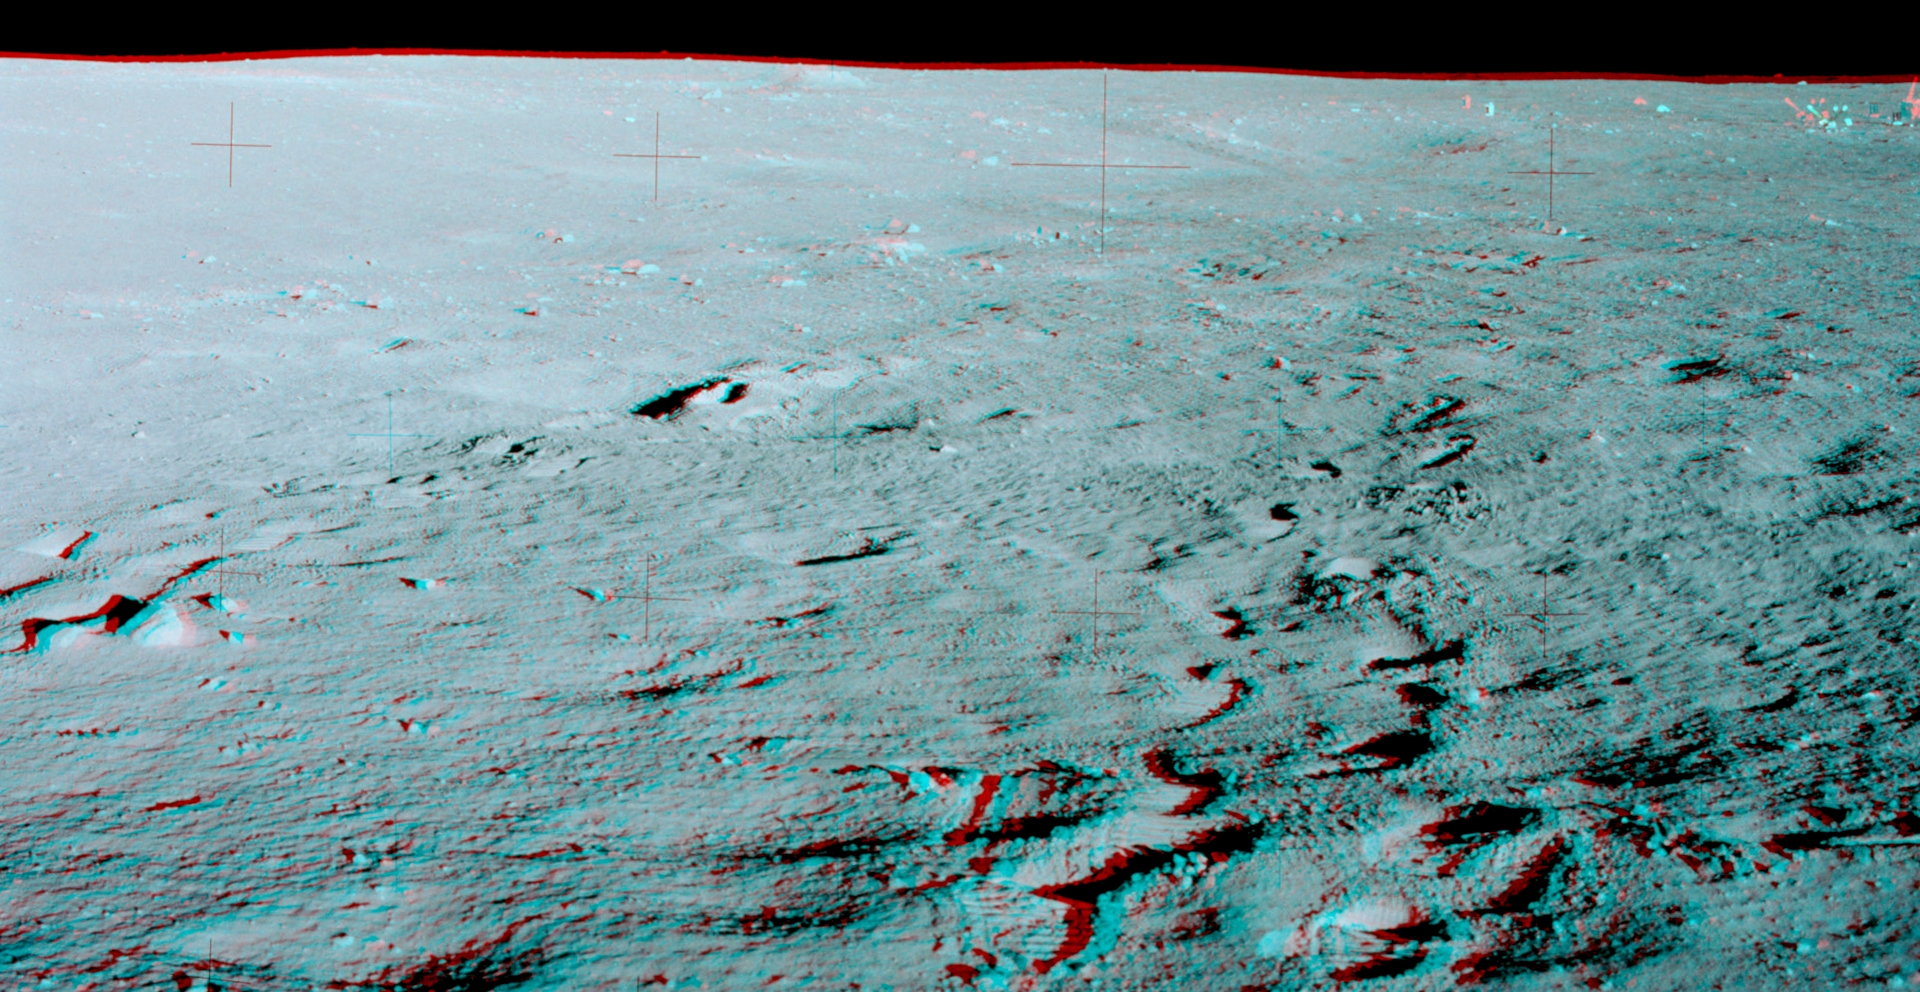
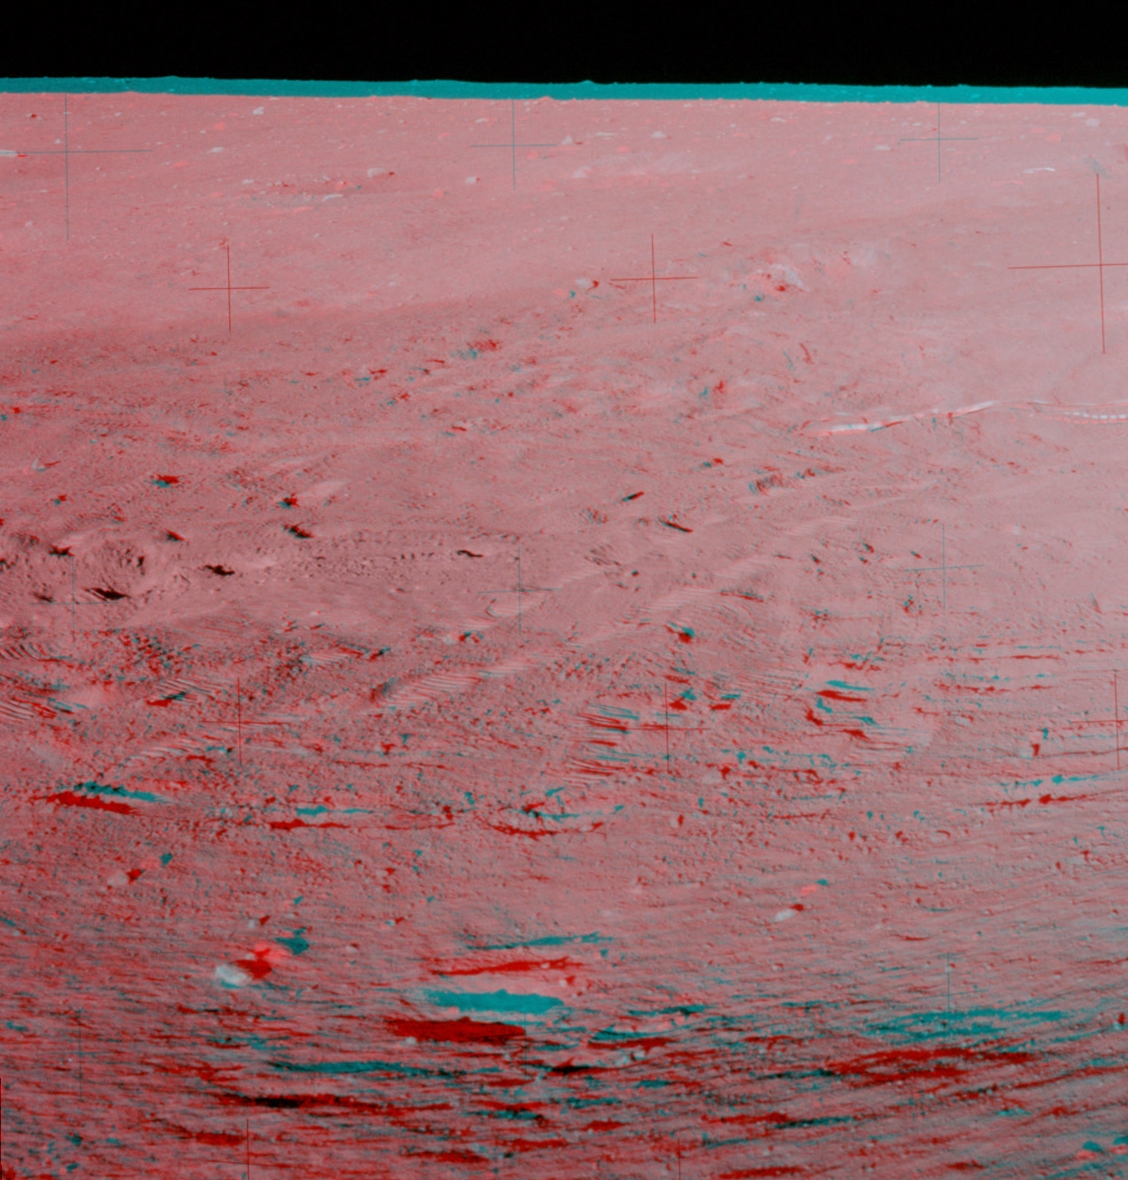
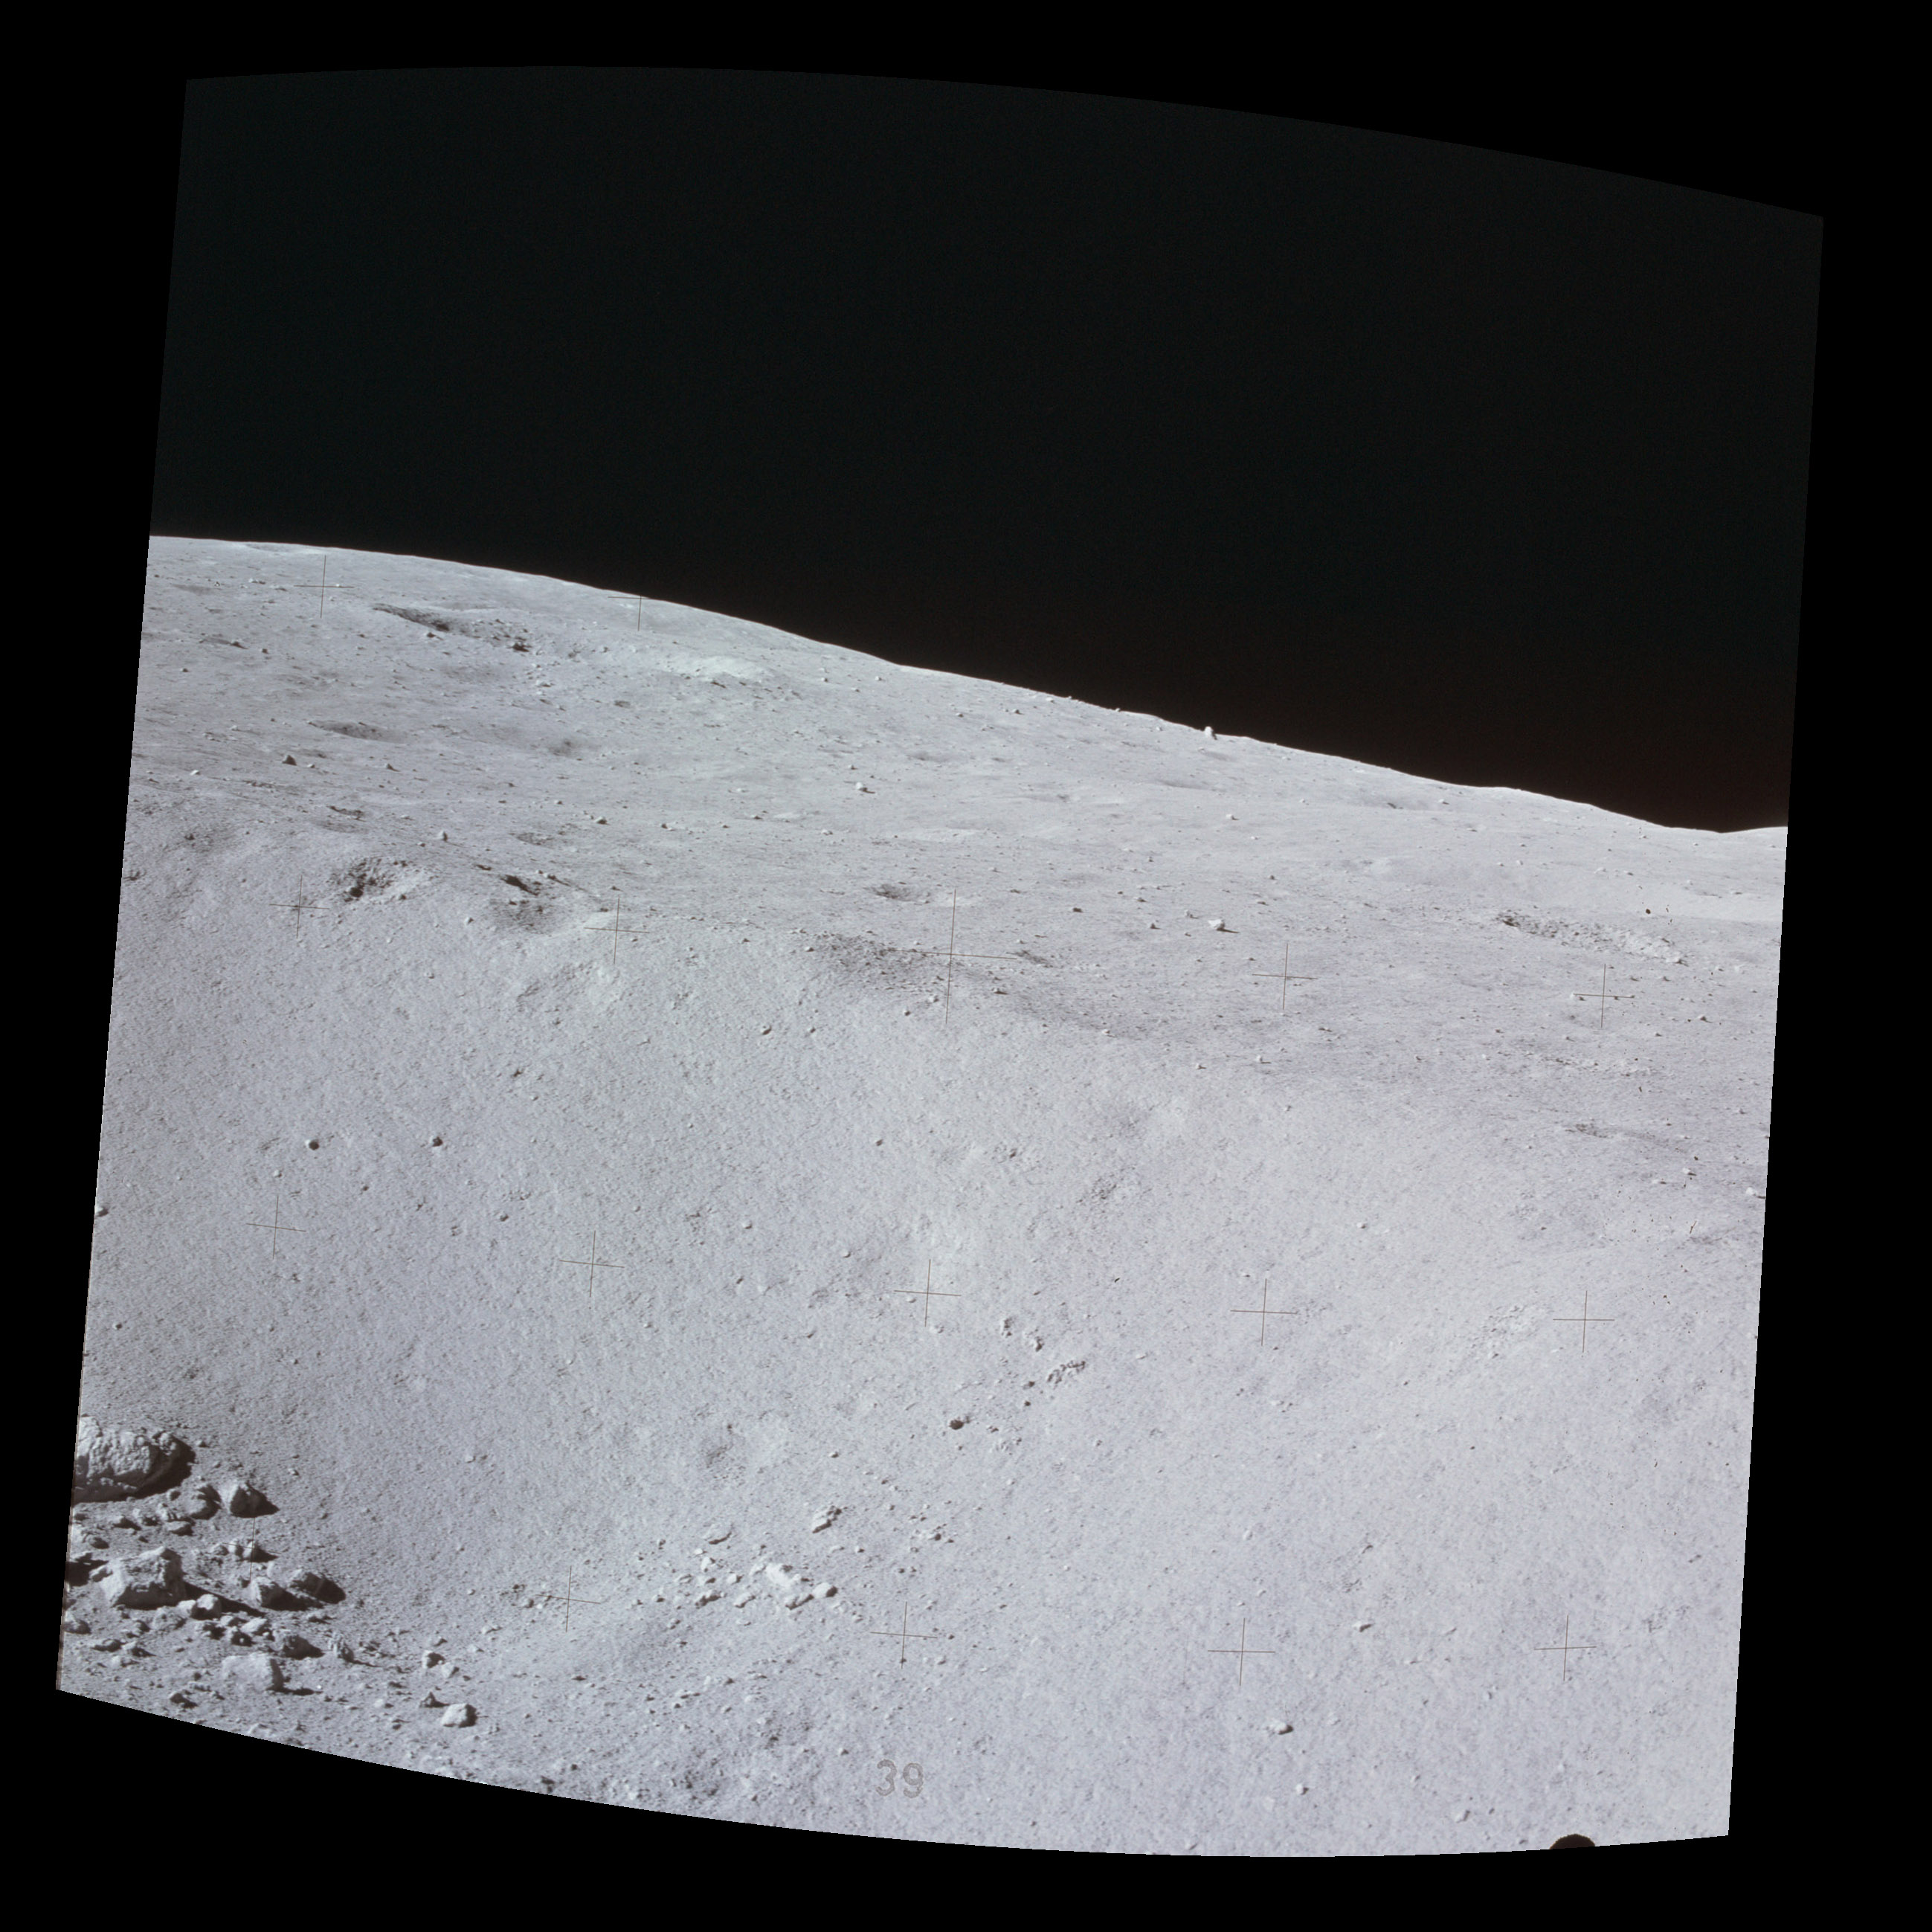
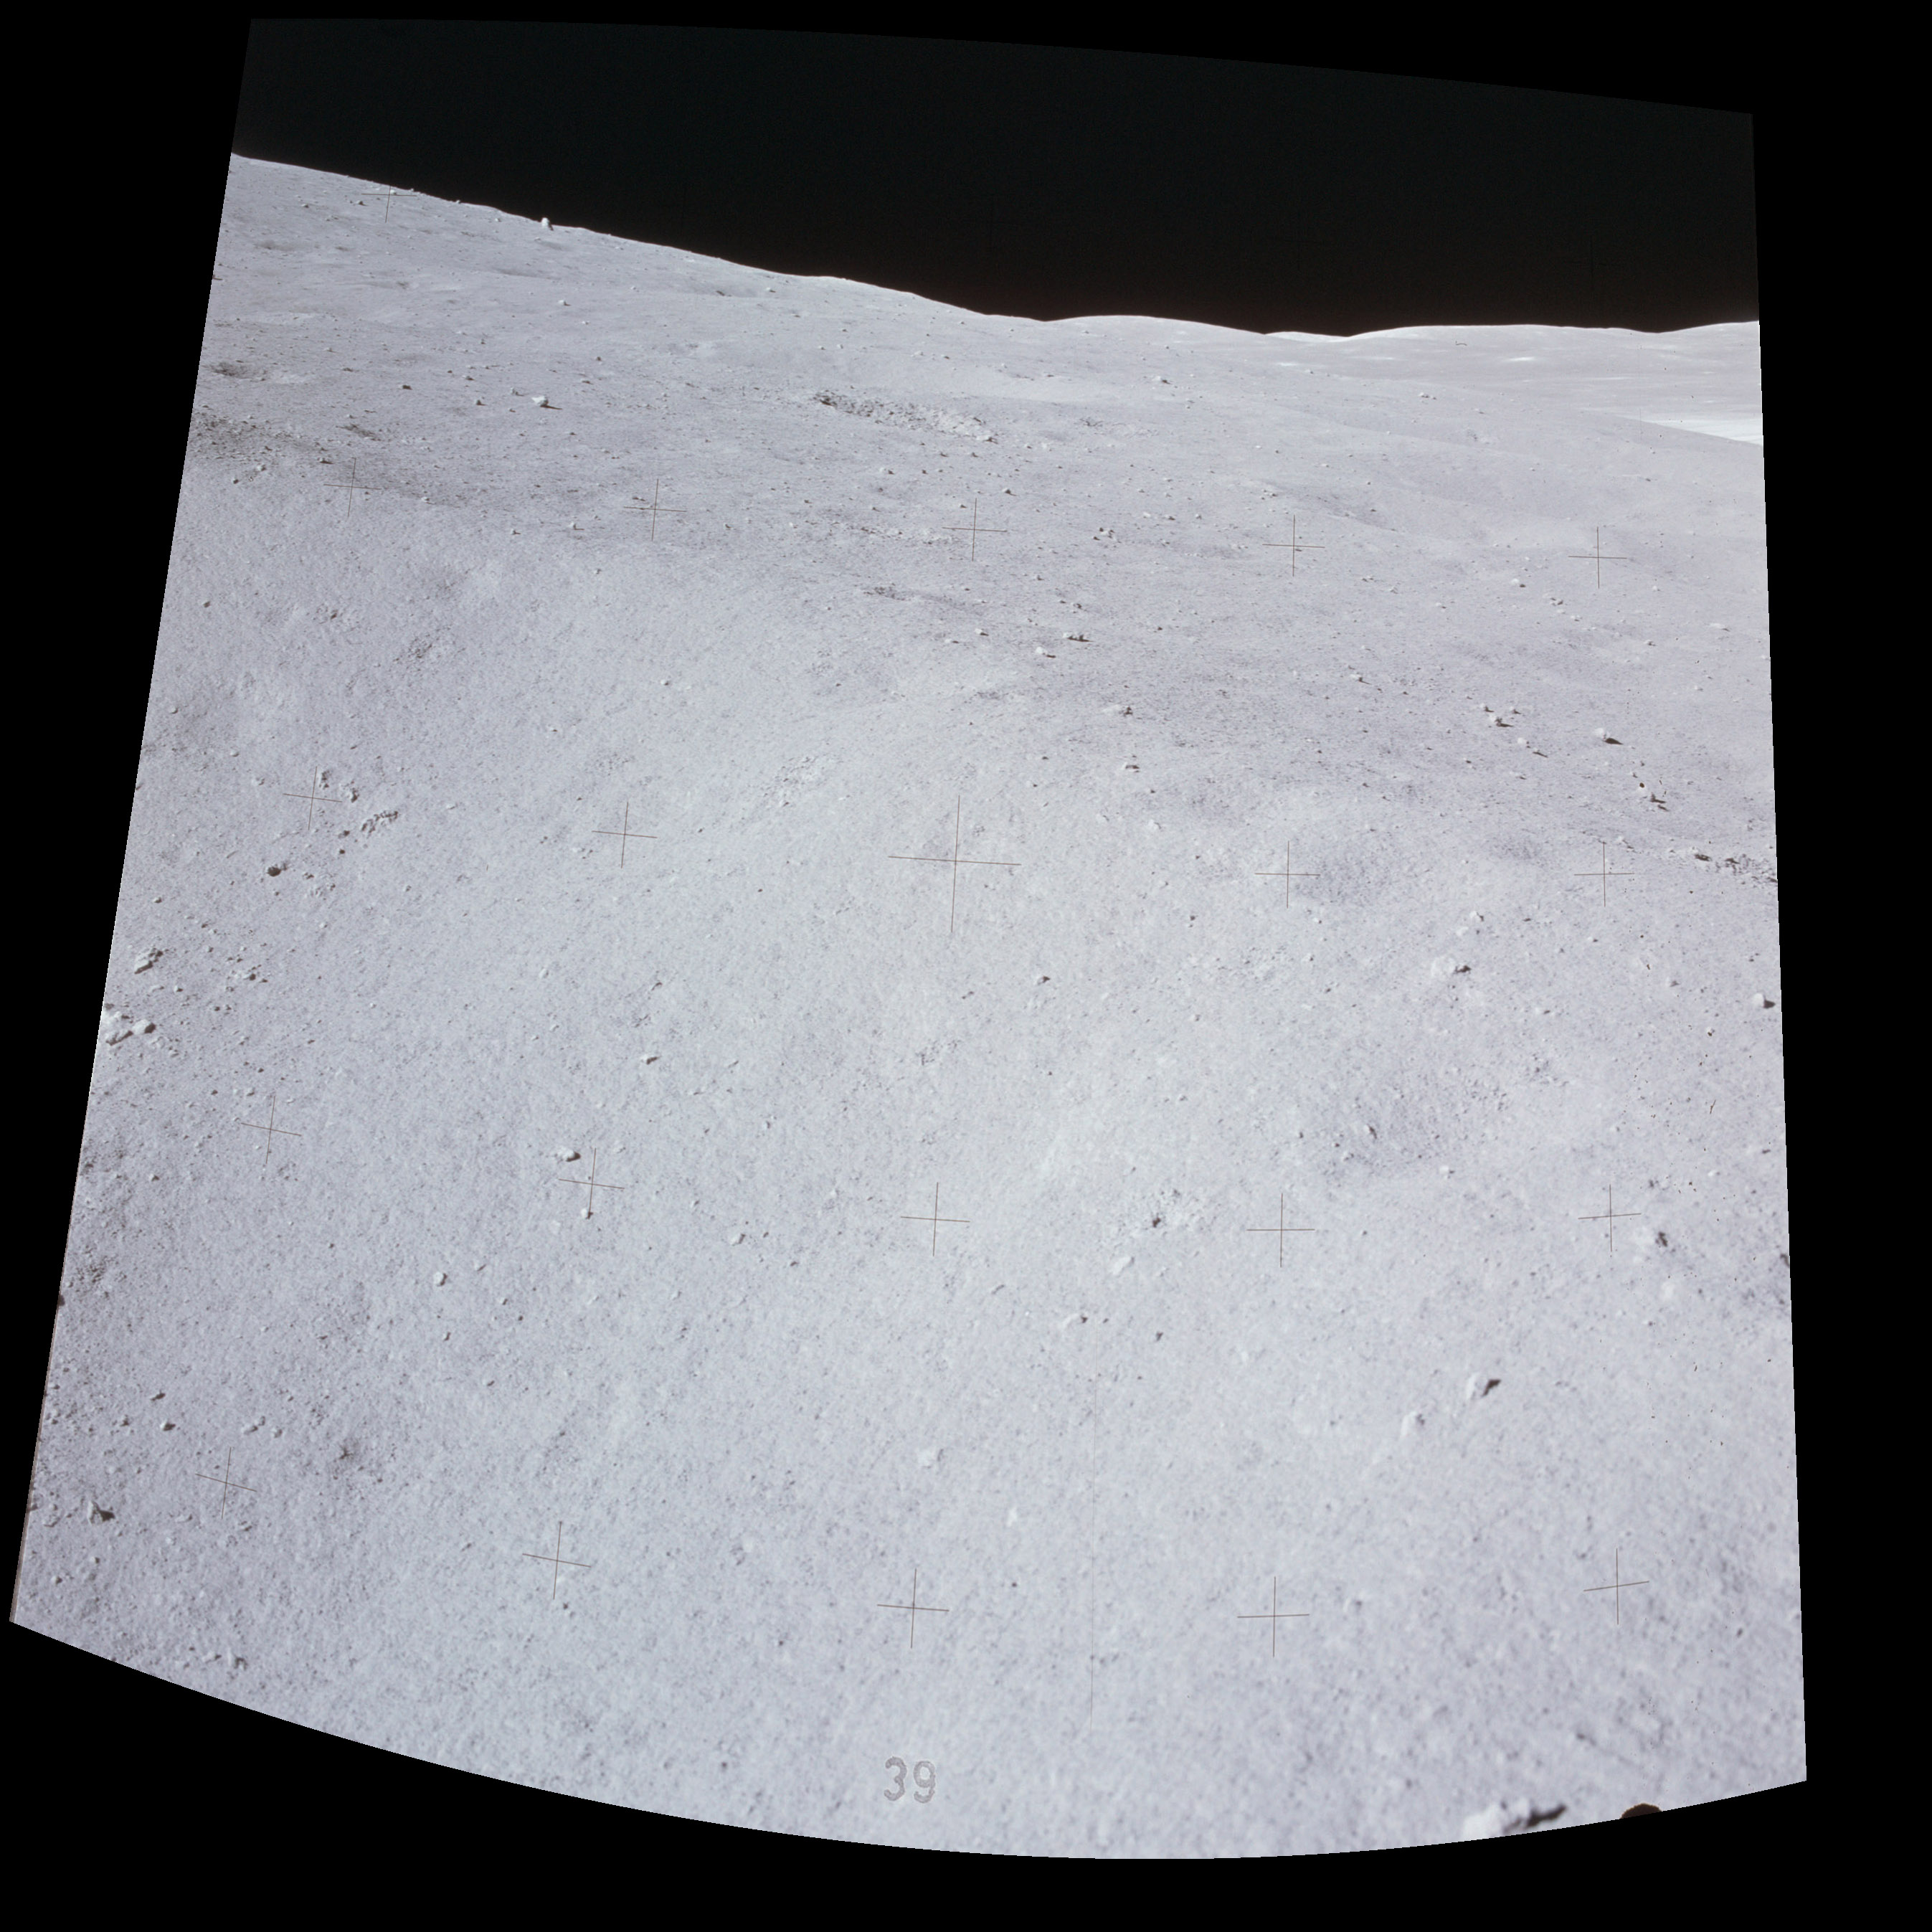
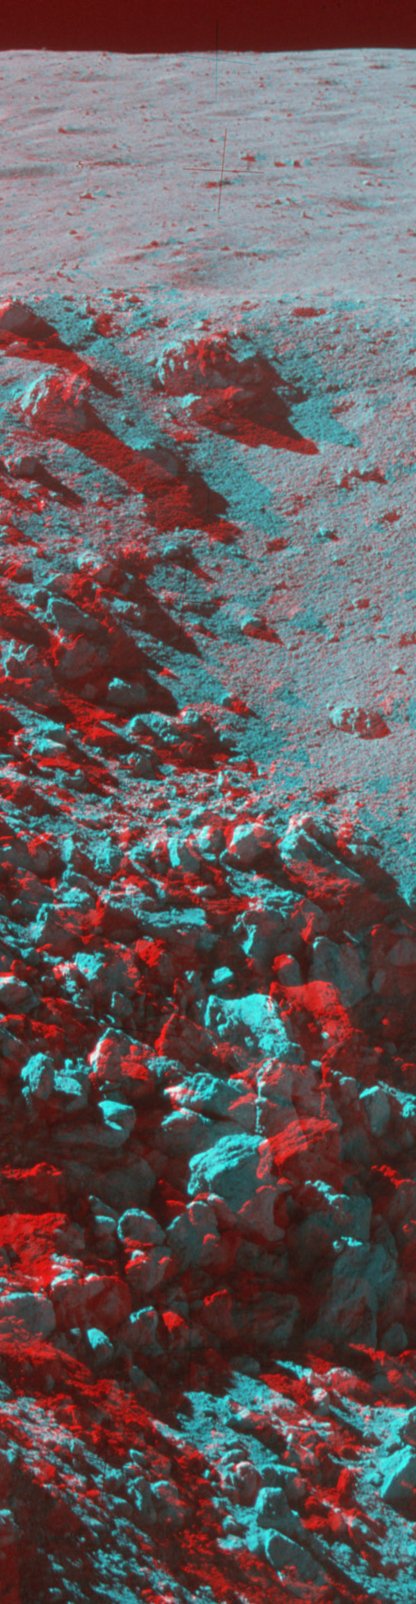
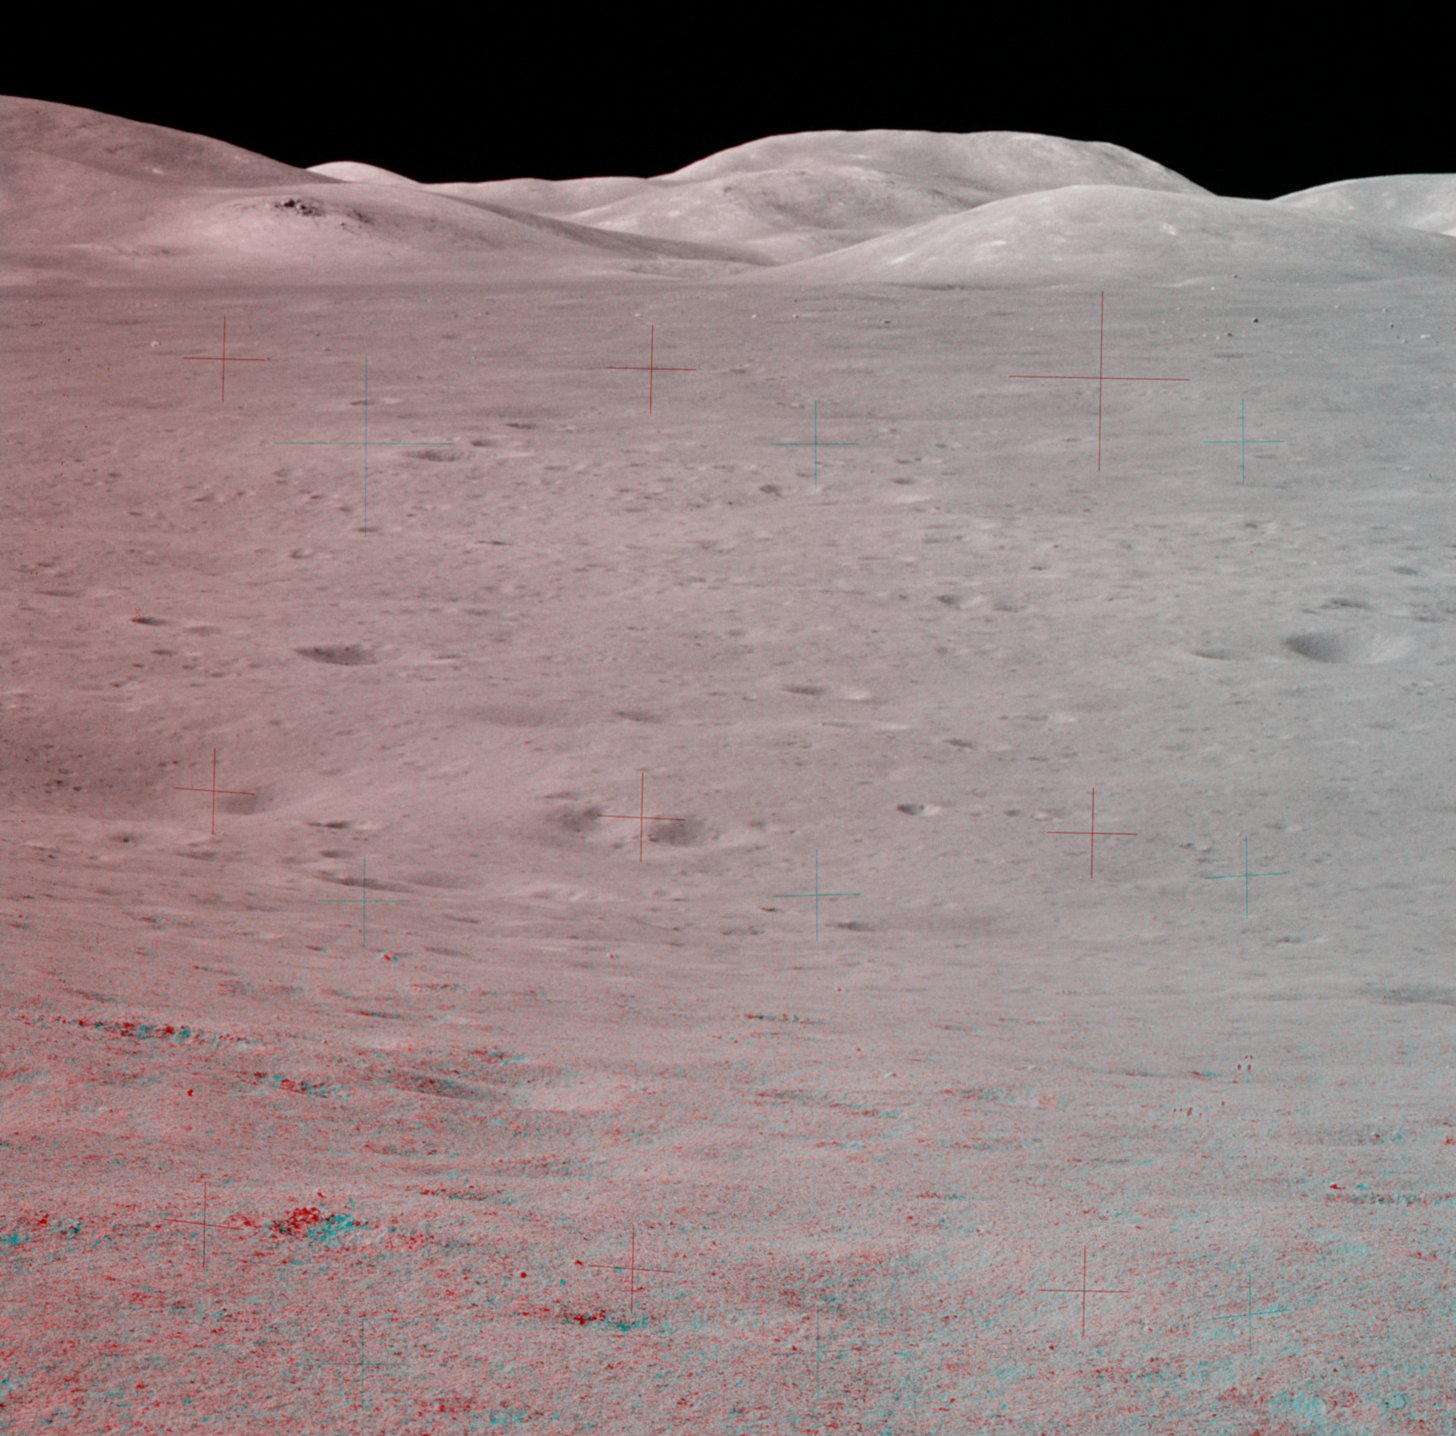
The Valley of Taurus-Littrow is on the southeast margin of the Serenitatis Basin, with its long axis pointing toward the center of the basin. It is flanked on the north and south by mountains that rise two km or more above the valley floor. The valley and mountains form a classic graben/horst geologic structure, which resulted from outward displacement of material at the edge of the basin during the impact, 3.87 billion years ago. Relatively soon after the impact event, lava began to fill the Serentitatis Basin. Geophysical measurements made during the mission suggest that the lava fill at Taurus-Littrow is about 1000 - 1200 m thick. The ages of the basalt samples returned by the crew indicate that the filling ended about 3.6 to 3.7 billion years ago. The thickness of the regolith layer accumulated since that time is not well determined at Taurus-Littrow. Typical thicknesses on the lunar mare are about 5 meters. Regolith sampled in the center of the valley is composed almost entirely of basalt fragments, indicating that material thrown off the mountains is not an important contributor. Serentitatis is a relatively old mare, suggesting that typical regolith thickness at Taurus-Littrow is greater than 5 meters. Evidence at Shorty Crater indicates a regolith thickness of 10 to 15 meters while, at Van Serg Crater, the regolith thickness is more than 15 meters. Like all mare surfaces, the valley floor has relatively few large craters but increasing numbers at smaller sizes. Overall, the valley is relatively flat, sloping down about 1 degree toward its eastern end. On smaller, local scales, the cumulative effect of randomly-distributed impacts is an surface between the larger craters that rises and falls a few meters over distances of several tens of meters.
Trafficability on the valley floor is good. During the three traverses, Cernan and Schmitt drove a map distance of 32.3 kilometers in 253.5 minutes, giving an average speed of 7.6 km/hr. At that speed Cernan had to keep his eye on the road to spot hazards but, generally, was able to see hazards in plenty of time to steer around them. The total odometer distance travelled during the three traverses was 36.0 kilometers, only 11.5 percent greater than the map distance. The most important hazards were fresh craters from about the same size as the Rover (3 meters long) up to a size where crater rims and ejecta are easily visible in the rolling terrain. Around the LM, the average spacing of fresh craters bigger than 3 meters is roughly 40 meters.
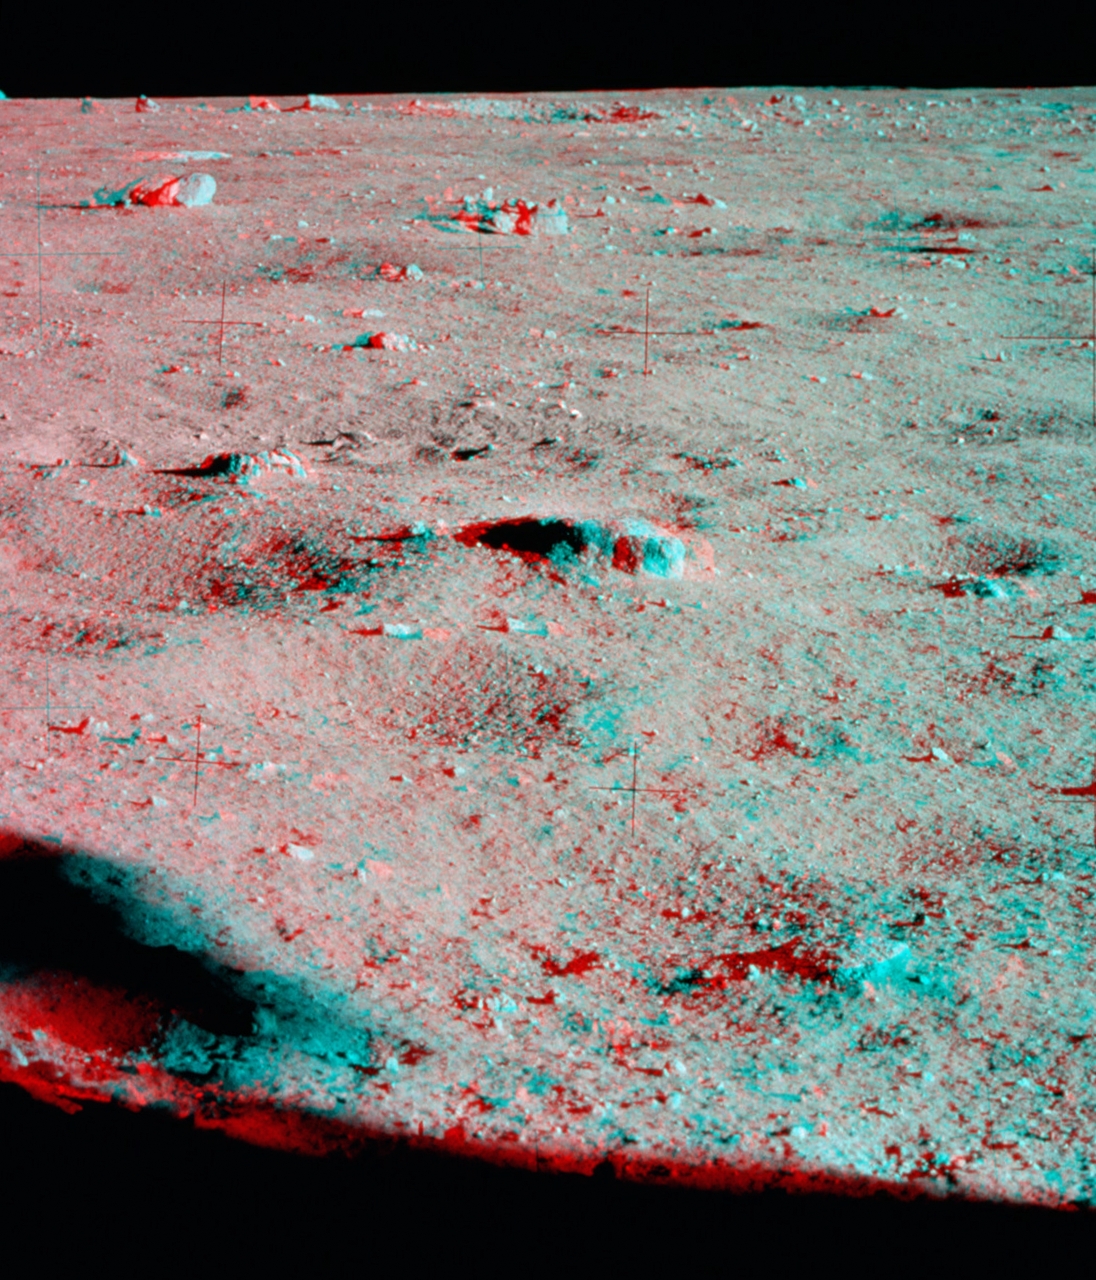
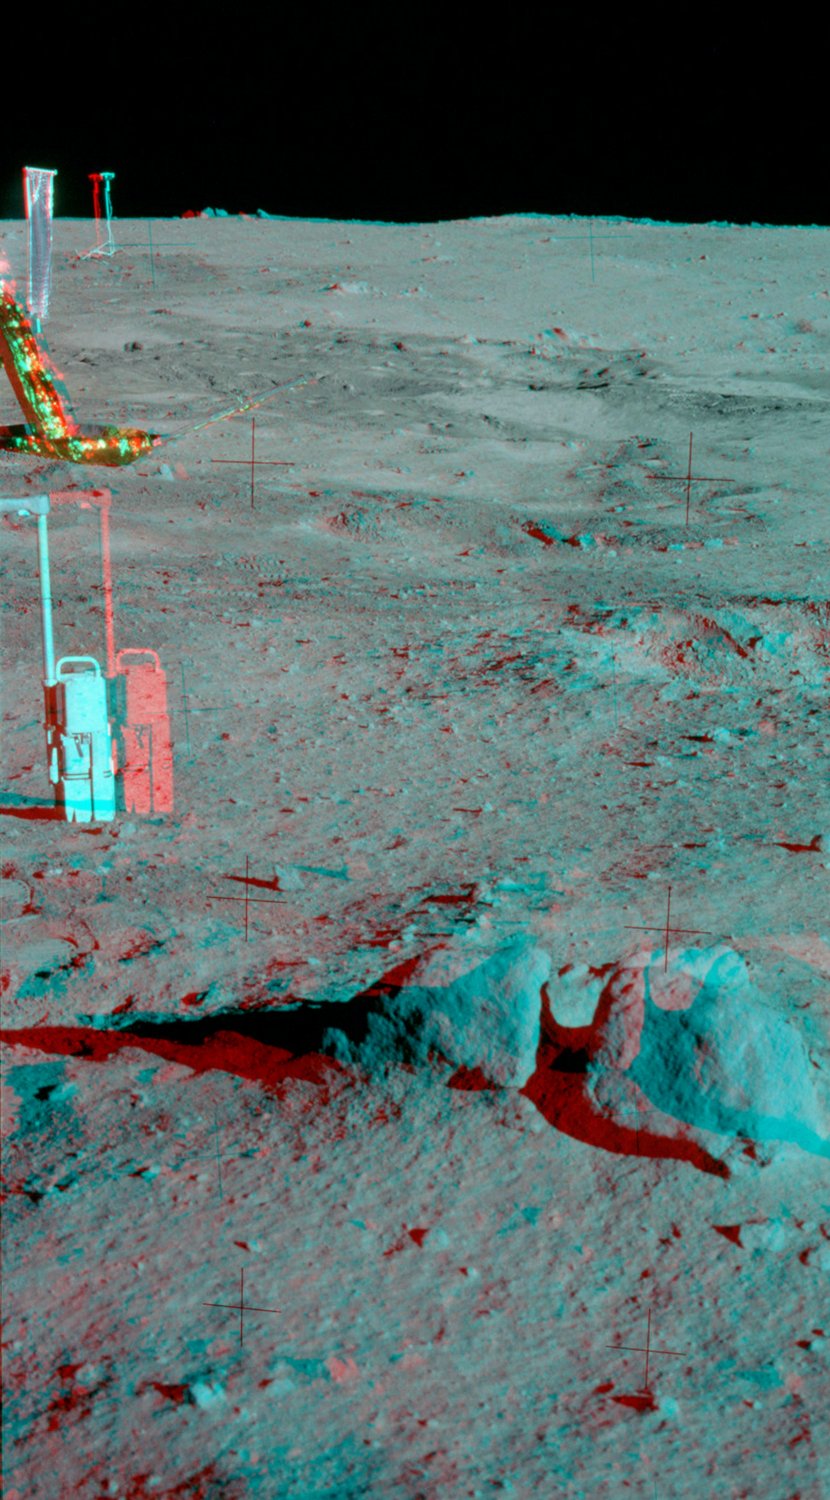
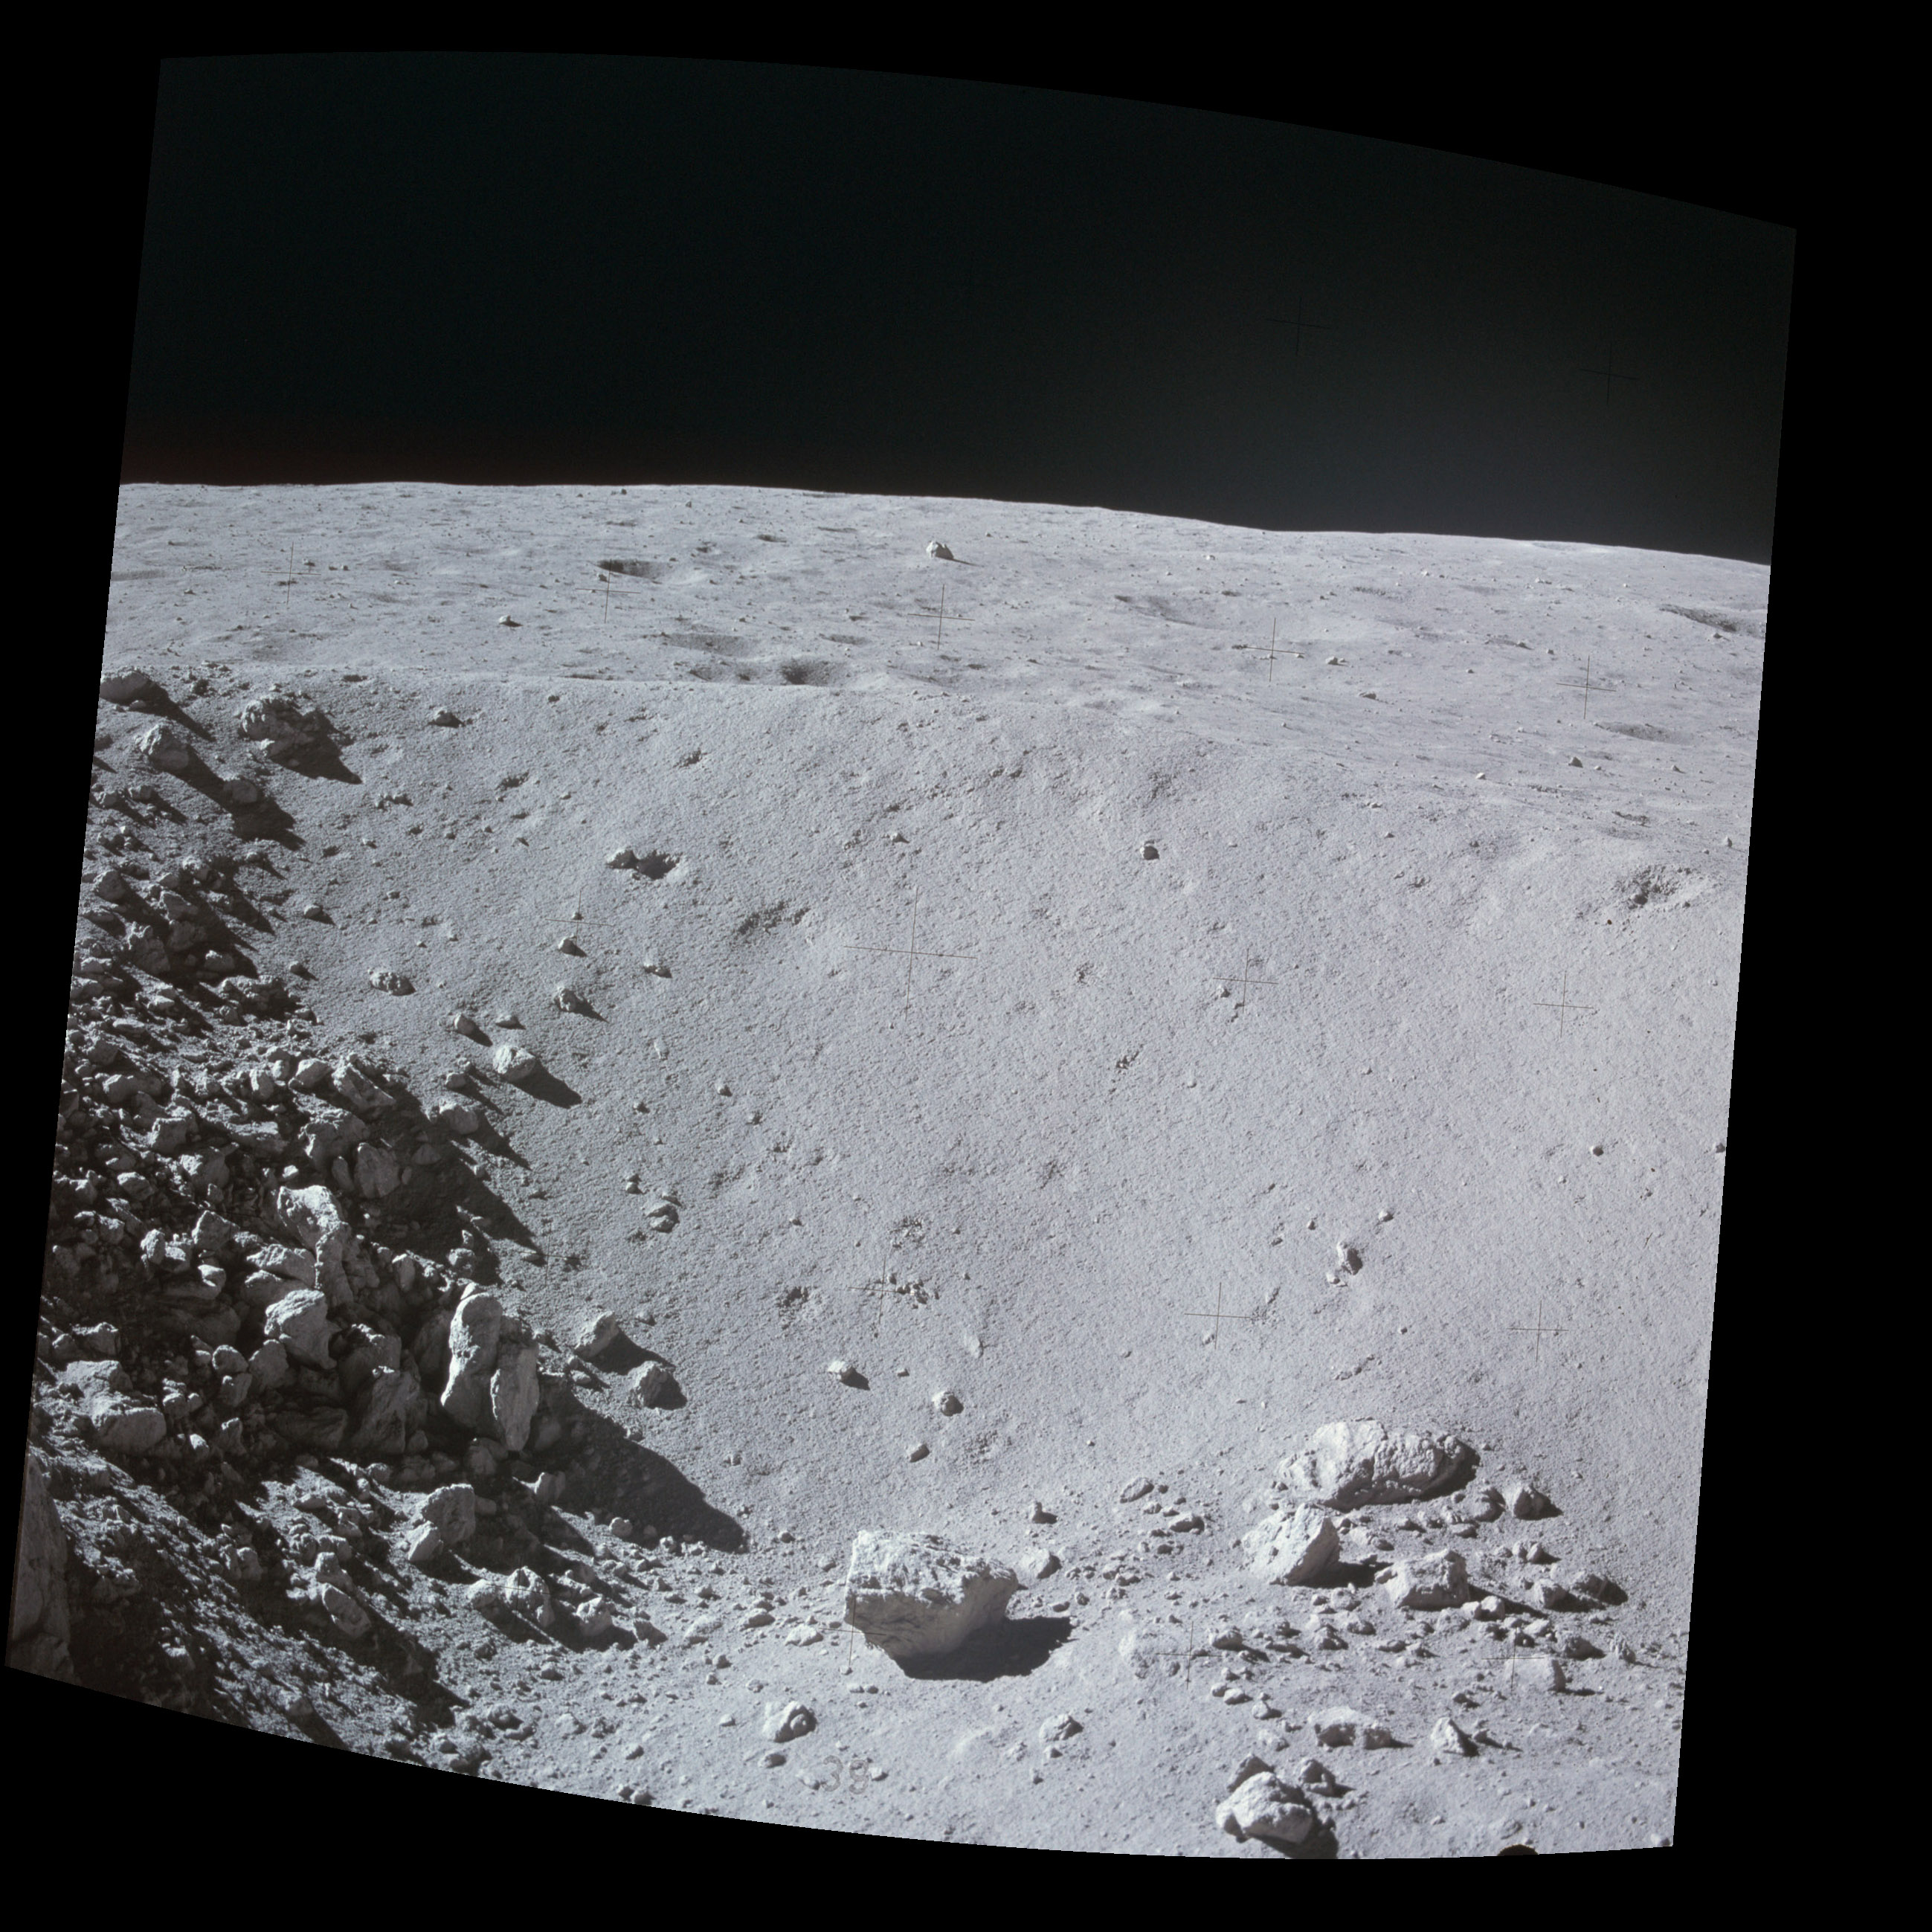
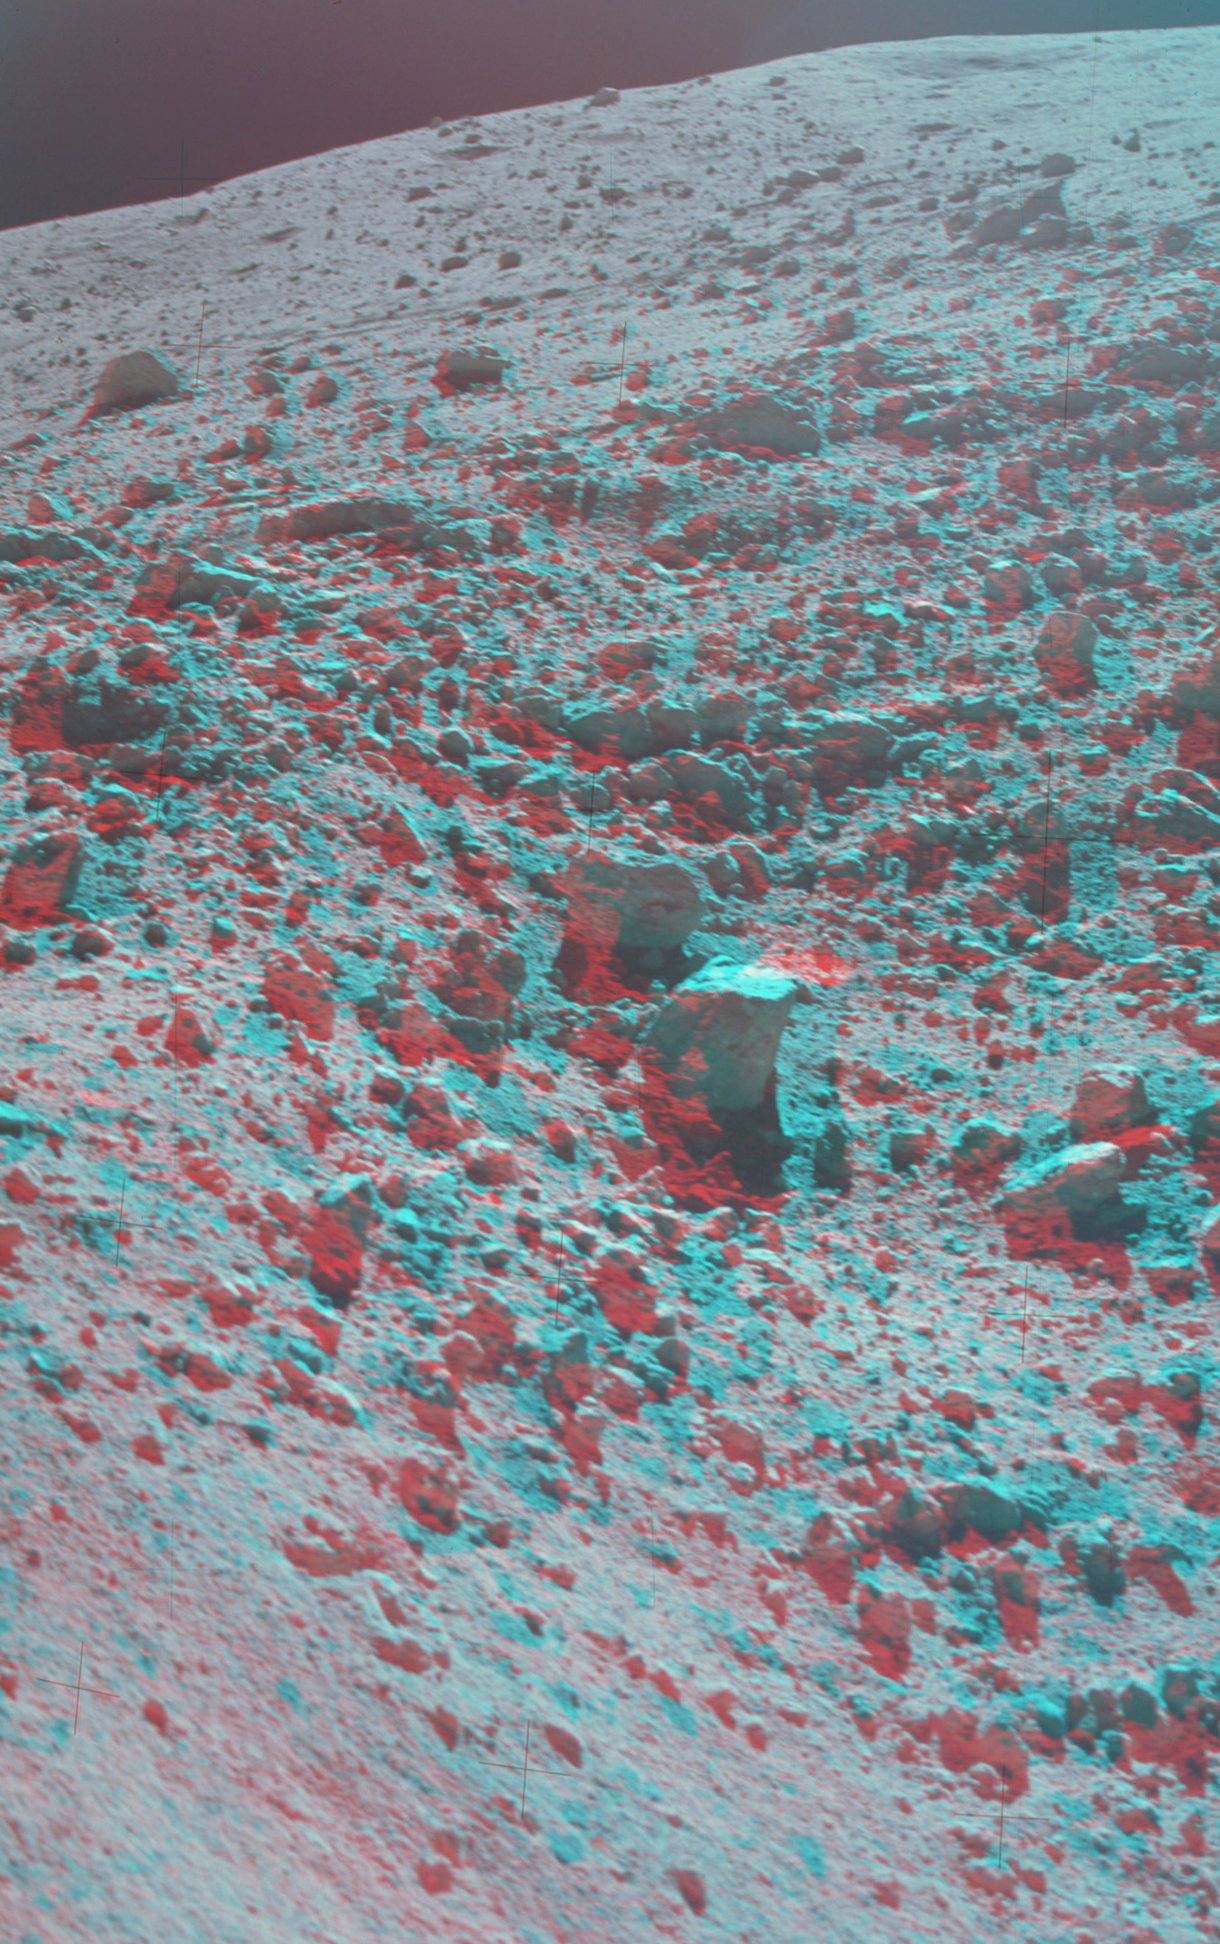
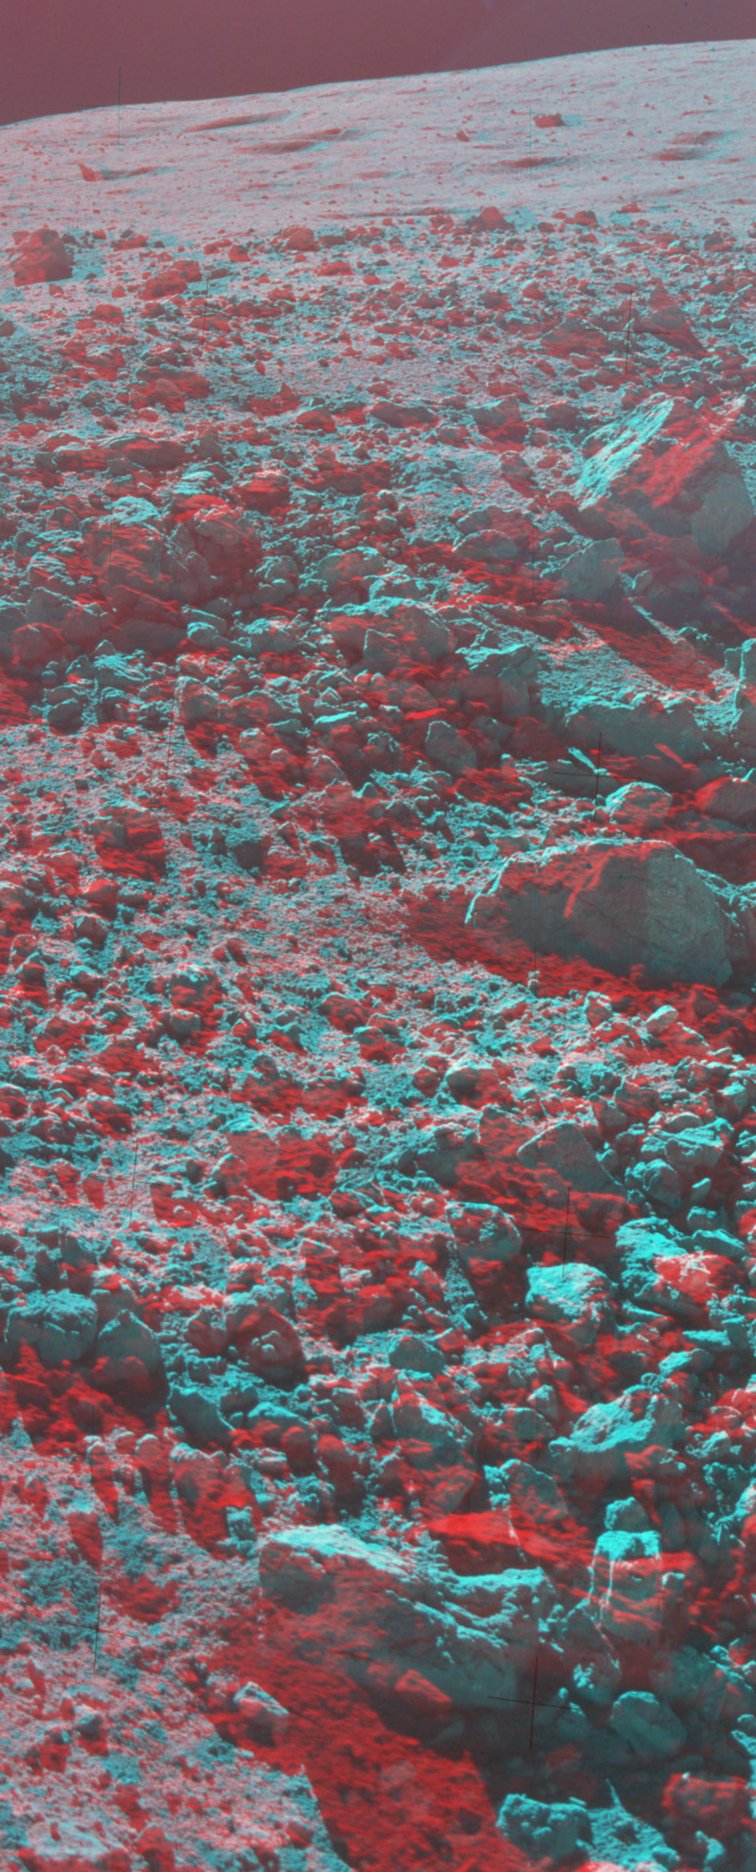
The mountains that bound the valley are composed of pre-Serentitatis material uplifted during the event. These were then draped with Serentitatis ejecta, much of it impact-melt breccias. During the second and third EVAs, the crew visited locations on the lower slopes of the North and South Masiffs and the Scultured Hills where they could examine and sample boulders that had tumbled down into reach from outcrops of Serenitiatis ejecta high on the mountains. The slopes above these locations are about 26 degrees.
Because of the slopes, impacts on the mountain flanks produces net downward motion of ejecta. Rock outcrops on the upper third of the South Massif and the upper two thirds of the North Massif indicate that the regolith on those parts of the mountains is thin. On the lower parts mountains, depth of the regolith increases toward the bottom and then decreases with distance out on the valley floor. At about the 4800 m contour at the base on the North Massif in the 1974 Lunar Topophotomap of the landing site, the slope changes for about 26 degrees to something like 16 degrees on the accumulated talus. Simplistic geometry suggests talus accumulations at the base of the mountain of up to 40 meters.
One notable feature of the mountain flanks are tracks made by boulders as they bounce, tumble, roll, and slide down from various outcrops after being dislodged by impacts or seismic activity. Figure 8-15 from the Apollo 17 Prelimiinary Science Report shows identified boulder tracks on the North Massif.
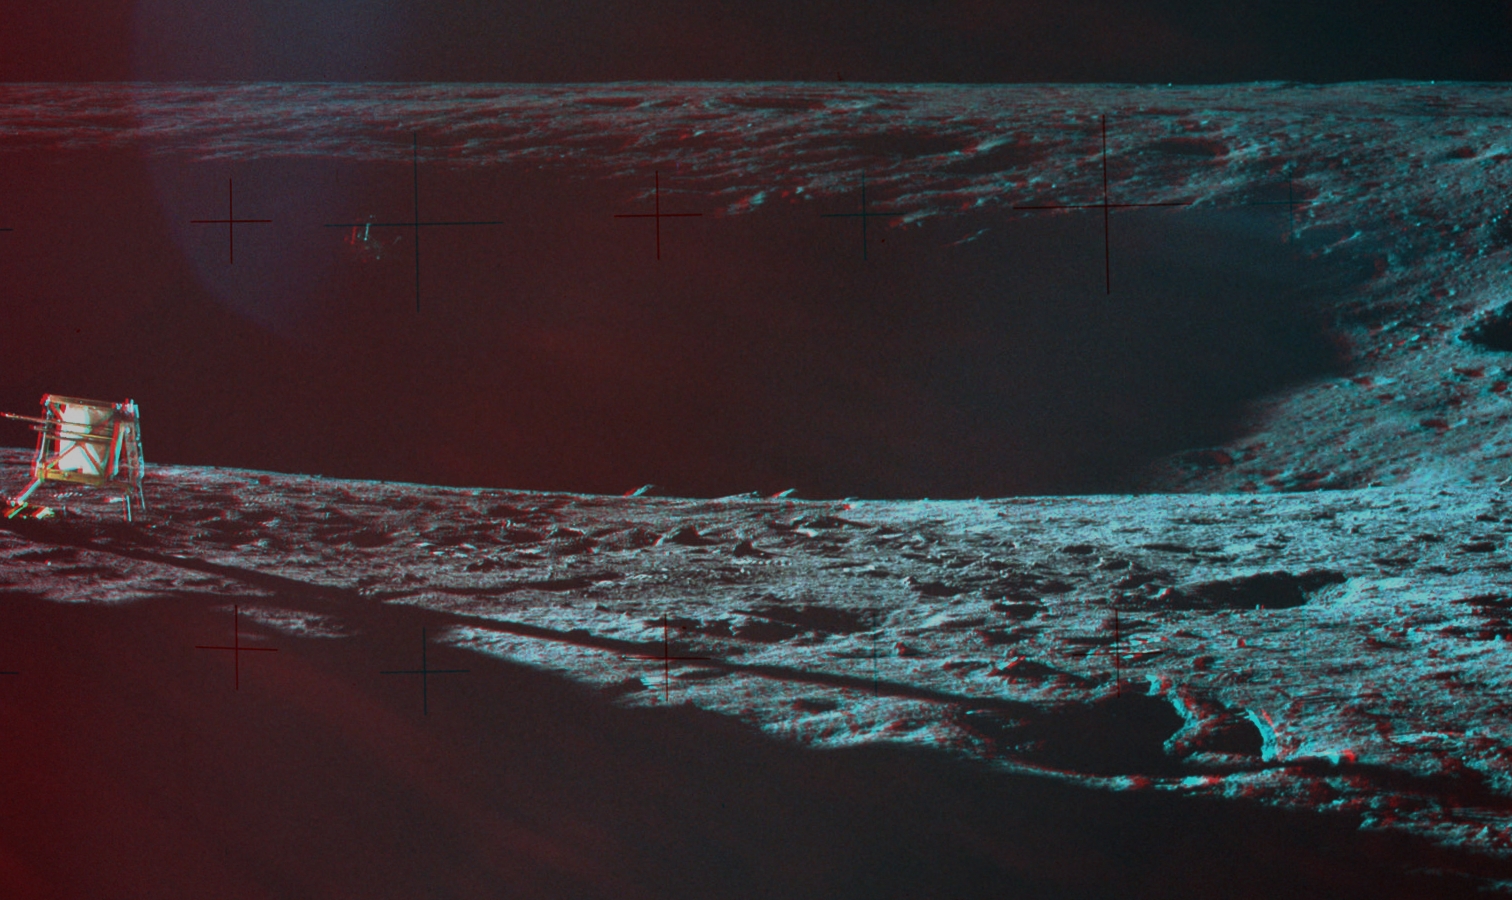
7.1 Valley Floor, LM/ALSEP/SEP
| Mission Elapsed Time | Location | Color/ B&W |
Assembly Link |
Frames | Anaglyphs |
Additional Material | Notes | |
| 115:03:02 | LM Cabin, LMP Window |
C |
Pre-EVA LMP Window | AS17-147- 22469-76 |
||||
| LM Cabin, CDR Window |
Pre-EVA CDR Window | AS17-147- 22479-91 |
||||||
| 117:47:43 |
4 o'clock LM position |
C |
AS17-147- 22492-521 |
|||||
| Western portion | 22493-504, 517 to 519 |
Clockwise from the LM
to the Wessex Cleft |
||||||
| Northern portion | 22493-509 |
Clockwise from down-Sun to up-Sun | ||||||
| Eastern portion | 22504-14 |
Clockwise from Wessex
Cleft to the LM |
||||||
| 120:36:02 |
Geophone 4 |
C |
Geo. 4 Partial | AS17-147- 22528-32 |
||||
| 120:40:30 |
Geophone 3 |
C |
AS17-147- 22544-62 |
|||||
| Northern portion | 22544-55 |
Clockwise from down-Sun to up-Sun | ||||||
| Southern portion | 22553-61 |
Clockwise from up-Sun to down-Sun | ||||||
| 120:48:56 |
ALSEP |
C |
AS17-147- 22569-88 |
|||||
| Northern portion | Clockwise from down-Sun to up-Sun | |||||||
| Southern portion | Clockwise from up-Sun to down-Sun | |||||||
| 120:55:55 |
ALSEP |
BW |
AS17-136- 20683-710 |
|||||
| Northern portion (3Mb) |
20687-99 |
Anaglyphs with
context (7Mb) |
Indiv. Anaglyps: 20688-89 20689-90 20690-91 20691-92 20692-93 20693-94 20694-95 20695-96 |
Clockwise from down-Sun to up-Sun | mid-distance anaglyphs done |
|||
| Southern
portion (3Mb) |
20685-86 plus 20699-710 |
Anaglyphs with
context (7Mb) |
Indiv. Anaglyphs: 20685-86 20701-02 20702-03 20703-04 20704-05 20705-06 20706-08 20708-09 |
Clockwise from up-Sun to down-Sun | mid-distance anaglyphs done |
|||
| 123:06:24 |
SEP |
C |
Partial Pan |
AS17-134- 20437-46 |
||||
| 127:02:28 | South Massif outcrops,
LMP window |
AS17-144- 21983-88 |
||||||
| 127:02:28 | North Massif boulder
tracks, LMP Window |
AS17-144- 21991-93 |
Taken with the 500-mm lens. The images are blurred by camera motion due to the difficulty Jack had in aiming the camera off to his right in the cramped confines of the LM cabin. The 'dark boulder' and the lower part of its track are on the right. Orientation of the assembly matches that seen in AS17-147-22502, a frame from Jack's 4 o'clock pan taken at 117:47:43, early in EVA-1. A second boulder, below and slightly to the left of the dark boulder, also has an associated track. | |||||
| 127:02:28 |
North Massif outcrops,
LMP window |
AS17-144- 21994-98 |
7.2 Valley Floor, EVA-1 Traverse and Station 1
| Mission Elapsed Time | Location | Color/ B&W |
Assembly Link | Frames | Anaglyphs |
Additional Material | Notes |
| 1215051 |
Valley floor |
B&W |
Traverse photos: SEP to Sta 1 (16Mb) |
AS17-136- 20723-38 AS17-134- 20390-93 |
LRO detail (1
Oct 2009) of EVA-1 traverse |
Because Jack is
carrying a seismic charge, he only averages
about 1 picture every 75 meters during the drive. |
|
| 122:26:14 | Station 1 | C | AS17-134- 20408-31 |
||||
| Northern portion | 20408 to 11, 20426 to 31 |
Clockwise from down-Sun to up-Sun | |||||
| Southern portion | 20411 to 25 | Clockwise from up-Sun to down-Sun | |||||
| 122:32:24 | Station 1 | B&W |
AS17-136- 20744-76 |
||||
| Northern portion | 20745 to 62 | Clockwise from down-Sun to up-Sun | |||||
| Southern portion | 20764 to 76 | Clockwise from up-Sun to down-Sun | |||||
| 122:36:58 |
Valley Floor |
B&W |
Traverse photos: Return from Sta. 1 - Part 1 (17Mb) |
AS17-136- 20777-96 |
LRO detail (1 Oct 2009) of EVA-1 traverse | This sequence ends at
about 122:40:04
just
before
Gene
turns
to
his
left
(west)
so
Jack
can
take
some
pictures
of
the
white
mantle
and
the
LM.
Jack
has
taken
20
pictures
during
the
400-meter
drive,
or about one every 20 meters |
|
| 122:40:04 |
Valley floor |
B&W |
Traverse photos: Return from Sta. 1 - Part 2 (13Mb) |
AS17-136- 20797-814 |
LRO detail (1 Oct 2009) of EVA-1 traverse | Sequence ends just
before deployment of EP-7 at 122:42:15 |
|
| 122:42:15 | Valley floor |
B&W C |
EP-7 "Locators" |
AS17-136- 20814-15 AS17-134- 20433-34 |
LRO detail (1 Oct 2009) of EVA-1 traverse | "Locator" shots taken
before Jack deploys the seismic charge |
|
| 122:43:12 |
Valley floor |
B&W |
EP-7 LRV Pan see, also, a PDF version (12Mb) |
AS17-136- 20815-28 |
LRO detail (1 Oct 2009) of EVA-1 traverse | Gene drove the Rover in
a slow, clockwise circle around the seismic charge
while Jack took a sequence of thirteen frames.
The stitched assembly uses on the upper right portion
of each frame |
|
| 122:43:44 |
Valley floor |
B&W |
Return trv from
Sta. 1 - Part 3 (13Mb) |
AS17-136- 20828-44 |
LRO detail of EVA-1 traverse | Sequence ends as they
emerge from a depression where Jack photographed what
they believe is bedrock at 122:45:33.
The photos of the bedrock are probably 20838 to
20842. The bearing and distance to the LM
is 336 and 0.4 km. |
|
| 122:45:33 | Valley floor |
B&W |
Return from Sta. 1
- Part 4 (16Mb) |
AS17-136- 20844-63 |
LRO detail (1 Oct 2009) of EVA-1 traverse | the sequence ends when
Gene drop Jack off at the SEP receiver before laying
down orthogonal Rover tracks to guide deployment of
the SEP antenna wires. |
|
7.2 EVA-2
| Mission Elapsed Time |
Location | Color/ B&W |
Assembly Link | Frames | Anaglyphs |
Additional Material | Notes |
| 143:01:23 | EVA-2, LM, 8
o'clock |
AS17-137- 20866-93 |
|||||
| 143:01:52 | Station 2 Boulder 1, Gene | AS17-137- 20903-08 |
|||||
| 143:01:52 | Station 2 Boulder 1, Jack | AS17-138- 21030-35 |
|||||
| 143:10:08 | Station 2 Boulder 2, Gene | AS17-137- 20912-23 |
|||||
| 143:22:02 | Station 2, Gene | AS17-137- 20926-56 |
|||||
| 143:37:16 | Station 2, Jack | AS17-138- 21053-73 |
|||||
7.3 EVA-3 Traverse to North
Massif, Turning Point Rock, Station 6, and Station 7
Gene and Jack took multiple photographs at three locations on
the North Massif: Turning Point Rock, where they
maneuvered the Rover to get good photographic coverage but
didn't dismount; and Stations 6 and 7. These three sites
are marked in a CSM Pan Camera detail, along with three
boulders that serve are markers in some of the photographs.
| Mission Elapsed Time | Location | Color/ B&W |
Assembly Link | Frames | Anaglyphs |
Additional Material | Notes |
| 164:24:50 |
Valley floor, north of
the LM |
B&W |
LM to Rover Sample Stop
( 22 Mb ) |
AS17-141- 21519-41 |
|||
| 164:33:38 |
Valley floor, north of the LM | B&W | LRV Sample Stop to
first view of Henry ( 8 Mb ) |
AS17-141- 21542-49 |
|||
| 164:37:49 |
Valley floor, north of the LM | B&W | Henry to the foot of
the North Massif |
AS17-141- 21549-59 |
|||
| LRO Detail (1
Oct 2009) TPR, Stations 6 and 7 |
|||||||
| 166:26:58 |
Station 7 | C | Gene's Sta. 7 pan (9Mb) | AS17-146- 22339-63 |
|||
| Southern portion
(4Mb) Views out into the valley and along the slopes to the east and west. |
22339 to 55 |
Anaglyphs with
context (8Mb) |
Indiv. anaglyphs: 22339-40 22340-41 22341-42 22342-43 22343-44 22344-45 22347-48 22348-49 22349-50 22350-51 22351-52 22352-53 22353-54 22354-55 |
Labelled version
(1Mb) |
7.3 EVA-3 Traverse to Sculptured
Hills, Station 8
| Mission Elapsed Time | Location | Color/ B&W |
Assembly Link | Frames | Anaglyphs |
Additional Material | Notes |
| |
|||||||
| |
|||||||
| |
|||||||
| |
|
|
|||||
| 167:07:50 | Station 8 | C | Gene's Station 8 Pan
(9 Mb) Gene took this pan from a location on the slope, well above the Rover |
AS17-146- 22375-97 |
Anaglyphs with
context (17 Mb) |
Indiv. anaglyphs: 22375-76 22376-77 22377-78 22378-79 22379-81 22381-82 22382-83 22383-84 22384-86 22387-88 22388-89 22389-90 22392-94 22394-95 22395-96 22396-97 |
|

North Massif Outcrops. Jack continued taken 500-mm photos out his window, taking this portrait of outcrops
on the upper part of the mountain. Assembly by Eric Jones. Click on the image for a full-resolution version.
Gene's 500mm shots taken outside the LM
Photographic Sites on the North Massif

Overlay of details from the 1974
Topophotomap and Pan
Camera frame AS17-2309
showing the locations and elevations of Turning Point Rock and Stations 6 and 7.
The scale and the lower right indicates 1 km. The contour intervals are 20 m.
(Click on the image for a larger version.)
showing the locations and elevations of Turning Point Rock and Stations 6 and 7.
The scale and the lower right indicates 1 km. The contour intervals are 20 m.
(Click on the image for a larger version.)
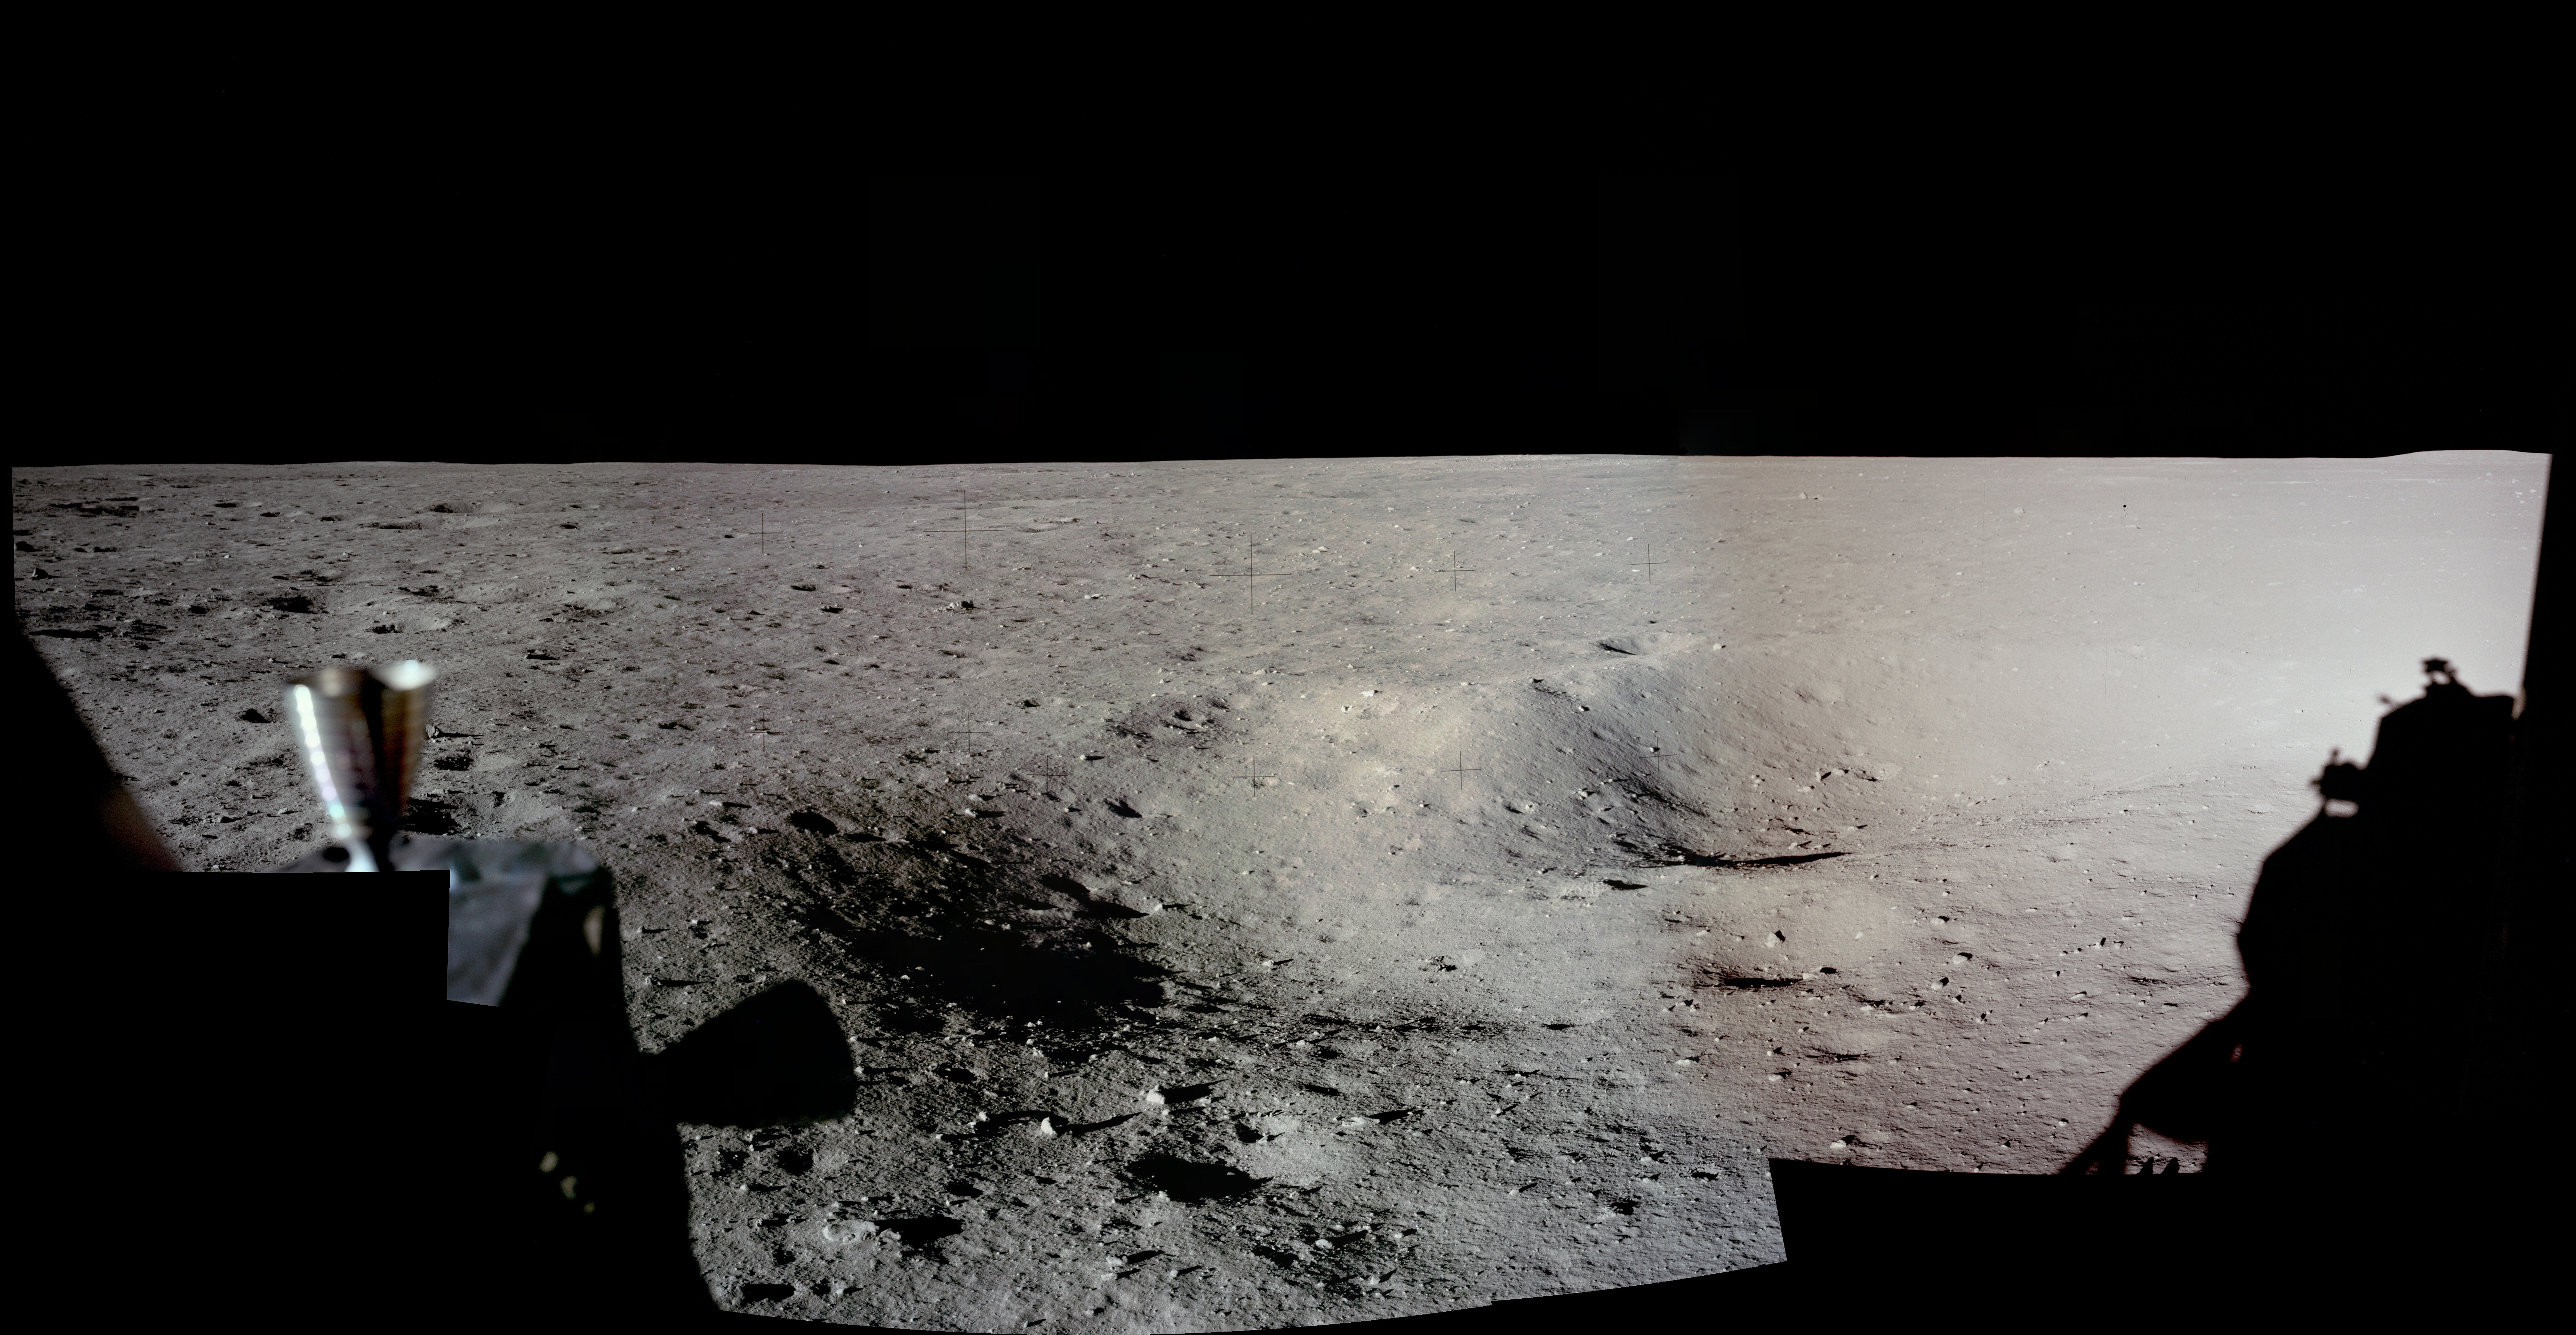
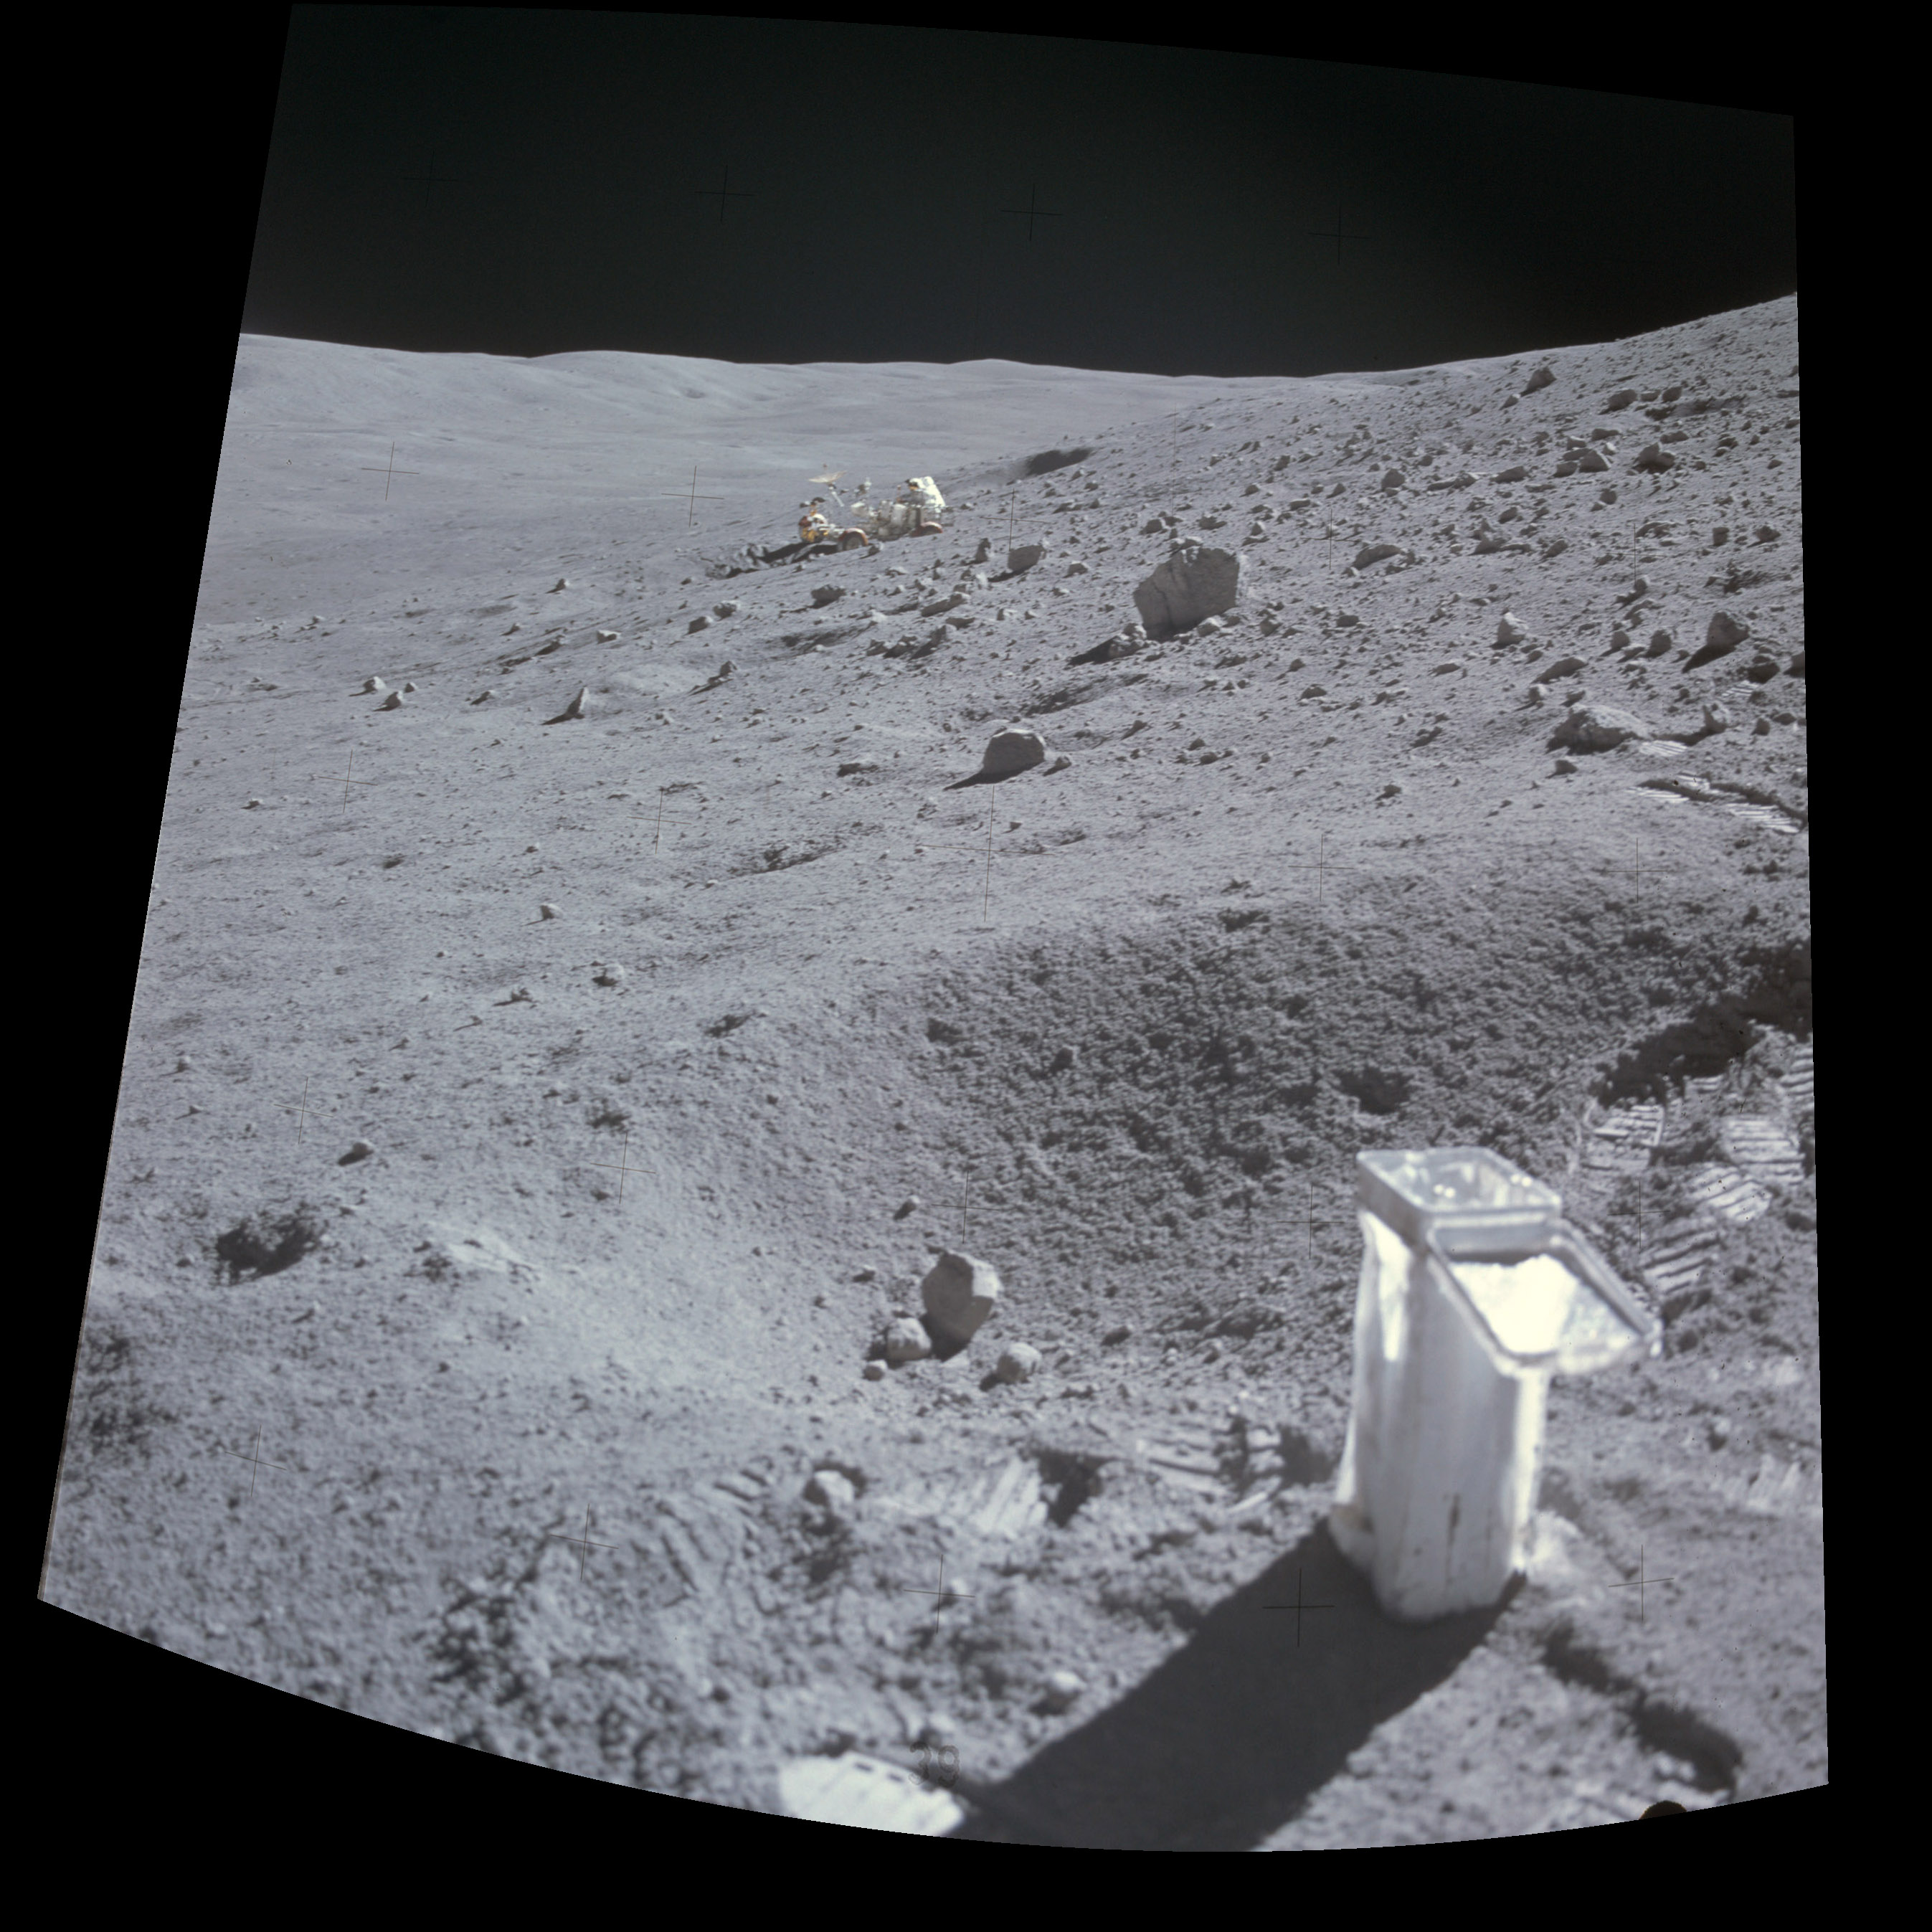
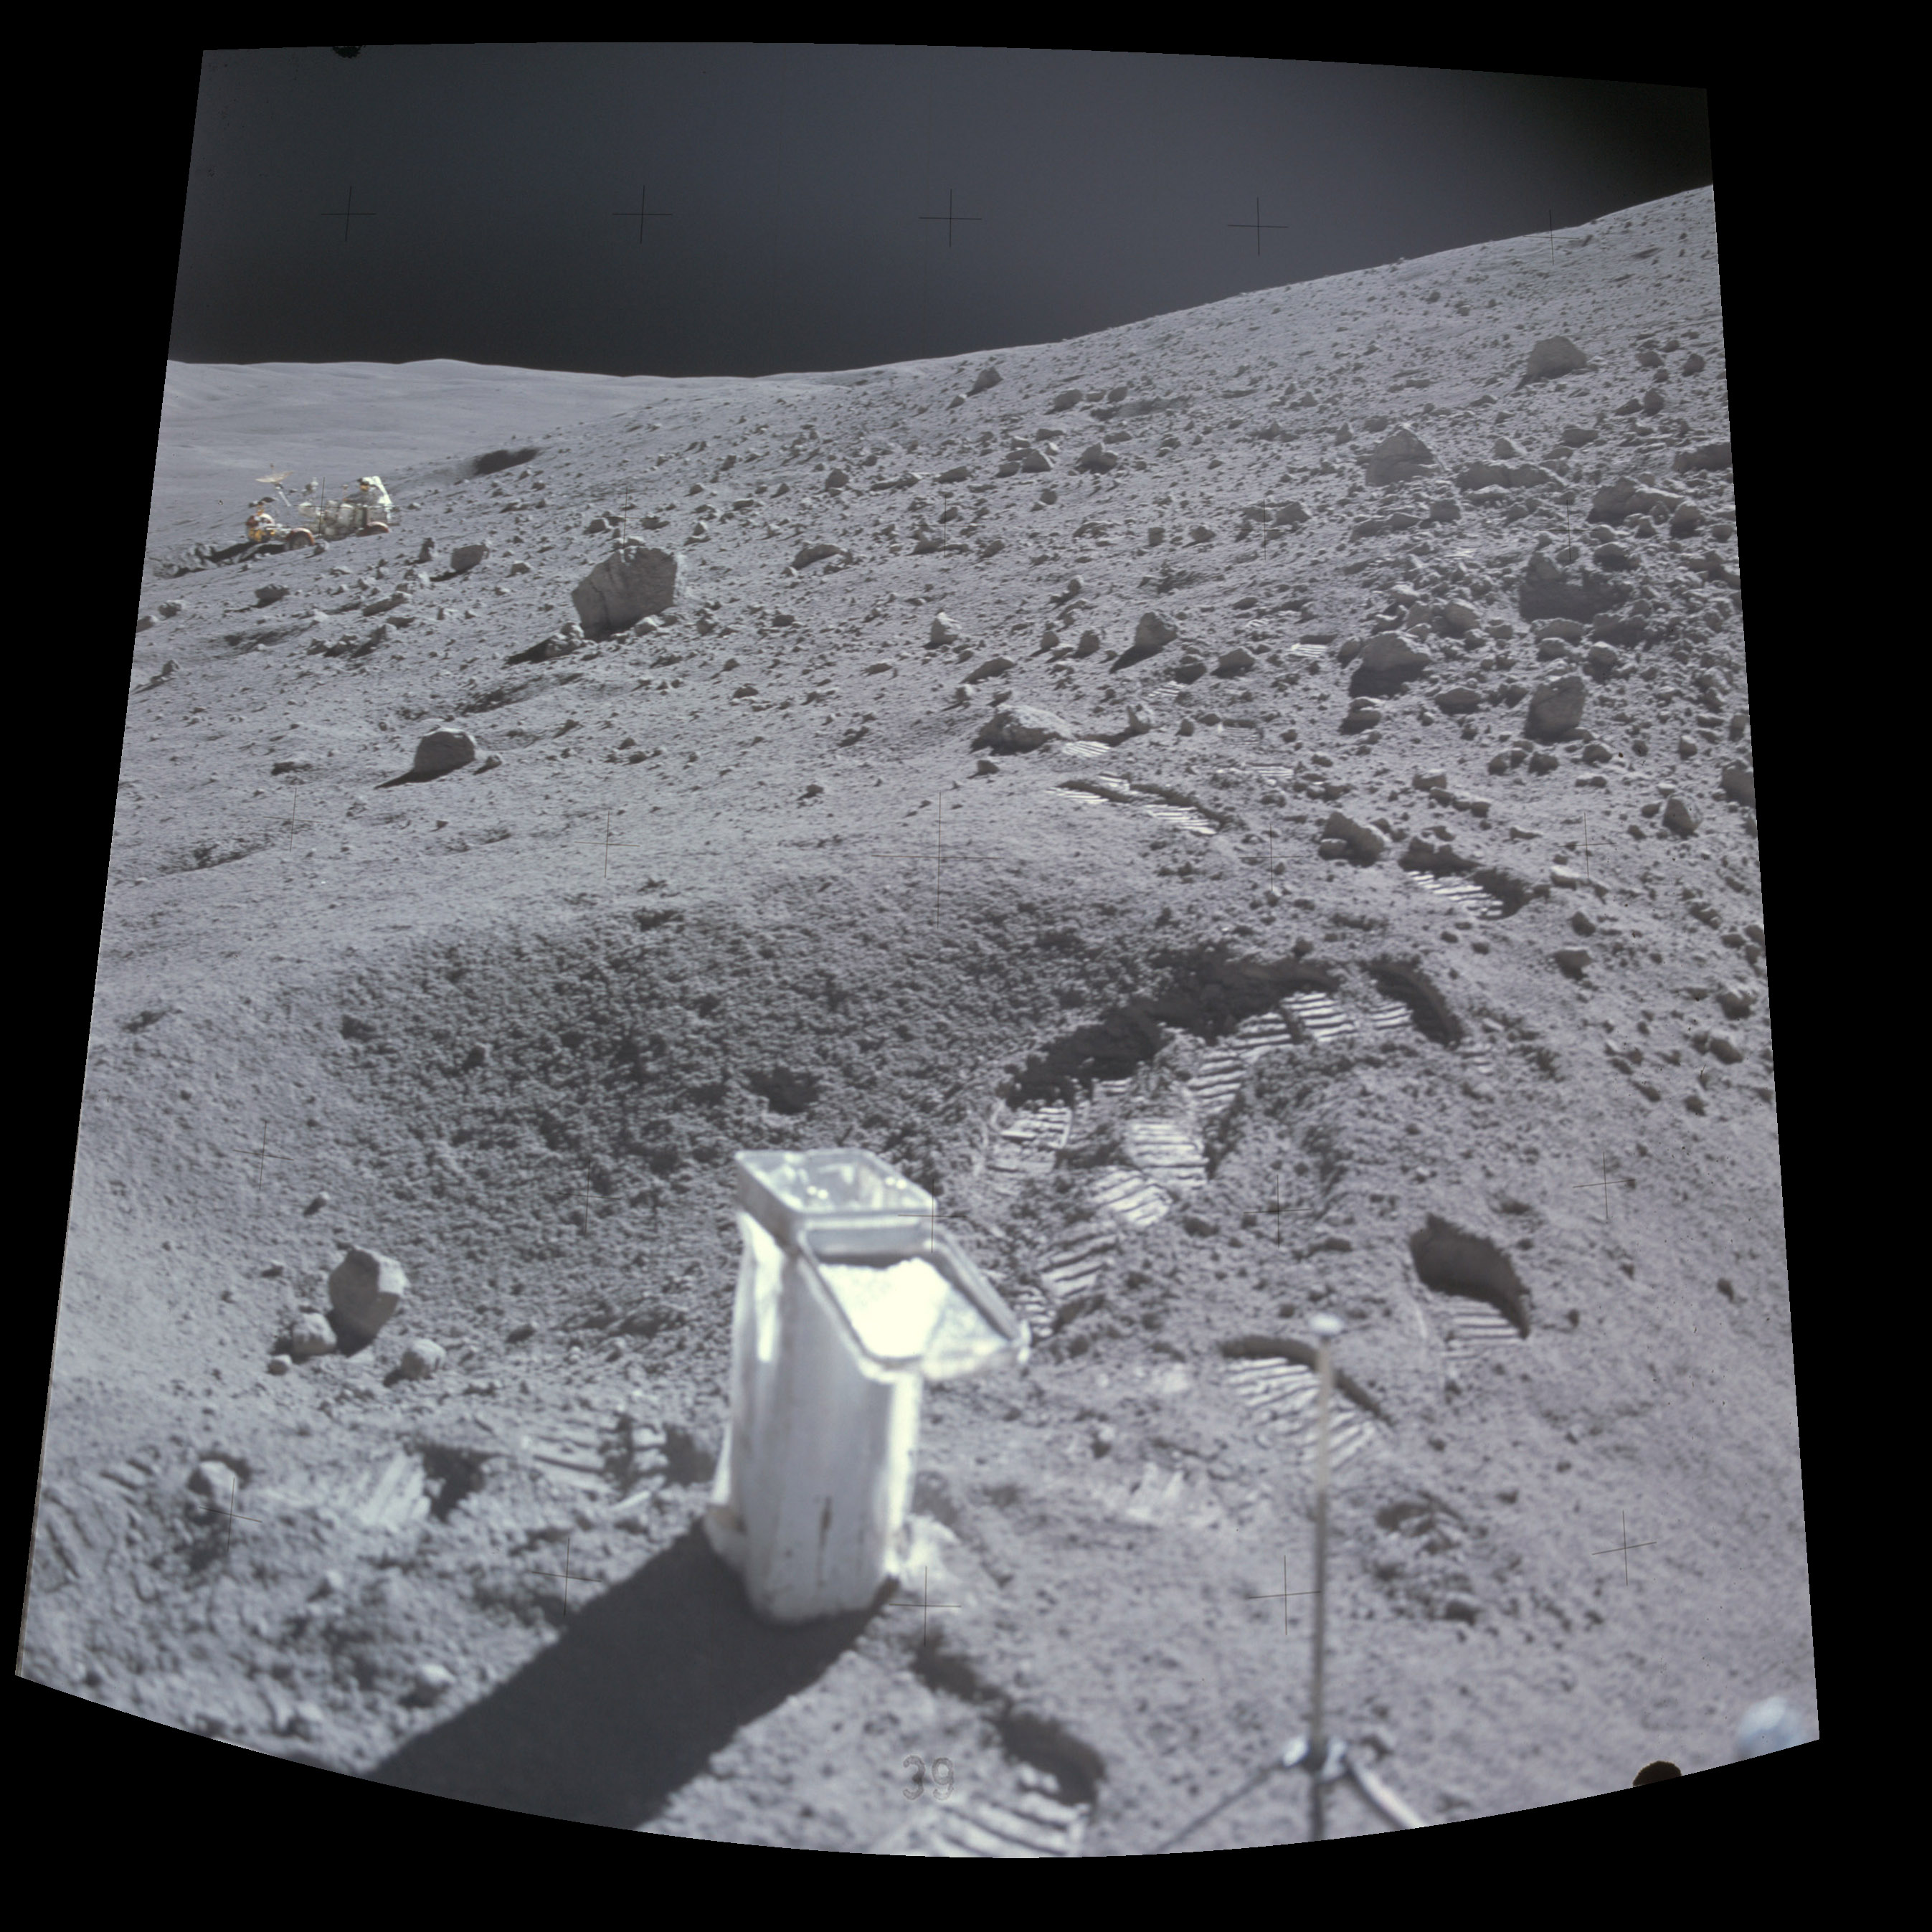
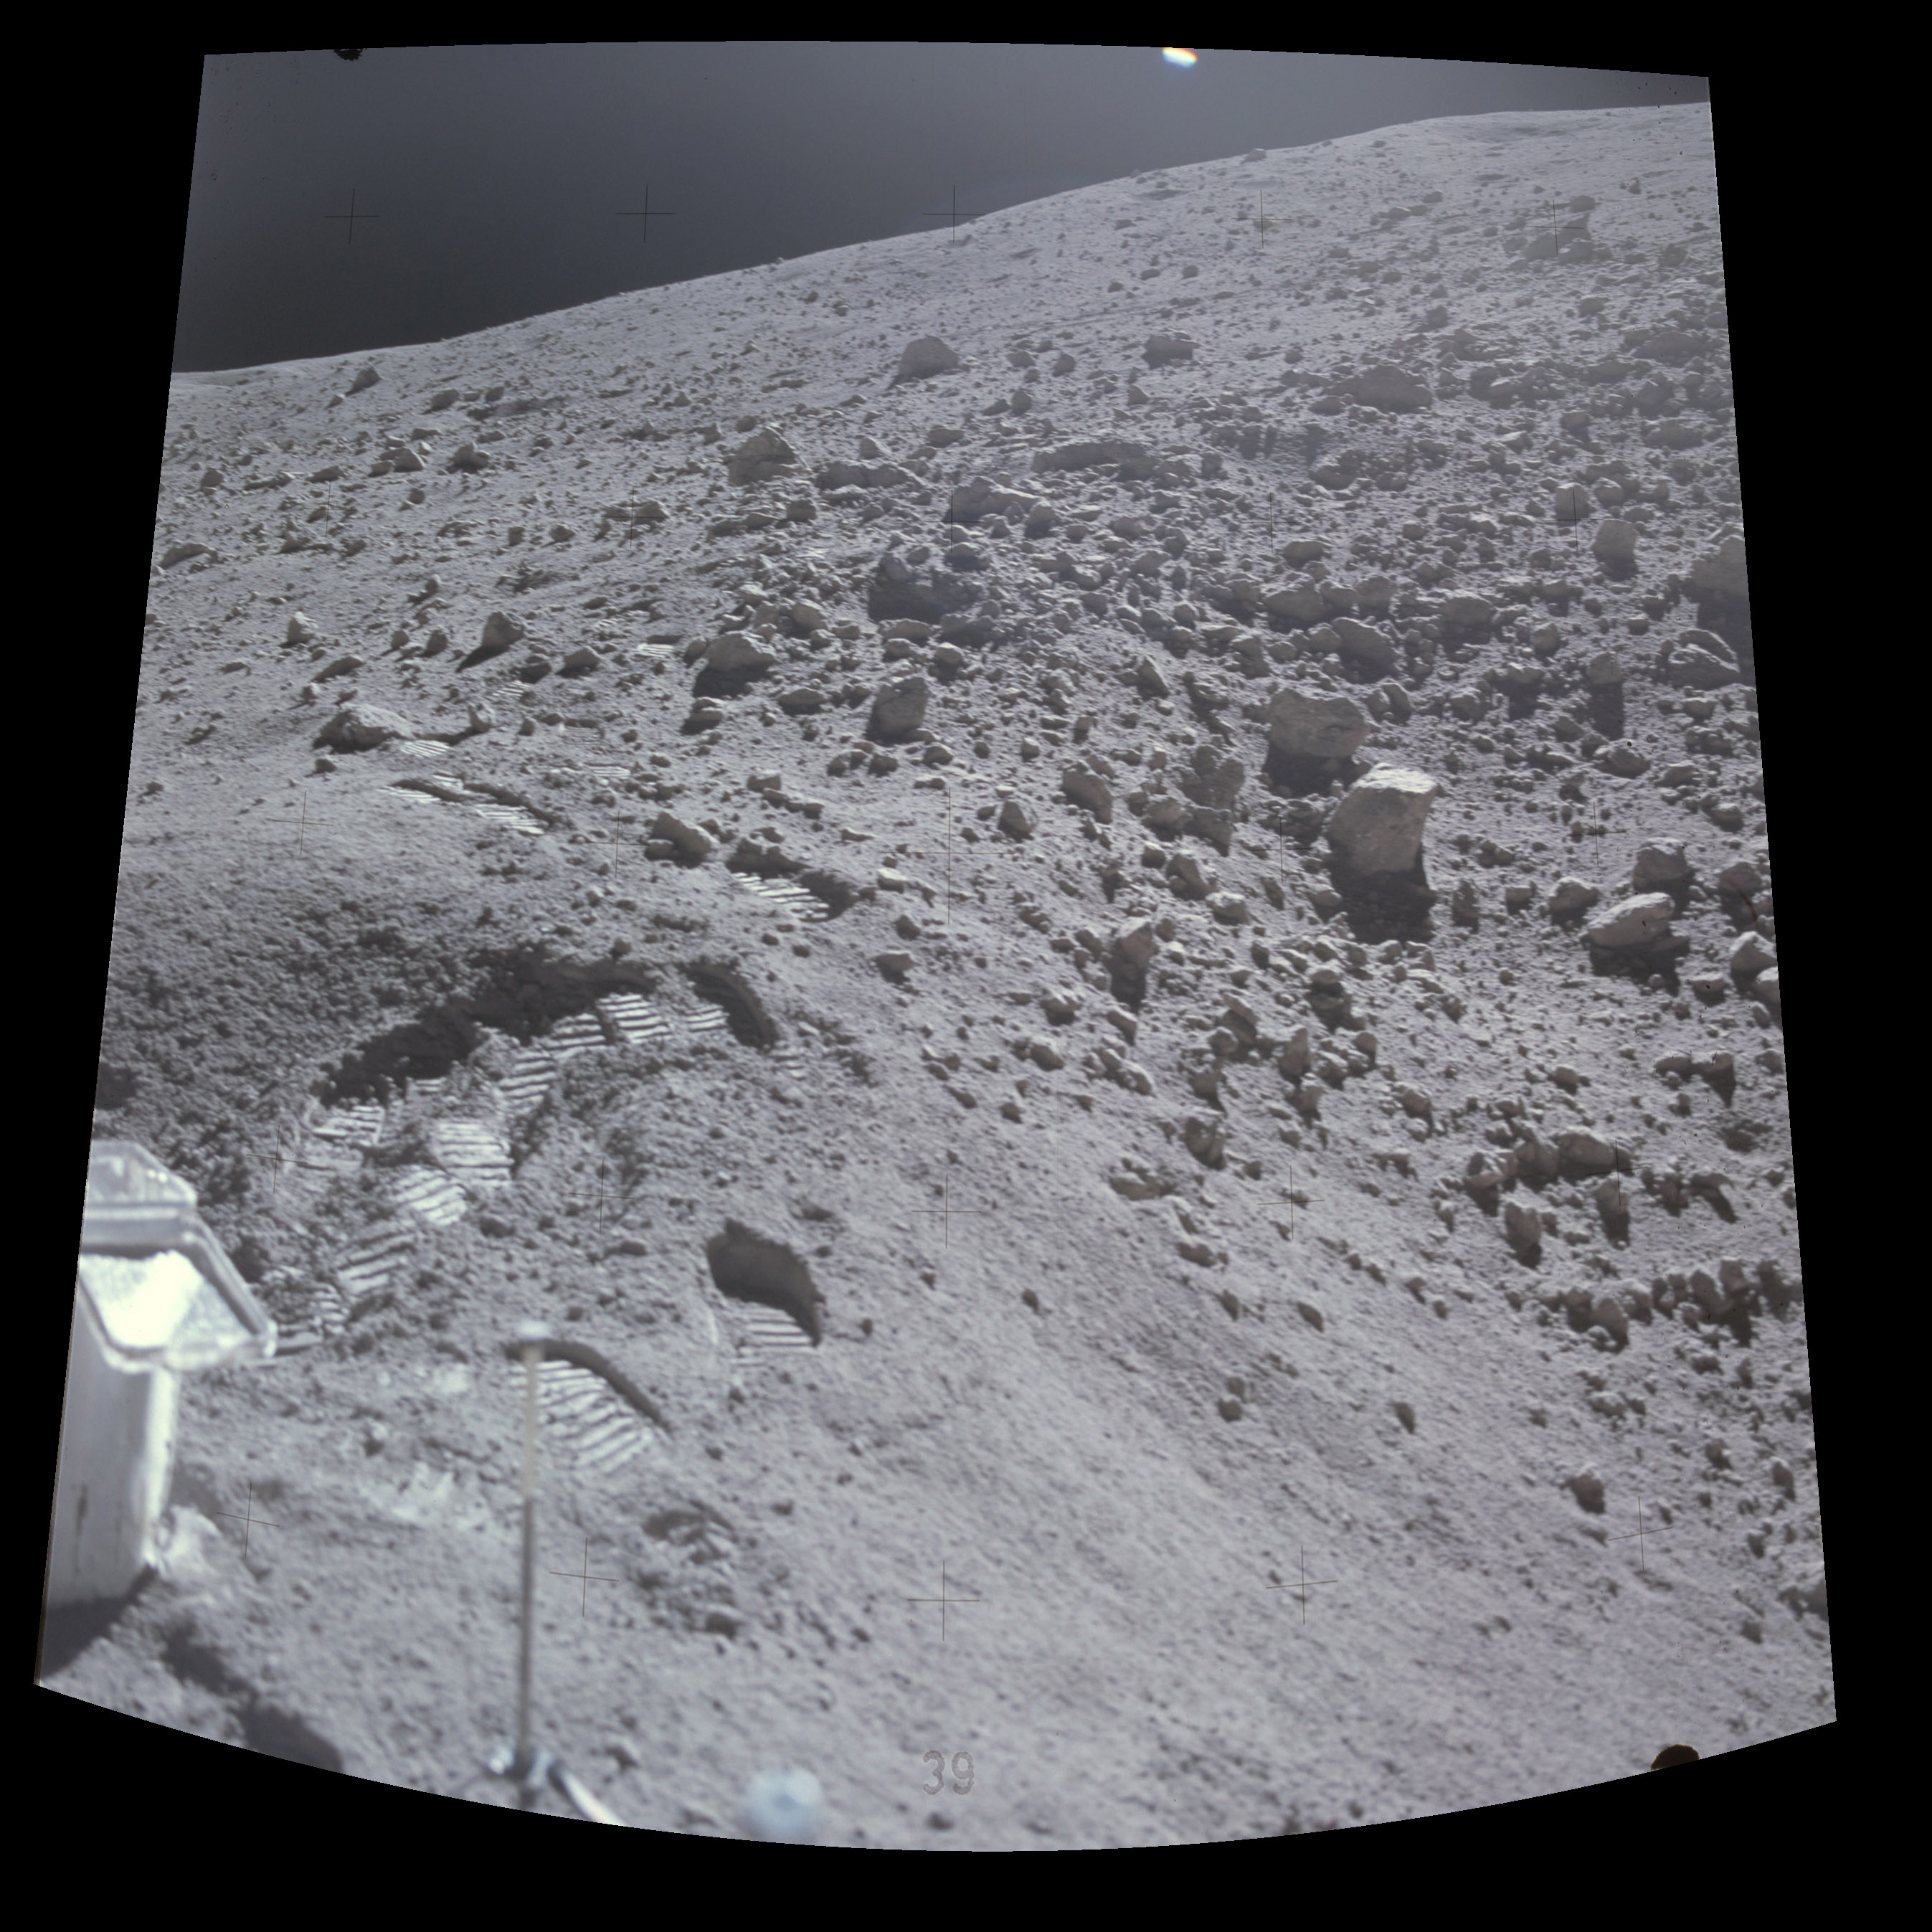
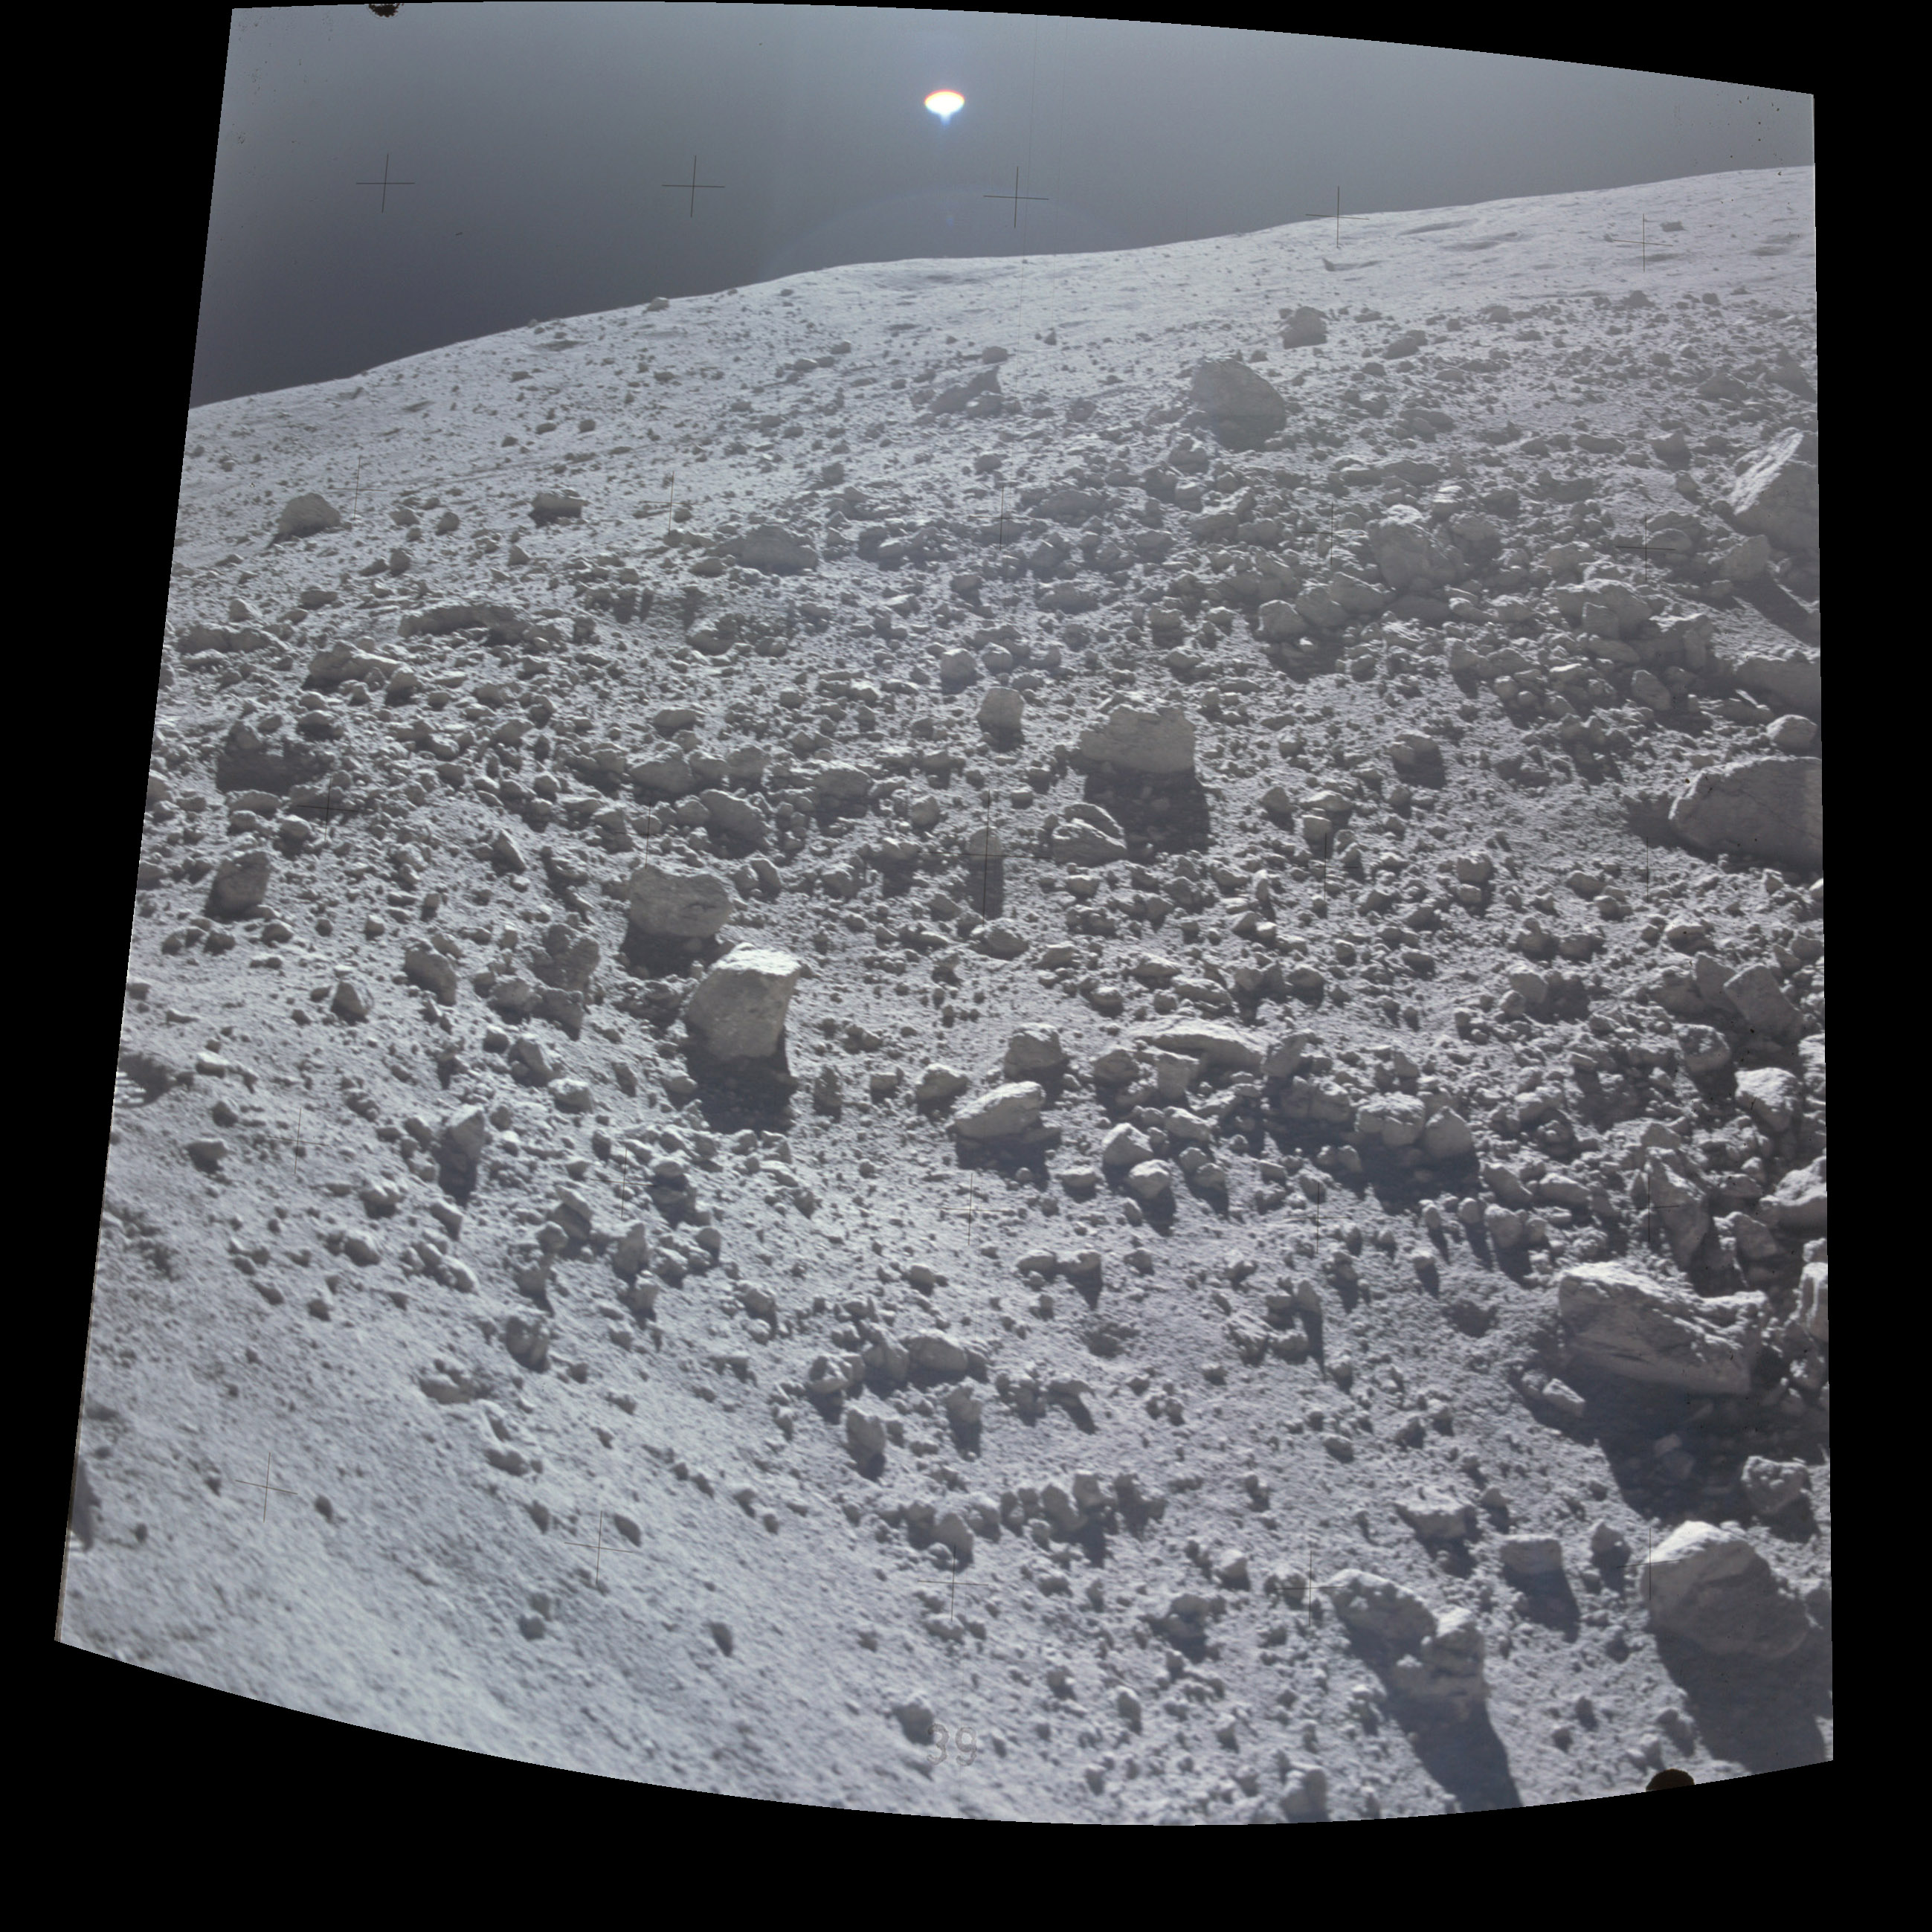
Station 7
For this second EVA-3 geology stop on North Massif, Cernan and Schmitt parked near a a 3-m high boulder, which proved to have been at its current location (its emplacment age) for 28 million years. The maximum dimension of the boulder is about 5 meters. From page 6-27 in the Preliminary Science Report), Although there is no visible boulder track, there is little doubt that the Station 7 boulder was derived from the North Massif because of its similarity in composition ahd structure to other material collected from the Massif. Because it is considerably smaller than the Station 6 boulder, it probably bounded downslope - as did those of comparable size on the South Massif (fig 6-6) - rather than rolled." As shown in the superposition of the 1974 contour map on the pan camera frame for Stations 6 and 7, Station 7 is at an elevation of about 4720 m, which is 40 to 60 meters above the valley floor at this east-west location. The local slope is about 9 degrees.
Return to Table of Contents